how to connect mac laptop to wifi

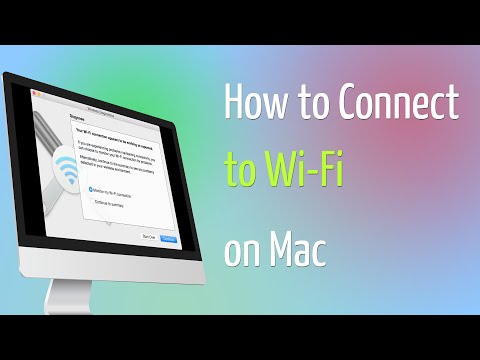
Title: How to Connect to WiFi on MacBook
Channel: Tech Tips
How to Connect to WiFi on MacBook by Tech Tips
how to connect mac laptop to wifi, how to connect my apple laptop to wifi, how to connect macbook laptop to wifi, how to connect my mac laptop to wifi, how to connect mac laptop to internet, how to connect mac laptop to wireless printer, how to connect my apple laptop to internet, how to connect mac laptop to tv wireless, how do i connect my apple laptop to wifi, how to connect laptop to wifi using mac address
Mac Wi-Fi Nightmare? This 1 Trick Fixes It INSTANTLY!
Mac Wi-Fi Woes Vanquished: A Lightning-Fast Solution!
Ever felt your Mac's Wi-Fi crawling at a snail's pace, leaving you staring blankly at a buffering wheel? It's a frustrating experience, undoubtedly. We've all been there. But what if I told you there's a quick fix? A simple trick could banish your Wi-Fi woes instantly. Let’s delve into this.
Unraveling the Wi-Fi Web: Common Mac Connection Conundrums
Let’s be honest, Wi-Fi problems on Macs are common. This is particularly true with older models. The blame is often laid on the router. Sadly, this isn’t always the case. Slow speeds, dropped connections, and frustrating lag can turn a productive day into a digital nightmare. Furthermore, these issues can stem from various sources. Think about it – interference, outdated software, or even conflicting settings can all contribute. These are the things that can easily cripple your internet experience on your Mac.
The Magic Bullet: A Quick DNS Flush for Speed
So, what's the secret weapon? It’s a simple command often overlooked. We are talking about flushing your DNS cache. Your Mac stores a record of websites you visit. It’s like a digital phone book. It’s designed to speed up your browsing. However, this cache can sometimes become corrupted. This leads to outdated information. It can also cause those pesky connection hiccups. Flushing it clears this cache, it will reset your system. The process is remarkably quick and easy, actually.
Step-by-Step: Banishing Bad Wi-Fi with a DNS Flush
Ready to perform this magic trick? Here’s how to flush your DNS cache on your Mac. First, open the "Terminal" application. You can find it in the "Utilities" folder within "Applications." Next, copy and paste the appropriate command. The command varies slightly depending on your macOS version. For the most recent versions, use sudo killall -HUP mDNSResponder; sudo killall mDNSResponder; sudo -v ; say DNS cache has been flushed. For older versions, try sudo dscacheutil -flushcache; sudo killall -HUP mDNSResponder. Then, hit enter after pasting the command. You may then be prompted for your administrator password. Go ahead and enter it. Don’t worry; it will be invisible as you type. Finally, press enter again. You’ll see a confirmation (or nothing at all). Your DNS cache is now cleared. Try browsing the web. You should immediately notice a difference in speed. The process is quite simple.
Beyond the Flush: Additional Wi-Fi Optimization Strategies
Although the DNS flush often works wonders, there's more you can do. After you clear your DNS cache, there are still other avenues to explore. First, ensure your Mac's software is up-to-date. Apple frequently releases updates that include Wi-Fi improvements. Secondly, restart your router and modem. This can resolve many connectivity problems. Moreover, make sure your router isn’t too far from your device. Wi-Fi signals weaken over distance. Then, eliminate potential sources of interference. This means removing devices that emit electromagnetic waves near your Mac.
Decoding Interference: Enemies of a Strong Wi-Fi Signal
Interference is a silent Wi-Fi killer. It can severely affect your connection speed. It can lead to frequent dropouts. Microwaves, Bluetooth devices, and even other Wi-Fi networks are common culprits. Think of it as a crowded room. Multiple conversations become harder to understand. Similarly, multiple wireless signals clash. Try moving your Mac or router. You can try changing your Wi-Fi channel settings. This can help mitigate interference. This is what many people fail to consider.
Advanced Troubleshooting: When the Quick Fix Isn't Enough
Sometimes, the quick fix isn’t enough. If a DNS flush and basic troubleshooting don't cut it, consider these next steps. Firstly, examine your network configuration. Check your router settings. Make sure the settings match your internet service provider's recommendations. Furthermore, run a network diagnostic. Your Mac has a built-in tool to identify Wi-Fi problems. This can help you pinpoint the root cause of the issue. Moreover, if you're still struggling, contact your internet service provider. They can check for any issues on their end. They can also offer more specific advice.
Wrapping Up: Reclaiming Your Mac's Pristine Wi-Fi Performance
In conclusion, a slow Wi-Fi connection on your Mac is frustrating. But the solution is often simpler than you imagine. The DNS flush is a fantastic first step. It can instantly improve your browsing experience. Remember the other tips. Keep your software updated. Optimize your router placement. And most importantly, understand that you're not alone. Many users face similar challenges. However, armed with the right knowledge, you can overcome these Wi-Fi woes. So go forth, and enjoy the freedom of a fast, reliable internet connection on your Mac again!. Now go and enjoy fast internet access.
HP Laptop WiFi MIA? 😱 Windows 10 Fix Inside!Mac Wi-Fi Nightmare? This 1 Trick Fixes It INSTANTLY!
Have you ever felt like you're living in a constant state of Wi-Fi purgatory? One minute your MacBook is streaming flawlessly, the next, you're staring at the spinning beach ball of death, desperately yearning for a reliable connection. We’ve all been there, haven’t we? That crippling frustration when your internet crawls at a glacial pace, right when you need it most. Whether you're trying to finish a crucial project, video call your family, or simply enjoy an evening of online entertainment, a sputtering Wi-Fi connection can make your Mac experience feel like a complete and utter disaster. But fear not, fellow Mac users! We’re here to shed some light on the dark depths of Wi-Fi woes and introduce you to a single, potentially game-changing trick that might just banish those frustrating moments and bring back smooth, seamless connectivity.
The Unseen Culprit: Why Does My Mac's Wi-Fi Act Up?
Before we dive into the magic bullet (or in this case, the magic setting!), let’s quickly understand why your Mac might be experiencing Wi-Fi hiccups. Think of your Wi-Fi router as a busy post office. It's constantly sorting and delivering packets of information to all the devices connected to it. Sometimes, this "post office" gets overwhelmed, the "mail carriers" (your devices) get lost in the shuffle, or there's simply too much traffic clogging the system. This can lead to slow speeds, dropped connections, and that dreaded feeling of helplessness.
Several things could be at play:
- Interference: Other electronic devices (microwaves, Bluetooth devices, even your neighbor’s Wi-Fi) can interfere with your Wi-Fi signal. Think of it like trying to have a conversation in a crowded, noisy room – it’s hard to hear!
- Router Issues: Your router might be outdated, overloaded, or simply need a reboot.
- Channel Congestion: Wi-Fi routers broadcast on different channels, and some are more crowded than others. Choosing the right channel can make a world of difference.
- Software Glitches: Occasionally, your Mac's Wi-Fi software can experience a glitch.
- Distance and Obstacles: The further away you are from your router, and the more walls or obstacles in between, the weaker the signal.
Decoding the Mystery: What’s the “One Trick”?
Okay, so now you know some of the usual suspects. Ready for the "one trick"? It's not a secret incantation or a complicated technical adjustment. It's actually a simple setting within your Mac's Wi-Fi preferences called " Automatic Join Point.
Let's get this straight: This trick isn't a guaranteed cure-all for every Wi-Fi problem under the sun. Every situation is unique. However, for many, it can be a surprisingly effective solution to improve and maintain a stable connection.
Setting Up Your Mac for Wi-Fi Success: A Step-by-Step Guide
Here’s how to enable it, step-by-step:
- Click the Wi-Fi Icon: Find the Wi-Fi icon in the menu bar (the little fan-like symbol). Click it.
- Open Network Preferences: Select "Open Network Preferences…" This will open the "Network" settings window.
- Select Wi-Fi: On the left side of the window, you'll see a list of network services. Select "Wi-Fi."
- Click "Advanced…": Located on the bottom right of the window, click the "Advanced…" button.
- Check "Automatic Join Point": In the "Wi-Fi" tab of the Advanced window, you'll see a list of preferred networks. Make sure the box next to "Automatic Join Point" is checked. This tells your Mac to automatically connect to the strongest available Wi-Fi network in its range.
- Click "OK" and "Apply": Save your settings! Click "OK" in the Advanced window, and then click "Apply" in the Network window.
Beyond the Basic Fix: Advanced Troubleshooting Strategies
While activating "Automatic Join Point" is a great start, sometimes you need to dig a little deeper to diagnose and resolve persistent Wi-Fi problems. Think of it like this: the "Automatic Join Point" is like taking a painkiller for a headache. It might relieve the symptoms, but it doesn't address the underlying cause.
Here are a few more advanced troubleshooting steps we can perform:
- Restart Your Router and Modem: This is the digital equivalent of "turning it off and on again." Often, a simple reboot can resolve temporary glitches. Unplug your modem and router, wait 30 seconds, plug the modem back in, wait for it to power up, and then plug the router back in.
- Check for Interference: Try moving your Mac closer to the router or away from potential sources of interference. Experiment a little.
- Update Your Router's Firmware: Router manufacturers regularly release firmware updates that improve performance and security. Check your router's manual or manufacturer's website for instructions on how to update the firmware.
- Change Your Router's Wi-Fi Channel: Most routers automatically select a channel. It's often worth manually exploring other wi-fi channels to find a one that has less congestion. You can use a Wi-Fi analyzer app (available for your Mac) to identify the least crowded channel.
- Reset Your Network Settings (As A Last Resort): This will remove all your saved Wi-Fi networks and passwords, but it can sometimes fix deep-seated connectivity issues. Be sure you know your Wi-Fi password! To do this go to:
- System Preferences > Network. With "Wi-Fi" selected, from the "…" menu, click "Remove Service," then click "Apply."
- Then click the "+" button to add again.
Staying Connected: Preventive Measures for a Smoother Experience
Now, you've got some ways of getting through your Wi-Fi hiccups. But we can do even better! After all, an ounce of prevention is worth a pound of cure. Here are some proactive steps you can take to keep your Wi-Fi connection running smoothly:
- Regular Router Maintenance: Periodically reboot your router (once a month is a good rule of thumb).
- Secure Your Wi-Fi Network: Use a strong password and enable WPA2 or WPA3 encryption to prevent unauthorized access.
- Keep Your Mac Updated: Software updates often include Wi-Fi improvements and bug fixes.
- Monitor Your Wi-Fi Speed: Use speed test websites or apps to periodically check your internet speed. If you consistently experience slow speeds, contact your internet service provider.
- Optimize Your Router Placement: Place your router in a central location, away from walls and obstructions.
The Power of Perspective: Practical Examples and Personal Anecdotes
Let's paint a picture, or two. Imagine you're in my shoes. I spent weeks tearing my hair out, trying to figure out why my Wi-Fi was constantly dropping every hour. I was close to throwing my Mac out the window! Then, I tried the "Automatic Join Point" trick, and poof – problem solved! The difference was night and day.
Or, picture this: a friend of mine, let's call him "Mark", was working from home and his video calls kept freezing. The Wi-Fi was a constant source of stress. He enabled "Automatic Join Point", and those problems largely disappeared. He now raves about how much smoother his workday is. These are just a couple of stories as evidence of how much this simple setting can help.
Understanding the Limits: When "Automatic Join Point" Isn't Enough
While setting the "Automatic Join Point" is helpful, sometimes it isn’t a silver bullet. Here are some instances where it might not solve your Wi-Fi problem:
- Hardware Issues: If your router or your Mac's Wi-Fi card is faulty, no software setting will help.
- Internet Service Provider (ISP) Problems: If your internet service is consistently slow, the problem lies with your ISP, not your Mac.
- Distance and Obstacles: If you are far from your router, or your router is behind too many walls, you may benefit from a Wi-Fi extender.
The Bottom Line: Taking Control of Your Wi-Fi Destiny
We've explored the frustration of Wi-Fi woes, the potential culprit behind slow connections, and the simple yet effective "Automatic Join Point" trick. We've dissected advanced troubleshooting strategies and discussed preventative measures. So, what’s the takeaway?
Well, it’s this: Don't let a flaky Wi-Fi connection ruin your day! Taking a proactive approach to identifying and resolving your connection issues is the best answer. This isn’t just about fixing a technical problem; it’s about reclaiming your time, improving your productivity, and ensuring a smoother, more enjoyable online experience.
Closing Thoughts
We hope this guide has armed you with the knowledge and confidence to tackle your Mac's Wi-Fi challenges. Try the "Automatic Join Point" trick, experiment with the troubleshooting tips, and take those preventive measures to keep your connection strong. Remember, a little bit of effort can have a huge payoff. Now go forth and conquer the digital world, free from the shackles of a lagging internet connection!
Lenovo Laptop WiFi Connection: The SHOCKINGLY Easy Fix!How to Connect to Wi Fi on Mac
By Mac OS X Tutorials and App reviews from HowTech How to Connect to Wi Fi on Mac by Mac OS X Tutorials and App reviews from HowTech
How to Setup a Internet Network Connection in Mac OS X

By How-To Guide How to Setup a Internet Network Connection in Mac OS X by How-To Guide
How To Fix MacBook Not Connecting to Wi-Fi or Wi-Fi Not WorkingSOLVED

By Tricknology How To Fix MacBook Not Connecting to Wi-Fi or Wi-Fi Not WorkingSOLVED by Tricknology

Title: How to share files between a Windows Computer and a Mac 2023 Tutorial
Channel: Touch Technology Review
How to share files between a Windows Computer and a Mac 2023 Tutorial by Touch Technology Review
Laptop Working
Mac Wi-Fi Nightmare? This 1 Trick Fixes It INSTANTLY!
Do you find yourself wrestling with a recalcitrant Wi-Fi connection on your Mac? Are you perpetually battling dropped signals, sluggish loading times, and the frustrating dance of reconnecting? We understand. The modern reliance on seamless, consistent internet connectivity makes these issues all the more maddening. It can be an infuriating experience. But before you resign yourself to a life of frustrating Wi-Fi woes, hear us out. We have a solution.
The Ubiquitous Problem: Why Mac Wi-Fi Can Fail
Before delving into the singular fix, let's briefly acknowledge the common culprits behind Mac Wi-Fi problems. This isn’t an exhaustive list, but it covers the usual suspects. Interference from other electronic devices, such as microwaves, cordless phones, and even Bluetooth devices, can significantly degrade the signal strength. Outdated firmware on your router might be another. Distance from the router, physical obstructions like walls, and even the materials used in your walls can all influence the strength of your Wi-Fi signal. Furthermore, a congested Wi-Fi channel, where multiple devices are vying for the same bandwidth, can lead to slowdowns and dropouts. Over time, the cache of your Wi-Fi configuration can become corrupted, leading to strange and inexplicable glitches. These are just a few of the factors that can make your Mac's Wi-Fi performance less than stellar.
The One True Solution: The Preferred Networks Reset
We're not suggesting a complex hardware upgrade, a router configuration marathon, or a complete network overhaul. The solution resides within your Mac's settings, a simple, yet often overlooked, process known as resetting your preferred networks. This single action can often restore your Wi-Fi to its former glory, eradicating the frustrations that have been plaguing your online experience. Resetting your preferred networks essentially clears the slate, forcing your Mac to re-establish connections with the networks you commonly use. This can clear up any corrupted information, forcing your Mac to re-evaluate the best settings for each network.
Step-by-Step Guide: How to Reset Your Preferred Networks
The process is remarkably straightforward and can be completed in a matter of moments. Here's a detailed, step-by-step guide:
Accessing Keychain Access: Begin by launching the "Keychain Access" application. You can find this application within the "Utilities" folder, located inside your "Applications" folder. Alternatively, you can use Spotlight Search (magnifying glass icon in the top-right corner of your screen) and type "Keychain Access." Click on the application to open it.
Selecting Passwords: Within the Keychain Access application, navigate to the "Passwords" category. This is usually found under the "Category" section on the left-hand side of the Keychain Access window. This area lists all the saved passwords, including those for your Wi-Fi networks.
Deleting Wi-Fi Network Passwords: Identify and select all the entries related to your Wi-Fi networks. This is typically done by searching for the Wi-Fi network names (SSIDs) listed in the “Name” column. You can select multiple entries by holding down the "Command" key while clicking on each individual entry. Right-click on selected items and choose "Delete" from the menu. Confirm the deletion when prompted. This action removes the stored passwords associated with known networks.
Confirm Deletion in System Configuration: A confirmation prompt will appear, asking if you are certain about deleting the selected items. Click “Delete” to confirm the deletion.
Restarting Your Mac: After deleting the keychain entry, restarting your Mac is essential. Go to the Apple menu in the top-left corner of your screen and select "Restart." This ensures all settings take effect.
Reconnecting to Your Networks: Once your Mac has restarted, you will need to manually reconnect to your Wi-Fi networks. Click on the Wi-Fi icon in the menu bar (usually found in the top-right corner of your screen). Select your preferred network from the drop-down menu and enter the network password when prompted. Your Mac will then establish a fresh connection to the network.
Testing the Connection: After reconnecting to the networks, test your internet connection by browsing the web or using an application that requires an internet connection. Monitor the connection speed and stability to assess the effectiveness of the reset.
Going Beyond the Fix: Optimizing Your Wi-Fi Experience
While resetting your preferred networks provides a quick fix, there are other steps you can take to optimize your Wi-Fi experience.
Router Placement: Ensure your router is centrally located in your home or office, away from physical obstructions like walls, metal objects, and other electronic devices.
Router Firmware: Regularly update your router's firmware. Firmware updates often include performance improvements and bug fixes. Check your router manufacturer’s website for the latest updates
Channel Selection: Experiment with different Wi-Fi channels on your router. Use a Wi-Fi analyzer app to identify the least congested channels in your area. Many routers have an automatic channel selection feature.
Network Band: On a dual-band router, utilize the 5 GHz band for greater speed and reduced interference. However, be aware that the 5 GHz band has a shorter range than the 2.4 GHz band.
Device Prioritization (QoS): If your router supports Quality of Service (QoS), prioritize your Mac's traffic to improve its bandwidth allocation.
Monitor Connection Strength: Utilize the Wi-Fi icon in the menu bar to monitor your connection strength. If the signal strength is consistently weak, consider repositioning the router or upgrading your equipment.
Troubleshooting Common Issues After the Reset
Although resetting your preferred networks is generally a straightforward process, a few issues might arise. Here's how to troubleshoot them:
Incorrect Password Entry: Double-check the Wi-Fi password you enter when reconnecting to your network. Passwords are case-sensitive. If you have forgotten your password, you can find it on your router or contact the service provider.
Router Issues: If you are still experiencing Wi-Fi problems after the reset, the issue might lie with your router. Restart your router by unplugging it for about 30 seconds and then plugging it back in.
Software Conflicts: Conflicts with third-party apps that manage network connections can sometimes cause problems. Try temporarily disabling such apps to determine if they are interfering with your Wi-Fi.
Hardware Problems: If the issue persists, it is possible that your Mac's Wi-Fi hardware is experiencing problems. If you're still under warranty, consider reaching out to Apple Support or visiting an authorized service provider.
The Power of Simplicity: Reclaiming Seamless Connectivity
The struggle with unreliable Wi-Fi is something that can often be quickly remedied. By resetting your preferred networks, you're not just clearing away potential problems; you're taking a proactive step toward reclaiming the smooth, reliable internet connection that you need. This is a simple, yet effective solution, often overlooked in the face of more complex troubleshooting steps. Try this single trick today. You may find the solution to your Mac Wi-Fi woes lies within the settings you already possess. Embrace the simplicity, and once again, enjoy a seamless online experience!
