how to use laptop camera for broadcast wifi

Title: Wireless tethering a Canon Camera with your Computer using Wifi
Channel: Touch Technology Review
Wireless tethering a Canon Camera with your Computer using Wifi by Touch Technology Review
Laptop Camera Broadcast WiFi: SHOCKINGLY Easy Guide!
Laptop Camera Broadcast WiFi: Seriously Simple Secrets Revealed!
Ever wished you could share your laptop's camera feed wirelessly? It seems like a complex task. However, it’s surprisingly straightforward. You could even do it with a few clicks. Let's unravel the mystery and show how simple it is. This guide removes the hassle. Prepare to be amazed by the ease.
Unleashing Your Laptop's Inner Broadcaster
Firstly, dismiss the idea of needing expensive equipment. You already possess the core ingredients. Your laptop's built-in webcam is the star. Your WiFi connection acts as the messenger. Also, an understanding of a few key concepts accelerates the process. Think of it as preparing a delicious, yet simple, meal. You don’t need culinary school, just the right ingredients. You are in control.
In fact, the principle relies on mirroring your camera output. You're essentially displaying the camera feed elsewhere. The “elsewhere” could be another device on your network. It could also be an online platform. The setup varies slightly, depending on your goal. But it remains, overall, quite user-friendly. Ready to begin? Great, let’s proceed.
Choosing Your Wireless Broadcasting Arsenal
Next, consider your desired destination. Where do you want to broadcast the footage? Several options exist. Each offers differing levels of complication. Consider your needs before deciding. Fortunately, the choices are quite flexible. Here is a shortlist of popular methods.
WiFi Direct: This is a quick, device-to-device connection. It skips the need for a router. It is ideal for sharing with a nearby friend. Therefore, it’s perfect for internal communication. This would be useful in presentations.
Screen Mirroring Apps: Many apps facilitate wireless display. These are commonly found on smartphones and tablets. You could easily display the video on a larger screen. This may require installing a companion app. It still provides an easy setup.
Streaming Services: Platforms like OBS Studio are powerful. They allow broadcasts to YouTube, Twitch, etc. They do require some initial configuration. However, they provide vast reach. This method is suitable for audiences of all sizes.
Prepping Your Tech: Essential Steps
Before diving in, ensure everything functions correctly. Begin by checking your webcam. Open your preferred video conferencing app. Verify it captures clear images and transmits audio. If not, troubleshoot the webcam driver. Update the software if necessary. Then you should move on.
Afterwards, confirm your WiFi connection is robust. A weak signal causes buffering and frustrating delays. Test your internet speed. Moreover, position yourself near your router. This simple step improves signal strength. It sets the stage for a smooth broadcast.
Step-by-Step Guide: WiFi Direct Magic
Let's begin with the easiest method: WiFi Direct. It requires minimal setup. Firstly, activate WiFi Direct on your laptop. This usually involves accessing your network settings. Look for an option to enable it.
Then, on the receiving device, activate WiFi Direct. Search for available devices. Once your laptop appears, connect. This pairs the two devices directly. Finally, use a screen mirroring app. Many free apps are available. Start the app and choose your camera feed as the source. Voila! Your camera footage now displays on another device.
Streaming to the World: Unleashing Power
Now, let's explore streaming to a wider audience using a platform like OBS Studio. Download and install OBS Studio, if you haven't already. It is free and open-source. Upon installation, set up video sources. This includes your laptop's webcam. You'll also likely need a microphone.
Configure your output settings. Select your desired streaming platform (YouTube, Twitch, etc.). Enter your stream key. This is found on the platform's dashboard. Now, customize your scene. This means arranging your video layout. Add other elements like text overlays.
Test your stream. Click "Start Streaming." Then, ensure everything looks and sounds perfect. Make necessary adjustments. When ready, go live! Don't forget to promote your broadcast. Engage with your audience.
Troubleshooting Common Hiccups
Encountering technical issues? Do not fret. Here are some quick fixes.
- Poor Video Quality: Adjust your video settings in OBS. Reduce the resolution or change your camera settings. Check your internet connection.
- Audio Problems: Ensure your microphone is selected. Examine input levels. Mute other unnecessary audio sources.
- Connection Drops: Move closer to your router. Close unnecessary applications. Optimize your network.
- Software Conflicts: Restart your computer. Update or reinstall your software.
Beyond the Basics: Creative Applications
Broadcasting your laptop camera wirelessly lends itself to creative uses. Think about these applications.
- Remote Presentations: Share your screen with colleagues in real-time. Avoid using unreliable cables and physical connections.
- Tutorial Creation: Record engaging tutorials for your audience. Demonstrate software without complications.
- Family Communication: Connect with loved ones using video calls. Share your world even when apart.
- Live Gaming: Stream yourself playing games. Engage with your audience.
Final Thoughts: Embrace the Wireless Revolution
In conclusion, broadcasting your laptop camera over WiFi is remarkably simple. Follow these steps, and you'll be sharing your world in no time. Therefore, get ready to unlock creative possibilities. It truly is a game changer. Now, go forth and broadcast!
ASUS Laptop WiFi Connection: The SHOCKINGLY Easy Fix!Laptop Camera Broadcast WiFi: SHOCKINGLY Easy Guide!
Ever wished you could share your laptop's camera feed wirelessly, like a live broadcast, without wrestling with complicated setups? Trust me, we’ve all been there. From trying to show off a new pet to sharing a quick tutorial, the desire to broadcast your laptop's camera feed via WiFi is more common than you might think. Guess what? It’s not as daunting as it seems. This guide cuts through the tech jargon like a hot knife through butter, making the whole process shockingly easy. Let’s dive in!
1. Why Broadcast Your Laptop Camera Feed? The Secret's Out!
Okay, let’s be real: why wouldn’t you want to broadcast your laptop camera? Think about it. You could be:
- Teaching a quick craft: Want to demonstrate how to fold a paper crane? Boom – instantly broadcast!
- Sharing a pet's antics: Got a fluffy friend who's a social media star in the making? Let the world watch the adorableness!
- Presenting remotely: Need to give a live presentation but stuck at home? WiFi broadcasting to the rescue!
- Collaborating creatively: Brainstorming sessions are awesome with a shared visual!
- Just plain having fun: Sometimes, it's just because you can. And that's a perfectly valid reason!
The possibilities are truly endless.
2. The Tech You'll Need: Your Broadcasting Toolkit
Before we get started, let’s gather our tools. Thankfully, it's a pretty minimal kit. You'll need:
- Your Laptop: Obviously! Make sure it has a built-in webcam or an external one.
- A Stable WiFi Connection: This is crucial. Think of it like the internet highway for your video stream. The better the connection, the smoother the ride.
- A Broadcasting Application (or two): We will explore the application aspect in greater detail later. Think of it as your video DJ.
3. Choosing Your Weapon: The Right Broadcasting Software
This is where the magic happens! The software you choose is the heart of your broadcast. Here are a few popular options, simplifying the process:
- OBS Studio (Open Broadcaster Software): This is the heavyweight champion, offering tons of customization. It's free, open-source, and incredibly versatile. Think of it as the Swiss Army knife of broadcasting. The learning curve is slightly steeper, but the power is unmatched. You can broadcast to virtually any platform with it.
- ManyCam: Easier to use than OBS Studio, with a straightforward interface. It's a great choice for beginners. While there's a free version, some features are locked behind a paid subscription.
- XSplit Broadcaster: Another powerful option, known for its user-friendly design. It’s a favorite of many streamers. Similar to ManyCam, it offers a free and paid version.
Choose the one that feels right for you. Experiment! It's like trying different flavors of ice cream – you have to find your favorite!
4. Setting Up Your Broadcasting Software: The Initial Dance
Let's get down to the nitty-gritty. The exact steps will vary slightly depending on your chosen software, but the general process is remarkably similar.
- Download and Install: Head to the software's website, download the application, and install it on your laptop. Follow the on-screen prompts.
- Launch the Application: Open your chosen software. You’ll likely be greeted with a blank canvas (the preview screen) and a somewhat intimidating interface. Don't panic!
- Add Your Camera as a Source: This is where you tell the software to use your laptop's webcam. In OBS Studio, you generally click the "+" button in the "Sources" box and select "Video Capture Device." In ManyCam or XSplit, the process might be even more intuitive. Select your webcam from the list of devices.
- Configure Your Camera: You might have options to adjust your webcam's settings, like resolution, brightness, and contrast. Fine-tune these to get the best possible image quality.
- Connect To Your Destination: The place where viewers will watch. This can be on your local wifi network or an online streaming platform.
5. Broadcasting Via WiFi: The Network Connection
This is the next crucial piece of the puzzle. You will need to broadcast to the specific wifi network.
- Verify Your Wifi Connection: Ensure that your laptop is connected to a stable wifi network. It’s best to have a strong signal strength, but not a necessity.
- Configure the Wifi In Settings: This section varies greatly depending on the software you choose, but can be located under Settings -> Broadcasting.
- Select Your Wifi Network: Choose the network from a dropdown menu or by manually entering it.
- Start Broadcasting: Once the camera, network, and destination parameters are set, you can start broadcasting.
6. Broadcasting to Your Local Network: Watch Party Time!
Want to broadcast to other devices on your home network – like a smart TV or another laptop? Here’s how:
- Find the IP Address: You'll need the IP address of the laptop running the broadcast. You can usually find this in your network settings.
- Use a Streaming Receiver: You'll need software/hardware on the receiving device that can "tune in" to the broadcast, usually built into the broadcasting software such as OBS Studio.
- Enter the IP and Port: In the receiving device’s streaming software.
- Enjoy The Show!
7. Broadcasting to Online Platforms: Reaching the World
Ready to share your camera feed with the world? Here's the lowdown:
- Choose Your Platform: YouTube, Facebook Live, Twitch, etc. Each has its own steps.
- Create or Sign In: Go to your chosen platform and create a new streaming account (or use your existing one.)
- Get the Stream Key: This is a unique code that links your broadcasting software to your platform account. It allows it to stream your video content.
- Paste the Stream Key: Copy and past the stream key from the streaming service to the broadcasting software. This is vital.
- Initiate The Stream: Simply go live!
8. Optimizing Your Broadcast for Quality: Picture Perfect
Even with the easiest setup, we still can improve the quality via the following tips:
- Good Lighting: Proper lighting can make a massive difference. Place a lamp or light source in front of you to illuminate your face. Avoid backlighting, which can make you look like a silhouette.
- Strong Internet: As mentioned, a strong connection is key.
- Adjust Camera Settings: Play around with brightness, contrast, and other settings in your broadcasting software to get the best picture.
- Clean Up Your Surroundings: Nobody wants to see your laundry pile! Make sure your background is tidy and visually appealing.
9. Troubleshooting Common Issues: Don't Panic!
Running into bumps? No problem. Here's a quick guide to solving some common issues:
- No Camera Detected: Make sure your webcam is properly plugged in (if it's external) and that your software has permission to access your camera.
- Poor Video Quality: Check your internet connection! Also, verify your camera settings.
- Audio Problems: Make sure your microphone is enabled and that the volume is turned up both in your software and on your computer.
- Lagging/Buffering: This almost always points to a weak internet connection. Optimize your network or consider using a wired connection (Ethernet) for better stability.
10. The Power of Practice: Get Comfortable!
The more you practice, the better you'll become. Stream a few times just to get comfortable with the software and the process before going live to an audience. The more time you spend, the smoother the experience will be!
11. Beyond the Basics: Level Up Your Broadcast Game
Once you've mastered the basics, there are many ways to add a little pizzazz to your broadcasts!
- Add Overlays and Graphics: Use the overlays feature on the broadcasting software.
- Learn About Audio Optimization: A great sounding broadcast is key!
- Interact with Your Audience: Engage with viewers in real time to make your broadcast feel more dynamic.
12. Security Considerations: Keeping It Safe
Always remember to be wary about what you are broadcasting!
- Protect Your Account: Use strong, unique passwords.
- Be Mindful Of Your Background: Don't broadcast anything you wouldn't share publicly.
- Check Your Software Privacy Settings: Make sure you're only sharing what you intend to share.
13. The Future of Broadcasting: Where We're Headed
The world of live broadcasting is constantly evolving. With new technologies on the horizon, there’s a lot to be excited about in the future of broadcasting.
14. Your Broadcasting Journey Begins Now!
You've got the knowledge, the tools, and the motivation. Now it's time to take action! Don't be afraid to experiment, make mistakes, and learn as you go. That experimentation is a pathway to success!
1
Boost Your Laptop's Wi-Fi Signal: Insane Speed Hacks!How to use old laptop into Network Camera Recorder NETVN
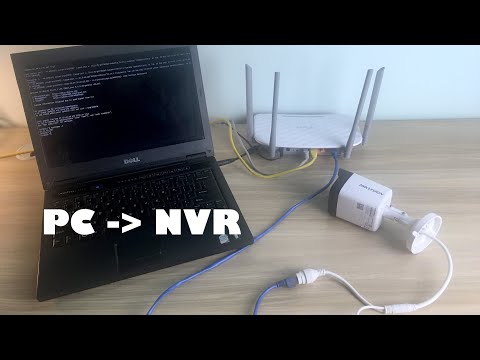
By NETVN82 How to use old laptop into Network Camera Recorder NETVN by NETVN82
How to add a network camera in windows 11 and use as your web cam
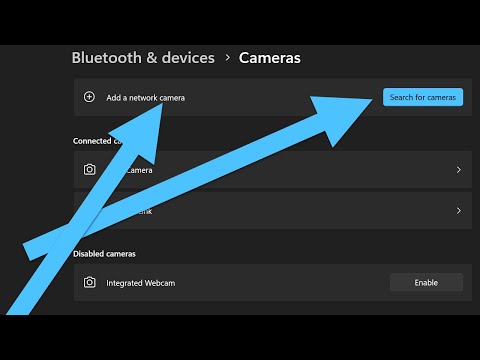
By Logan Dunning How to add a network camera in windows 11 and use as your web cam by Logan Dunning
How hackers hack CCTV & Webcam & IP Network cameras
By Jadi How hackers hack CCTV & Webcam & IP Network cameras by Jadi

Title: how to connect Canon camera to Computer using WiFi
Channel: Bhupinder Tube
how to connect Canon camera to Computer using WiFi by Bhupinder Tube
Working With Laptop
Laptop Camera Broadcast WiFi: Unveiling the Effortless Path to Seamless Streaming
We live in an era where connectivity is paramount. From virtual meetings to live-streamed gaming sessions, the ability to broadcast ourselves and our surroundings instantly is no longer a luxury but an essential component of modern life. And at the heart of this instantaneous communication lies the ubiquitous laptop camera, ready to transform your machine into a powerful broadcasting tool. Forget clunky setups, confusing software, and unreliable connections. We're here to illuminate a path that unlocks the ease and sophistication of broadcasting directly from your laptop, harnessing the power of WiFi with surprising simplicity.
Understanding Your Laptop Camera: The Unsung Hero
The built-in laptop camera is often overlooked, treated as a mere afterthought. Yet, it's a surprisingly capable device, offering resolutions that have steadily improved with each generation of laptops. Most modern laptops boast cameras capable of delivering crisp 720p or even 1080p video, perfectly adequate for conveying your message with clarity and professionalism. The key lies in treating this often-underestimated component with respect, ensuring it's optimized for the task ahead.
Assessing Your WiFi Connection: The Foundation of Flawless Streaming
Before we dive into software and settings, let’s address the elephant in the room: your WiFi connection. A stable and robust WiFi signal is the bedrock upon which your broadcasting success is built. A weak or intermittent connection will result in buffering, dropped frames, and a generally frustrating viewing experience for your audience. There are a few crucial steps to ensure optimal WiFi performance.
Proximity Matters: The closer your laptop is to your WiFi router, the stronger the signal. Ideally, position yourself within the same room as the router, minimizing obstructions like walls and furniture.
Channel Optimization: WiFi routers broadcast on different channels. These channels can sometimes experience interference from other devices, impacting your connection. Most routers allow you to manually select a channel. Experiment with different channels to identify the one that provides the strongest and steadiest signal. There are many free WiFi analyzer apps available, such as those available on the Google Play Store or Apple App Store, which help you assess the channel congestion in your area.
Router Refresh: Periodically resetting your router can clear temporary glitches and improve overall performance. Unplug the router from its power source for about 30 seconds, then plug it back in. This can often work wonders.
Upgrade If Necessary: If your current router is outdated or struggling to keep up with your streaming needs, consider upgrading to a newer model with support for faster WiFi standards like 802.11ac or 802.11ax (WiFi 6). These newer standards offer improved speed and range, which are crucial for smooth, lag-free streaming.
Software Selection: Choosing the Right Tools for the Job
The good news is that setting up your laptop camera for broadcasting doesn't require complex, professional-grade software. Several user-friendly options effectively streamline the process:
OBS Studio (Open Broadcaster Software): This is a popular, free, and open-source software that provides a wealth of features. While it might initially seem a bit daunting, OBS Studio offers unparalleled control over your streams. You can customize your broadcast with overlays, multiple camera angles, and various audio sources. It supports a wide variety of streaming platforms, including Twitch, YouTube Live, and Facebook Live.
StreamYard: StreamYard is a browser-based streaming platform that is designed for ease of use, even for beginners. It simplifies the process of setting up a broadcast and inviting guests. StreamYard conveniently handles much of the technical complexity behind the scenes, making it perfect for webinars, interviews, and panel discussions. While it does have a free version with limitations, its paid tiers offer advanced features such as branding customization and extended streaming times.
XSplit Broadcaster: XSplit offers both free and paid versions, catering to users of all levels. It offers an intuitive interface and a wide range of features, including screen recording, game capture, and webcam integration. The paid versions provide more advanced capabilities, such as multiple camera inputs and customized transitions.
Step-by-Step Guide: From Camera to Broadcast
Let's walk through the process of setting up a basic broadcast using OBS Studio (adapt the steps to your chosen software):
Download and Install OBS Studio: Visit the OBS Studio website and download the installer for your operating system (Windows, macOS, or Linux). Run the installer and follow the on-screen instructions.
Configure Video Settings: Launch OBS Studio. In the "Sources" panel (usually located at the bottom left), click the "+" button and select "Video Capture Device." Choose your laptop's built-in camera from the device selection drop-down. You can then adjust the resolution, frame rate, and other settings to optimize video quality. Experiment with these settings. Higher resolution will look better but will consume more resources.
Camera Positioning and Lighting optimization: Position yourself in front of the camera, ensuring that your face is well-lit. Natural light is typically ideal. If necessary, use a desk lamp or ring light to illuminate your face and avoid shadows. Framing is crucial. Position the camera to capture you from the chest or waist up, ensuring the background isn't distracting.
Audio Setup: In the "Sources" panel, click the "+" button and select "Audio Input Capture." Choose your laptop's built-in microphone or, ideally, an external microphone for better audio quality. Monitor your audio levels in the "Audio Mixer" panel (usually located below the "Sources" panel) and adjust the volume accordingly to prevent clipping or distortion.
Connecting to Your Streaming Platform: Go to "Settings" and then the "Stream" tab. Select the streaming service you will use (e.g., Twitch, YouTube Live, or Facebook Live) and enter your stream key. You can usually find your stream key on your streaming platform's website, in your live dashboard.
Start Streaming: Click the "Start Streaming" button in the bottom right corner of OBS Studio. Your broadcast is now live! You can monitor your stream's status in the OBS Studio interface. Remember to test your settings thoroughly before going live for an extended period.
Troubleshooting Common Issues
Camera Not Detected: Ensure the camera is enabled in your operating system's privacy settings. Check the camera driver in your device manager.
Poor Video Quality: Adjust the resolution, frame rate, and bitrate in your broadcasting software's settings. A higher bitrate will result in better video quality but will also require a faster internet connection.
Audio Problems: Make sure your microphone is properly connected and selected as the audio input device. Adjust the audio levels in your broadcasting software.
Lagging or Buffering: Check your internet connection speed. Reduce the video resolution or frame rate to lower the bandwidth requirements by adjusting the settings in the broadcasting software.
Beyond the Basics: Elevating Your Broadcast
Once you've mastered the fundamentals, consider these advanced techniques:
External Microphone: Invest in a dedicated microphone to significantly improve your audio quality. USB microphones are easy to set up, offering a marked improvement over your built-in laptop microphone.
Green Screen: Use a green screen to create a virtual background. This allows you to replace your actual background with an image or video, adding a professional touch.
Overlays and Graphics: Create custom overlays and graphics to brand your broadcast and provide information to your audience.
Interaction: Encourage interaction with your audience by responding to comments and answering questions in real time.
Practice: The more you broadcast, the more comfortable and confident you will become. Experiment with different settings and techniques to find what works best for you and your audience.
Conclusion: Embrace the Simplicity
Broadcasting from your laptop camera over WiFi is no longer a complex endeavor for the technologically savvy . With the right tools, a stable WiFi connection, and a bit of practice, you can transform your laptop into a powerful broadcasting hub, sharing your ideas, talents, and experiences with the world with astonishing ease. Don't be intimidated; the path to seamless streaming is paved with simple steps. Embrace the simplicity, and unlock the limitless potential of your laptop camera.
