laptop connected to wifi but no internet access windows 8

Title: how to fix wifi connected but no internet access windows 8
Channel: All laptop solution
how to fix wifi connected but no internet access windows 8 by All laptop solution
laptop connected to wifi but no internet access windows 8, why is my laptop connected to wifi but no internet access, laptop connected to wifi but no internet access windows 10, laptop connected to wifi but no internet access windows 7, why my laptop connected to wifi but no internet
WiFi's Down? Emergency Windows 8 Internet Fix!
Oh No! Your Windows 8 Internet Is Down? Rescue Mission Activated!
The digital world grinds to a halt. Suddenly, your lifeline to the internet, the wireless connection you depend on, vanishes. Silence descends – no streaming, no social media, just a frustrating void. You stare at that glowing Windows 8 screen, bereft of its online capabilities. But fear not! Because you're not alone. We've all been there. And, therefore, a solution often lies closer than you think. Let’s get you reconnected.
Decoding the Internet Apocalypse: Step One, Diagnostic Mode
First, take a deep breath. Panicking won't help. Instead, consider the situation. Internet issues aren't uncommon. Therefore, we must calmly assess the landscape. Begin with the basics. Is the router blinking? Is the power cord securely plugged in? Perhaps a simple reboot of your modem and router will do the trick. Since this is a common solution, try it first. Give it a few minutes to fully reset. Furthermore, check the physical connections. The Ethernet cable, if connected, should be firmly seated in your computer. Consequently, a loose cable is a frequent culprit. You should consider these foundational troubleshooting strategies.
Windows 8’s Hidden Helpers: Troubleshooter Power-Up!
Windows 8, while not always the most intuitive, actually includes some surprisingly useful troubleshooting tools. Because of this, they’re often overlooked. To access them, start by navigating to the Control Panel. Then, select "Network and Internet." From there, click on "Network and Sharing Center." You'll then discover a link labeled "Troubleshoot problems." Go ahead and click it! Then, choose “Internet Connections” or "Network Adapter," depending on your situation. Windows will then run a diagnostic. It identifies the root cause of the issue. Subsequently, it attempts to fix it automatically. Give it a moment to work its magic. This tool can often resolve common problems.
Network Adapter Shenanigans: A Deeper Dive
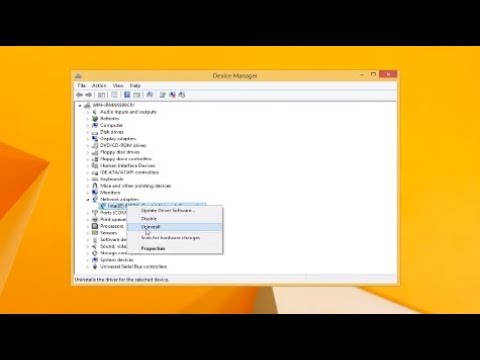
If the troubleshooter doesn’t resolve the problem, it's time to investigate further. Your network adapter might be the issue. To investigate, begin by accessing Device Manager. You can typically find this by searching in the Search bar. Then, locate "Network adapters" in the Device Manager list. Expand it, and you should see your network adapter listed. Right-click on your adapter. Then, select "Properties." Check the “Device status” section. It is vital to see if it indicates a problem. It could be disabled, malfunctioning, or experiencing driver issues.
Driver Drama: Keeping Things Up-to-Date
Outdated or corrupted drivers are a frequent cause of connectivity issues. However, don't panic. Updating drivers is usually straightforward. In the device manager, right-click on your network adapter. Then choose "Update driver software." Windows will search for the latest drivers from the internet. If it finds any, it will automatically install them. If that doesn't work, you may need to download the drivers directly from your computer manufacturer's website. Then, install them manually. Ensuring drivers are always current is a good practice.
The IP Configuration Conundrum: Unraveling the Mysteries
Sometimes, the issue lies in your IP configuration settings. Because of this, you might need to refresh your IP address. To do this, open the Command Prompt as an administrator. You can search for "cmd" and right-click to select "Run as administrator." In the Command Prompt, type ipconfig /release and press Enter. Then, type ipconfig /renew and press Enter again. This will release and renew your IP address. In essence, this is like giving your computer a fresh start. Furthermore, this can often resolve network conflicts. Therefore you should consider this step.
The Firewall Follies: Checking the Security Gates
Windows Firewall, while essential for security, can sometimes block internet access. To ensure this isn’t happening, review your firewall settings. Go to the Control Panel and select "Windows Firewall." Ensure your network profile allows internet access. You might have to configure exceptions for specific applications. Another potential solution is temporary disabling the firewall to test connectivity. However, be mindful of security risks. Consider this carefully before disabling your firewall entirely.
Beyond the Basics: External Factors and Further Investigation
If, after exhausting these steps, you're still offline, the problem might lie elsewhere. Double-check your internet service provider (ISP). Are there any known outages? Furthermore, restart your computer. Sometimes, a simple restart can clear temporary glitches. If the problem persists, contact your ISP. Because they often have the tools to remotely diagnose the issue. They often can offer more specific solutions.
Final Thoughts: Staying Connected in a Connected World
Dealing with internet outages is never fun. However, knowing how to troubleshoot the situation can save time and frustration. Also, remember patience is key. Because not every problem has an immediate solution. With these steps, you can hopefully get back online quickly. Moreover, you should remember that troubleshooting is a continuous process. Internet problems can be annoying. However, there are solutions. Stay persistent, stay calm, and keep exploring. Now, go get back online!
Is Your Laptop WiFi Antenna DEAD? (Secret Fix Inside!)WiFi's Down? Emergency Windows 8 Internet Fix!
Hey everyone! Let's face it – we've all been there. You're in the middle of something crucial, maybe a Zoom call for work, a late-night streaming session, or just trying to check your bank balance, and BAM! The dreaded WiFi icon pops up with a sad little "X" mark. It's like your digital lifeline has been severed. But don’t panic! Because, let's be honest, that’s easier said than done, especially when deadlines are looming, or you’re just craving a digital escape. This article is your lifeline. We're going to dive into some quick, actionable steps to get your Windows 8 internet connection back on track, even if your WiFi is playing hide-and-seek. Think of it as your digital emergency kit, filled with tools to fight off those pesky internet outages.
1. The Initial Reconnaissance: Is It Really Your WiFi?
Before we start frantically clicking buttons and wrestling with wires, let’s do a little detective work. Is it actually your WiFi? Maybe the internet is down at the source, maybe it is your provider causing the outage. Before you go through elaborate troubleshooting, ask around. Are other people in your household (or even your neighborhood, if you're feeling neighborly!) experiencing connectivity issues too? A quick text or shout across the room can save you a lot of time and frustration. If everyone else is fine, then we can safely assume the problem lies within your lair, and we can proceed with our rescue mission.
2. The Classic Reboot: Your Router's First Responder
Okay, so it looks like the problem is within your domain. The first, and often most effective, line of defense is a good old-fashioned reboot. I'm talking about your router and your modem. Think of them as the heart and lungs of your internet connection. Here's the drill:
Unplug both your router and your modem from the power outlet. Give them a good 30 seconds – maybe even a minute – to completely power down. This clears their memory and allows them to re-establish a fresh connection. It's like hitting the reset button on your brain after a long day.
Plug the modem back in first. Wait for the modem to fully power up and indicate a stable connection (usually by a solid light).
Then, plug in your router. Give it a minute or two to boot up.
Try connecting to the internet again. Fingers crossed! This simple step resolves probably 80% of WiFi issues.
3. Windows 8 Network Troubleshooter: Your Digital Sherlock Holmes
If the reboot didn't do the trick, time to call in the big guns: the Windows 8 Network Troubleshooter. This built-in tool is like your digital Sherlock Holmes, sniffing out the clues and suggesting solutions. Here’s how to find it:
Access the Charms Bar. Swipe from the right edge of your screen, or move your mouse to the bottom-right corner and then move it up.
Click on "Settings". It's the gear icon.
Click on "Control Panel".
In the Control Panel, navigate to "Network and Internet" and then "Network and Sharing Center".
Look for "Troubleshoot problems" in the right-hand sidebar. It's usually in the “View active networks” section. Click on it.
Follow the prompts. The troubleshooter will guide you through a series of diagnostic steps and, hopefully, identify and resolve the issue. It's like having a tech expert right inside your computer!
4. Update Your Network Adapter Driver: Breathing Life Back Into Your Connection
Think of your network adapter driver as the translator between your computer and your WiFi. Sometimes, this translator gets a little rusty, especially if it hasn't been updated in a while. Updating your driver can breathe new life back into your connection.
Open the Device Manager. You can find it by searching for "Device Manager" in the Start menu (or by using the Windows key + X shortcut and selecting "Device Manager").
Expand the "Network adapters" section. You'll see a list of your network adapters.
Right-click on your WiFi adapter (it might be labeled something like "Wireless Network Adapter" or "Wi-Fi").
Select "Update driver software".
Choose "Search automatically for updated driver software". Windows will search for and install the latest drivers if available.
Restart your computer after the installation has completed.
5. Forgetting and Reconnecting to Your Network: A Fresh Start
Sometimes, a simple "forget and reconnect" can do the trick. It’s like wiping the slate clean and starting anew. In my personal experience, this has been a surprisingly effective solution.
Go back to the Charms Bar, then "Settings," then "Control Panel," then "Network and Sharing Center."
Click “Manage wireless networks.”
Right-click on your WiFi network name (the one you're having trouble with) and select "Remove network".
Go back to your available networks and select your WiFi network and enter your password. It’s like a digital first date, but hopefully, this one leads to a lasting connection.
6. Check Your Firewall Settings: Avoiding Digital Gatekeepers
Your firewall is designed to protect your computer, but occasionally, it can become a little too protective, blocking your internet connection.
Again, you guessed it, access the Charms Bar, "Settings," "Control Panel," and then type “Windows Firewall” in the search bar and open it.
Click on "Allow an app or feature through Windows Firewall".
Scroll through the list of apps and make sure your web browser (like Chrome, Firefox, or Edge) is allowed. If it's not, click "Change settings" and check the boxes for "Private" and "Public" network locations.
Click "OK."
7. Diagnose with ipconfig/all: Decoding the Geek Speak
Okay, now we’re getting into a little bit of tech jargon, but don't worry; it's not as scary as it sounds. Sometimes, looking at your network configuration can provide clues.
Open Command Prompt. You can find it by searching for "cmd" in the Start menu.
Type
ipconfig /alland press Enter. This command displays a detailed overview of your network settings.Look at the IP address, Subnet Mask, Default Gateway, and DNS server. Make sure they seem correct (they're often automatically assigned by your router). You can compare it to another computer on your network that is working to see if there are any discrepancies.
8. Flush Your DNS Cache: Clearing Out the Digital Clutter
Your DNS cache is like a digital scrapbook that your computer uses to remember website addresses. But sometimes, this scrapbook gets filled with outdated information, leading to connection problems.
- Open Command Prompt.
- Type
ipconfig /flushdnsand press Enter. This command clears your DNS cache. - Type
ipconfig /renewand press Enter. This command renews your IP address, which can sometimes solve connection issues.
9. Inspect Your Physical Connections: Cables and More
Let's move from the ethereal digital realm and back to the physical world. Check the cables connected to your modem and router. Are they securely plugged in? Are they damaged? A loose or faulty cable can be a common culprit.
Make sure the Ethernet cable (the one connecting your computer to your router) is securely plugged into your device. A loose connection is like trying to drink through a straw with a hole in it - it's just not going to work.
Check the phone line connecting your modem to the wall (if you have DSL). Make sure it is firmly connected.
10. Reset Router to Factory Settings: The Nuclear Option
If all else fails, you might need to perform a factory reset on your router. This will erase all your custom settings and revert it to its original state. Be warned: you'll need to reconfigure your WiFi network and password afterward.
Locate the reset button on your router. It's usually a small, recessed button that you'll need to press with a paperclip or a similar small object.
Press and hold the reset button for about 30 seconds. The router's lights will blink, indicating that it's resetting.
After the reset, reconfigure your Wi-Fi settings and password. Refer to your router's manual for instructions.
11. Contact Your Internet Service Provider (ISP): When All Else Fails
If you've tried everything and you're still stuck, it's time to call in the professionals. Your internet service provider (ISP) can often diagnose issues on their end and provide assistance. They may know about wider outages that you are not aware of.
12. Consider Alternative Connections: The Backup Plan
In the digital age, options are your friend. If your WiFi is truly down for the count (and you absolutely must have internet), consider these alternatives:
- **Use your smartphone as a hotspot
Windows 8.1 - No Internet Connection Available
By MDTechVideos Windows 8.1 - No Internet Connection Available by MDTechVideos
Cara Mengatasi Wifi Connected Tapi No Internet Access

By Sobat OPS Cara Mengatasi Wifi Connected Tapi No Internet Access by Sobat OPS
Wifi Connected but No Internet Access Windows 10 8 - Howtosolveit

By Howtosolveit Wifi Connected but No Internet Access Windows 10 8 - Howtosolveit by Howtosolveit

Title: Fix WiFi Connected But No Internet Access on Windows 11 - Easy Ways
Channel: Sandeep Singh
Fix WiFi Connected But No Internet Access on Windows 11 - Easy Ways by Sandeep Singh
Wifi On Laptop Phone
WiFi's Down? Emergency Windows 8 Internet Fix!
The crimson glow of the offline icon blazes on your Windows 8 machine. Panic sets in – deadlines loom, streaming services demand their pound of bandwidth, and the digital world seems to shrink to the confines of your unresponsive screen. But wait, there's hope! Before you resign yourself to the tortures of internet limbo, let's systematically resurrect your connection. We'll methodically explore the most common culprits and, armed with precise solutions, bring your Windows 8 internet back to life.
Diagnosis: Unearthing the Root of Your Internet Woes
Before diving headfirst into corrective measures, a moment of calm introspection is paramount. Is the problem limited to your single Windows 8 device, or has the internet connection entirely collapsed across all your devices? This initial assessment guides our efforts: a localized issue suggests a problem within your Windows 8 configuration, while a network-wide failure points to the router or internet service provider's domain.
Begin with the simple checks. Ensure your physical connections are secure. Is the Ethernet cable firmly plugged into both your computer and the router? Are the router's power and internet status lights indicating a healthy connection? A loose cable can easily trigger the dreaded "no internet" message. If you’re using Wi-Fi, double-check that Wi-Fi on your laptop is enabled. A simple toggle of the physical switch or use of the function keys can sometimes be the solution.
Next, investigate the network status from within Windows 8. Click on the network icon in your system tray (usually located in the bottom right corner of your screen). You should see a list of available Wi-Fi networks, along with the status of your wired connection. Is your network listed? Does it show "Connected," "Limited," or "No internet access?" The exact message is a critical clue.
Troubleshooting: Your Arsenal of Windows 8 Internet Fixes
Now, let's arm ourselves with a series of effective fixes, tailored specifically for the nuances of Windows 8. We'll move through these steps in a logical order, gradually increasing the complexity as needed.
Restarting the Obvious: The Power Cycle Protocol
Often, the most elegant solution is the simplest. Begin by restarting your computer. Shut down Windows 8 completely and then power it back on. This allows your system to refresh itself, clear temporary files, and sometimes rectify minor software glitches affecting network connectivity.
Next, address the unsung hero of your internet setup: the router. Unplug the router from its power source. Wait a full 60 seconds. This allows for a complete discharge and a fresh start. Plug the router back in and allow it to fully power up (this may take a few minutes). Following the router restart, power on your Windows 8 machine.
The Network Troubleshooter: Windows 8's Built-in Medic
Windows 8 boasts a built-in troubleshooting tool specifically designed to diagnose and repair network issues. This is your digital first responder.
Access the Troubleshooter: Right-click the network icon in the system tray (again, in the bottom right). Choose "Troubleshoot problems."
Follow the Prompts: Windows 8 will automatically scan for problems and suggest solutions. Carefully read the suggestions and follow the on-screen instructions. The troubleshooter often identifies and resolves common issues with IP address configuration, DNS settings, and more.
Verifying Your IP Configuration: Ensuring the Right Address
Your Windows 8 computer requires a valid IP address to communicate with the internet. Let's ensure it's correctly configured.
Access Network Connections: Press the Windows key + X to open the Power User menu. Select "Network Connections."
Identify Your Connection: Locate your active network connection (Ethernet or Wi-Fi).
Properties Dive: Right-click on the connection and select "Properties."
IP Settings Examination: Scroll down and double-click on "Internet Protocol Version 4 (TCP/IPv4)".
Automatic or Manual? The configurations here are critical. Ensure that "Obtain an IP address automatically" and "Obtain DNS server address automatically" are selected. If manual settings are present, they are often incorrect. If these are not selected, and you are configuring them for the first time, contact your internet service provider.
Apply and Test: Click "OK" on all the windows. Restart your connection by disabling and then re-enabling your network adapter or restarting your computer. Test your internet connection.
DNS Server Shenanigans: Guiding Traffic Correctly
DNS (Domain Name System) servers translate website addresses (like google.com) into numerical IP addresses that your computer understands. Incorrect DNS settings can block your internet access.
Revisit IP Properties: Repeat the steps from the "Verifying Your IP Configuration" section to access the TCP/IPv4 Properties.
Manual DNS Override (If Necessary): If you still have no connection after checking the above and you are still not able to connect, choose "Use the following DNS server addresses." While you might choose your ISP's DNS servers, Google's public DNS servers often improve speed and reliability.
Google's DNS: Enter 8.8.8.8 in "Preferred DNS server" and 8.8.4.4 in "Alternate DNS server."
Apply and Test: Click "OK" on all the windows, restart your connection, and test.
Driver Dilemmas: Keeping Your Network Adapter Up-to-Date
Outdated or corrupted network adapter drivers can result in connectivity failures.
Open Device Manager: Press the Windows key + X, then select "Device Manager."
Locate Network Adapters: Expand the "Network adapters" section.
Identify Your Adapter: Locate your Wi-Fi or Ethernet adapter.
Update Driver: Right-click on your adapter and select "Update driver software." Follow the on-screen prompts.
Restart as Needed: Windows may require a restart after updating the driver.
Firewall Fiascos: Ensuring Unobstructed Traffic
Your Windows 8 firewall is designed to protect your system, but sometimes it can inadvertently block legitimate internet traffic.
Access Windows Firewall: Search for "Windows Firewall" in the Windows 8 Start screen and select the result.
Allow an App/Feature (If Applicable): If you recently installed new software, it is possible a firewall is blocking it. Click "Allow an app or feature through Windows Firewall." Review the list. If your relevant application is blocked, check the necessary boxes (both private and/or public) to allow it.
Factory Default: To rule out firewall misconfiguration as the culprit for the internet not running, you may try resetting the Windows Firewall to its default settings.
Advanced Tactics: When Simplicity Falls Short
If the above steps have proven ineffective, we'll venture into more advanced settings. This section can be trickier, so proceed with caution.
Resetting Winsock and TCP/IP Stack: A Clean Slate for Networking
Winsock and the TCP/IP stack are fundamental components of Windows networking. Corruption in these areas can create major internet disruptions. Resetting them provides a fresh start.
Open Command Prompt (as Administrator): Search for "cmd" in the Windows 8 start screen. Right-click "Command Prompt" and select "Run as administrator."
Execute Commands: Type the commands below, pressing Enter after each one. Ensure each command is entered correctly.
netsh winsock resetnetsh int ip reset
Restart Your Computer: This is critical after running these commands.
Checking Your Proxy Settings: Bypassing the Middleman
Incorrect proxy settings can redirect your internet traffic and prevent you from accessing the web.
Access Proxy Settings: Open Internet Explorer (yes, even if you primarily use another browser).
Click the gear icon (Settings) in the top right corner. Choose "Internet options."
Go to the "Connections" tab, then click "LAN settings."
Verify Settings: Ensure that "Automatically detect settings" is checked. If a proxy server address is entered, unless you know you have a proxy server, uncheck the box next to "Use a proxy server for your LAN."
Apply and Test: Click "OK" on all windows. Restart your computer and test.
Network Reset: The Nuclear Option (Use with Caution)
As a final desperate measure, you can reset your entire network configuration to its default state.
Open Settings: Press the Windows key + I to open the Settings charm. Click "Change PC settings."
Network Reset: Go to "Network" and then "Connections." Locate the "Network reset" option.
Follow Prompts: Windows will warn that this will remove any saved network settings, including Wi-Fi passwords. Click "Reset now."
Restart: Your computer will shut down and restart. You will need to re-enter your Wi-Fi password.
Final Thoughts: Maintaining a Stable Internet Connection
Once your internet connection is resurrected, there are a few preventative measures to take to avoid future outages:
- Regular Driver Updates: Keep your network adapter drivers updated.
- Strong Wi-Fi Password: Secure your Wi-Fi network with a
