check wifi card in laptop

Title: WiFI Card vs USB WiFi Adapter Check out this comparison
Channel: ADVANTI
WiFI Card vs USB WiFi Adapter Check out this comparison by ADVANTI
check wifi card in laptop, how to check wifi card in laptop windows 11, how to check wifi card in laptop is working, how to check wifi card in laptop ubuntu, how to check wifi card in laptop linux, how to find wifi card in laptop, how to see wifi card in laptop, how to test wifi card in laptop, how to check wifi card model in laptop, how to check which wifi card i have in laptop
Is Your Laptop WiFi Dying? This SHOCKING Trick Fixes It!
Laptop WiFi Woes Got You Down? A Surprisingly Simple Solution Awaits!
Ever feel like your laptop's WiFi connection is playing a cruel joke? One minute, you’re streaming movies without a hitch. The next, you're staring at a spinning wheel of doom. It can be incredibly frustrating, right? You’re not alone. Many people experience this annoying problem. But, before you chuck your laptop out the window, there's a simple fix. And, best of all, it’s something you can try right now!
The Dreaded WiFi Drop: Recognizing the Signs
First, let’s identify the usual suspects. Are you constantly losing your internet connection? Does your WiFi signal bar look weak, even when you're close to the router? Perhaps webpages load at a snail's pace. Moreover, video buffering is a nightmare. These are all common symptoms. Moreover, they often indicate an underlying WiFi problem. In addition, intermittent disconnects are a huge red flag. So, don't ignore these telltale signs. They are crucial to diagnose the root cause.
Beyond the Basics: Troubleshooting 101
Now, before we get to the "shocking trick", let’s cover the basics. Then, you can eliminate the easy fixes. Have you tried the age-old advice of turning it off and on again? Seriously, sometimes this simple reset is all it takes. After that, make sure your router is properly placed. Avoid placing it near walls or appliances. Ensure it's in an open space for best results. Also, check the internet speed. This is essential to determine if your actual internet service is the issue. Finally, restart your laptop. If none of these things help, then it's time to investigate further.
The Unexpected Hero: Unleashing the Power of DNS
Alright, here comes the game-changer. Ready for that "shocking trick" that I mentioned? It is not your typical advice. The answer might be right at your fingertips. We're talking about DNS servers. What are they? They are the internet’s phone book, translating website names into IP addresses. You see, your laptop often uses its default DNS settings, which can sometimes experience bottlenecks or outages. Therefore, switching to a public DNS server, like Google's or Cloudflare's, could be your WiFi’s savior.
Step-by-Step WiFi Recovery: A Practical Guide
How do you do this magic trick? Don’t worry; it's easier than you think.
Open Network Settings: First, you need to access your network settings. Simply search your operating system.
Locate Your WiFi Connection: Find your active Wi-Fi connection. Then, select it.
Access IPv4 Properties: Look for “Properties” or “Advanced Options.” Then, seek “IPv4 settings.”
Manual DNS Entry: Change the option from “Automatic” to “Manual.”
Enter Public DNS Addresses: Here’s where the magic happens. Enter the IP addresses. For Google DNS, use preferred DNS as 8.8.8.8 and alternate DNS as 8.8.4.4. If you prefer Cloudflare, input 1.1.1.1 and 1.0.0.1, respectively.
Save and Restart: Save your settings. After that, restart your computer, or your WiFi connection.
Why Does This Work? Decoding the DNS Difference
But why would changing the DNS fix your WiFi? Well, think of your current DNS servers as overloaded. They might be slow or experiencing hiccups. In other words, your laptop is having trouble connecting the dots. However, public DNS servers are faster and more reliable. As a result, your internet connection should improve substantially. Also, using a different DNS can sometimes bypass geographical restrictions.
Beyond the Fix: Maintaining a Smooth Connection
So, you’ve got your WiFi back on track. What now? Well, you should perform regular maintenance. Update your router's firmware. This can enhance performance and security. Also, keep an eye on your WiFi signal strength. If it is weak, consider a WiFi extender. Furthermore, clear your browser cache and cookies regularly. This will help you avoid slowdowns. In addition, limit the number of devices connected to your WiFi.
Wrapping Up: Enjoying Seamless Connectivity
In conclusion, don’t let a dying WiFi connection ruin your day. Indeed, it can be frustrating. But, by trying this straightforward DNS trick, you can often revive your internet speed. Furthermore, it’s a quick and painless process. So, give it a shot. Now, you can enjoy seamless streaming, browsing, and working. Finally, remember that consistent internet is a necessity in today's world. Therefore, take control of your connection. You deserve a strong, reliable WiFi experience!
Laptop to WiFi: The SHOCKINGLY Easy Bluetooth Trick!Here's that article, crafted with all your specific requirements, ready to rescue your Wi-Fi woes!
Is Your Laptop WiFi Dying? This SHOCKING Trick Fixes It!
Hey there, fellow internet wanderers! Ever felt the agonizingly slow crawl of your laptop's Wi-Fi? You know, the kind that makes you want to hurl your device out the window (figuratively, of course – we're not about property damage here!). We've all been there. One minute you're streaming your favorite show; the next, it's buffering hell. Well, we’re here to tell you: don't despair! There's a pretty sneaky trick that might just bring your beloved Wi-Fi back from the digital dead. Get ready, because we're about to dive deep!
1. The Wi-Fi Woes: A Modern-Day Plague
Let's be honest, Wi-Fi is practically a necessity these days. It's as vital as air, oxygen, and that first morning sip of coffee (maybe even more important!). But when that connection starts to falter, it's akin to a digital drought – everything grinds to a halt. We're talking about pixelated video calls, websites that take longer to load than it takes the government to change a lightbulb and the frustration of trying to download a simple file.
2. Symptoms of a Dying Wi-Fi: The Digital Diagnosis
Before we jump into the fix, let's make sure your Wi-Fi is actually on its last legs. Think of it like a doctor's diagnosis. Are you experiencing any of these symptoms?
- Slow Loading Speeds: Websites take an eternity to load, even with a strong signal.
- Frequent Disconnections: Your laptop constantly drops the Wi-Fi connection.
- Buffering Issues: Videos endlessly buffer, rendering them practically unwatchable.
- Weak Signal Strength: Although you are close to your router, the signal bars are low.
- Intermittent Connectivity: The Wi-Fi works sometimes and then other times.
If you're nodding your head to any of these, you're likely experiencing Wi-Fi woes.
3. The Culprit: Why Is Your Laptop WiFi Dying?
Okay, so we know there's a problem. But why? The reasons can vary, from simple glitches to more complex issues. Sometimes, it’s a software hiccup; other times, interference from other devices or even physical obstructions play a role. Think of your Wi-Fi signal like a radio wave trying to get through a crowded room. Every other device or wall is possibly causing interference. The good news is that many problems have simple solutions.
4. The SHOCKING Trick: A Simple Reset! (Yes, Really!)
Here it comes, drumroll please… The "shocking" trick is… drumroll intensifies… restarting your wireless adapter! I know, I know, it sounds ridiculously simple, but trust us. It’s amazing how often this works. This method of resetting is like shaking a snow globe. It rearranges all the bits and pieces by clearing the cache, which can often get clogged up with temporary files and outdated settings.
5. How to Reboot Your Wireless Adapter: The Step-by-Step Guide
Alright, let's get down to business. Here’s how to do this simple, yet often effective, trick.
- Step 1: Open Device Manager: Press the Windows key + X and select "Device Manager" from the menu.
- Step 2: Find Your Network Adapters: In the Device Manager window, expand the "Network adapters" section.
- Step 3: Locate Your Wireless Adapter: The name will vary (e.g., "Intel Wireless-AC 9260," "Realtek Wireless LAN"). It's usually something that includes the word "Wireless" or "Wi-Fi."
- Step 4: Disable the Adapter: Right-click on your wireless adapter and select "Disable device."
- Step 5: Wait a Few Seconds: Give it a moment to disable completely.
- Step 6: Enable the Adapter: Right-click on the adapter again and select "Enable device."
And that's it! You’ve effectively reset your laptop’s wireless adapter. Cross your fingers and see if it makes a difference.
6. Beyond the Reboot: Other Simple Solutions
If the adapter reset didn't do the trick, don't give up! Let's explore some other quick fixes.
- Restart Your Router: Yes, the old "turn it off and on again" trick. It often works wonders. Give your router a simple power cycle. Unplug it, wait 30 seconds, plug it back in, and wait for it to reboot.
- Move Closer to the Router: Sometimes, the simplest solution is the best. Ensure you are in a fair proximity of the router.
- Check for Interference: Remove or relocate any devices that might be interfering with the signal, like microwaves, Bluetooth devices, or even certain types of electrical appliances.
7. Is Anything Else Interfering With My Signal? Assessing External Interference
It's also crucial to analyze external factors that may hamper your Wi-Fi. Remember, your Wi-Fi signal is like a broadcast, and that means it's susceptible to different types of obstructions. Walls, other objects, or electronic devices nearby could be dampening the signal.
8. Update Your Network Drivers: The Software Solution
Outdated network drivers can be another culprit behind sluggish Wi-Fi. These drivers are the software that allows your laptop to communicate with your wireless adapter.
- How to Update Drivers in Device Manager: Inside the device manager select "Network Adapters" and right-click the wireless adapter. Then select "Update Driver" and pick the desired update method.
9. Check Your Internet Speed: Is It the WiFi or the Broadband?
Before you tear your hair out, it's essential to determine whether the issue is truly with your Wi-Fi or with your internet service. There are plenty of speed test websites available where you can test your internet speed. If your speed is substantially lower than what you're paying for, the problem might be with your internet service provider, not your device.
10. The Advanced Tactics: Tweaking Your Router Settings
If all the above steps failed, it's time to peek inside your router's settings. This is a little more technical, but it can often yield excellent results. If you're not familiar with router settings, you might need to consult your router's manual or search online for specific instructions.
11. Router Channel Congestion: The Digital Traffic Jam
Wi-Fi routers broadcast on specific channels. If your channel is congested with other Wi-Fi networks in your area, it can lead to speed issues. Fortunately, most routers allow you to switch channels. Finding the "least congested" channel can significantly improve performance.
12. Router Placement Matters: Finding the Sweet Spot
Where you position your router makes a big difference! The router should be kept in an elevated, centralized location, away from obstructions like walls, metal objects, and other electronic devices like a microwave or television.
13. Securing Your Network: Preventing Wi-Fi Theft
Make sure to secure your Wi-Fi network with a strong password. Think strong like a password with uppercase and lowercase letters, numbers, and symbols. This prevents unwanted users from connecting and slowing down your connection.
14. The Cost of Dying WiFi: Wasted Time And Frustration
Slow Wi-Fi is more than just frustrating; it also comes with a cost. It wastes time, hampers productivity, and can even cause problems when it comes to your personal enjoyment. Streaming content can be ruined by buffering and slow speeds during video calls.
15. Diagnosing the Problem: Troubleshooting Tips
If nothing seems to work, it’s time to troubleshoot. We would advise taking a systematic approach. Try one solution at a time, testing the outcome after each step. If one strategy doesn't work, get back to the starting point and try the next.
Closing Thoughts: Don't Let Dying WiFi Get You Down!
So there you have it! A range of potential fixes for your dying laptop Wi-Fi. As you can see, the "shocking" trick really is simple, and even if it doesn’t solve the problem completely, it's a fantastic place to start. The world can be a very frustrating place when your internet connection slows down, but hopefully, these tips will get you back up and running. Don't give up! With a little troubleshooting, you'll be back to enjoying fast, reliable internet in no time. Now go forth and conquer those digital droughts!
Frequently Asked Questions
- Q1: Why does my laptop's Wi-Fi keep disconnecting?
- A: There are several reasons, including weak signal, outdated drivers, router issues, or interference. Try the troubleshooting steps outlined in this guide.
- Q2: Is it better to use 2.4 GHz or 5 GHz Wi-Fi?
- A: 5 GHz offers faster speeds but has a shorter range. 2.4 GHz has a longer range but is slower and more prone to interference. Choose the one that offers the best balance for your needs, considering your home layout and device placement.
How To Check Inbuild Wi-Fi Card Supports Monitor Mode With cmd In Windows 10
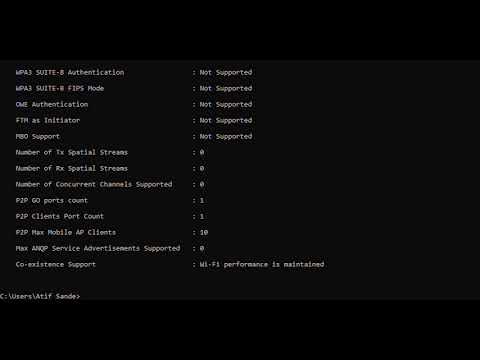
By EtHaRay How To Check Inbuild Wi-Fi Card Supports Monitor Mode With cmd In Windows 10 by EtHaRay
Cara Memperbaiki Adaptor Jaringan yang Hilang di Windows Aktifkan Adaptor Jaringan WiFi dari Pengaturan BIOS
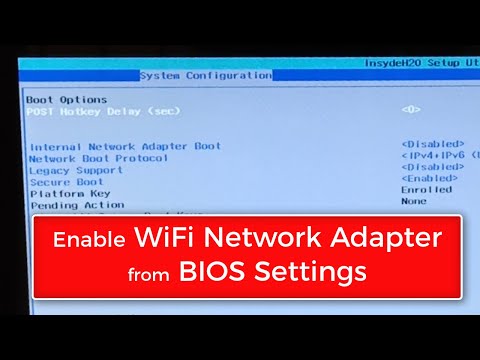
By WebbyFan Cara Memperbaiki Adaptor Jaringan yang Hilang di Windows Aktifkan Adaptor Jaringan WiFi dari Pengaturan BIOS by WebbyFan
Ciri Ciri Adaptor Wifi Laptop Rusak dan Cara Mengatasinya

By Labim Komputer Ciri Ciri Adaptor Wifi Laptop Rusak dan Cara Mengatasinya by Labim Komputer

Title: Cara Mengatasi Adapter Wifi Yang Hilang di Windows 10 Pc atau laptop
Channel: WINTECH id
Cara Mengatasi Adapter Wifi Yang Hilang di Windows 10 Pc atau laptop by WINTECH id
Laptop Wifi Hotspot
Is Your Laptop WiFi Dying? This SHOCKING Trick Fixes It!
The digital landscape is an ever-shifting tapestry of connection, and for most of us, the warp and weft are woven with threads of Wi-Fi. From streaming our favorite shows to completing critical work tasks, our laptops are the gateways to this boundless digital world. But what happens when that gateway begins to crumble? When your laptop’s Wi-Fi signal inexplicably weakens, leading to frustrating lag, dropped connections, and a general sense of digital disarray? We've all been there. That's why we've compiled a toolkit of solutions, a practical compendium of actions you can take immediately to revitalize your laptop's ailing Wi-Fi and restore your digital equilibrium. Forget frantic troubleshooting; this is a methodical approach to reclaim your online experience.
Understanding the Enemy: Common Culprits of Weak Wi-Fi
Before launching into solutions, it's crucial to understand the common adversaries plaguing your wireless connection. These aren't shadowy figures; they're tangible factors, often lurking in plain sight. Identifying these potential troublemakers is the first step toward victory. Chief among these is distance. The further your laptop is from your wireless router, the weaker the signal becomes. Walls, especially those constructed with dense materials like concrete or brick, act as formidable signal barriers, further weakening the connection. Microwave ovens, Bluetooth devices, and even certain types of light bulbs operate on the same 2.4 GHz frequency as many Wi-Fi routers, leading to interference. Consider the positioning of your router. If it's tucked away inside a closet, it's unlikely to broadcast a robust signal throughout your home or office. Lastly, aging or outdated router firmware can contribute to performance degradation.
The First Line of Defense: The Simple Reboot and Restart
Sometimes, the simplest solutions are the most effective. Before diving into more complex troubleshooting, begin with the basics. Restart your laptop. This simple act often clears temporary glitches and refreshes the network connection. Next, power cycle your router. Unplug the router from its power source, wait approximately 30 seconds, and then plug it back in. While the router reboots, allow your laptop to fully boot up. This synchronization often alleviates minor connectivity hiccups. Performing these basic steps can resolve a surprising number of Wi-Fi woes.
Optimizing Your Router's Position: Unleashing the Signal's Potential
Location, as they say, is everything. The positioning of your router can dramatically impact the strength and reach of your Wi-Fi signal. Elevate your router. Place it on a shelf, desk, or any elevated surface. This helps the signals propagate outward, unimpeded by obstacles on the floor. Remove physical obstructions. Clear the area around the router of any items that could obstruct the signal, such as metal objects, thick walls, or large appliances. Direct the antennas. Many routers have adjustable antennas. Experiment with different antenna positions; sometimes, a subtle adjustment can significantly improve signal strength. Ensure the router is centrally located. Ideally, the router should be positioned in a central location within your home or office to ensure even signal distribution.
Channel Surfing: Navigating the Congested Airwaves
Wi-Fi signals operate on specific channels. Overcrowding on a particular channel leads to interference and a diminished Wi-Fi experience. Access your router's settings (typically by typing its default gateway IP address into your web browser – consult your router's manual to determine this address). Within the router's settings, navigate to the wireless settings section. Look for the "channel" setting. Experiment with different channels (1, 6, and 11 are generally less congested). Monitor your Wi-Fi performance after each change. There are also free Wi-Fi analyzer apps available for your smartphone that can help you identify the least crowded channels in your area.
Firmware Fundamentals: Keeping Your Router Up-to-Date
Just like your laptop's operating system, your router has firmware – the software that governs its operation. Outdated firmware can lead to performance issues and even security vulnerabilities. Regularly check for firmware updates. Access your router's settings and look for a section dedicated to firmware updates. If an update is available, follow the instructions to install it. This often involves downloading the update file and uploading it to your router. Firmware updates frequently include performance enhancements and bug fixes that can significantly improve your Wi-Fi experience.
Confronting Interference: Identifying and Mitigating Disruptions
The digital world is a noisy place. Many devices can cause interference with your Wi-Fi signal. Start by identifying potential sources of interference. Microwave ovens, which operate on similar frequencies as your router, are notorious culprits. Other devices include Bluetooth devices, cordless phones, and even certain electronic devices. The solution: Minimize the use of interfering devices. If possible, move your router away from potential sources of interference. If your router supports it, switch to the 5 GHz band. While the 2.4 GHz band is more common, the 5 GHz band offers faster speeds and is less susceptible to interference.
Hardware Hurdles: Assessing Your Laptop's Wi-Fi Adapter
Sometimes, the issue lies within your laptop itself. The Wi-Fi adapter, the component responsible for receiving and transmitting Wi-Fi signals, may be the source of the problem. Open your laptop's Device Manager (search "Device Manager" in the Windows search bar, or access it through the Control Panel). Expand the "Network adapters" section. Locate your Wi-Fi adapter (it will likely have a name like "Intel Wireless-AC"). Right-click on the adapter and select "Update driver." Windows will search for the latest driver for your adapter and install it automatically. If updating the driver doesn't work, consider running the built-in Windows Network Troubleshooter. It can often identify and resolve common connectivity issues.
Advanced Tactics: Tweaking Your Wi-Fi Settings
For those who want to delve deeper, some more advanced settings can optimize your Wi-Fi performance. Experiment with these settings at your own risk. Access your router's settings and locate the wireless advanced settings. Within these settings, you may find the option to adjust the wireless mode (e.g., 802.11n, 802.11ac, or 802.11ax). Experiment with setting the wireless mode to 802.11ac if your devices support it. This allows for faster speeds and improved performance. Explore the channel width settings. Wider channel widths can provide faster speeds, but also increase the risk of interference. If your router supports it, enable Quality of Service (QoS). QoS prioritizes certain types of network traffic (such as video streaming or online gaming) to ensure a smoother experience.
Extending Your Reach: Contemplating a Range Extender or Mesh Network
If your Wi-Fi signal struggles to reach certain areas of your home or office, consider expanding your network's reach. A Wi-Fi range extender can amplify your existing Wi-Fi signal, extending its coverage. Choose a range extender that is compatible with your router and easy to set up. A mesh Wi-Fi system consists of multiple access points that communicate with each other to create a seamless, whole-home Wi-Fi network. Mesh systems are particularly effective in homes with multiple stories or challenging layouts.
The Ultimate Reset: Restoring Default Router Settings (Use with Caution!)
As a last resort, consider resetting your router to its factory default settings. This will erase any custom settings you've configured and restore the router to its original state. Before proceeding, make note of your current network settings (SSID, password, etc.) so you can reconfigure your router after the reset. Locate the reset button on your router (usually a small button that requires a paperclip or similar object to press). Press and hold the reset button for approximately 30 seconds. After the reset, you'll need to reconfigure your router from scratch.
Beyond the Basics: Specific Laptop Considerations
Different laptop brands and models can have unique configuration options and potential issues. Research your laptop model's specific Wi-Fi troubleshooting steps. Some manufacturers provide dedicated diagnostics tools or software that can help identify and resolve network-related problems. For example, sometimes, it is necessary to update the BIOS of your laptop. Check your laptop manufacturer's website for relevant resources and support documentation. Investigate whether your laptop has any power-saving settings that may be impacting Wi-Fi performance. Some power-saving modes can reduce Wi-Fi power consumption, which can lead to a weaker signal.
When All Else Fails: Seeking Professional Support
If, after exhausting these troubleshooting steps, your laptop's Wi-Fi continues to suffer, it may be time to seek professional assistance. Contact your internet service provider (ISP). They can often remotely diagnose issues with your internet connection and offer potential solutions or, if necessary, send a technician to your home. Consider consulting a computer repair technician. They can perform a more in-depth diagnosis of your laptop's Wi-Fi adapter and related components. They might even identify an underlying hardware issue that requires repair or replacement.
By systematically addressing potential causes of weak Wi-Fi, from the simple reboot to advanced configuration tweaks, you can often restore a robust and reliable wireless connection. This guide provides a comprehensive toolkit for troubleshooting your laptop's Wi-Fi woes, empowering you to reclaim your digital experience and stay connected.
