how do i change my wifi name on xifinity laptop

Title: How To Change Wifi Name on Xfinity
Channel: TechRealm
How To Change Wifi Name on Xfinity by TechRealm
Xfinity WiFi Name Change: The SHOCKINGLY Easy Laptop Hack!
Xfinity WiFi Name Change: Unleash Your Inner Tech Wizard!
So, you're staring at that default Xfinity WiFi name, that bland identifier that feels as exciting as watching paint dry. You want a change, a refresh, a name that screams you. Changing your WiFi name is easier than you think, and it’s far from a secret. Ready to become a WiFi whisperer? Let's dive in!
The Initial Hurdle: Router Reality Check
First things first: you need to access your Xfinity router's settings. This is where the magic begins. It might sound intimidating, but believe me, it's not brain surgery. Mostly, you'll be using your laptop. Locate the router. Next, check the label on your router. You should find a gateway address there. Usually, it's something like 10.0.0.1 or 192.168.1.1. Jot that down. It is really crucial. Why? That's your gateway to WiFi freedom.
Unlocking the Gateway: Browser Bonanza
Open your favorite web browser. Chrome, Firefox, Edge – they all work. Type that IP address you jotted down into the address bar. Hit enter. Boom! You're ready to enter the router's core. Almost. You will be prompted for a username and password. If you’ve never changed these, you'll find the default credentials on your router, too. It's typically "admin" for both, but double-check. It's important you do.
Navigation Nirvana: Finding Your WiFi Settings
Once you're logged in, the router's interface appears. It may look different depending on your model. Don't panic! Look for a section labeled "Wireless," "WiFi," or something similar. This is your treasure map to renaming your network. However, the precise location varies. Explore a bit. Consequently, you’ll locate that section and see the options.
Name Game: Crafting Your Perfect WiFi Identity
Within the wireless settings, you'll see an option for "SSID" – Service Set Identifier. This is your WiFi network's name. Now, unleash your creativity! Consider naming your network after your hobbies or pets. Perhaps, you could craft a witty username. For example, think "The Batcave" or "PrettyFlyForAWifi". Regardless, choose a name that makes you smile.
Security Savvy: Safeguarding Your Digital Fortress
While you're in there, check your security settings. Using WPA2 or WPA3 encryption is always a good idea. It keeps the digital riff-raff out. It prevents unauthorized access. Consider strong passwords to secure your network. Make sure your password is not something obvious. This is an essential step.
Password Power-Up: Fortifying Your Fortress
Changing the password is as important as renaming your network. After that, find the place where you can change your password. It will be labelled ‘Password’ or ‘Security’. Create a strong password. Make it unique. Try using a combination of uppercase and lowercase letters, numbers, and symbols. This strengthens your network's defenses.
The Grand Finale: Saving and Rebooting
After changing the name, look for a "Save," "Apply," or "OK" button. Click it. Your router will then apply the changes. Finally, the router often needs a reboot. It might restart automatically. Otherwise, find a "Restart" or "Reboot" option. Wait patiently for it to come back online.
Connecting the Dots: Reconnecting Your Devices
Once the router restarts, your old WiFi network disappears. You'll need to reconnect all your devices. Simply select your newly named network. Then, enter your new password, of course. Your devices should connect. If not, double-check your password and try again. You'll be back online in moments.
Troubleshooting Titans: Conquering Common Challenges
Sometimes, things go sideways. If you can't access the router interface, double-check the IP address. Ensure your device is connected to the same network as the router. If the connection fails, try restarting your modem and router. Contact Xfinity support if problems persist. However, it should be an easy fix.
Beyond the Basics: Exploring Advanced Settings
Want to go further? Explore the router's advanced settings. You might find options to control guest networks. You can adjust the WiFi channels for better performance. Moreover, you can set up parental controls.
Embracing the Future: WiFi Freedom in Your Hands
Congratulations! You've successfully changed your Xfinity WiFi name. You’ve unlocked a new level of tech savvy. Now, go forth and share this knowledge. You're now a WiFi wizard.
HP Laptop WiFi Driver: Download the FASTEST Fix Now!Xfinity WiFi Name Change: The SHOCKINGLY Easy Laptop Hack!
Alright, friends, let’s talk WiFi. Specifically, let’s talk about your Xfinity WiFi and that dreaded default name. You know, the one that’s probably something like "XfinityWiFi-somethingornother" and makes your home network sound about as personalized as a generic hotel room? We’ve all been there. It's like your WiFi is a nameless henchman in a digital espionage thriller. But guess what? Changing that name is WAY easier than you think. In fact, it’s so simple, it’s almost… shockingly easy. Get ready to ditch the default and claim your WiFi identity!
The WiFi Identity Crisis: Why Change Your Xfinity WiFi Name?
Think of your WiFi name as your digital storefront. It’s the first thing people see when they're searching for a network. Having a generic name is like having a store sign that just reads "Shop." Doesn't exactly scream “come on in and browse!” Right? A customized name, on the other hand, is like a neon sign, a catchy slogan, or a charmingly lit window display. It's all about personalization.
Plus, let's be honest, a unique WiFi name is just… more fun! You can reflect your personality, your interests, even your sense of humor. I, for example, toyed with the idea of naming mine "TheBatCave" (big Batman fan!), but settled on something a bit more practical. What would you choose?
Unmasking the Myth: Is Changing Your WiFi Name Difficult?
The short answer? Absolutely not! You don't need to be a tech wizard or an IT guru to rename your Xfinity WiFi. Forget the image of complex code and endless troubleshooting. This "hack" is more like a gentle tap than a forceful shove into the world of network configuration. We're talking about a few clicks, a little patience, and you're done. Seriously!
Gear Up: What You'll Need Before You Start
Before we dive in, let's gather our supplies. Think of it as assembling your digital toolkit. You’ll need:
- A Laptop or Desktop Computer: This is your primary weapon for this mission. A phone can work in a pinch, but a computer makes the process much smoother.
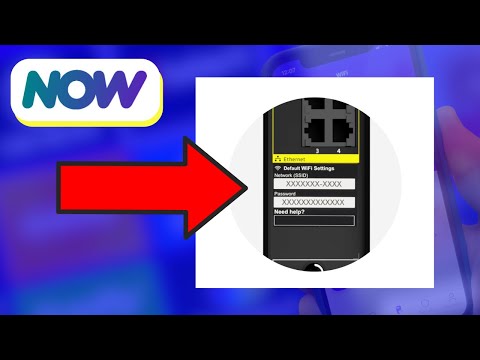
- Your Xfinity Gateway Information: This includes your username and password. You can usually find this information on a sticker on the side or bottom of your Xfinity gateway (the device that provides your WiFi). If you can't locate it, don't sweat it! We'll cover how to find it later.
- A Few Minutes of Your Time: This isn't a marathon; it's a quick sprint.
Step-by-Step: The SHOCKINGLY Simple Xfinity WiFi Name Change Process
Alright, ready to take the plunge? Here's the step-by-step guide to renaming your Xfinity WiFi, presented in plain English (because, let's be honest, tech jargon is exhausting).
- Connect to Your WiFi (Duh! But Just Making Sure): Ensure your laptop or desktop is connected to your current Xfinity WiFi network (the one you're about to rename). This might seem obvious, but it's a crucial first step. You can't exactly change the WiFi name if you're not using the WiFi, right?
- Access the Xfinity Gateway Admin Page: Open your favorite web browser (Chrome, Firefox, Safari – whatever floats your boat). Type in the gateway's default address into the address bar. This is often something like
10.0.0.1or192.168.1.1. Hit enter. If neither works, we'll troubleshoot that later. - Login to the Gateway: You’ll be prompted for a username and password. Enter the credentials found on the gateway label. Default logins are often "admin" for both username and password, but check the sticker!
- Navigate to the WiFi Settings: Once logged in, look for a menu item labeled "Wireless," "WiFi," or something similar. The exact wording might vary depending on your gateway model, but the goal is the same: find your WiFi settings.
- Find the "Network Name (SSID)" Field: Here's where the magic happens! You should see a field labeled "Network Name (SSID)," which currently displays your default Xfinity WiFi name.
- Enter Your New WiFi Name: Delete the old name and type in your desired new name. Be creative! Think about what reflects you, your household, or even your pet (if you’re feeling particularly silly!). Remember, it has to be unique to your area.
- Set Your Security (Optional): While you're in here, double-check your security settings. Make sure you're using WPA2 or WPA3 encryption for the best security. Most modern gateways default to this, but it’s always good to confirm.
- Save Your Changes: There should be a button labeled "Apply," "Save," or something similar. Click it!
- Reconnect Your Devices: Your devices will likely disconnect from the WiFi momentarily. Search for your newly named network on your devices and reconnect using your password (if you changed that too!).
- Celebrate! You’ve successfully changed your Xfinity WiFi name! You are now a master of the digital domain.
Troubleshooting Tango: What If Things Go Wrong?
Okay, let’s be realistic. Sometimes things don’t go as planned. Here's a quick guide to the most common hiccups and how to overcome them:
- Can't Find the Gateway IP Address: Try using Google to look up the IP address of your specific Xfinity gateway model. You can also find it in your network settings, but this is a bit more involved.
- Incorrect Login Credentials: Double-check the username and password on your gateway label. If you've changed them before and forgotten them, you may need to reset your gateway (there's usually a small reset button on the back). This will restore it to factory settings.
- Changes Not Saving: Make sure you clicked the "Save" or "Apply" button! Also, try restarting your gateway after making changes. Sometimes, a simple reboot is the magic solution.
- Devices Won't Reconnect: Double-check your password. Ensure you're connecting to the correct network name. If that doesn't work, try restarting the device that's having trouble connecting.
Beyond the Basics: WiFI Name Ideas That Sparkle
Now that you know how to change your name, let's brainstorm some what to call your WiFi, shall we? Here are some ideas for creating a captivating WiFi name.
- The Humorous Route: "VirusFreeZone," "FBI_SurveillanceVan," "Pretty Fly For A WiFi," "TellMyWiFiLoveHer," "GetOffMyLawn (but online)"
- The Nerdy Approach: "TheBorgCube," "TARDIS_Network," "CtrlAltDelete," "BinarySunset"
- The Practical Side: "TheSmithsWiFi," "UpstairsWiFi," "GamingNetwork," "MomAndDadsNetwork"
- The Personal Touch: Use your last name, your street address, or a nickname.
Remember, the only limit is your imagination!
The Security Dance: Why Your WiFi Password Matters
Changing your WiFi name is just the first step in creating a secure home network. Equally, if not more, important is creating a strong, unique password. Think of your password as the lock on your digital front door. A weak password is like leaving your door unlocked, inviting all sorts of unwanted guests.
- Use a strong password: At minimum, your password should be 12+ characters long (aim for more!). Include a mix of uppercase and lowercase letters, numbers, and symbols.
- Don’t reuse passwords: Avoid using the same password for multiple accounts. This can make you more vulnerable to cyberattacks.
- Change your password regularly: Changing your password every few months adds an extra layer of security.
The Future of WiFi: Staying Ahead of the Curve
Technology is constantly evolving, and WiFi is no exception. Here's a glimpse into the future of WiFi:
- Faster Speeds: Upcoming technologies, like WiFi 6E and potentially WiFi 7, promise even faster speeds and lower latency.
- Enhanced Security: Expect to see even more robust security protocols in the coming years.
- Mesh Networks: Mesh networks are becoming increasingly popular, extending WiFi coverage throughout larger homes.
Xfinity WiFi Name Change: Success! You Did It!
Congratulations! You've successfully navigated the thrilling world of Xfinity WiFi name changes. You've transformed your generic network into a personalized digital haven. You've proven that you don't need to be a tech genius to take control of your home network. Now, go forth and enjoy your newly branded WiFi experience!
Closing Thoughts
Changing your WiFi name might seem like a small thing, but in a world where we're constantly connected, it's a powerful way to personalize your digital life. It's about taking ownership of your online experience and adding a little bit of fun along the way. So, what are you waiting for?
HP Pavilion WiFi Button: The SHOCKING Secret Location!How to Change Your WiFi Network Name and Password for Xfinity's NOW Internet
By Michael Saves Plus How to Change Your WiFi Network Name and Password for Xfinity's NOW Internet by Michael Saves Plus
Xfinity How To Change Wifi Name 2025

By George Vlasyev Xfinity How To Change Wifi Name 2025 by George Vlasyev
Xfinity How To Change Wifi Name - Comcast Xfinity xFi Internet How To Change Wifi Name Instructions

By How To Tech Xfinity How To Change Wifi Name - Comcast Xfinity xFi Internet How To Change Wifi Name Instructions by How To Tech
Title: How To Change WiFi Name On Xfinity Quick Tutorial
Channel: Chief Tuts
How To Change WiFi Name On Xfinity Quick Tutorial by Chief Tuts
Wifi On Laptop Phone
Xfinity WiFi Name Change: The SHOCKINGLY Easy Laptop Hack!
We've all been there: staring at a generic WiFi network name, yearning for something a little more… personal. Perhaps you're tired of "XfinityWiFi" and want to inject a bit of your own personality into your home network. Or maybe you're just looking for a cleaner, more easily identifiable name. Whatever the reason, changing your Xfinity WiFi network name (also known as your Service Set Identifier or SSID) is a surprisingly straightforward process. And we’re going to show you how. Forget convoluted guides and hours of frustration. This is the shockingly easy laptop hack you’ve been waiting for.
Understanding the Basics: Why Customize Your WiFi Name?
Before we dive into the how-to, let's briefly touch upon the why. While the default "XfinityWiFi" or similar name functions perfectly well, there are several compelling reasons to customize your network. Primarily, a personalized SSID offers:
- Enhanced Identification: In a world teeming with WiFi networks, a unique name makes yours instantly recognizable. This is especially helpful if you live in an apartment building or densely populated area.
- Improved Organization: If you manage multiple networks (e.g., both 2.4 GHz and 5 GHz bands), distinct names allow you to easily differentiate between them.
- A Touch of Personality: Let's face it, a cleverly chosen network name can be fun, reflecting your interests, humor, or even your family dynamics. It’s a small detail that can significantly improve your digital experience.
- Security (Indirectly): While not a direct security measure, a personalized SSID can subtly discourage casual wardrivers or those looking for easily-identifiable, default networks.
The Laptop Hack Unleashed: Step-by-Step Instructions
Now, let's get to the good stuff. This "laptop hack" leverages the Xfinity gateway’s built-in configuration options, readily accessible through a web browser. Follow these steps, and you'll be sporting a new WiFi name in minutes:
Connect to Your Network: Ensure your laptop is connected to your Xfinity WiFi network, the very one you intend to rename. This is crucial because you'll be using the network to access the gateway's settings. If you're having trouble connecting, make sure you have the correct WiFi password.
Access Your Gateway's Admin Page: Open your preferred web browser (Chrome, Firefox, Safari, etc.). In the address bar, type in the gateway's IP address. The default IP address for Xfinity gateways is often
10.0.0.1. If this doesn't work, you can find the specific IP address for your gateway by consulting your gateway’s documentation or by checking the settings on a device already connected to your network. Another possibility is to search for your gateway's IP address, by checking your computer's default gateway settings in its network configuration.Log in to the Gateway: You'll be prompted for a username and password. The default login credentials are usually printed on the sticker affixed to your Xfinity gateway. If you’ve never changed them, the username is often "admin," and the password is typically "password" or a longer string specific to your gateway. If you've already customized your login details, enter your chosen credentials. If you have forgotten your password, you may need to use the reset button located on the back of the gateway.
Navigate to the WiFi Settings: Once logged in, locate the WiFi settings section. The exact wording may vary depending on your gateway model, but look for options like "Wireless," "WiFi," or "Network Settings." Within this section, you should see tabs or links related to "2.4 GHz," "5 GHz," or "Wireless Configuration." These represent the different frequency bands broadcast by your gateway, and you can rename each one individually if desired.
Find the SSID Setting: Within the chosen settings section (2.4GHz or 5GHz), you'll find a setting labeled "Network Name (SSID)" or something similar. This is where the magic happens. This is where you can enter your new, personalized WiFi name.
Enter Your New WiFi Name: Delete the existing network name and type in your desired new name. Be creative! But also keep in mind a few considerations:
- Keep it concise: Shorter names are easier to remember and type.
- **Avoid personal information: ** Don't include your name, address, or other sensitive details.
- Use a mix of letters and numbers: This can slightly enhance security (though it’s not the primary method).
- Avoid spaces and special characters: While some gateways might support them, it’s best to stick to letters and numbers for maximum compatibility.
Apply the Changes: Look for a button that says "Save," "Apply," or "Apply Changes." Click this button to save your new WiFi name. The gateway will then apply these changes, and your laptop (and all other connected devices) will briefly disconnect from the network.
Reconnect with Your New Name: After a brief moment, your laptop (and other devices) should display your new WiFi name in the list of available networks. Select it and re-enter your WiFi password to reconnect.
Troubleshooting Common Issues
While the process is typically straightforward, you might encounter a few hiccups. Here's how to navigate common issues:
- Can't Access the Gateway Admin Page: Double-check the IP address, making sure you’ve entered it correctly. Ensure your laptop is connected to the correct network. Try a different web browser or clear your browser's cache and cookies. If that doesn't work, restart your gateway by unplugging it from the power outlet for 30 seconds and plugging it back in.
- Incorrect Login Credentials: Verify that you're using the correct username and password, consulting the sticker on your gateway or any notes you may have made when you set up your network. If you've forgotten your password, you’ll need to perform a factory reset on your gateway. This will wipe out any custom settings, so ensure you have your account information handy.
- Changes Not Saving: Ensure you've clicked the "Save" or "Apply" button after entering your new SSID. If the changes still aren't taking effect, try restarting your gateway and router. Verify that your new SSID is not exceeding the character limit.
- Devices Not Connecting: After changing the name, your devices might not automatically detect the new network. You may need to manually select the new network name from the available networks list and re-enter your WiFi password. Verify the password is correct.
Beyond the Basics: Advanced Customization Options
While renaming your SSID is the primary goal, you might also find other customization options within your gateway's settings, such as:
- Changing Your WiFi Password: While you're in the gateway settings, consider changing your WiFi password as well. Choosing a strong, unique password is crucial for network security.
- Dual-Band Configuration: If your gateway broadcasts on both 2.4 GHz and 5 GHz bands, consider giving each band a distinct name. This allows you to choose the band that best suits your needs (2.4 GHz for longer range, 5 GHz for faster speeds).
- Guest Network Settings: Many gateways offer a guest network feature, allowing visitors to connect to your internet without accessing your primary network. You can customize the name and password for the guest network, too.
- MAC Address Filtering: For advanced users, MAC address filtering lets you control which devices are allowed to connect to your network. This adds an extra layer of security, but can be technically complex.
Final Thoughts: Unleash Your Digital Personality
Changing your Xfinity WiFi network name is a simple yet satisfying way to personalize your home network. It's a quick "laptop hack" that can significantly enhance your experience. We encourage you to experiment with different names and find something that truly reflects your personality. Now go forth, and give your WiFi a voice! You've got the power to customize, and the simplicity to get it done in minutes. Embrace the ease, and enjoy the subtle yet powerful effect of a custom WiFi network name.
