how to share wifi from laptop to lan

Title: How to share internet from laptop to desktop using ethernet cable
Channel: IT Magics
How to share internet from laptop to desktop using ethernet cable by IT Magics
how to share internet from laptop wifi to lan, how to share internet from laptop to pc via lan cable, how to share internet from laptop to laptop using lan cable, how to share internet from laptop to desktop using lan cable, how to share internet from laptop to desktop using ethernet cable, how to share internet from laptop to pc with ethernet cable, sharing wifi from laptop, share wifi from laptop to phone
Unlock Your WiFi: Laptop to LAN Sharing Made Easy!
Share the Internet: From Laptop WiFi to LAN – It’s Simple!
Let's face it. We've all been there. That frustrating moment when your shiny new laptop is happily surfing the web via Wi-Fi. However, your desktop, a steadfast workhorse, sits silently unplugged, yearning for internet access. Fear not! Sharing your laptop's Wi-Fi connection with your desktop using a LAN (Local Area Network) cable is far easier than you imagine. Indeed, it's a digital dance that's easier to learn than you'd think.
The Wired Bridge: Connecting Your Devices
First things first. You need the essential hardware: an Ethernet cable. These cables are readily available. You can find them at any electronics store. Ensure the cable is long enough to comfortably reach from your laptop to your desktop. Next, plug one end of the Ethernet cable into your laptop's Ethernet port. Most laptops today still include this crucial port. Subsequently, plug the other end directly into your desktop's Ethernet port. Often, this port is located near the USB ports.
Configuring the Magic: Laptop Settings First
Now for the software side. This is where the true magic happens. We'll configure your laptop to share its Wi-Fi connection. Firstly, access your "Network and Sharing Center." You can usually find this by right-clicking the Wi-Fi icon in your system tray. Next, look for the option to "Change adapter settings." This will open a window displaying your network adapters. You'll see your Wi-Fi adapter (typically labeled something like "Wi-Fi") and your Ethernet adapter (often labeled "Ethernet" or "Local Area Connection").
Sharing the Love: Enabling Connection Sharing
Right-click your Wi-Fi adapter. Afterwards, select "Properties." Then, click on the "Sharing" tab. Here's where the magic happens! Check the box that says "Allow other network users to connect through this computer's Internet connection." A dropdown menu will appear. Choose your Ethernet adapter from this list. Finally, click "OK." Therefore, you've essentially told your laptop to act as a bridge. It's passing its Wi-Fi connection through the Ethernet cable to your desktop.
Desktop Setup: A Simple Configuration
With the laptop configured, let's move to your desktop. You might require a quick configuration adjustment here. Often, the desktop will automatically detect the shared connection. However, there might be some tweaking needed. Navigate to your desktop's network settings. Similar to the laptop, you can usually access this via the system tray's network icon. In the advanced settings, verify that both "Obtain an IP address automatically" and "Obtain DNS server address automatically" are selected. These settings allow your desktop to receive an IP address and DNS settings from your laptop. Consequently, it can access the internet.
Troubleshooting Tips: When Things Go Awry
What if things don't work perfectly? It’s a common scenario. No worries. First, double-check all the physical connections. Ensure the Ethernet cable is securely plugged in on both ends. Next, reboot both your laptop and desktop. Sometimes, a simple restart can resolve the problem. If you're still facing issues, check your firewall settings on both devices. Ensure they aren't blocking the connection. Consider temporarily disabling your firewall as a test. Sometimes, the simplest solutions prove most effective.
Beyond the Basics: Advanced Tweaks
For those tech-savvy users, there are advanced options. You could assign static IP addresses. This gives you more control. However, for most users, the automatic settings work perfectly. Explore the possibilities. The settings usually are available under your network adapter’s properties. Furthermore, you can prioritize certain bandwidth usage. This can also be a useful feature.
Expanding Your Network: The Possibilities
Once you've mastered this technique, the possibilities expand. You can connect multiple devices to your desktop through a network switch. That, in turn, is connected to your laptop. Imagine sharing your internet connection with even more devices. You could create a simple home network. You could also share files with other computers. The world is truly your oyster!
Conclusion: Embrace the Simple Solution
Sharing your Wi-Fi connection via LAN is a valuable skill. It's not as complex as it sounds. You have learned how to bridge your laptop’s Wi-Fi and your desktop using a simple cable. So, embrace the simplicity! It provides internet access to devices that might otherwise be offline. This setup can be a lifesaver. Enjoy your newly shared internet connection and the convenience it brings!
Laptop WiFi Hotspot: The Ultimate Guide to Free & Fast InternetUnlock Your WiFi: Laptop to LAN Sharing Made Easy!
Hey there, tech adventurers! Ever found yourself staring at a bunch of devices, each craving internet access, while your Wi-Fi signal feels as weak as a kitten? Or maybe you’re like me – sometimes, Wi-Fi just isn't cutting it for gaming or transferring huge files. That's where sharing your laptop's connection through a LAN (Local Area Network) comes in, and trust me, it's easier than untangling a nest of headphones. Today, we’re diving deep into how you can Unlock Your WiFi: Laptop to LAN Sharing Made Easy! Think of it as building your own superhighway for data – fast, reliable, and ready whenever you need it.
1. Why Bother? The Power of Laptop-to-LAN Sharing
Let’s face it, Wi-Fi can be a fickle friend. Walls, distance, and too many connected devices can turn your connection into a digital snail race. Sharing your laptop’s connection via LAN bypasses those issues, offering a stable, often faster, and more secure connection. This is especially crucial for tasks that demand bandwidth like online gaming, streaming high-definition content, and transferring large files. Imagine downloading a massive game in minutes, not hours. That's the power of a direct LAN connection! We're talking about a performance boost that's like upgrading from a bicycle to a rocket ship.
2. What You’ll Need: Your Arsenal for Success
Before we dive into the nitty-gritty, let's gather our supplies. Think of this like prepping your adventurer's backpack. You’ll need:
- A Laptop: This is your central hub, the brain of the operation. It should have an active Wi-Fi connection (the internet source).
- An Ethernet Cable: This is your digital lifeline, the bridge between your laptop and the destination device (like a desktop computer, smart TV, or game console).
- A Destination Device: Whatever device you want to connect to the internet.
- A Router or Switch (Optional, but often necessary): If you want to connect multiple devices, a router or switch is your best friend. Think of it as a traffic controller, directing data flow efficiently.
3. Prep Work: Ensuring Your Laptop is Ready to Share
Before we get to the main event, we need to ensure your laptop is ready to play ball. Make sure your Wi-Fi is connected and working. Double-check your internet speed; you want a good starting point for sharing. A sluggish internet connection is like trying to run a marathon with a broken leg - the end result won't be pretty.
4. Method 1: Sharing via Ethernet (The Direct Route)
This is the most straightforward method, the equivalent of a direct flight from one location to another. Here's how it works:
- Connect the Ethernet Cable: Plug one end into your laptop's Ethernet port and the other end into the Ethernet port of your destination device.
- Access Network Settings: In your laptop, go to Settings > Network & Internet > Change adapter options.
- Enable Internet Connection Sharing: Right-click on your Wi-Fi connection (the one you’re using to get internet) and select "Properties." Go to the "Sharing" tab.
- Share with Ethernet: Check the box that says "Allow other network users to connect through this computer's internet connection." Then, in the drop-down menu, select your Ethernet connection (it might simply be labeled "Ethernet"). Click "OK."
- Configure the Destination Device: On your destination device, ensure it's set to automatically obtain an IP address and DNS server.
That's it! Your destination device should now have internet access powered by your laptop’s Wi-Fi.
5. Method 2: Leveraging a Router or Switch for Multiple Connections
If you want to connect multiple devices, or if your destination device doesn’t have an Ethernet port, you'll need a router or switch. This method is like a well-organized city with efficient traffic management.
- Connect Everything: Physically, this involves connecting your laptop to the router or switch (using an Ethernet cable). Then, connect your other devices to the router or switch as well (either via Ethernet or Wi-Fi).
- Configure Internet Sharing (Similar to Method 1): Follow the steps outlined in Method 1 to share your laptop's Wi-Fi connection with the router or switch.
- Router Configuration (Potentially): Some routers need to be configured to receive internet from a single device connected by Ethernet. Consult your router's manual if you're having trouble. Most of today's routers are smart and will handle this automatically.
- Destination Device Configuration: Ensure your destination devices are set to automatically obtain an IP address from the router.
- Check Connection: Check all connected devices for internet access.
6. Troubleshooting Common Pitfalls: Navigating the Digital Maze
Sometimes, things don't go as planned. Here are a few common problems and how to fix them:
- No Internet Connection: Double-check your Ethernet cable connections, ensure your Wi-Fi is working on your laptop, and verify that your destination device is set to automatically obtain an IP address.
- Slow Speeds: Try restarting both your laptop and your destination device. Also, make sure you’re not running too many bandwidth-intensive applications on your laptop while sharing.
- Firewall Issues: Your firewall might be blocking the connection. Temporarily disable your firewall (for testing purposes only) to see if that's the issue. Remember to re-enable it afterward!
- Incorrect IP Address Allocation: Check your destination device’s IP address to ensure it corresponds to your shared network.
7. Security Considerations: Keeping Your Data Safe
Sharing your internet connection also means sharing your network. Be mindful of your security.
- Keep Your Wi-Fi Password Strong: Use a complex password to prevent unauthorized access to your Wi-Fi.
- Update Your Software: Keep your operating system and antivirus software up-to-date to patch potential security vulnerabilities.
- Monitor Your Network: Keep an eye on your network activity for any suspicious behavior.
- Use a Firewall: Ensure your firewall is enabled on both your laptop and your destination device.
8. Speed Test: Verifying Your Internet Boost
It's always a good idea to measure the difference. Before and after sharing, run a speed test (like on Speedtest.net) on your destination device. Seeing the difference in speed is a satisfying feeling!
9. Benefits Beyond Speed: Exploring the Advantages
The benefits of laptop-to-LAN sharing extend beyond just speed. It offers:
- Reliability: A stable connection, ideal for online gaming and streaming.
- Cost Savings: If you’re paying for Wi-Fi at home and want to connect a device that doesn’t have built in Wi-Fi, laptop LAN sharing can be a solution.
- Security: A dedicated wired connection is often more secure than Wi-Fi.
10. LAN vs. WiFi: Understanding the Core Differences
Wi-Fi uses radio waves, creating a wireless connection. LAN uses Ethernet cables, and provides a more direct, and generally faster, connection. Let's compare:
- Speed: LAN typically offers faster and more consistent speeds.
- Stability: LAN connections tend to be more stable.
- Security: LAN provides a more secure connection.
- Convenience: Wi-Fi is more convenient for portability.
11. Real-World Applications: Where Laptop-to-LAN Shines
Laptop-to-LAN sharing is incredibly useful in various scenarios:
- Gaming: For competitive gaming, a wired connection is a must.
- Streaming: Enjoy buffer-free streaming of high-definition content.
- File Transfer: Quickly transfer large files between devices.
- When Wi-Fi is unreliable: In situations where Wi-Fi is spotty or unreliable.
12. Optimizing Bandwidth: Maximizing Performance
To get the most out of your shared connection, keep these tips in mind:
- Close Unnecessary Applications: Close any applications on your laptop that are consuming a lot of bandwidth (like video streaming services or torrent clients).
- Limit Simultaneous Usage: Try to limit the number of devices using the shared connection simultaneously.
- Prioritize Traffic: Some routers allow you to prioritize certain traffic, such as online gaming.
13. The Future of Connectivity: Trends to Watch
The world of connectivity is always evolving. Here are some trends to keep an eye on:
- Faster Ethernet Standards: Expect faster Ethernet speeds, like 2.5 Gbps or 5 Gbps, to become more commonplace.
- Mesh Wi-Fi Systems: These systems offer improved Wi-Fi coverage throughout your home.
- 5G and Beyond: The continued expansion of 5G and future technologies will offer even faster and more reliable mobile internet speeds.
14. Step-by-Step Guide: For any Operating System
The settings might change slightly depending on your operating system (Windows, macOS, etc.), but the overall process remains the same. I will cover a detailed breakdown for the most popular.
Windows:
- Go
Share Internet from PC to PC via EthernetLAN cable

By Techy Druid Share Internet from PC to PC via EthernetLAN cable by Techy Druid
How to share the Internet from one PC to another using an ethernet Cable or LAN Cable

By Loxyo Tech How to share the Internet from one PC to another using an ethernet Cable or LAN Cable by Loxyo Tech
How to connect internet connection from laptop to pc via lan cable
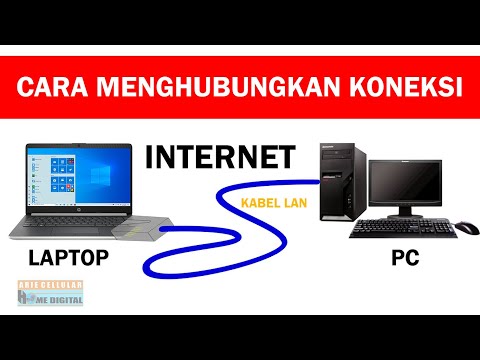
By ARIE CELLULAR How to connect internet connection from laptop to pc via lan cable by ARIE CELLULAR

Title: Share Internet from PC to Router via Ethernet
Channel: Techy Druid
Share Internet from PC to Router via Ethernet by Techy Druid
Laptop Working
Unlock Your WiFi: Seamless Laptop-to-LAN Sharing Made Simple!
Navigating the complexities of network configurations can be daunting. Sharing an internet connection from your laptop to a Local Area Network (LAN) shouldn't feel like deciphering ancient scrolls. We're here to demystify the process, transforming a potential headache into a straightforward, rewarding experience. This comprehensive guide equips you with the knowledge and practical steps to effortlessly broadcast your laptop's WiFi connection to your wired devices, unlocking a world of streamlined connectivity.
Understanding the Core Concepts: WiFi, LAN, and Bridging the Gap
Before diving into the "how-to," let’s build a solid foundation. Your laptop, equipped with a WiFi adapter, can connect to the internet wirelessly. A LAN, on the other hand, typically involves a wired network connection, often using Ethernet cables, providing a stable and secure connection to devices like desktop computers, game consoles, or smart TVs. The magic of laptop-to-LAN sharing lies in bridging this gap, allowing your laptop to act as a virtual router, funneling its WiFi connection to the wired devices on your LAN.
This process, inherently, is about network address translation (NAT). Your laptop, connected to WiFi, receives a single IP address from your wireless router. When you share this connection, your laptop effectively becomes a small router of its own. It assigns private IP addresses to the devices connected to the LAN, masking their individual requests behind its single, public facing IP address. This is the essence of how you share your WiFi connection.
Prerequisites: Gathering Your Equipment and Ensuring Compatibility
Before we initiate the sharing process, ensure you have the essential components and that everything is working together harmoniously.
- A Laptop with WiFi Capability: This is, of course, paramount. Your laptop needs a functioning WiFi adapter to connect to your wireless network.
- An Ethernet Cable: This will be your lifeline, physically connecting your laptop to your wired devices or a network switch. Ensure it's a good quality cable to minimize potential connection issues.
- A Device To Connect To The LAN: Whether a desktop, game console, or other device, you will need something to connect to the LAN.
- A Working WiFi Connection: Your laptop needs to be successfully connected to a WiFi network with an active internet connection.
- Operating System Compatibility: The following instructions are tailored for the most commonly used operating systems. We'll provide detailed guidance for Windows, which is the most common.
Windows: The Gateway to Seamless Sharing
Windows has built-in features to facilitate this process, making it relatively simple to configure.
Step 1: Accessing Network and Sharing Center
- Click the Windows Start menu.
- Type "Control Panel" and select it from the search results.
- In the Control Panel, navigate to "Network and Internet" and then "Network and Sharing Center."
Step 2: Setting up Mobile Hotspot (Windows 10 and 11)
Windows 10 and 11 offer a simplified approach using the Mobile Hotspot feature.
- In the Network and Sharing Center, click on "Change adapter settings."
- Right-click on your WiFi adapter and select "Properties."
- Navigate to the "Sharing" tab.
- Check the box labeled "Allow other network users to connect through this computer’s Internet connection."
- From the "Home networking connection" dropdown, select your Ethernet adapter. This is the connection your LAN devices will use.
- Click "OK" and close any remaining windows.
Step 3: Troubleshooting Common Issues
- No Internet Access on LAN Devices: Verify the Ethernet cable is securely connected. Ensure the LAN devices are configured to obtain an IP address automatically (DHCP). Restart your laptop and the devices.
- Limited Connectivity: Double-check the sharing settings from step 2. Ensure the correct network adapter is selected. Your WiFi network may be congested.
- Security Considerations: Make sure your WiFi password is secure. This connection is literally a pathway for your device to the internet.
Mac: Harnessing the Internet Sharing Power
Mac OS offers an equally straightforward process for sharing your WiFi connection.
Step 1: Accessing the Internet Sharing Menu
- Click the Apple icon in the top-left corner of your screen.
- Select "System Preferences" or "System Settings" depending on your macOS version.
- Click "Internet Sharing."
Step 2: Configuring Internet Sharing
- In the Internet Sharing panel, check the box labeled "Internet Sharing."
- From the "Share your connection from" menu, select your WiFi adapter.
- From the "To computers using" menu, select "Ethernet."
- Click "Start" to enable Internet Sharing.
- If prompted, confirm your selections in the dialog box.
Step 3: Key Considerations for Mac Users
- Firewall Settings: Ensure your Mac's firewall isn't blocking traffic to and from your shared connection. Navigate to System Preferences/Security & Privacy/Firewall.
- DHCP vs. Manual IP Assignment: By default, Mac assigns IP addresses automatically to connected devices. If you have specific IP configuration needs, access the "Ethernet" setting panel and adjust the configuration.
- Restarting or Rebooting: After making changes, a restart or reboot of your Mac, alongside any connected devices, can eliminate problems.
Linux: The Power of Adaptability
Linux-based operating systems offer various methods to share your WiFi connection. We'll cover the most common and versatile approach, using Network Manager, a widespread network management tool.
Step 1: Configuring Network Manager
- Open your system's Network Manager interface. This can vary based on your desktop environment (Gnome, KDE, XFCE, etc.), but it's usually found in the system tray or settings menu.
- Locate your WiFi connection, usually identified by its name.
Step 2: Sharing the Connection
- Right-click on your WiFi connection.
- Select "Configure…" or "Edit Connection" (depending on your desktop environment).
- Navigate to the "IPv4 Settings" or "IPv6 Settings" tab, depending on your needs.
- In the "Method" dropdown, change it to "Shared to other computers."
- Save the settings.
Step 3: Additional Linux Insights
- Firewall Configuration: Ensure your Linux firewall (e.g.,
iptablesorufw) allows traffic forwarding. - Service Restart: After making changes, you may need to restart the Network Manager service or your networking service for the settings to take effect. This can be done via the terminal.
- Command-Line Interface (CLI): For advanced users, the command line offers greater control. You can configure sharing using commands like
nmcli(Network Manager's command-line tool) oriptablesfor firewall configuration.
Advanced Techniques: Exploring Further Optimization
Beyond the basic setup, you can optimize your shared connection for optimal performance and security.
- Static IP Addresses: Assigning static IP addresses to your LAN devices can improve stability and prevent IP address conflicts. However, it’s worth understanding how your router handles assignments.
- Bandwidth Management (QoS): If you have performance requirements, you can configure Quality of Service (QoS) to prioritize certain types of traffic (e.g., gaming) on your laptop. This enhances the user experience.
- MAC Address Filtering: Implement MAC address filtering on your laptop's virtual router to restrict access to your shared connection, adding a layer of security.
- Monitoring Network Usage: Use built-in tools or third-party applications to monitor network traffic and identify potential bandwidth bottlenecks.
Troubleshooting: Resolving Common Hurdles
Even with a clear process, you may encounter some roadblocks. Here’s how to tackle them:
- Check Your Cables: Ensure the Ethernet cable is securely connected to both your laptop (or switch) and the device. Try a different cable if necessary.
- Restart Everything: Reboot your laptop, the LAN devices, and your WiFi router. This often resolves temporary glitches.
- Verify IP Address Configuration: On your LAN devices, ensure they are set to obtain an IP address automatically (DHCP). If you are using static IPs, verify they are correct.
- Disable Firewall (Temporarily): While not recommended for long-term use, you can temporarily disable your laptop's firewall (Windows Firewall, Mac's firewall, or Linux's
iptables) to rule out any blocking of network traffic. Remember to re-enable it after testing. - Check Your WiFi Signal Strength: A weak WiFi signal can hinder the shared connection. Move your laptop closer to the wireless router.
- Update Network Drivers: Outdated network drivers on your laptop can cause connection problems. Update the drivers for your WiFi and Ethernet adapters.
- Consult Your Router's Manual: Your router's documentation may contain valuable information about network configuration and troubleshooting.
Conclusion: Unleashing Seamless Connectivity
Sharing your laptop's WiFi connection to your LAN is a valuable skill. By following these steps, you can easily bridge the gap between your wireless and wired devices, creating a unified network experience. Embrace the power, and enjoy seamless connectivity
