how to connect brother printer to laptop through wifi

Title: HOW TO SETUP WI-FI DIRECT AND USING LAPTOP WIRELESS PRINTING - BROTHER DCP-T710W PRINTER.
Channel: TECH-AID TV
HOW TO SETUP WI-FI DIRECT AND USING LAPTOP WIRELESS PRINTING - BROTHER DCP-T710W PRINTER. by TECH-AID TV
how to connect brother printer to laptop through wifi, how to connect my brother printer to my laptop via wifi, how to connect brother printer to laptop without wifi, how to add brother printer to laptop wifi, how to connect brother printer to laptop wireless, how to connect brother printer to computer using wifi, how to connect brother printer to desktop via wifi
Brother Printer WiFi Setup: Lightning-Fast Connection Guide!
Brother Printer WiFi Setup: Your Wireless Printing Adventure Begins!
So, you've snagged a Brother printer, congratulations! You're ready to ditch the tangled cords and embrace the freedom of wireless printing. However, setting up the Wi-Fi connection can sometimes feel like navigating a labyrinth. Don't worry, though. This guide will transform that feeling into a triumphant quest. We'll get your Brother printer connected to your home network in a flash. Therefore, let's dive right in!
Unboxing and Preparation: Getting Started Swiftly
First things first. Let's ensure everything is in order before we start. Unpack your printer and take a moment to admire its sleek design. Next, locate the power cord and plugin to an outlet. Make sure your printer is switched on. Also, ensure your Wi-Fi router is up and running. Moreover, you should know your Wi-Fi network name (SSID) and password. This is crucial, without this setup is impossible. You are almost ready to begin!
The Magic Button: WPS Connection (Simplest Route!)
Many Brother printers offer a WPS (Wi-Fi Protected Setup) button. Now, this is your express ticket to a hassle-free setup. Consequently, this is the easiest method. Locate the WPS button on both your printer and your router. Often, the WPS button on your router is indicated by a logo that resembles two arrows forming a circle. Press and hold the WPS button on your router. Simultaneously, press the WPS button on your Brother printer. The printer and router will almost magically negotiate a secure connection. Within moments, your printer should connect to your Wi-Fi network. Afterward, you'll see the Wi-Fi light stabilize, indicating a successful setup.
Manual Configuration: When WPS Isn't an Option
Not all routers support WPS. Therefore, you will need to manually configure your printer's Wi-Fi settings in some cases. Don't fret, it's still manageable! First, you'll need to access your printer's control panel. This is usually a small screen with buttons or a touchscreen interface. Select the "Network" or "Wi-Fi" option. You will see a list of available Wi-Fi networks. Select your network from the list. You'll be prompted to enter your Wi-Fi password. Be extremely careful when typed. Ensure the password is accurate. After entering the password, confirm your settings. The printer will connect to your network for a few moments. Once complete, the connection indicator light will illuminate.
Installing the Software: Connecting Your Devices
Now your printer is connected to your Wi-Fi. It's time to get your computers, smartphones, and tablets connected. Download the latest printer drivers and software from the Brother website. This is crucial. It ensures your devices can communicate with the printer. Install the software on each device you want to use for printing. Follow the on-screen instructions. The software will guide you through the setup process. In most cases, it will automatically detect your printer on the network. Once detected, follow the prompts to complete the installation. Now, configure your printer as the default printer. This will make printing easier.
Troubleshooting: When Things Go Awry (and How to Fix It!)
Sometimes, things don't go according to plan. Your printer might not connect, or you might experience other issues. Don't panic. Therefore, let's troubleshoot! First, confirm your Wi-Fi network is functioning. Make sure your router is broadcasting a signal. Second, check the printer's network settings. Verify the Wi-Fi network and password are correct. Ensure the printer is within range of your router. If you still have problems, try restarting both your printer and your router. Furthermore, a simple restart often resolves connectivity issues. Finally, consult the Brother printer's manual. It’s a treasure trove of helpful tips.
Staying Connected: Maintaining a Smooth Workflow
Once your Brother printer is up and running, it's important to keep things running smoothly. Regularly check for firmware updates for your printer. Brother often releases updates. They enhance performance and security. Keep your printer's drivers updated on all your devices. Furthermore, ensure your devices are connected to the same Wi-Fi network as your printer. When your network changes, reconfigure your printer's Wi-Fi settings. This is important to maintain connectivity.
Beyond Printing: Exploring the Capabilities
Your Brother printer offers more than just printing. Explore other features. Consider using the Brother iPrint&Scan app. This is a handy application. It allows you to print directly from your smartphone or tablet. Experiment with scanning documents. Use the printer's document feeder or flatbed scanner. Furthermore, utilize the printer’s cloud printing capabilities. This enables printing from anywhere in the world. Finally, dive into the user manual. Discover all of your printer's hidden capabilities.
Conclusion: Printing Power Unleashed!
You've now successfully set up your Brother printer's Wi-Fi connection! You successfully navigate the process. You have freed yourself from tangled cords! You're ready to enjoy the benefits of wireless printing. We hope this guide simplifies the process. Enjoy the convenience and flexibility of wireless printing! Happy printing!
Lenovo ThinkPad T460s WiFi Hotspot: The SHOCKINGLY Easy Fix!Brother Printer WiFi Setup: Lightning-Fast Connection Guide!
Hey everyone! Let's talk about something that's probably been the bane of your existence at least once in your life: setting up a new printer. Specifically, a Brother printer on your Wi-Fi network. Trust me, we’ve all been there – staring at blinking lights, muttering under our breath, and wondering if we accidentally angered some kind of technology deity. But fear not! Setting up a Brother printer for wireless printing doesn't have to be a Herculean task. We're here to guide you through the process, making it as painless as possible. Think of this as less a technical manual, and more a friendly chat with your tech-savvy pal. We'll cover everything from the basics to some troubleshooting tips, all designed to get you printing wirelessly in record time. Let’s get started!
1. Why Go Wireless With Your Brother Printer?
Before we dive into the nitty-gritty, let's briefly discuss why you'd want to go wireless in the first place. Picture this: You're working on a project, your laptop is on the couch, and your printer is… well, however far away your USB cable allows. Wireless printing eradicates this constraint! It’s like giving your printer the wings of a digital eagle, freeing it (and you!) from the shackles of cords. You can print from anywhere in your home or office, provided you're connected to the same Wi-Fi network. It's about convenience, flexibility, and creating a clutter-free workspace. Plus, let's be honest, it’s pretty cool to be able to print directly from your phone, tablet, or laptop without having to physically plug anything in. It's a modern-day marvel. So, are you ready to take a leap into the wireless world?
2. What You'll Need Before You Start
Okay, let's gather our supplies. Think of this phase as gathering the ingredients before starting a fantastic meal. You wouldn’t start baking a cake without flour, right? Here's your shopping list for printer setup:
- Your Brother Printer: This seems obvious, but it’s the star of the show! Make sure it’s properly unpacked, and all the protective tape has been removed.
- Your Wi-Fi Network: You'll need your network name (SSID) and password. If you've forgotten either of these details, don't panic! They're usually printed on your router or in the router's settings.
- A Computer, Smartphone, or Tablet: This is the device you'll use to configure the printer. Make sure it’s connected to the same Wi-Fi network as you want the printer to join.
- The Brother Printer Driver: You'll likely need to download and install the printer driver from Brother's official website. We’ll guide you through the process.
- Patience: Okay, this one’s not a physical item, but trust me, it's vital. Technological hiccups happen, and a little patience goes a long way.
3. Getting Started: The Initial Setup Steps
Alright, let's get down to business. Before you start wrestling with settings, it's crucial to do a quick check of your printer.
- Power On: Make sure your printer is switched on and plugged into a power outlet. Look for the power button; it's usually on the front or side of the printer.
- Locate the Wi-Fi Settings: Your Brother printer will have a menu or display that lets you configure the Wi-Fi settings. This might be a touch screen, or it could involve using the arrows and buttons on the printer itself.
- Connect to Your Network: You'll need to select your Wi-Fi network from the list of available networks and enter your password. This is the digital handshake that connects your printer to the internet.
4. Using WPS (Wi-Fi Protected Setup) for a Lightning-Fast Connection
If your router and printer support WPS, you're in for a real treat – it’s like a shortcut to Wi-Fi bliss! WPS is designed to make connecting devices super easy. Here's how it typically works:
- Find the WPS Button: Look for a WPS button on your router. It might be labeled “WPS,” “QSS,” or something similar.
- Press the WPS Button on Your Router: Hold it down for a few seconds until the WPS light starts flashing.
- Activate WPS on Your Printer: Many Brother printers have a WPS option in their menu. Select it on your printer to initiate the connection.
- Wait for the Magic to Happen: The printer and router will automatically connect, and in a matter of seconds, you should be all set.
5. Manual Wi-Fi Setup: The Step-by-Step Guide
If WPS isn't an option, don't worry! Manual setup is equally effective, albeit a little more involved. Think of it as the scenic route.
- Open the Printer’s Control Panel: This can be a touchscreen or physical buttons and a display.
- Navigate to Network Settings: Look for an option like "Network," "Wireless," or "WLAN."
- Select "Setup Wizard" or "Network Setup": The exact wording will vary, but you’re looking for a guided setup process.
- Choose Your Wi-Fi Network: From the list of available networks, select your network's name (SSID).
- Enter Your Password: This is where you’ll enter the Wi-Fi password. Type it carefully, as typos can throw things off!
- Confirm and Confirm: The printer will then attempt to connect to your network.
6. Downloading and Installing the Brother Printer Driver
Once the printer is connected to your Wi-Fi, it's time to install the printer driver on your computer or device. The driver is essentially the translator that allows your computer to "talk" to your printer.
- Visit the Brother Support Website: Go to Brother's official website and navigate to the "Support" or "Downloads" section.
- Search for Your Printer Model: Enter your printer's model number (found on the printer itself) into the search bar.
- Download the Correct Driver: Make sure you select the correct driver for your operating system (Windows, macOS, etc.).
- Run the Installer: Follow the on-screen instructions to install the driver. This typically involves accepting the terms and conditions and choosing the installation location.
- Connect the Printer During Installation: The installer might prompt you to connect your printer to your computer via USB temporarily. Follow the instructions.
7. Testing the Connection: Printing a Test Page
After installing the driver, it’s time to put your printer to the test. This is where you ensure that the setup was a success.
- Access Printer Settings: Go to your computer's "Devices and Printers" (Windows) or "Printers & Scanners" (macOS) settings.
- Select Your Brother Printer: Right-click on your printer (Windows) or click the "Options & Supplies" button (macOS).
- Print a Test Page: Look for an option to print a test page or perform a self-test. A test page will confirm that everything is working correctly.
8. Troubleshooting Common Wi-Fi Setup Issues
Let's face it, things can sometimes go awry. But fret not, because we've compiled a list of common issues and their solutions:
- Printer Not Connecting to Wi-Fi:
- Double-check your Wi-Fi password. It's the most common culprit!
- Make sure your printer is within range of your Wi-Fi router.
- Restart your printer and router. It's the tech equivalent of a good night's sleep.
- Check for firmware updates for your printer.
- Printer Not Showing Up on Your Computer:
- Ensure the printer driver is installed correctly.
- Check your computer's firewall settings; it might be blocking the connection.
- Make sure your computer and printer are on the same Wi-Fi network.
- Printing Errors:
- Check to see if you have enough ink or toner.
- Make sure the paper is loaded correctly.
- Restart both your printer and computer.
9. Setting Up Wireless Printing from Your Smartphone or Tablet
Printing from your mobile device is a breeze, especially with the right apps and settings.
- Download the Brother iPrint&Scan App: This free app allows you to print directly from your mobile device.
- Ensure Your Device and Printer Are on the Same Network: This is the fundamental requirement for wireless printing.
- Open the App and Select Your Printer: The app should automatically detect your Brother printer.
- Select the Document or Photo: Choose the file you want to print.
- Adjust Printing Settings (if needed): Change things like paper size, orientation, and number of copies.
- Print! Send the document to your printer and watch the magic happen.
10. Managing Printer Settings and Preferences
Fine-tuning your printer settings can optimize your printing experience.
- Access Printer Properties: Go to your computer's "Devices and Printers
How to Setup WiFi and print wirelessly using your PCLaptop Brother DCP-T420W
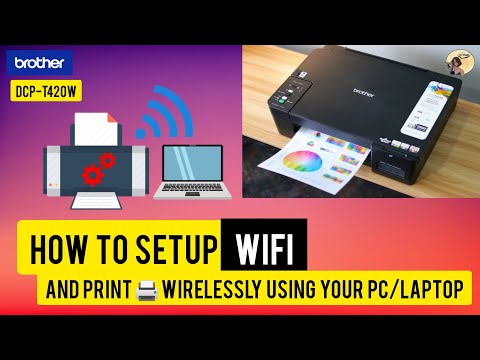
By Andrias Instructional Vlogs How to Setup WiFi and print wirelessly using your PCLaptop Brother DCP-T420W by Andrias Instructional Vlogs
Brother MFC-L2730dw Wireless Setup With Windows Laptop, Printing & Scanning video.

By Copy Print Scan Brother MFC-L2730dw Wireless Setup With Windows Laptop, Printing & Scanning video. by Copy Print Scan
Brother Printer WiFi SetUp using the Control Panel.
By Copy Print Scan Brother Printer WiFi SetUp using the Control Panel. by Copy Print Scan

Title: Connect Brother DCP-B7535DW Printer To Laptop Using its IP AddressFull Setup Step By Step in 2023
Channel: Techodeck
Connect Brother DCP-B7535DW Printer To Laptop Using its IP AddressFull Setup Step By Step in 2023 by Techodeck
Laptop Wifi Hotspot
Brother Printer WiFi Setup: Your Ultimate Guide to Seamless Wireless Printing
Welcome! We understand the frustration of wrestling with technology, especially when it comes to setting up your Brother printer on your Wi-Fi network. But fret not! This comprehensive guide is designed to demystify the process, ensuring you can print wirelessly in a matter of minutes. Whether you're using Windows, macOS, iOS, or Android, we've got you covered with clear, step-by-step instructions and troubleshooting tips to conquer any connectivity challenge.
Preparing for the Setup: Essential Pre-Requisites
Before we dive into the setup process, let's ensure you have everything you need for a smooth and successful connection.
- Your Brother Printer: Make sure your Brother printer model is compatible with Wi-Fi connectivity. Check your printer's documentation or the Brother website to confirm its wireless capabilities.
- Your Wi-Fi Network: You'll need access to a functional Wi-Fi network. Ensure you know your network's SSID (network name) and password.
- A Computer or Mobile Device: You'll use a computer (Windows or macOS) or a mobile device (iOS or Android) to initiate the setup process. This device must also be connected to your Wi-Fi network.
- The Brother Printer Driver: It's highly recommended to have the latest printer driver installed on your computer or mobile device. You can download the driver from the official Brother support website by searching for your printer model. Having the latest drivers is crucial for optimal performance and compatibility.
- Sufficient Power: Make sure your Brother printer is plugged into a working power outlet and turned on. The printer will need power to function while you attempt to connect it to your network.
Setting Up Your Brother Printer on Windows: Step-by-Step Instructions
Let's walk through the setup process for Windows users. This process assumes you have already installed the necessary printer drivers.
- Initial Preparation: Locate your Brother printer and ensure it is powered on and ready. Your printer’s display should indicate that it's ready. Double check the network name and password of the WiFi network you want to connect the printer to.
- Access the Printer Settings: Navigate to your computer's "Settings" menu. You can typically find this by clicking the "Start" button (usually represented by the Windows logo) and selecting settings (the gear icon).
- Add a Printer or Scanner: Within Settings, click on "Devices," Then select "Printers & scanners." Click "Add a printer or scanner." Windows will begin searching for available devices.
- Select Your Printer: Once Windows detects your Brother printer, select it from the list of available devices. If it’s not detected immediately, make sure the printer is powered on and within range of your Wi-Fi router. At this point the wizard will walk you through the setup.
- Choose Wireless Connection: Select the option to connect your printer wirelessly. The setup wizard may prompt you to enter your Wi-Fi network's SSID and password. Type in the correct credentials, and if you do, the printer should connect.
- Driver Installation (If Necessary): If prompted, Windows will guide you through the driver installation process. Follow the on-screen instructions to complete the installation.
- Print a Test Page: Once the setup is complete, print a test page to confirm the wireless connection. You can usually find this option in the printer settings or the Brother printer's software. After printing the test page, you can be sure your printer is set up correctly.
Setting Up Your Brother Printer on macOS: A Simplified Approach
The macOS setup process is generally more straightforward. Here's how to establish a wireless connection:
- Open System Preferences: Click on the Apple menu in the top-left corner of your screen and select "System Preferences."
- Choose Printers & Scanners: Click on the "Printers & Scanners" icon. This will open the printer management window.
- Add Your Printer: Click the "+" button located below the printer list to add a new printer. A window will appear that will search for your printer.
- Select Your Brother Printer: Select your Brother printer from the list of detected devices. If your printer doesn't show up, ensure it's turned on and connected to your Wi-Fi network.
- Use the Wi-Fi Connection: macOS should automatically recognize the printer's Wi-Fi capabilities. Select the wireless option.
- Select the Correct Driver: Choose the appropriate printer driver from the "Use" dropdown menu. macOS should automatically select the correct driver, but verify it for your specific Brother printer model.
- Add Printer: Click “Add.” macOS will install the necessary drivers.
- Print a Test Page: As with Windows, print a test page to confirm that your printer has connected to your Wi-Fi network.
Connecting Your Brother Printer with iOS and Android Devices
Setting up your Brother printer with your mobile device offers unparalleled convenience for mobile printing.
iOS Setup:
- Download the Brother iPrint&Scan App: If you haven't already, download the Brother iPrint&Scan app from the App Store. This app is essential for mobile printing.
- Open the App and Locate Printer: Open the iPrint&Scan app. The app will search for Brother printers on your network.
- Select Your Printer: Tap on your Brother printer when it appears in the list. You might be prompted to confirm your printer model.
- Follow the App's Instructions: The app will guide you through the setup process. It might ask you for your Wi-Fi network credentials.
- Start Printing: Once the setup is complete, select a document, photo, or webpage from your device and tap the print icon. You should see your Brother printer as an available printer.
Android Setup:
- Download the Brother iPrint&Scan App: Find the Brother iPrint&Scan app in the Google Play Store and install it.
- Open the App and Initiate Search: Launch the iPrint&Scan app. The app should automatically begin searching for Brother printers on your local network.
- Select Your Printer: Tap on your printer from the list. You may be prompted to confirm your printer model.
- Setup Process: The app will guide you through the setup process, which may involve entering your Wi-Fi network credentials.
- Print Wirelessly: Select the file or document you want to print. Then tap the print icon. Select your Brother printer as your printing destination.
Troubleshooting Common WiFi Connectivity Problems
Encountering issues during setup is not uncommon. Here are some troubleshooting tips:
- Check the Wi-Fi Password: Double-check that you've entered your Wi-Fi password correctly. It's case-sensitive.
- Router Proximity: Ensure your printer is within range of your Wi-Fi router. Move the printer closer to the router if necessary.
- Router Compatibility: Ensure your router supports the 2.4 GHz band. Some older printers are not compatible with 5.0 GHz networks. Check your printer's and router's specifications.
- Restart Your Devices: Restart your printer, router, and your computer or mobile device. This can often resolve temporary connectivity glitches.
- Firewall Issues: Check your computer's firewall settings. Firewalls sometimes block printer connections. Ensure your firewall allows communication with your Brother printer.
- Driver Issues: Reinstall the printer driver. Corrupted drivers can cause connection problems.
- Printer IP Address: Consider manually configuring a static IP address for your printer on your network. This can help resolve potential IP address conflicts. Check your printer’s instruction guide for details.
- Network Congestion: During periods of heavy network usage, there may be drop in speed. Try printing at a later time or at a time when there is less activity on the network.
Advanced Setup Considerations: WPS (Wi-Fi Protected Setup)
Many Brother printers support WPS, which simplifies the wireless setup process. WPS allows for a one-button push-to-connect method.
- Locate the WPS Button: Find the WPS button on your Brother printer. It’s often marked with a WPS icon (usually two arrows forming a circle).
- Activate WPS on Your Router: Locate the WPS button on your Wi-Fi router. It’s usually a physical button on the router.
- Initiate the Connection: Press the WPS button on both your Brother printer and your router simultaneously, or in quick succession. The devices will then attempt to establish a wireless connection automatically.
- Confirmation: Once the connection is successful, your printer should be connected to your Wi-Fi network. Check your printer's display or print a network configuration page (if available) to confirm the connection.
Optimizing Wireless Printing Performance and Reliability
Once your Brother printer is successfully connected, there are measures you can take to optimize performance and guarantee reliability.
- Firmware Updates: Regularly update your printer's firmware. Firmware updates often include bug fixes, performance improvements, and security enhancements. Brother provides firmware updates on their website.
- Network Interference: Minimize potential sources of Wi-Fi interference. Keep your printer away from devices that emit electromagnetic interference, such as microwaves.
- **Quality of Service (QoS
