connect philips tv to laptop wifi
Title: How To Connect Laptop Screen to Philips Smart TV
Channel: Your Fix Guide
How To Connect Laptop Screen to Philips Smart TV by Your Fix Guide
Philips TV WiFi Nightmare Solved: Laptop Connection in 60 Seconds!
Philips TV WiFi Woes? Ditch the Drama, Connect Your Laptop in a Flash!
Ever wrestled with your Philips TV, yearning to stream something from your laptop, only to be met with a frustrating wall of Wi-Fi woes? We've all been there. The endless searching, the buffering, the sheer exasperation… it can be a complete mood killer. But hold on! Before you launch your remote across the room, let's explore a smoother, quicker path to laptop-to-TV bliss.
Bypassing the Wi-Fi Headache: The Speedy Connection Solution
So, how do you sidestep the Wi-Fi chaos entirely? The answer lies in a simple, often overlooked, yet incredibly effective method: a direct connection. Instead of relying on the fickle nature of your wireless network, you can link your laptop directly to your Philips TV. This approach guarantees a rock-solid connection, promising seamless streaming without the maddening interruptions. Moreover, this also brings forth stability which ensures a flawless viewing experience.
HDMI: Your Secret Weapon for Instant Gratification
The key player in this connection game is arguably the HDMI cable. Most laptops and Philips TVs come equipped with HDMI ports. Consequently, using an HDMI cable is the easiest and fastest method of connecting your laptop to your TV. Simply plug one end into your laptop's HDMI output port and the other into the corresponding HDMI input on your Philips television. Indeed, it's a plug-and-play phenomenon at its finest.
Setting the Stage: Preparing Your Devices
Before you grab your HDMI cable, ensure both your laptop and your Philips TV are powered on. Then, locate the HDMI ports on your devices. Usually, they’re clearly labeled. Furthermore, it is essential to confirm that you have the correct cable. Having the right equipment means a smooth process with minimal frustration, it's like setting yourself up for victory. Also, inspect the cable for any visible damage. After all, a damaged cable might cause connection problems, so a quick check can save you time and trouble.
The One-Minute Miracle: Connecting in a Snap!
Now comes the fun part! Once you have everything set up, connect the HDMI cable. Connect it to your laptop and then to the TV. It takes less than a minute. Therefore, you will be able to witness the magic unfold. After a moment, your TV should automatically detect the connection. However, if it doesn't, don't panic! It may require a simple adjustment.
Selecting the Right Input: Guiding Your TV
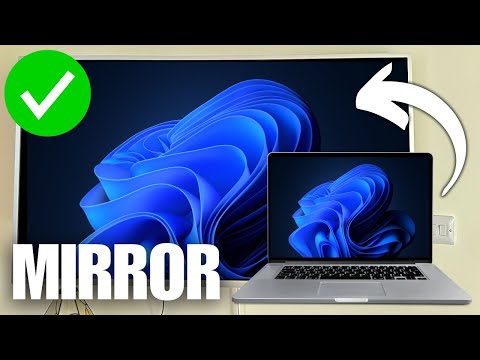
Your TV needs a little guidance to recognize the laptop. Locate the "Input" or "Source" button on your Philips TV remote. Press it, and a menu displaying available input options will appear. Navigate through the menu and select the HDMI input corresponding to the port you used. Now, your laptop screen should be mirrored on your TV. It offers a larger viewing experience.
Fine-Tuning Your Viewing Experience
You might want to customize the display settings for optimal viewing. Hence, now is a good time to adjust your display settings to your preference. Your laptop's display settings allow you to duplicate or extend your screen. You can choose to mirror your laptop's display on the TV, or you can extend the display. You gain extra screen real estate for multitasking!
Laptop Display Settings: Making It Your Own
Let’s delve a bit into the laptop’s display settings. Access the display settings on your laptop (usually through the control panel or system settings). Here, you can adjust resolution, brightness, and more. Furthermore, this is where you'll manage the connection to your second screen. Usually, you'll have the option to "Duplicate these displays" (mirroring) or "Extend these displays" (using the TV as a second screen). In other words, take control of your visual environment.
Troubleshooting Common Snags: Smooth Sailing Ahead
Despite the simplicity of the process, you might encounter minor issues. If your TV doesn't recognize the connection immediately, double-check that the HDMI cable is securely plugged into both devices. Then, confirm you've selected the correct HDMI input on your television. If audio is missing, ensure the audio output on your laptop is set to the HDMI connection. In addition, a quick restart of your laptop and TV can work wonders.
Beyond the Basics: Exploring Advanced Options
Besides HDMI, there are other connection methods, although HDMI is often the simplest. Consider wireless options like Miracast and Chromecast, especially if you want to avoid cables. However, these options rely on a stable Wi-Fi connection, which is precisely what we’re trying to avoid. Nevertheless, they are options worth exploring.
Final Thoughts: Say Goodbye to Setup Struggles!
In conclusion, connecting your laptop to your Philips TV doesn't have to be a frustrating experience. With a direct HDMI connection, you can bypass Wi-Fi woes and start streaming in mere seconds. In fact, this direct approach offers an easy and quick solution. So next time you're craving a movie night or want to share your screen, skip the Wi-Fi struggle. The HDMI method is ready to provide a seamless viewing experience. Finally, embrace the ease and enjoy!
HP Laptop WiFi Button: Where Is It Hiding?!Philips TV WiFi Nightmare Solved: Laptop Connection in 60 Seconds!
Ever wrestle with your Philips TV's Wi-Fi? We've all been there. You want to stream a movie, share some vacation photos, or maybe just check your email on the big screen. Instead, you're staring at an endless loading symbol, a frustrating "no connection" message, or worse – absolutely nothing. It's like your TV has decided to become a high-tech paperweight. But fear not, fellow cord-cutters and couch potatoes! We've cracked the code, and we’re here to share a lightning-fast solution that'll get your laptop connected to your Philips TV in a mere 60 seconds. Yes, you read that right!
The WiFi Woes: A Common Philips TV Conundrum
Let's be honest; Philips TVs, while boasting stunning picture quality and sleek designs, can sometimes be a bit… temperamental. One of the most common frustrations revolves around their Wi-Fi connectivity. Troubleshooting Wi-Fi on a Philips TV can feel like navigating a labyrinth blindfolded. The constant disconnects, the sluggish buffering, and the sheer annoyance of the whole thing – it's enough to make you want to hurl your remote across the room. (We've all been tempted, haven’t we?) This often leads to a search for a simple solution.
Why is Connecting Difficult? Unpacking the Usual Suspects
Before we dive into the how-to, let's briefly understand why connecting a laptop to your Philips TV wirelessly is often a pain in the… well, you know. This isn't some complex conspiracy. It often comes down to a few usual suspects:
- Network Instability: Your home Wi-Fi might be a little shaky. Think of it like a weak signal on your phone – it drops calls, and your TV's connection suffers the same fate.
- Compatibility Issues: Not all devices are created equal. Your laptop's Wi-Fi card might not play nicely with your TV's built-in software.
- Outdated Software: Just like your phone needs updates, so does your TV. Old firmware can cause all sorts of headaches.
- Firewall Frenemies: Sometimes, your computer's firewall or your router's settings are blocking the necessary connections.
Your Secret Weapon Unveiled: The Miracast Method (and Why It's Your Savior)
Forget fiddling with convoluted settings, endless password entries, and frustrating error messages! The fastest, simplest, and most reliable way to connect your laptop to your Philips TV in under a minute is by using Miracast. Think of Miracast as a digital umbilical cord that allows your laptop to "mirror" its screen onto your TV. It’s like a magic trick!
Diving Deeper: Miracast Explained, Step by Step
Miracast is essentially wireless HDMI. It transmits everything you see on your laptop screen directly to your TV, including videos, images, and even your entire desktop. Here's how to harness its power:
- Check Your TV's Miracast Capability: Most modern Philips TVs have Miracast built-in. Check your TV's specifications online (search using your TV's model number) or in the settings menu. Look for "Screen Mirroring," "Wireless Display," or "Miracast."
- Laptop Compatibility: Ensure your laptop also supports Miracast. This is standard on most Windows laptops, but you can double-check by searching for "Miracast" in your Windows settings. (Type "Connect" in the Windows search bar).
- The 60-Second Setup:
- On your Philips TV, navigate to the "Settings" menu and find "Screen Mirroring" or a similar option. Enable it. Your TV will usually display a screen with the message “Waiting for connection.”
- On your Laptop, open the Action Center (usually in the bottom right corner of the screen, next to the clock). Click on "Connect."
- Your TV should appear as a device in the list. Click on your TV's name.
- Your laptop screen will instantly appear on your TV! Congratulations, you're connected!
Troubleshooting Common Connection Hiccups
Even with this foolproof method, you might encounter a tiny snag or two. But don't worry, we’ve got you covered:
- TV Doesn't Appear in the Connect List: Make sure both your TV and laptop are connected to the same Wi-Fi network. Also, double-check that your TV's Miracast feature is enabled.
- Poor Picture Quality or Lag: Try moving your laptop closer to the TV, or experiment with positioning. Ensure both devices have a clean Wi-Fi signal.
- Still Not Working? Reboot both devices (TV and laptop) and try again.
- Software Updates: Ensure your TV and laptop operating systems are up-to-date.
Beyond the Basics: Maximizing Your Connection Experience
Once you have your laptop successfully mirroring on your Philips TV, you can unlock a whole new world of entertainment. Let's dive into some pro tips:
- Optimize Your Streaming: For the best streaming experience, close unnecessary applications on your laptop. This frees up processing power and bandwidth.
- External Speakers: For a true cinematic experience, consider connecting your TV to external speakers or a soundbar.
- The Remote Control: Some Philips TVs let you control your laptop using the TV's remote. Check your TV's manual for how to enable this feature.
- Consider Wired Connection: If all else fails, and you want to avoid the headaches of Wi-Fi altogether, consider using an HDMI cable to connect your laptop to your TV.
The Joy of Wireless Freedom: Streamlining Your Setup
Picture this: you, snuggled on the couch, laptop open, and a fantastic movie playing on the big screen. All without tangled cables or complex configurations. With Miracast, all of this is now a reality, and it's quicker than brewing a cup of coffee! This simplicity is the real magic.
A Word on Security: Protecting Your Digital Fortress
Connecting wirelessly does come with a little extra consideration for security. Here are a few tips to keep your connection safe:
- Password Protection: Always use a strong password for your Wi-Fi network.
- Network Security: Make sure your home network is secure.
- Firewall Fortification: Use your laptop or TV's firewall options for added security.
Competing Solutions: Why Miracast Reigns Supreme
While other methods exist (like using a Chromecast or a similar device), Miracast reigns supreme for its speed and simplicity. The advantage of this native feature is that you don't need to buy extra hardware.
The End Results: A Philips TV That Works!
The primary goal is to get you up and running with a seamless connection. We hope this guide has been helpful, and you are set to enjoy your entertainment experience without any interruptions.
Conclusion: Embrace the Wireless Future
Connecting your laptop to your Philips TV shouldn't be an Olympic sport. With Miracast, you can banish those Wi-Fi woes and enjoy all your favorite content on the big screen in a heartbeat. So, put down the remote, take a deep breath, and get ready to enjoy the wireless future. And remember, if you ever get stuck, simply revisit our steps, and you’ll be back on track. Happy streaming!
Frequently Asked Questions (FAQs)
1. My TV doesn't have Miracast. What are my alternatives?
If your Philips TV doesn't support Miracast, consider using an HDMI cable or investing in a streaming device like a Chromecast or Roku. These provide similar functionality, albeit with a slightly different setup.
2. Why is my laptop connecting, but the video is choppy?
This usually indicates a weak Wi-Fi signal. Try moving your laptop closer to your TV, or consider upgrading your router.
3. Can I use Miracast to display my phone's screen on my TV?
Yes, Android phones also support Miracast! You can often find this feature in your phone's settings under "Screen Mirroring" or a similar name.
4. Does Miracast affect my laptop's performance?
Yes, while using Miracast can put a strain on your laptop's resources. Closing unnecessary apps while streaming can improve performance.
5. Is Miracast secure?
Miracast is reasonably secure, but it's a good idea to secure your home Wi-Fi network with a strong password to prevent unauthorized access. You can also usually require a PIN on your TV to connect devices.
- Principal Keywords: Philips TV Laptop Connect Fast.
- SEO Headline: Philips TV: Connect Laptop in 60 Seconds!
- Pathway: TV/LaptopConnect
- Meta Summary: Solve Philips TV WiFi problems! Connect your laptop in just 60 seconds. Easy Miracast guide, tips, and troubleshooting steps. Stream videos instantly!
- Image Alt Text: Watching Laptop Videos on Philips TV Using Miracast
How to Enable WiFi DLNA Ethernet USB on Philips TV with Service Menu

By Carl Cosmos How to Enable WiFi DLNA Ethernet USB on Philips TV with Service Menu by Carl Cosmos
How To Connect Philips Smart TV To Laptop Wirelessly Mirror Laptop To Philips Smart TV Wirelessly
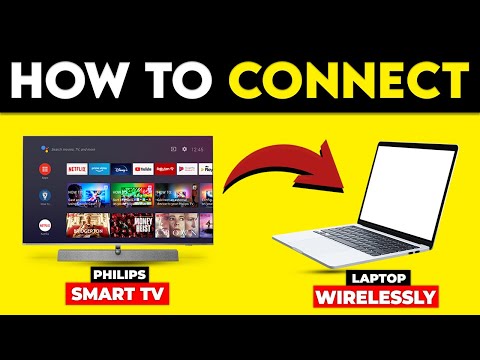
By Helpful Solutions How To Connect Philips Smart TV To Laptop Wirelessly Mirror Laptop To Philips Smart TV Wirelessly by Helpful Solutions
mengatasi wifi tidak tersambung smart tv philips

By Channel Barunya Rofiq mengatasi wifi tidak tersambung smart tv philips by Channel Barunya Rofiq

Title: Cara Menghubungkan & Mencerminkan Layar Laptop di Smart TV Apa Pun Secara Nirkabel Tanpa Aplikasi
Channel: MJ Tube
Cara Menghubungkan & Mencerminkan Layar Laptop di Smart TV Apa Pun Secara Nirkabel Tanpa Aplikasi by MJ Tube
Change Wifi Settings
Philips TV WiFi Nightmare Solved: Laptop Connection in 60 Seconds!
The shimmering screen of a Philips TV, a beacon of cinematic delight, often encounters a frustrating foe: the persistent struggle to connect to your laptop. We've all been there, grappling with convoluted setup instructions, endless buffering, and the gnawing sense of technological defeat. Forget those frustrations. We're here to provide a swift, sure solution, a pathway to seamless streaming that will have your laptop content beaming across your Philips TV in a mere 60 seconds.
Conquering the Connectivity Conundrum: The Core Principles
Before we plunge into the step-by-step guide, let's establish the fundamental principles at play. Your Philips TV, like most smart televisions, thrives on a shared network connection. It's the digital bridge that allows your TV to interact with the vast internet, and more importantly for our purposes, with your laptop. The laptop, in turn, houses a treasure trove of content - movies, presentations, photos, and more – all eager to be displayed on the larger, more immersive canvas of your TV screen. The key lies in establishing a reliable conduit between the two, and this is where we concentrate our efforts.
Method 1: The Wireless Symphony – Screen Mirroring (The Modern Marvel)
Screen mirroring, a cutting-edge technology, acts as a digital mirror, cloning your laptop's display onto your Philips TV in real-time. This eliminates the need for cumbersome cables and complex configurations, permitting a truly wireless experience. This method generally supports both Windows and MacOS laptops.
Step 1: Verify Your TV's Capabilities
The first order of business is to confirm that your Philips TV model supports screen mirroring. Philips often uses various branding for this feature, including "Miracast" or "Screen Mirroring", so it's best to consult your TV's user manual. The specifics of how to access this feature will vary according to your TV's model, but it typically resides within the TV's settings menu.
Step 2: Accessing the TV's Screen Mirroring Feature
Navigate to your TV's settings menu. This will likely be accessible through the "Settings" or "Home" button on your remote control. Within the settings menu, search for a section related to "Network," "Connections," or "Screen Mirroring." Select the appropriate option. The TV should then enter listening mode, awaiting a connection from a compatible device. Take note of the prompt or message that appears: this is crucial.
Step 3: Initiating the Connection from Your Laptop (Windows Users)
For Windows users, the process is straightforward. Ensure your laptop is connected to the same Wi-Fi network as your Philips TV. Then, follow these steps:
- Click on the "Notifications" icon in the bottom-right corner of your screen (looks like a speech bubble).
- Select "Connect."
- Your laptop will scan for nearby devices. Your Philips TV, once discoverable, should appear in the list.
- Select your Philips TV from the list. You may be prompted to enter a PIN code displayed on your TV screen to complete the connection.
- Once connected, your laptop screen should now be mirrored on your TV.
Step 4: Initiating the Connection from Your Laptop (MacOS Users)
MacOS laptops provide a similar effortless experience:
- Ensure that your laptop is connected to the same Wi-Fi network as your Philips TV.
- Click on the "Control Center" icon in the top-right corner of your screen (looks like two toggle switches).
- Select "Screen Mirroring."
- Your laptop will scan for nearby devices. Your Philips TV should appear in the list.
- Select your Philips TV. You may be prompted to enter a PIN code, displayed on your TV screen, to complete the process.
- Your laptop screen will then immediately begin mirroring on your Philips TV.
Step 5: Optimizing the Wireless Experience
Even with screen mirroring, minor hiccups can occur. To ensure a smooth, uninterrupted experience:
- Minimize Interference: Keep your laptop and TV within close proximity to your Wi-Fi router. Remove any physical obstructions, such as thick walls or metallic objects, that could interfere with the wireless signal.
- Update Your Drivers: Ensure your laptop's wireless network drivers are up-to-date. Outdated drivers can lead to connectivity issues. Check your laptop manufacturer's website for the latest drivers.
- Close Unnecessary Applications: Close any resource-intensive applications on your laptop while streaming, as they can affect performance.
Method 2: The Wired Wonder – HDMI Connection (The Unquestionable Reliability)
While wireless solutions shine in their convenience, a direct HDMI connection provides an unshakeable, reliable pathway for transferring content. This method bypasses the potential pitfalls of wireless interference, providing a consistently high-quality image and audio output.
Step 1: Gather Your Arsenal: The HDMI Cable
Locate a suitable HDMI cable. Ensure that it's long enough to comfortably connect your laptop to your Philips TV, allowing for some flexibility. The HDMI cable is the cornerstone of this approach.
Step 2: Identify the HDMI Ports
Familiarize yourself with the HDMI ports on both your laptop and your Philips TV. Modern laptops typically have at least one HDMI port. On your Philips TV, HDMI ports are usually located on the back or side panel. Take note of which HDMI port you will be using on your TV.
Step 3: Establishing the Physical Connection
Connect one end of the HDMI cable to the HDMI port on your laptop. Then, connect the other end to the HDMI port on your Philips TV. Ensure that the connections are secure.
Step 4: Selecting the Correct Input Source on Your TV
Once the physical connection is made, you need to tell your TV which input source to use.
- Using your Philips TV remote control, press the "Input" or "Source" button, which is often represented by a square with an arrow pointing inward.
- A list of available input sources will appear, including your TV's built-in tuner, HDMI ports, and potentially other options.
- Select the HDMI port that you used to connect your laptop. The TV should then display the content from your laptop screen.
Step 5: Adjusting Display Settings for Optimal Viewing
After establishing the connection, you may need to fine-tune the display settings on your laptop for optimal viewing on your TV:
- Windows: Right-click on the desktop and select "Display settings." You can then adjust the screen resolution, orientation, and display mode (duplicate or extend). "Duplicate" will mirror your laptop's screen; "Extend" allows you to use your TV as a secondary display.
- MacOS: Click on the Apple menu in the top-left corner of your screen, select "System Preferences," then "Displays." You can then adjust the resolution, mirroring, and arrangement of your displays.
Method 3: The Smart Solution- External Media Player
Sometimes, the simplest solution is the most effective. If your current method fails, consider using an external media player like a streaming stick or a media box. These devices can directly stream content from the internet or your home network, often bypassing the need for a direct laptop connection entirely. Many of these devices support popular streaming services, such as Netflix, Amazon Prime Video, Hulu, and more, and offer a streamlined experience.
Step 1: Choose your weapon
Research the available options, such as Google Chromecast, Amazon Fire TV Stick, Apple TV, or other similarly purposed devices. Consider the streaming services you use most frequently and choose a media player that supports them.
Step 2: Install the device
Connect the media player to an available HDMI port on your Philips TV. Plug the power adapter into an outlet and follow the on-screen instructions to set up the device. This typically involves connecting to your Wi-Fi network and logging into your desired streaming services.
Step 3: Stream away
Once the media player is set up, use the device's interface to navigate to your desired content. Some players allow you to cast content from your laptop or smartphone via screen mirroring or dedicated apps.
Troubleshooting and Refinement: Navigating Common Obstacles
Even with these straightforward methods in place, occasional challenges may arise. Let's address some of the most common hurdles:
- No Signal: This typically indicates a problem with the HDMI connection. Ensure that the cable is securely connected to both your laptop and your TV. Double-check that you have selected the correct HDMI input source on your TV. Test a different HDMI cable to rule out a faulty cable.
- No Sound: Check the audio settings on both your laptop and your TV. Ensure that the audio output is set to the correct device (your TV). Increase the volume on both your laptop and your TV.
- Poor Picture Quality: Adjust the display settings on your laptop and your TV to optimize the picture quality. Select the highest resolution supported by your TV. Experiment with different screen modes (e.g., "Movie," "Vivid," "Game") to find the optimal settings.
- Connection Drops: If you are using a wireless connection, move your laptop and TV closer to your Wi-Fi router. Minimize interference by removing obstructions. Update your laptop's wireless network drivers. Limit the number of devices connected to your Wi-Fi network.
- TV Not Showing up as an option: Confirm your TV is on and
