how to share my laptop wifi connection

Title: Sharing Files Between Computers Wirelessly Solution for sharing folders on WIFI network
Channel: FIXsage
Sharing Files Between Computers Wirelessly Solution for sharing folders on WIFI network by FIXsage
how to share my laptop internet connection with other devices, how to share your laptop wifi connection to mobile, how to share my wifi connection to laptop, share your laptop wifi connection, sharing wifi from laptop, sharing wifi from pc, can i share wifi from my computer
Unlock Your Laptop's WiFi Hotspot: The Secret Trick They Don't Want You To Know!
Unleash Your Laptop's Hidden Power: Become a WiFi Whisperer!
Ever wished you could share your internet connection, even when a router wasn't around? Well, guess what? You already possess the key! Your laptop, that trusty digital companion, holds a secret weapon. It's a built-in WiFi hotspot capability. But sometimes, it feels like a locked vault. Fear not, tech enthusiasts! This isn't some elaborate conspiracy. Instead, it's about knowing the right moves. Let's transform your laptop into a broadcasting powerhouse.
Taking Control: The WiFi Hotspot Genesis
First, consider your laptop's operating system. Each has its own slightly nuanced path to hotspot creation. Windows, the ubiquitous operating system, offers a surprisingly straightforward experience. Mac users have a similarly intuitive process. Furthermore, Linux distros, though varied, typically provide hotspot functionality.
Windows: Your WiFi Gateway
Navigating the Windows universe is generally simple. You begin by heading to the Settings application. Then, search for "Mobile Hotspot." Within this section, enable the hotspot feature. Subsequently, choose your network name and password. These will be the credentials others use to connect.
Mac Magic: Sharing Your Internet
Mac users typically find the answer in System Preferences. Look for the "Sharing" pane. Select "Internet Sharing" and configure it. This involves selecting your internet connection source. Then define the connection method for your shared WiFi. Finally, assign a network name and password.
Linux Liberation: Open Source Hotspots
Linux setup is often dependent on your specific distribution. However, the general method involves network manager settings. You might also encounter tools with graphical user interfaces. These assist in easy WiFi configuration, enabling you to set up the hotspot. Moreover, command-line interfaces provide advanced control for the tech-savvy.
Troubleshooting Troubles: Smoothing the Path
Sometimes, the process doesn't run like clockwork. After all, tech hiccups are common. Don’t despair! Let's bypass any roadblocks.
Firstly, double-check your internet connection. Ensure your laptop is actually receiving internet. Without a source connection, broadcasting isn't possible. Secondly, review your firewall settings. They might inadvertently be blocking hotspot functionality. You can temporarily disable your firewall to test it. Then, establish whether it's the cause.
Thirdly, update your network drivers. Outdated drivers can cause compatibility issues. Visit your laptop manufacturer's website. Download and install the latest drivers for your network adapter. Fourthly, confirm your laptop’s WiFi card supports hotspot creation.
Security First: Protecting Your Network
Once your hotspot is active, prioritize security. Never broadcast with default settings or weak passwords. Choose a strong, unique password. Consider using WPA2 or WPA3 encryption. Limit the number of connected devices. This prevents bandwidth congestion and mitigates potential security risks. Furthermore, always monitor your network activity.
Beyond the Basics: Advanced Tactics
Once you conquer the basics, explore advanced configurations. Adjust your hotspot's band (2.4 GHz or 5 GHz). The latter is often less congested and faster. You can limit data usage. This prevents accidental overage charges if your connection has data caps.
The Benefits: Freedom and Connectivity
Now, consider the advantages. Your laptop now serves as a mobile internet access point. It's perfect for travelers. It's also beneficial in areas with unreliable WiFi. Share your connection with friends and family. You become the tech support hero.
So, What's the "Secret"?
Ultimately, there's no grand, hidden secret. It's just a matter of knowing the tools. Now, you wield a powerful tool. By mastering your laptop's hotspot feature, you unlock incredible connectivity. Embrace this newfound freedom. Enjoy the benefits of shared internet access. Go forth and connect! And besides, you deserve the credit!
Unleash the Power of Wireless: Laptops with Built-in Wi-Fi That'll Blow You Away!Unlock Your Laptop's WiFi Hotspot: The Secret Trick They Don't Want You To Know!
Hey there, internet adventurers! Ever found yourself in a bind, desperately needing Wi-Fi but stranded without a connection? We’ve all been there, right? Picture this: You're at a remote cabin, miles from civilization, wanting to binge-watch your favorite show. Or perhaps you're in a coffee shop, the free Wi-Fi is down, and you're about to miss a crucial video call. Frustrating, isn't it? But what if I told you the solution to this common predicament is nestled right inside your laptop, a secret weapon most people don't even know exists? Today, we’re diving deep and unlocking the power of your laptop's built-in WiFi hotspot, a trick they don’t readily share (or perhaps, you just didn't know about!). Let's get started!
1. Why Your Laptop is a Portable WiFi Powerhouse
Think of your laptop as a Swiss Army knife of technology. It's got processing power, storage, and, importantly, the capability to connect to the internet. But did you know it can also act as a Wi-Fi router, broadcasting its own signal? It’s like having your own personal Wi-Fi base station, ready to share your internet connection with your other devices – your phone, your tablet, even your friend's laptop. It's that simple. This means you can share your internet connection from wired Ethernet, another Wi-Fi network, or even your mobile data from a USB dongle (those old-school tech devices, am I right?).
2. The Secret: It's Built-In (and Usually Hidden!)
The magic lies in your laptop's operating system. Both Windows and macOS have built-in features that allow you to create a mobile hotspot. The settings are usually buried a little bit, like a hidden treasure on a map. Finding them can take a little digging, but trust me, the reward is worth the effort. It's not some complicated piece of software you need to download and install; it's a native feature, patiently waiting to be activated.
3. Windows Warriors: Setting Up Your Hotspot (Step-by-Step)
For our Windows pals, here’s how to set up your hotspot. Think of it like building a Lego set; each step gets you closer to the finished product.
- Step 1: Access the Settings: Click on the Start Menu and select “Settings” (the gear icon).
- Step 2: Network & Internet: Choose "Network & Internet."
- Step 3: Mobile Hotspot: Select "Mobile Hotspot" from the left-hand menu.
- Step 4: Turn It On: Toggle the "Share my Internet connection with other devices" switch to "On.” That's it!
You can customize the network name (SSID) and password to protect your connection in these settings too. You can also choose the source of your internet – is it from your Ethernet connection, your Wi-Fi connection, or your mobile data?
4. MacOS Mavericks: Creating Your Wi-Fi Oasis
Apple fans, don't feel left out! Setting up a hotspot on your Mac is equally straightforward. Consider it a sleek, streamlined experience, like driving a Porsche compared to a pickup truck (no offense, pickup truck users!).
- Step 1: System Preferences: Click the Apple icon in the top-left corner of your screen and select “System Preferences.”
- Step 2: Sharing: Click on “Sharing.”
- Step 3: Internet Sharing: Select "Internet Sharing" from the left-hand menu.
- Step 4: Configure: From the “Share your connection from” dropdown, select the connection you want to share (Wi-Fi, Ethernet, etc.).
- Step 5: Enable: Check the box next to "Internet Sharing" to activate the hotspot.
- Step 6: Customize: Click “Wi-Fi Options…” to configure your network name and password.
Within seconds, your Mac is throwing out that sweet, sweet Wi-Fi signal!
5. Security First: Protecting Your Digital Fortress
Just like you wouldn't leave your front door unlocked, you need to secure your hotspot. This is where the password comes in. Choose a strong, unique password – at least eight characters long, with a mix of uppercase and lowercase letters, numbers, and symbols. Don’t be tempted to use "password" or "123456." Think of it as your digital moat, keeping the internet pirates away. Ensure you never broadcast your password loudly in public; a little discretion goes a long way.
6. Bandwidth Blues: Understanding Data Usage
Now, here’s a gentle word of caution. Sharing your internet connection consumes data. Just like when you're using your phone for browsing or streaming, your laptop will be eating data during hotspot mode. Be mindful of your data allowance, especially if you're using a mobile data connection. If you're streaming high-definition videos to multiple devices whilst using a mobile hotspot, chances are there will be a data limit.
7. Battery Life: Conserving Your Power
Running a hotspot drains your laptop battery. It's like asking your laptop to pull double duty, handling both its regular tasks and acting as a router. Monitor your battery levels, and consider plugging in your laptop when using the hotspot for extended periods. An external power source is your friend!
8. The Limitations: When a Hotspot Isn't the Answer
While your laptop’s hotspot is a lifesaver in many situations, it isn’t a perfect solution. The range of a laptop hotspot is limited, typically extending up to around 30-40 feet, depending on the environment and the strength of your Wi-Fi adapter. It also won’t replace a dedicated router if you require a high-bandwidth connection for multiple devices.
9. Troubleshooting Troubles: Common Pitfalls and Fixes
Sometimes, things don’t go as smoothly as planned. If your hotspot isn't working, don’t sweat it. Here are some common issues and their solutions:
- No Internet Access: Double-check your laptop's internet connection. Ensure it's connected to a working Wi-Fi network or has a stable Ethernet or mobile data connection.
- Devices Can't Connect: Verify that your device is entering the correct password. Also, check if your hotspot has reached its device limit.
- Slow Speeds: The speed of your hotspot is determined by your internet connection's speed. If your primary connection is slow, your hotspot will be too. Check for other devices that may be using the network.
10. The Power of Public Wi-Fi: Weighing the Pros and Cons
Public Wi-Fi is an option but it’s not always the best. Coffee shops, libraries, and airports offer free Wi-Fi. The upsides are the cost savings and convenience. However, public Wi-Fi networks are notoriously insecure. Your data is more vulnerable to prying eyes. Your laptop's hotspot offers greater control.
11. Sharing Your WiFi for Emergencies
Think of this as a "pay it forward" scenario, like opening a door for someone. You can share your hotspot with a friend down on their luck. The key is to have good, honest communication. Afterall, we are all in this together, aren't we?
12. Hotspot for Gamers: A Double-Edged Sword
Gamers, the hotspot is a somewhat complex relationship. The convenience of a hotspot, even for mobile gaming on tablets or phones, is undeniable. However, the latency, or "ping," can be challenging. A hotspot is not best in an environment requiring low latency.
13. The Home Office: Using Your Laptop As A Backup
Even if you have a home Wi-Fi router, your laptop's hotspot can serve as a handy backup. If your primary internet connection fails, you can use your phone's mobile data (via your laptop's hotspot) to stay connected.
14. Beyond the Basics: Advanced Configurations
For the tech-savvy, there are more advanced configurations you can explore, but the settings we have provided should work. You can change the channel your hotspot broadcasts on to reduce interference in crowded environments.
15. The Future is Wireless: Why This Skill Matters
In a world increasingly connected, understanding how to create a Wi-Fi hotspot is a valuable skill. We carry multiple devices that rely on the internet to function. The more you can maximize and optimize their features, the better. This skill allows you to stay productive, entertained, and connected, regardless of your location.
Closing Thoughts
So there you have it! The seemingly secret trick to unlocking your laptop’s WiFi hotspot. It's the perfect solution when you're in a pinch, offering you the freedom to connect your devices to the internet, anytime, anywhere. Now go forth and broadcast your own personal Wi-Fi signal! You're now the Wi-Fi wizard everyone wishes to have access.
FAQs
1. Is using my laptop as a hotspot safe?
Yes, as long as you use a strong password and keep your laptop’s operating system updated. Treat it like you would any other Wi-Fi network. Ensure your device
Turn Your XP Laptop into a WiFi Hotspot: The SHOCKINGLY Easy Trick!Transfer Files Between Two Laptops over Wi-Fi

By Techy Druid Transfer Files Between Two Laptops over Wi-Fi by Techy Druid
How to transfer files from PC to PC using WiFi Windows 10 7 8

By IT Magics How to transfer files from PC to PC using WiFi Windows 10 7 8 by IT Magics
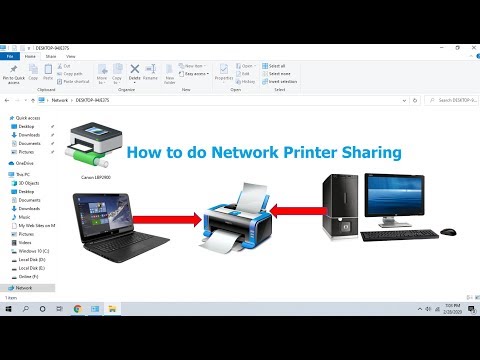
How to Share Printer on Network Share Printer in-between Computers Easy
By MJ Tube How to Share Printer on Network Share Printer in-between Computers Easy by MJ Tube

Title: How to Create Wifi Hotspot in Windows 10 Tutorial
Channel: MDTechVideos
How to Create Wifi Hotspot in Windows 10 Tutorial by MDTechVideos
My Laptop Work
Unlock Your Laptop's WiFi Hotspot: The Secret Trick They Don't Want You To Know!
We've all been there. You're stranded with terrible internet, maybe tethering off your phone is eating into your data plan, or perhaps you simply need to share your connection with a friend or colleague. The solution? Turning your laptop into a WiFi hotspot. It's a superpower, really – a portable internet generator disguised as a computing device. But what if the standard methods feel clunky, unreliable, or simply don't offer the control you crave? This is where the "secret trick" comes in, a slightly more advanced yet surprisingly accessible technique to unlock your laptop's full hotspot potential. Prepare to become a master of your own wireless domain.
Bypassing the Built-in Limitations: Why Default Hotspot Functionality Can Fall Short
Most operating systems – Windows, macOS, and even Linux distributions – offer built-in hotspot functionality. While convenient at first glance, they often come with limitations. These built-in solutions might restrict customization of the network name (SSID), limit the password complexity options, or even have a tendency to randomly disconnect. They can also be resource-intensive, potentially slowing down your laptop's performance. These constraints are more than just minor inconveniences; they can significantly impact the usefulness and reliability of your hotspot, especially in demanding situations. We aim for more than just a basic connection; we strive for a robust, easily managed, and secure wireless network.
The Power of the Command Line: Windows' Hidden Hotspot Arsenal
The secret weapon? The command line interface, specifically the netsh utility in Windows. This powerful tool, often overlooked, provides granular control over your network settings, allowing you to configure your hotspot with precision and efficiency. This isn't about complicated coding; it's about understanding a few key commands to unlock significantly more control and customization.
Step 1: Unveiling the Interface Details
Before you even think about creating a hotspot, you need to gather some crucial information. This includes the network adapters connected to your laptop. Open the command prompt as an administrator (right-click the Start button and select "Windows PowerShell (Admin)" or "Command Prompt (Admin)"). Then, type the following command and press Enter:
netsh wlan show drivers
This command displays information about your wireless adapter, including its capabilities. You'll be looking for the "Hosted network supported" line. If it says "Yes," you're golden. If it says "No," then your adapter might not support this particular method. Another useful command to find interface details is:
ipconfig /all
This will provide detailed information about your network configurations, including the names of your network interfaces. Make sure you remember the interface name associated with your active internet connection (e.g., Ethernet or Wi-Fi) as you'll need it later to share your existing internet connection.
Step 2: Setting Up the Virtual Hosted Network
Now for the magic! We'll create and configure the virtual hosted network with a specific SSID (the name of your WiFi network) and a secure password. In the command prompt (or powershell), type the following commands one by one, replacing the placeholders with your desired values:
netsh wlan set hostednetwork mode=allow ssid="YourWiFiName" key="YourPassword123"
Replace "YourWiFiName" with the name you want to give your hotspot (e.g., "MyLaptopHotspot"). Replace "YourPassword123" with a strong, secure password. The password should be at least eight characters long and contain a combination of upper and lowercase letters, numbers, and symbols.
Step 3: Enabling the Hosted Network
After setting up the network, you need to enable it. Type the following command:
netsh wlan start hostednetwork
This command activates the virtual adapter, making your hotspot ready to accept connections. It's like flipping the switch that brings your wireless network to life.
Step 4: Sharing Your Internet Connection
This is a critical step, ensuring your hotspot actually shares your existing internet connection. Go to the "Network Connections" settings (search for "view network connections" in the Windows search bar). Locate your active Internet connection (e.g., Ethernet or Wi-Fi) right-click it, and select "Properties".
In the "Sharing" tab, check the box that says "Allow other network users to connect through this computer's Internet connection." Then, in the "Home networking connection" dropdown, select the virtual network adapter associated with your hosted network. This is often named "Microsoft Hosted Network Virtual Adapter." Apply the changes and close the windows. The connection is now shared.
macOS's Built-In Advantage: Fine-Tuning Your Personal Hotspot
macOS offers a more intuitive approach to creating a WiFi hotspot than a standard Windows system, integrated directly into their operating system. While simple to set up, there are ways to refine the experience for optimal performance and security.
Accessing Personal Hotspot Settings
Apple's streamlined approach makes starting your hotspot a breeze. Go to System Preferences (found in their System Settings), choose "Sharing," and select "Internet Sharing."
Configuring Sharing Settings
In "Internet Sharing," you have to select the source of your internet connection in the dropdown menu marked "Share your connection from:". If you are using Wi-Fi, specify the interface by selecting the "Wi-Fi" option. If you are using Ethernet, specify this interface. Next, click the box next to “Internet Sharing" to enable the connection. Then, in the configuration options, select "Wi-Fi Options…" to customize your wireless network.
Fine-Tuning Your Hotspot for Performance
While macOS offers a user-friendly interface, there are ways to fine-tune your hotspot for optimal performance. You might consider the following:
- Channel Selection: If possible, experiment with different WiFi channels (accessed through a third-party utility or wireless router settings) to reduce interference from other networks in your area. Choose a channel that experiences the least amount of traffic.
- Security Protocols: Verify the security protocol selected for your hotspot. WPA2/WPA3-Personal is generally recommended for strong security.
- Network Name (SSID) and Password: Choose a memorable and descriptive network name for easy identification. As always, select a robust password using a combination of upper and lower case letters, numbers, and symbols.
Troubleshooting Common Issues: Your Guide to a Smooth Connection
Even with the best configuration, things can go wrong. Here are some common issues and how to fix them:
- Hotspot Not Showing Up: Double-check that you've enabled the hosted network (Windows) or that internet sharing is turned on (macOS). Verify that the SSID is correct and that your devices are within range. Ensure that your wireless adapter is enabled in your device's settings.
- No Internet Connection on Connected Devices: Ensure you’ve correctly shared your internet connection (Windows) or that the internet sharing is enabled and configured correctly (macOS). Have your devices selected a standard connection mode (WPA2/WPA3-Personal) with your selected password.
- Slow Speeds: Interference, distance, or network congestion can slow down your hotspot. Try moving closer to your laptop, changing the channel on your wireless adapter (Windows), or reducing the number of connected devices. Consider using a wired connection to your laptop for the fastest speeds.
Beyond the Basics: Advanced Hotspot Considerations
For power users, the following strategies can increase the functionality of your hotspot:
Bandwidth Throttling
Using third-party utilities or command-line tools, you can limit the bandwidth allocated to each connected device, preventing a single device from hogging all the available bandwidth. This can be especially useful if you have multiple users connected.
MAC Address Filtering
Implement MAC address filtering to restrict which devices can connect to your hotspot. This adds an extra layer of security, as you can define a list of approved devices.
Monitoring and Management Tools
Explore network monitoring tools to track bandwidth usage, identify potential issues, and gain insights into your hotspot's performance. These tools can provide valuable data for optimizing your settings.
The Secret Unleashed: Your Laptop, Your Wireless Command Center
By embracing these techniques, you've moved beyond the basic built-in hotspot functionality. You've unlocked a more powerful, versatile, and secure solution, converting your laptop into a true wireless command center. Remember that practice makes perfect. Experiment with different settings, troubleshoot any issues, and adapt the techniques to your unique needs. You now possess the knowledge to create and manage a reliable, efficient, and secure WiFi hotspot whenever, and wherever, you need it. Enjoy the freedom of wireless connectivity, on your terms.
