how to connect a laptop to another laptop using wifi

Title: Transfer Files Between Two Laptops over Wi-Fi
Channel: Techy Druid
Transfer Files Between Two Laptops over Wi-Fi by Techy Druid
how to connect laptop to laptop using wifi, how to connect a laptop to wifi using qr code, how do i connect my laptop to someone else's wifi, how to connect laptop to another laptop wirelessly, can you connect a laptop to another laptop, can you share wifi from laptop to pc
Laptop to Laptop WiFi: The SHOCKINGLY Easy Trick!
Here's the rewritten article:
Connect Without Wires: The Laptop-to-Laptop WiFi Secret
Have you ever needed to share files quickly? Perhaps you needed to connect two laptops when there’s no internet. It's a frustrating situation. But, there's a surprisingly simple solution. It's a trick that lets your laptops talk directly to each other. It's all done using WiFi. This method bypasses the need for an external router.
Setting the Stage: Preparing Your Laptops
First, gather your laptops. Ensure both are charged. That's because the process can take a little while. You're essentially creating a mini-network. Consider this process as analogous to a secret handshake. One laptop will act as the host. The other will join the network. This is a straightforward preparation stage.
Step One: Host It Up! Creating the Network
Now, let's get down to business. We'll start by creating the "host" network. Find the WiFi icon on your chosen laptop. Therefore, right-click it. Select "Open Network & Internet settings." Then, click on a "Mobile hotspot." Click "Edit" next. Change the "Network name" to something memorable. Also, create a strong, unique password. It's also best practice to write these down. Finally, toggle the "Mobile hotspot" switch to "On". In short, you've created your own private network.
Step Two: Joining the Party: Connecting the Second Laptop
It is time to connect the second laptop. On this laptop, search for available WiFi networks. You should see the network name that you created. Therefore, click on the network. Enter your password. Then, hit "Connect". Success! Your second laptop is now on your private network. It can now "talk" to the first laptop.
Step Three: Sharing the Goods: File Sharing Magic
Next, you need to enable file sharing. On the host laptop, search for “File sharing options”. Click on "View network computers and devices". Now, select "Change advanced sharing settings." Here, you'll find several options. First, turn on network discovery. Also, turn on file and printer sharing. Importantly, select "Turn on sharing so anyone with network access can read and write files in the public folders". Save your changes.
Next, you'll need to specify what you want to share. Locate the file or folder you want to share. Right-click it. Then, choose "Properties." Click on the "Sharing" tab. Click on "Share." Add "Everyone" to the list. Give "Everyone" read/write permissions. Click "Share" again. Another option is to use the "Homegroup" feature. It will streamline file sharing.
Now, back on the second laptop. Open File Explorer. In the navigation pane, look for "Network." You should see the first laptop listed. Double-click on the first laptop's icon. Therefore, you should be able to access the shared folders and files. Transferring files should be quick and easy.
Troubleshooting and Tweaks
Sometimes things don't go as planned. In this case, don’t panic. If you can’t see the host laptop, check the firewall settings. Ensure that network discovery is enabled on both laptops. Restarting both laptops can also work wonders. Make sure both laptops are connected to the same network. If they are connected, then you have file-sharing access.
Why This Trick Matters
This simple trick is incredibly useful. Moreover, it’s valuable in many situations. It is helpful for sharing large files. You can also use it to transfer data quickly. Consider the times when you have no internet. Maybe you’re traveling. Perhaps your internet is down. This method provides a direct, reliable connection. It's a secret weapon in your tech arsenal.
Beyond File Sharing: Other Uses
However, the advantages extend beyond file sharing. For instance, you can play multiplayer games. You can also share a printer. Think about the possibilities. You have created a mini-network. Consequently, you have bypassed the need for a physical connection. All you need is WiFi.
Safety First: Security Considerations
Even though this is a private network, security matters. Always use a strong password. Be cautious about what you share. Regularly review your file-sharing settings. Therefore, you can maintain a secure connection.
Conclusion: The Super Simple WiFi Secret
Finally, you’ve learned a valuable trick. It lets your laptops connect directly. This is the power of laptop-to-laptop WiFi. It's shockingly easy to set up. The result is a quick and private connection. Embrace this simple, but powerful, technique. It will make your digital life easier. So go ahead, try it out. It's a secret that's too good not to share.
Lenovo T420 WiFi: The SHOCKINGLY Easy Fix (No Tech Skills Needed!)Laptop to Laptop WiFi: The SHOCKINGLY Easy Trick!
Alright, tech adventurers! Ever been in a situation where you desperately needed to share files, screen mirror, or even just get some extra browsing power, but your internet connection was as reliable as a politician's promise? Been there, done that, and trust me, it's frustrating! That's where the magic of connecting your laptops directly via Wi-Fi comes in. Forget fussing with cables or relying on dodgy public Wi-Fi; we're talking about a super-speedy, secure connection, and, believe it or not, it's shockingly easy. Buckle up, buttercups, because we're about to dive into this game-changing trick!
1. The Wireless Brotherhood: Why Connect Laptops Directly?
Think of it like this: you and your laptop are best friends, and you're sharing a secret handshake, without needing a third party (aka the internet). Connecting laptops directly via Wi-Fi opens up a whole world of possibilities. Forget those clunky USB drives for file transfers; we're talking instant sharing! You can mirror your screen for presentations, create a mini-network for gaming, or even use one laptop's internet connection on the other (if you're feeling generous!). It's like having a private, high-speed lane on the digital highway. This is not just a convenience; it's a necessity in a world constantly demanding quick and efficient solutions.
2. Decoding the Mystery: How Wi-Fi Direct Works (Simplified!)
Before we get our hands dirty, let's understand the basic principle. Wi-Fi Direct is like a private Wi-Fi network between your laptops. Instead of connecting to a router (like you usually do), the laptops talk directly to each other. It's a point-to-point connection, meaning a direct line of communication, rather than going through a central hub. Think of it as two people chatting without needing a phone company to connect them. Simple, right? Now, let's get started!
3. Windows Warriors: Setting Up Wi-Fi Direct on Your Windows Laptop
Windows makes this process incredibly straightforward. We'll walk you through it step-by-step.
- Step 1: Accessibility - Make sure both laptops are within reasonable Wi-Fi range of each other. Ideally, a few feet is perfect.
- Step 2: Finding the Hidden Gem - On the sending laptop (the one initiating the connection), go to Settings (The gear icon in the start menu).
- Step 3: Network & Internet Adventure - Click on "Network & Internet" on your Windows Laptop.
- Step 4: Mobile Hotspot's Call - Select "Mobile Hotspot". This is where the magic happens – it's the secret door to a direct connection.
- Step 5: Unleash The Hotspot - Turn "Share my internet connection from" to the Wi-Fi option that is currently connected. If there is no internet connection, configure "Share my internet connections from" to another option or Ethernet. Make sure that "Share over" is set to Wi-Fi.
- Step 6: Password Protection - Once activated you will be asked for WiFi security (WPA2-Personal is recommended) and Password, make a strong one, and remember it because you will need it.
- Step 7: Receiving The Signal - On the receiving laptop, go to the Wi-Fi settings (usually in the system tray, that little icon that looks like radio waves). Find the name of the hotspot you just created from your sending laptop.
- Step 8: Password Please - Enter the password you established in your "sending laptop" and connect.
Congratulations! You now have a direct connection!
4. Mac Mavericks Unite: Connecting Laptops via Wi-Fi on macOS
Fear not, Apple aficionados! The process on macOS is just as painless.
- Step 1: AirDrop Ready? - Make sure your laptops are close and that Wi-Fi and Bluetooth are enabled.
- Step 2: The Quest for Settings - Navigate to "System Preferences" (in the Apple menu, that little apple logo in the corner).
- Step 3: Hotspot Activation - Click "Internet Sharing."
- Step 4: Source Selection - From the "Share your connection from" dropdown, select the source of your internet (if you intend to share). If you do not, select the Wi-Fi.
- Step 5: Sharing Method - Under "To computers using," choose "Wi-Fi."
- Step 6: Wi-Fi Options - Click on "Wi-Fi Options…" and assign a network name and password. This is your private Wi-Fi network.
- Step 7: Share It! - Check the box next to "Internet Sharing" to start sharing your connection.
- Step 8: Receiving the signal - On your other Mac, go to Wi-Fi and select the network name you created in step 6. Enter the password, and voilà!
5. Troubleshooting Troubles: Common Pitfalls and Solutions
Sometimes, things don't go as smoothly as planned. Here's how to troubleshoot common issues:
- No Connection? - Double-check the Wi-Fi settings and that both laptops are within range.
- Password Problems? - Make sure you're entering the correct password. Remember, case matters!
- Firewall Frenzy? - Your firewall might be blocking the connection. Temporarily disable it (for testing purposes) or create an exception for the connection.
- Driver Dilemmas? - Ensure your Wi-Fi drivers are up-to-date. You can usually update them through your operating system's update center.
6. File Transfer Fiesta: Mastering the Art of Sharing
Now that you're connected, let's get to the good stuff: sharing files!
- Windows Wonders - You can use the "Share" button in File Explorer, set up a shared folder within your network settings, or utilize third-party file transfer applications (like Send Anywhere or WeTransfer).
- Mac Magic - Use AirDrop for the simplest file transfers. Simply drag and drop the file onto the other laptop's icon. Alternatively, you can use file-sharing (setup in System Preferences) or cloud storage services.
7. Screen Mirroring Secrets: Projecting Your Digital Canvas
Want to show off your presentation on a bigger screen or share your gaming exploits? Screen mirroring is your friend!
- Windows Wins - Use the "Connect" feature in the Action Center (swipe from the right edge of the screen). Select the other laptop and mirror away!
- Mac Masterstrokes - Use AirPlay to mirror your screen to another laptop. Look for the AirPlay icon in the menu bar.
8. Gaming Galaxies: Multiplayer Fun on a Private Network
Feeling competitive? Set up a private network for some multiplayer gaming! Both laptops need to be running the same game and connected to the private Wi-Fi network you created. This eliminates lag and provides a super-smooth gaming experience.
9. Bandwidth Bonanza: Sharing an Internet Connection (If You Dare!)
If one laptop has internet access and the other doesn't, you can share it. However, be aware that sharing your internet connection can slow down both laptops depending on your bandwidth.
- Windows Way - Follow the steps in Section 3.
- Mac Method - Follow the steps in Section 4.
10. Security Savvy: Protecting Your Private Network
While Wi-Fi Direct is generally secure, it's vital to protect your network.
- Strong Passwords - Always use a strong, complex password.
- Encryption - Ensure your Wi-Fi connection uses encryption (WPA2-Personal is recommended).
- Network Name Secrecy - Consider changing the network name to something less obvious.
- Limited Sharing - Only share files and folders required.
11. The Speed Demon: How Fast is Laptop-to-Laptop Wi-Fi?
The speeds you experience depend on various factors, including your Wi-Fi adapter and the distance between the laptops. However, you can expect much faster transfer speeds compared to older technologies like USB 2.0, and often, even faster than an Ethernet connection.
12. Beyond the Basics: Advanced Uses for Laptop-to-Laptop Wi-Fi
Think outside the box! Wi-Fi Direct can be used in unexpected ways:
- Remote Desktop Access - Control one laptop from the other.
- Printer Sharing - Share a printer connected to one laptop with the other (if the printer supports it).
- Media Streaming - Stream movies or music from one laptop to another.
13. When to Use Laptop-to-Laptop Wi-Fi and When Not To
This method is perfect for:
- File transfers when you need to transfer big files.
- Screen mirroring for presentations or demonstrations.
- Creating a private network for online gaming.
- Quick, secure file sharing.
- Sharing an internet connection in a pinch.
It might not be the best choice for:
- Situations requiring an extremely consistent
How to use a Laptop a Second Monitor
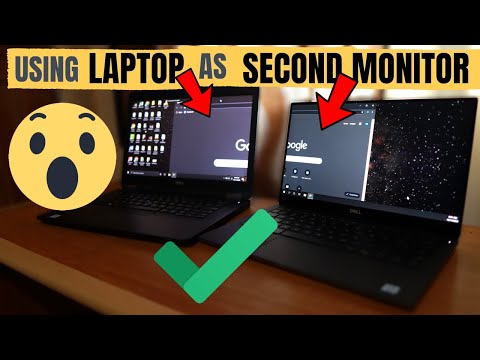
By Torogi Pro How to use a Laptop a Second Monitor by Torogi Pro
Windows 1110 - How to create a local network and share files between computers over the network

By ipMalik Windows 1110 - How to create a local network and share files between computers over the network by ipMalik
How to transfer files from PC to PC using WiFi Windows 10 7 8

By IT Magics How to transfer files from PC to PC using WiFi Windows 10 7 8 by IT Magics

Title: How to Create Wifi Hotspot in Windows 10 Tutorial
Channel: MDTechVideos
How to Create Wifi Hotspot in Windows 10 Tutorial by MDTechVideos
Change Wifi Settings
Laptop to Laptop WiFi: The SHOCKINGLY Easy Trick!
Connecting two laptops wirelessly, directly, without the need for a router or internet connection, might seem like something out of a tech thriller. However, the reality is far simpler than you imagine. We are here to unveil a straightforward, incredibly easy method for establishing a direct WiFi connection between your laptops, allowing for file transfers, screen sharing, and even basic gaming, all without the complexities of a standard network infrastructure. This is the "SHOCKINGLY Easy Trick" you've been waiting for.
Understanding the Core Concept: Ad-hoc Networks
The foundation of this direct connection lies in the often-overlooked functionality of ad-hoc networks. Think of an ad-hoc network as a temporary, peer-to-peer WiFi setup. Instead of connecting to the internet via a router, your laptops will communicate directly with each other, creating a mini-network on the fly. This eliminates the need for an intermediary and simplifies the entire process.
Setting Up Your Ad-hoc Network: Windows Edition
Let's dive into precisely how to set this up on a Windows operating system. We will detail step-by-step instructions to ensure a seamless and user-friendly experience.
Accessing Network and Sharing Center: Begin by navigating to your Windows settings. The easiest way to do this is by right-clicking the Start button and selecting "Settings." From within Settings, click on "Network & Internet." Then, click on "Network and Sharing Center."
Creating a New Connection or Network: Inside the Network and Sharing Center, you'll find the option to set up a new connection or network. Select this option.
Manually Set Up a Wireless Network: From the list of connection options, choose "Manually connect to a wireless network" and click "Next."
Network Configuration: Provide the essential information for your ad-hoc network. This includes the following:
- Network Name: Choose a unique name for your network. Think of something memorable, for instance, "LaptopLink" or "MyPrivateNetwork".
- Security Type: Select "WPA2-Personal" for excellent security for your network.
- Security Key: Create a strong passphrase. This password is what other devices will use to connect. This should be a combination of upper and lowercase letters, numbers, and symbols.
- Start the Network: Check the "Start this connection automatically" box.
Network Creation Confirmation: Windows will confirm that your network has been successfully created. At this point, the network is active but awaiting connections.
Connecting the Second Laptop: Windows Method
Now, let's configure the second laptop to join the newly created ad-hoc network.
Locate Available Networks: On the second laptop, click the WiFi icon in the system tray (usually in the bottom right corner of the screen). This will display a list of available wireless networks.
Select Your Ad-hoc Network: Find the network name you created on the first laptop. Select it and click "Connect."
Enter the Security Key: Enter the security key (password) you established earlier. Click "Next."
Network Connection Confirmation: Windows will attempt to connect.
Network Type Configuration (Important): After the connection is established, Windows might ask if you want to allow other devices to connect to this PC. Choose the appropriate setting based on your needs: "Yes" or "No." This determines the network profile.
Check the Connection: Verify that both laptops display the same network name and indicate a successful connection. The WiFi icon on both laptops should reflect the connection status. This often indicated by a full signal bar.
Optimizing Network Settings for File Sharing
Now that the connection is established, let's prepare the laptops for the primary reason for this exercise: file transfer and sharing.
Enable File and Printer Sharing: On both laptops, go back to the Network and Sharing Center. Click on "Change advanced sharing settings."
Turn on Network Discovery: Make sure "Turn on network discovery" is enabled. This allows the laptops to see each other within the network.
Turn on File and Printer Sharing: Under "Private" and possibly "Guest or Public" sections, enable "Turn on file and printer sharing."
Optional: Password Protection: You can adjust the password-protected sharing setting based on your requirements. If you want a fast and simple transfer and are comfortable with a small risk in a closed network, you can turn off password-protected sharing. However, for security, it is best to leave password protection on and use a strong password for the user accounts on your laptops.
Save and Apply: Save these settings to apply them.
Setting up Shared Folders:
- Select a Folder: Choose a folder on either laptop you want to share.
- Right Click and Properties: Right-click the folder and select "Properties."
- Click the Sharing Tab: Navigate to the "Sharing" tab.
- Advanced Sharing: Click the "Advanced Sharing" button.
- Share this Folder: Check the box that says, "Share this folder."
- Permissions: Click the "Permissions" button. Adjust the permissions to allow the appropriate users or groups to read and write to the shared folder. This is essential for successful file transfers.
- Apply and Close: Apply the changes and close the dialog boxes.
Accessing Shared Files: The Transfer Process
With sharing enabled, accessing files from the other laptop is straightforward.
Open File Explorer: Open File Explorer on either laptop.
Network Location: In the left-hand navigation pane, click on "Network" (or "This PC" then "Network").
Locate the Other Laptop: The other laptop should appear in the Network list. If it does not show up, wait a moment or refresh (press F5).
Access Shared Folders: Double-click the other laptop's icon to view its shared folders.
File Transfer: Copy files and folders from the shared folders as you would normally. Copy and paste the files between your laptops.
Laptop to Laptop WiFi: The Mac OS X Approach
While the Windows methods take up the majority, we will also discuss the Apple OS X approach, which is quite comparable.
Open System Preferences: Click the Apple menu in the top-left corner and select "System Preferences."
Open Sharing: Click on "Sharing."
Select Internet Sharing: In the left pane, select "Internet Sharing."
Share Your Connection From: From the "Share your connection from:" drop-down menu, choose your WiFi adapter.
To Computers Using: Check the box next to "Wi-Fi." (If you are using an Ethernet connection, select "Ethernet" instead.)
Wi-Fi Options: Click "Wi-Fi Options…" to configure your ad-hoc network.
Name and Security:
- Network Name: Enter a name for your network.
- Channel: Select a channel. You don't need to change this unless there are issues with interference.
- Security: Choose WPA2 Personal.
- Password: Enter a strong password. Confirm the password.
- Enable: Click "OK" and enable the "Internet Sharing" box.
Connecting the Second Laptop: Mac OS X
Now, move to your second laptop.
Click the WiFi Icon: Click the WiFi icon in the menu bar.
Select Your Network Name: Choose the network name you created.
Enter the Password: Enter the password, and connect. Your two laptops are now connected via WiFi.
File Sharing Setup: on both laptops, use the Finder to open the "Finder Preferences"
Select Sidebar: Select the Sidebar Tab and ensure the "Connected Servers" is enabled.
Enable File Sharing:
- Open System Preferences: Open System Preferences.
- Click Sharing: Click on the "Sharing" preference.
- File Sharing: Select "File Sharing."
- Add Folder: In the "Shared Folders" section, click the “+” button and choose the folder you wish to share.
- Permissions: Set permissions appropriately for users (Read Only, Read & Write, etc.).
Access Shared Files Access the shared folders from the other laptop. Open Finder, and make sure the other laptop is listed under the "Shared" section. Go to the "Go" menu at the top of the Finder, and select "Connect to Server…" to connect with the other one
Troubleshooting Common Issues
Sometimes, you can face some issues. Here's how to troubleshoot them.
Connection Problems: If you are unable to connect, double-check the network name and security key. Ensure that the WiFi adapters are enabled on both laptops. Consider temporarily turning off the firewall on the second laptop during initial setup.
File Sharing Issues: If you cannot see shared folders, confirm that file and printer sharing is enabled. Verify that the network discovery settings
