laptop is not detecting wifi hotspot

Title: How to fix windows 10 Hotspot not obtaining ip address Hotspot not sharing internet
Channel: The Guy's Computer
How to fix windows 10 Hotspot not obtaining ip address Hotspot not sharing internet by The Guy's Computer
laptop not detecting wifi hotspot, laptop not connecting to wifi hotspot, laptop not working wifi hotspot, laptop cannot detect wifi hotspot, why is my laptop not detecting wifi or hotspot, laptop does not recognize hotspot, can't find wifi in my laptop
Laptop WiFi Hotspot MIA? This FIX Works Every Time!
Laptop WiFi Hotspot Hiding? Conquer the Connection Chaos!
Have you ever felt the digital shackles of a missing WiFi hotspot? That frustrating feeling when your laptop refuses to share its internet love. You're facing a common tech woe, but breathe easy! This isn't a dead end. This guide reveals the secrets to reviving your laptop’s hotspot functionality. Get ready to unleash your device's full potential.
The Mystery of the Missing Hotspot Unveiled
Think of your laptop's hotspot feature as a shy friend. Sometimes, it just needs a little nudge. A missing hotspot can result from several potential culprits. However, don't get discouraged. These issues are typically easy to resolve. We’ll troubleshoot the most common culprits. We are going to bring your hotspot back to life.
Network Adapter Nirvana: Your First Stop
Your journey begins here. Consider your network adapter the heartbeat of your hotspot. It's responsible for broadcasting the WiFi signal. To ensure it’s functioning optimally, first check its status.
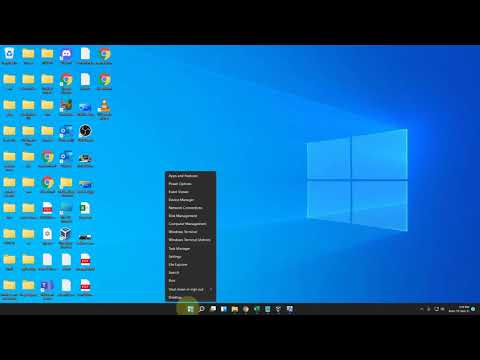
- Step 1: Dive into Device Manager. Hit the Windows key, and type "Device Manager." Click on the app.
- Step 2: Network Adapters Await. Expand the “Network adapters” section. It reveals all the network cards on your system.
- Step 3: Identify the WiFi Card. Your WiFi card is usually labeled with words like "Wireless" or "WiFi."
- Step 4: Check for Hiccups. Look for any yellow exclamation marks or red crosses. These indicate a problem.
- Step 5: The Repair. Right-click on the WiFi adapter. Then select "Enable device." If already enabled, select "Disable device" followed by "Enable device" again. This resets the connection.
This simple process resolves most adapter-related issues. But, if the problem persists, keep reading!
Software Stumbles: Updates and Compatibility
Software conflicts can also affect your hotspot. Outdated drivers are often the primary problem here. Your network adapter drivers need an update.
- Step 1: Locate the Driver. Go back to Device Manager. Right-click your WiFi adapter. Select "Update driver."
- Step 2: Search Automatically. Choose “Search automatically for drivers.” Windows will attempt to find the latest drivers online.
- Step 3: Embrace the Manual Method. If the automatic search fails, head to the manufacturer’s website. Search for the device.
- Step 4: Download and Install. Download the latest driver. Follow the install instructions.
Updating drivers resolves compatibility issues. However, sometimes an uninstall/reinstall is needed. This fresh start often removes hidden software glitches.
The Sharing Saga: Enabling Internet Connection Sharing
Your laptop shares an internet connection. Enabling this function is critical. You must allow the WiFi hotspot to function.
- Step 1: Access Network Connections: Press the Windows key + R keys. Then type "ncpa.cpl" and hit Enter.
- Step 2: Identify the Internet Source: Find the network connection you are using to get internet access, such as Ethernet or WiFi.
- Step 3: Properties, Please: Right-click on that connection. Select "Properties."
- Step 4: The Sharing Tab: Click the "Sharing" tab. Check the boxes. Allow other network users to connect through this computer's internet connection. Then choose the Wi-Fi adapter.
- Step 5: Apply the Changes: Finally, click "OK." Restart your computer.
This action ensures your internet is shared. It allows the creation of a working hotspot.
Firewall Fiascos: Letting the Signal Through
Sometimes, your firewall acts as a digital gatekeeper. It blocks your hotspot signal. You must adjust the firewall settings.
- Step 1: Open Windows Security: Type "Windows Security" in the search bar. Launch the app.
- Step 2: Firewall & Network Protection: Click on "Firewall & network protection."
- Step 3: Allow an App: Select “Allow an app through firewall.”
- Step 4: Find and Allow: Scroll through the list. Find “Windows Host Network Service." Make sure it is checked for both Private and Public networks. If it isn't, check them!
- Step 5: Apply and Test: Click "OK." Test your hotspot.
Firewall adjustments can resolve access issues. It’s essential to ensure the hotspot is allowed through the firewall.
Power Plan Predicaments: Optimization Overload
Power settings can surprisingly impact your hotspot. Sometimes, your laptop conserves power. It may disable the WiFi adapter.
- Step 1: Access Power Options: Type "Power & sleep settings" in the search bar. Open the settings.
- Step 2: Additional Power Settings: Select "Additional power settings."
- Step 3: Choose Your Plan: Select the power plan you are using. Click "Change plan settings."
- Step 4: Advanced Settings: Select "Change advanced power settings."
- Step 5: Wireless Adapter Settings: Expand "Wireless Adapter Settings." Set the “Plugged in” to Maximum Performance if possible. Also, ensure the "On battery" setting is also at maximum performance.
- Step 6: Save and Restart: Save your settings. Restart your laptop.
Adjusting power settings often resolves power-saving related problems. This will keep your WiFi adapter active!
Troubleshooting Triumph: A Final Word
If the hotspot persists, explore these other avenues. Test your hotspot on other devices. This isolates the issue. Also, consider restarting your router. Resetting your network is a good practice.
Wrapping it Up: You've Got This!
Confronting a missing hotspot is frustrating. However, it's often a solvable problem. By following these steps, you regain control of your connection. It's time to unleash your laptop's WiFi ability. Keep calm and connect on! You will conquer the connection chaos. Ultimately, you've got this!
Laptop Wifi Connected, But No Internet? FIX THIS NOW!Laptop WiFi Hotspot MIA? This FIX Works Every Time!
Hey everyone, how’s it going? Ever been in a situation where you desperately need a Wi-Fi hotspot, maybe you're at a conference, stranded in an airport, or just dealing with terrible home Wi-Fi, and your laptop's hotspot feature decides to play hide-and-seek? Annoying, right? We've all been there! I, for one, practically live on my laptop – it's my communication hub, my entertainment portal, and my lifeline to the outside world. When that hotspot disappears, it's like the internet gods are personally trying to sabotage my productivity (and my Netflix binge!). But fear not, because we’ve found a solution that works every single time. Today, we're cracking the code on how to bring that elusive laptop Wi-Fi hotspot back from the dead.
1. The Mystery of the Missing Hotspot: Why Did It Vanish?
Before we dive into the fix, let's briefly explore the “why” behind the “where’s my hotspot?”. Think of your laptop's Wi-Fi hotspot as a little digital lighthouse, broadcasting your internet connection to the world. Sometimes, that lighthouse gets a bit… temperamental. There's a whole host of reasons why your laptop’s hotspot might go MIA. It could be a simple software glitch, a driver issue, a conflict with other network settings, or even a setting that’s been accidentally toggled off. Think of it like a tangled ball of yarn – each strand represents a potential culprit. Untangling that ball is the key to restoring your hotspot.
2. Quick Checks Before the Deep Dive: The Obvious Suspects
Before we get into the nitty-gritty, let's run through some quick checks. These are like the basic troubleshooting steps you'd take before calling the IT guy (or, in this case, before we consult our digital guide).
- Is Wi-Fi Turned On? Seriously, this one gets me sometimes! Make sure your Wi-Fi adapter is actually enabled. It's the equivalent of making sure your car is turned on before you try to drive it. Check the system tray (that little area in the bottom right corner of your screen) for the Wi-Fi icon.
- Airplane Mode? Double-check that Airplane mode isn't accidentally turned on. It's the digital equivalent of a "Do Not Disturb" sign for your Wi-Fi.
- Restart Your Laptop: This is the age-old solution, the digital equivalent of a "reset" button. Sometimes, a simple reboot is all it takes to shake things loose and get your hotspot working again.
- Check Your Internet Connection: Make sure you have an active internet connection to begin with! No internet, no hotspot. Simple as that.
If the quick checks don’t fix the problem, don’t worry, we're just getting started.
3. Unleashing the Power of the Command Prompt (Don’t Panic!)
Now, let's get a bit more technical, but don’t worry; we’ll walk through it step-by-step. Think of the Command Prompt as your laptop's secret toolbox. We're going to use it to reset your network settings and, hopefully, kickstart that hotspot.
Here's how:
Open Command Prompt as Administrator: Type "cmd" in the Windows search bar, right-click on "Command Prompt," and select "Run as administrator." This is crucial! You need administrator privileges to make these changes.
Type and Execute the Commands: Type each of the following commands exactly as they appear, pressing Enter after each one:
netsh wlan stop hostednetwork(This stops any currently running hotspot.)netsh wlan set hostednetwork mode=allow ssid="YourHotspotName" key="YourPassword"(Replace"YourHotspotName"with the name you want your hotspot to have, and"YourPassword"with a secure password. Choose something you can remember!)netsh wlan start hostednetwork(This starts your hotspot.)
Share Your Internet Connection: Go to your Network Connections settings (search for "View network connections" in the Windows search bar), right-click on your active internet connection (e.g., your Wi-Fi connection or Ethernet connection), select "Properties," go to the "Sharing" tab, and check the box that says "Allow other network users to connect through this computer's Internet connection." You might have to select the name of your new hosted network in the "Home networking connection" dropdown.
There you have it! With a little command-line magic, you've hopefully revived your laptop's Wi-Fi hotspot. It’s like performing digital CPR on your internet connection.
4. Driver Drama: The Importance of Updated Drivers
Drivers are the unsung heroes of your computer's hardware. They act as the translators, allowing your operating system to communicate with your Wi-Fi adapter. Outdated or corrupted drivers can be a major culprit behind hotspot woes. Think of it as your Wi-Fi adapter speaking a different language than your computer.
- Check for Driver Updates: Right-click the Start menu and select "Device Manager." Expand "Network adapters." Find your Wi-Fi adapter (it’ll likely have "Wireless" or "Wi-Fi" in the name). Right-click it and select "Update driver." Let Windows search for the latest driver online.
- Manually Update Drivers (If Necessary): If Windows can't find an update, you might need to head to your laptop manufacturer's website (e.g., Dell, HP, Lenovo) and download the latest driver for your Wi-Fi adapter. You can also search for the manufacturer of your Wi-Fi adapter itself (e.g., Intel, Broadcom).
Updating drivers is often the equivalent of giving your Wi-Fi adapter a tune-up.
5. Power Saving Paradox: Disabling Power Management
Your laptop, in an effort to save battery life, might be shutting down your Wi-Fi adapter. This is like putting your lighthouse into sleep mode.
- Disable Power Saving: In Device Manager (see step 4), right-click your Wi-Fi adapter, select "Properties," go to the "Power Management" tab, and uncheck the box that says "Allow the computer to turn off this device to save power."
This step ensures your Wi-Fi adapter remains active, even when your laptop seems idle.
6. Firewall Frenzy: Allowing Hotspot Access
Your firewall, designed to protect your computer, might be blocking the hotspot from functioning properly. It's like a security guard that's a little too eager to keep people out.
- Check Firewall Settings: Search for "Windows Defender Firewall" in the Windows search bar. Click on "Allow an app or feature through Windows Defender Firewall." Scroll through the list and make sure "Hosted Network" is enabled for both "Private" and "Public" networks. If it's not there, you might need to add it manually.
By adjusting your firewall settings, you’re essentially giving your hotspot the green light to operate freely.
7. The Troubleshooter's Toolkit: Utilizing Windows Troubleshooters
Windows includes built-in troubleshooters designed to diagnose and fix common network problems. They're like having a virtual tech support guru at your fingertips.
- Run the Network Troubleshooter: Go to "Settings" > "Network & Internet" > "Status" and click "Network troubleshooter." Follow the on-screen prompts.
The troubleshooter can often identify and fix the problem with minimal effort on your part.
8. Network Reset: The Nuclear Option (Use with Caution!)
As a last resort, you can try resetting your network settings. This process essentially restores your network settings to their default values. It's the digital equivalent of a factory reset for your network. Important: This will erase all your saved Wi-Fi passwords, so make sure you have them handy before proceeding!
- Reset Network Settings: Go to "Settings" > "Network & Internet" > "Status" and click "Network reset." Click "Reset now" and follow the prompts.
This is a drastic measure, but it can often get your hotspot up and running again.
9. Check Your Hardware: The Adapter's Agony
Although less common, a faulty Wi-Fi adapter can also be responsible for your hotspot woes. A bit like a broken wire in the network.
- Inspect the Adapter: While difficult for the average user, sometimes a physical check of the Wi-Fi adapter (usually located under the laptop) may reveal signs of damage.
- Consider External Adapters: If your internal adapter is permanently broken, an external USB Wi-Fi adapter can act as a reliable alternative.
10. Understanding SSID and Password: Setting the Stage
The SSID (Service Set Identifier) is the name of your Wi-Fi hotspot. The password is the key to unlocking it. Make sure you have a memorable and secure password.
- Create a Unique SSID: Give your hotspot a unique name to make it easily identifiable.
- Choose a Strong Password: Use a combination of upper and lowercase letters, numbers, and symbols. Don’t get too complicated with your password.
11. Channel Chaos: Avoiding
Windows 7 WiFi Nightmare? Solved! (Easy Laptop Connection)Mobile hotspot not working in Windows 11 Fix
By The Geek Page Mobile hotspot not working in Windows 11 Fix by The Geek Page
All But My WiFi Network Not Appeared Solved 2020

By Simplify All But My WiFi Network Not Appeared Solved 2020 by Simplify
Fix WiFi Not Showing in Settings On Windows 10 Fix Missing WiFi 2025

By Sandeep Singh Fix WiFi Not Showing in Settings On Windows 10 Fix Missing WiFi 2025 by Sandeep Singh

Title: We Can't setup Mobile Hotspot Windows 10 SOLVED
Channel: Nam Anh Cap
We Can't setup Mobile Hotspot Windows 10 SOLVED by Nam Anh Cap
My Laptop Work
Laptop WiFi Hotspot MIA? This FIX Works Every Time!
Is your laptop refusing to cooperate, stubbornly denying your attempts to share its internet connection via a WiFi hotspot? The frustration is palpable, isn't it? You envision a seamless connection, allowing you to extend your internet reach to other devices – smartphones, tablets, perhaps even a friend's laptop. Instead, you're met with a glaring absence: your laptop's WiFi hotspot function is MIA. But fear not! We've all been there. We've delved deep into the labyrinthine settings, troubleshooting with a vengeance, and wrestling with cryptic error messages. We've compiled the most effective, guaranteed solutions. This isn't just a collection of generic fixes; this is a comprehensive guide, meticulously crafted to ensure your laptop's WiFi hotspot functions flawlessly, every single time. Let's dive in and reclaim your connectivity.
Understanding the Core of the Problem: Why Your Hotspot Goes AWOL
Before we implement the solutions, let's briefly consider the underlying reasons why your laptop's WiFi hotspot might be experiencing difficulties. The problems can stem from many things. From software glitches and driver conflicts to power settings and network configuration issues. In many cases, the culprit is a seemingly insignificant setting, a missing checkbox, or a corrupted driver that silently sabotages your hotspot endeavors. Pinpointing the specific cause can be a complex undertaking, but the good news is that our comprehensive approach will address the most common culprits, ensuring that your hotspot springs back to life.
Solution 1: The Power of Restart – A Simple Yet Powerful Reset
The simplest solution is often the most effective, and is a fundamental troubleshooting step. A simple restart can eliminate many transient software conflicts and clear out temporary files that might be interfering with the WiFi hotspot functionality.
- Perform a Full System Reboot: Do not settle for a simple "sleep mode". Select "Restart" from your operating system's power menu. This ensures a clean slate, allowing the system to reload all necessary drivers and services.
- Allow Time for Initialization: Once the system boots up again, allow a minute or two for all services to initialize fully, including the network adapters and related processes.
- Test Your Hotspot: After the system has settled, attempt to activate your WiFi hotspot again.
Solution 2: Correcting Network Adapter Settings: Your Gateway to Connection
Your network adapter, the unsung hero of your laptop's connectivity, plays a crucial role in enabling the WiFi hotspot. Sometimes, the adapter's settings are incorrectly configured, preventing your machine from creating or sharing a hotspot.
- Access Network Adapter Settings: Open the "Network Connections" window (search for "network connections" in the Windows search bar). You may also find this in the Control Panel by searching "Network and Sharing Center."
- Identify Your Wireless Adapter: Locate your active wireless network adapter. There may be several adapters listed, but you want the one currently connected to the internet. You will typically see the "WiFi" adapter option.
- Right-Click and Select Properties: Right-click on the wireless adapter and choose "Properties."
- Navigate to the Sharing Tab: In the Properties window, click the "Sharing" tab.
- Enable Internet Connection Sharing: Check the box that reads "Allow other network users to connect through this computer's Internet connection." This tells your computer to share the internet.
- Select the Home Network Connection: In the "Home network connection" dropdown, select the network the hotspot will use so other devices can connect. This is typically "Wi-Fi" or "Network adapter."
- Restart your Laptop: Save the settings and restart your laptop and try enabling the hotspot again.
Solution 3: Driver Updates: The Lifeline of Hardware Compatibility
Outdated, corrupted, or incompatible drivers are a common cause of WiFi hotspot malfunctions. Drivers act as the vital communication link between your software and your hardware.
- Access Device Manager: Open "Device Manager" (search for it in the Windows search bar).
- Expand Network Adapters: In Device Manager, expand the "Network adapters" section.
- Locate Your Wireless Adapter: Identify your wireless network adapter (e.g., "Intel Wireless-AC 9560").
- Update the Driver: Right-click on your wireless adapter and select "Update driver." Choose "Search automatically for drivers." Windows will search for and install the latest available driver. If the automatic search fails, you will want to manually update your driver.
- Manual Driver Updates: If automatic driver updates don't work, visit the manufacturer's website for your laptop or wireless adapter. Download the latest driver for your operating system.
- Repeat for Other Network Adapters: Repeat the driver update process for any other network adapters listed in Device Manager. This may include wired (Ethernet) adapters or Bluetooth adapters.
Solution 4: Troubleshooting Your Windows Firewall: Your Security Gateway
The Windows Firewall, designed to protect your system from unwanted access, can sometimes interfere with the WiFi hotspot. It could be mistakenly blocking the necessary network traffic.
- Access Windows Defender Firewall with Advanced Security: Search for "Windows Defender Firewall with Advanced Security" in the Windows search bar.
- Check Inbound Rules: In the left navigation pane, click "Inbound Rules."
- Look for Hotspot-Related Rules: Review the list of inbound rules for any rules that might be related to your WiFi hotspot. These might be named using the Wi-Fi hotspot name or referencing network sharing.
- Create a New Rule (If Necessary): If no relevant rules are found, create a new rule allowing traffic for the required software (e.g., "Microsoft Hosted Network Virtual Adapter").
- Check Outbound Rules: Also, review the outbound rules to make sure they are not blocking any necessary hotspot functions.
- Restart your Laptop: After any changes, restart your laptop and then test your hotspot.
Solution 5: Examine Your Power Settings: Optimizing Battery Life and Performance
Power settings can sometimes inadvertently disable the WiFi adapter to conserve battery life. We must find out whether these settings can disable your Wi-Fi hotspot. We want the hotspot to work optimally.
- Access Power Options: In the Windows search bar, type "Power options" or find it in "Control Panel."
- Choose or Create a Power Plan: Select your preferred power plan. You can also create a new plan.
- Change Advanced Power Settings: Click "Change plan settings" next to the power plan. Then select "Change advanced power settings."
- Wireless Adapter Settings: Expand "Wireless Adapter Settings," then "Power Saving Mode."
- Set "On battery" and "Plugged in" to "Maximum Performance": This configures the Wi-Fi adapter to have the highest performance.
- Apply Changes: Save your changes and reboot your laptop. Attempt to activate the WiFi hotspot.
Solution 6: Network Reset: A Clean Slate for Your Network Configuration
Sometimes, the underlying problem is a corrupted network configuration. A network reset will revert network settings to their default configuration.
- Access Network Settings: Go to "Settings" (press the Windows key + I).
- Navigate to Network & internet: Click on "Network & internet."
- Advanced Network Settings: Scroll down and select "Advanced network settings."
- Network Reset: On the right panel, select "Network reset."
- Reset Now: Click "Reset now" and confirm your action.
- Restart and Reconfigure: Windows will restart your computer. You may need to re-enter your WiFi password after the restart.
Solution 7: Check Your WiFi Security Settings: Keeping Things Secure
The WiFi hotspot uses a password to protect your hotspot. It also uses the same encryption as your home WiFi.
- Access Mobile Hotspot Settings: Go to "Settings" (Windows key + I).
- Navigate to Network & internet: Click on "Network & internet."
- Mobile Hotspot: Select "Mobile hotspot."
- Edit Settings: Click "Edit" to modify your hotspot's network name and password.
- Encryption Type: Make sure that you're using the appropriate encryption type. WPA2 Personal is a commonly used (and secure) option.
- Review and Save: Review the settings and save the settings.
Solution 8: Identify and Eliminate Software Conflicts: Removing Potential Culprits
Certain software applications, including VPNs, network monitoring tools, and security software, can sometimes interfere with the WiFi hotspot functionality; we must identify what software conflicts are occurring.
- Identify Suspect Software: Consider which software you've installed or updated recently. VPNs, firewall applications, and any networking tools are potential culprits.
- Disable or Uninstall: Temporarily disable or uninstall the suspected software. Reboot your laptop after making changes.
- Test Your Hotspot: After disabling or removing the software, try to activate your WiFi hotspot again.
- If the Hotspot Works: If the hotspot works after disabling a program, you've found your culprit. Reinstall the software, and change the settings to make it compatible with the hotspot.
