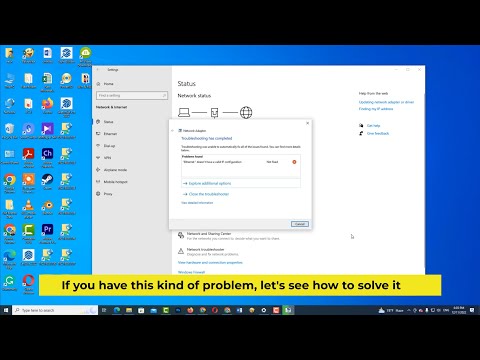
laptop says wifi has no valid ip configuration
Title: Fix ethernet doesn't have a valid ip configuration issue in windows 10 Windows 11
Channel: IT Magics
Fix ethernet doesn't have a valid ip configuration issue in windows 10 Windows 11 by IT Magics
laptop says wifi doesn't have a valid ip configuration, laptop wifi doesn't have a valid ip configuration
Laptop WiFi Nightmare? FIX Your IP Configuration NOW!
Laptop WiFi Woes? Conquer Your Connection Concerns Today!
Is your laptop waging war on your patience? Is the WiFi consistently failing you? Then, you're in the right place! It's time to diagnose and fix the problem. We’ll explore the mysteries of your IP configuration. Consequently, you can achieve seamless internet access.
The Invisible Enemy: Unmasking IP Configuration Issues
First, let’s understand the hidden culprit. Your laptop uses an IP address, which is its digital home address. It is how it finds its way on the internet. Think of it as your laptop's postal code. Without the correct address, your laptop is lost. It can't send or receive data. Therefore, it fails to connect. Issues with IP configurations are a common source of WiFi headaches.
Decoding the DHCP Dilemma: Dynamic vs. Static IP
Your router usually handles the IP address assignment. It uses a system called DHCP (Dynamic Host Configuration Protocol). It automatically assigns your laptop an IP address. This works well most of the time. However, problems can happen. Sometimes, the DHCP server isn't cooperating. Maybe your laptop gets a bad IP address. In that case, you won’t be connected.
Alternatively, you might have a static IP configuration. If your laptop has a fixed IP address, it won't change. This setup can be beneficial for specific network tasks. However, it can also introduce problems. If the static IP conflicts with another device, you'll lose connection. Also, if the static IP is incorrect, you will be disconnected.
Troubleshooting Tactics: Your WiFi Rescue Plan
Don't panic! There are simple solutions. Let's arm ourselves with the tools to fix these issues.
Step 1: The Reboot Ritual
Start with the basics. Power off your laptop. Turn off your router and modem, too. Unplug them from the power source. Wait for a full minute. Then, plug them back in. Turn on your modem, then the router, and finally your laptop. This simple reset often works wonders. Consequently, this clears temporary glitches.
Step 2: Renewing Your IP Address
If a reboot doesn't work, try renewing your IP address. This forces your laptop to request a new one from the router.
- Windows: Press the Windows key, type "cmd," and press Enter. In the Command Prompt window, type
ipconfig /releaseand press Enter. Then, typeipconfig /renewand press Enter. Restart your computer. - macOS: Open System Preferences. Click on "Network." Select your Wi-Fi connection. Click "Advanced." Then, click "Renew DHCP Lease." Apply the changes.
Step 3: Examining Your IP Settings
Your IP configuration settings may be wrong. Reviewing these is critical. Check the settings. They need to be correct to connect.
- Windows: Right-click the network icon in the system tray. Then, click "Open Network & Internet settings". Click “Change adapter options”. Right-click your Wi-Fi adapter. Select "Properties." Double-click "Internet Protocol Version 4 (TCP/IPv4)." Ensure "Obtain an IP address automatically" is selected. Also, ensure "Obtain DNS server address automatically" is selected.
- macOS: Open System Preferences. Click "Network." Select your Wi-Fi connection. Click "Advanced." Click the "TCP/IP" tab. The configuration mode should be set to "Using DHCP” or "Configure IPv4: Using DHCP."
Step 4: The DNS Detective: Solving Domain Name System Problems
Sometimes, the problem lies with your DNS servers. They translate website names into IP addresses. If these servers are misconfigured, you can't browse. Therefore, you need to fix it.
- Try a different DNS server: In your IP settings, manually set a public DNS server. Popular choices include Google DNS (8.8.8.8 and 8.8.4.4) or Cloudflare DNS (1.1.1.1 and 1.0.0.1). This frequently resolves connectivity issues.
Step 5: Firewall Follies: Checking for Blockages
Your firewall might be blocking your laptop's internet access. Therefore, you need to check it. Ensure your firewall isn't inadvertently blocking your Wi-Fi connection.
- Windows: Type "firewall" in the search bar. Open "Windows Defender Firewall." Check for any rules blocking your network adapter. If you find anything, temporarily disable it.
Step 6: Driver Diaries: Updating Network Adapters
Old or corrupted network drivers can be a cause. Keeping your drivers up to date will ensure smooth operation.
- Windows: Press the Windows key and "X." Select "Device Manager." Expand "Network adapters." Right-click your Wi-Fi adapter. Click "Update driver."
Advanced Tactics: When Basic Fixes Fail
These steps are for more complex situations. They can help to pinpoint other root causes.
Checking Your Router's Settings: Your router might have problems. It could be blocking your laptop. Access your router's configuration page. You can often reach it by typing your router's IP address into your web browser. Therefore, you have access. Check the DHCP settings. Make sure it's assigning IP addresses correctly. Ensure your laptop isn’t blocked via MAC address filtering.
Network Reset: This resets your network settings to their default configuration. It can resolve persistent issues. Consider this if other solutions don't work.
When to Call the Experts:
If these steps still don't work, don't despair. You might need help from a professional. Network issues can be complex. Therefore, it's okay to seek expert advice. Contact your internet service provider. They can offer support.
Conclusion: Reclaiming Your Online Realm
Laptop WiFi problems don't need to be a constant struggle. By understanding IP configurations and following these troubleshooting steps, you can regain control. You now have the tools needed. Therefore, you can banish those connection frustrations. Enjoy a smoother, more reliable online experience.
Laptop WiFi Card: Does YOUR PC Need One? (Shocking Truth!)Laptop WiFi Nightmare? FIX Your IP Configuration NOW!
Alright, fellow digital nomads, frustrated students, and anyone else who's ever flung their laptop across the room in a fit of WiFi rage – let's talk. We’ve all been there. That dreaded moment when your laptop decides to go silent, refusing to acknowledge the existence of the internet, even when you're practically hugging the router. Is your laptop WiFi giving you the silent treatment? Don't worry; you're not alone. It's a common struggle, a modern-day plague, and often, the culprit lies in the murky depths of your IP configuration. Luckily, fixing it is usually easier than you think. Think of it like this: your IP configuration is the postal address for your laptop. If it's wrong, the internet mailman (the connection) can't deliver your packages (websites, emails, everything). Let's get that mailman back on track, shall we?
1. The WiFi Woes: Understanding the Root of the Problem
Before we dive into solutions, let's diagnose the symptoms. What does the WiFi nightmare look like for you? Are you constantly getting "no internet access" messages? Does your connection drop out randomly? Or are you connecting, but everything's excruciatingly slow? These symptoms often point to IP configuration issues, DNS glitches, or other network-related gremlins. We will focus on IP configuration.
2. Demystifying IP Addresses: Your Laptop’s Digital ID
Okay, deep breath. Let's not let the jargon scare us. An IP address is simply a unique numerical label assigned to every device connected to a network. It's how your laptop identifies itself and communicates with other devices online. Think of it as your online home address. There are two main types: static and dynamic.
3. Static vs. Dynamic: The IP Address Showdown
- Dynamic IP Addresses: These are assigned automatically by your router and are like renting an apartment; they can change! This is the default setting for most home networks. The magic happens thanks to DHCP (Dynamic Host Configuration Protocol).
- Static IP Addresses: These are fixed and permanent, like owning your home. You manually assign them, giving you more control. This is handy if you're setting up a server or trying to troubleshoot persistent connectivity issues.
4. The DHCP Dance: Why Auto-Configuration Usually Works
For most of us, DHCP is our hero. It automatically assigns an IP address, subnet mask, default gateway, and DNS server information to your laptop. It's the easy button. But sometimes, DHCP gets confused, leading to, you guessed it, WiFi problems.
5. Checking Your Current IP Configuration: A Quick Glance
Before we start tweaking things, let's see what's going on under the hood. Here's how to check your current IP configuration on Windows and macOS:
- Windows: Open the Command Prompt (search for "cmd" in the search bar). Type
ipconfig /alland press Enter. Look for the "Ethernet adapter" or "Wireless LAN adapter" section. - macOS: Open Terminal (search for "Terminal" in Spotlight). Type
ifconfigand press Enter. Look for the "en0" or "en1" interface (usually your WiFi).
This will show you your IP address, subnet mask, default gateway, and DNS servers. Make a note of these settings; you might need them later!
6. The Basic Fix: Restarting Your Router and Laptop
Okay, this is the IT equivalent of "have you tried turning it off and on again?" It might sound silly, but it's surprisingly effective. Restarting your router clears its cache and often forces it to reassign IP addresses. Restarting your laptop clears its network settings. Do this first before we get into the more complex stuff.
7. Flushing Your DNS Cache: Like a Digital Spring Clean
Your DNS cache stores the IP addresses of websites you've visited. Sometimes, this cache gets corrupted, leading to connection problems. Flushing it can be a digital spring clean.
- Windows: Open Command Prompt (as above) and type
ipconfig /flushdnsand press Enter. - macOS: Open Terminal (as above) and type
sudo killall -HUP mDNSResponderand press Enter. You may need to enter your password.
8. Renewing Your IP Address: Forcing a Fresh Start
This forces your laptop to request a new IP address from your router. It's like asking for a new delivery address.
- Windows: Open Command Prompt and type
ipconfig /renewand press Enter. - macOS: This is generally automatic, but you can disconnect and reconnect to your WiFi network.
9. Releasing and Renewing: Unleashing Network Power
Sometimes, simply renewing isn't enough. You might need to release your current IP address before renewing. This is like telling the postal service to stop delivering mail to your old address before you ask for a new one.
- Windows: Open Command Prompt. Type
ipconfig /releaseand press Enter, then typeipconfig /renewand press Enter. - macOS: Disconnect from your WiFi, then release the network connection (usually under "Advanced" settings in Network preferences), then reconnect.
10. Manually Configuring a Static IP Address (Advanced)
If all else fails, you can try assigning a static IP address. This gives you more control but can also cause problems if not done correctly. Proceed with caution and only if you understand the basics.
- Windows: Go to Network & Internet settings, then Change adapter options. Right-click on your WiFi adapter, select "Properties," then choose "Internet Protocol Version 4 (TCP/IPv4)." Select "Use the following IP address" and enter the details:
- IP address: Choose an address within your router's IP range (e.g., 192.168.1.100 – check your router's settings).
- Subnet mask: Usually 255.255.255.0.
- Default gateway: This is your router's IP address (e.g., 192.168.1.1).
- Preferred DNS server: Use a public DNS server like Google's (8.8.8.8) or Cloudflare's (1.1.1.1).
- Alternate DNS server: If desired, use 8.8.4.4 (Google) or 1.0.0.1 (Cloudflare).
- macOS: Go to System Preferences, then Network. Select your WiFi, click "Advanced," and select "TCP/IP." Choose "Manually" for "Configure IPv4" and enter similar details.
Important note: Make sure you don't choose an IP address already in use on your network!
11. Checking Your DNS Servers: Guiding Your Digital Travels
Your DNS servers translate website names (like www.example.com) into IP addresses. If your DNS settings are wrong, you can't reach websites. Your router usually handles this, but sometimes you need to manually configure them.
- Check your DNS settings: Refer to sections 10 for how to adjust this.
- Consider using public DNS servers: Google's (8.8.8.8 and 8.8.4.4) and Cloudflare's (1.1.1.1 and 1.0.0.1) are popular and often faster.
12. Network Adapter Drivers: Keeping the Wheels Turning
Outdated or corrupted network adapter drivers can cause WiFi problems. Think of these drivers as the gears that make your WiFi adapter work.
- Windows: Open Device Manager (search for it). Expand "Network adapters." Right-click on your WiFi adapter and select "Update driver." Choose "Search automatically for drivers."
- macOS: macOS usually handles driver updates automatically.
13. Firewall Interference: The Digital Gatekeeper
Your firewall protects your computer, but sometimes it can block legitimate connections.
- Check your firewall settings: Make sure your firewall isn't blocking the necessary network traffic. You might need to add an exception for your WiFi adapter.
14. Wireless Interference: Navigating the WiFi Jungle
Other devices (microwaves, Bluetooth devices, nearby routers) can interfere with your WiFi signal. The WiFi spectrum is a crowded place, it's true!
- Try changing your WiFi channel: Log in to your router's settings (usually by typing its IP address into your browser). Find the "Wireless" or "WiFi" settings and look for the channel selection. Experiment with different channels (1, 6, and 11 are usually the least congested).
- Move your router: Place it in a central location, away from walls and obstructions.
15. When to Call in the Professionals: Knowing Your Limits
If you’ve exhausted all troubleshooting steps and still can't fix the issue, it might be time to call for backup. Contact your internet service provider (ISP) for help. They can often diagnose and resolve complex network problems, and that's their job!
Conclusion: Conquering the WiFi Nightmare!
So there you have it! We've
ASUS Laptop WiFi Nightmare? FIX It NOW! (Windows 10)WiFi Doesn't have a valid IP configuration on Windows 10

By FIXsage WiFi Doesn't have a valid IP configuration on Windows 10 by FIXsage
How to Fix Wi-fi Doesnt Have A Valid IP Configuration

By TechSimplify How to Fix Wi-fi Doesnt Have A Valid IP Configuration by TechSimplify
How to Fix Ethernet Doesn't Have a valid IP Configuration

By TechSimplify How to Fix Ethernet Doesn't Have a valid IP Configuration by TechSimplify

Title: WiFi Doesn't have a valid IP configuration in Windows 11 10 87 - How To Fix WI-FI Error
Channel: Victor Explains
WiFi Doesn't have a valid IP configuration in Windows 11 10 87 - How To Fix WI-FI Error by Victor Explains
My Laptop Work
Laptop WiFi Nightmare? FIX Your IP Configuration NOW!
Imagine this: You’re nestled in your favorite chair, laptop gleaming, anticipating an evening of streaming, working, or connecting with loved ones. Then, the dreaded buffering icon appears, or worse, the connection fails entirely. The WiFi signal bars are strong, mocking your frustration, yet you remain tethered to digital purgatory. You're not alone. We've all been there. This isn't just a minor inconvenience; it's a full-blown digital disruption, and in most cases, the culprit lies within your network's IP configuration. Let's unlock your laptop's WiFi potential and bid farewell to those frustrating connection dropouts.
Understanding the IP Foundation: Your Laptop’s Digital Address
Before diving into solutions, let's demystify the core principles. Every device connecting to a network, including your laptop, needs a unique identifier: an IP address. Think of it like your home address: it tells the postal service (the internet) where to deliver your "mail" (data). This address is typically automatically assigned by your router via Dynamic Host Configuration Protocol (DHCP). However, sometimes, this automatic assignment falters, leading to connectivity chaos.
An IP address typically comes in two flavors: IPv4 and IPv6. IPv4, the older standard, uses a series of four numbers separated by periods (e.g., 192.168.1.100). IPv6, the newer standard, uses a more complex alphanumeric format (e.g., 2001:0db8:85a3:0000:0000:8a2e:0370:7334). Both function similarly, but IPv6 offers significantly more available addresses, addressing the limitations of IPv4. The specifics of which you are using often don't matter for troubleshooting, but awareness can be helpful.
Troubleshooting IP Address Issues: A Step-by-Step Approach
When WiFi woes strike, a systematic approach is key. Let's methodically diagnose and repair common IP configuration problems.
1. The Power Cycle Protocol: A Reboot is Often the Answer
Begin with a simple reset. Power cycling is the digital equivalent of a good night's sleep for your devices.
- Router Reboot: Unplug your router and modem (if separate units) from their power source. Wait a full 60 seconds. Plug the modem back in first, waiting for it to fully boot up (indicated by steady lights). Then, plug in your router and allow it to boot as well.
- Laptop Reboot: Restart your laptop. This clears cached data and forces a new connection to the network.
Often, this resolves transient IP conflicts or temporary glitches.
2. Inspecting Your IP Address: Are You Even Getting One?
If a reboot doesn't fix the problem, it's time for a deeper dive. We need to ascertain if your laptop is receiving a valid IP address from the router. Here's how:
- Windows:
- Open the Command Prompt or Windows Terminal.
- Type
ipconfig /alland press Enter. - Examine the output. Specifically, look for:
- "IPv4 Address": This should display a valid IP address (e.g., 192.168.1.102). If it shows "0.0.0.0" or an address beginning with "169.254," your laptop is not getting a proper IP.
- "Default Gateway": This should be the IP address of your router (e.g., 192.168.1.1 or 192.168.0.1). If this is missing, your laptop isn't connecting to the router.
- "DHCP Enabled": Should say "Yes". If "No," your laptop is configured to use a static IP address.
- "DNS Servers": These are essential for resolving website domain names. You'll typically see two or more addresses listed.
- macOS:
- Go to System Preferences (or System Settings in newer versions).
- Click Network.
- Select your WiFi connection from the left-hand pane.
- Click Advanced….
- Click the TCP/IP tab.
- Check the following:
- "Configure IPv4": Should be set to "Using DHCP".
- "IPv4 Address": Displays your IP address.
- "Router": Displays your router's IP address.
- "DNS Servers": Displays the DNS server addresses.
- Interpreting the Results: If any of these are missing or appear incorrect, proceed to the following troubleshooting steps.
3. Releasing and Renewing Your IP Address: A DHCP Refresh
DHCP (Dynamic Host Configuration Protocol) is your network's automatic address allocator. Sometimes, it needs a nudge.
- Windows:
- Open the Command Prompt or Windows Terminal (as administrator).
- Type
ipconfig /releaseand press Enter. This releases your current IP address. - Type
ipconfig /renewand press Enter. This requests a new IP address from your router. - Check the output of
ipconfig /allagain to see if you now have a valid IP address.
- macOS:
- In System Preferences > Network (or System Settings > Network), select your WiFi connection.
- Click Advanced…
- Go to the TCP/IP tab.
- Click "Renew DHCP Lease".
This forces your laptop to request a new IP address from your router.
4. Static IP Configuration: When Automatic Doesn't Suffice
In rare instances, dynamic IP allocation isn't optimal. This is usually for some advanced network configurations, where your local network devices, for example, are configured to use static IPs. Assigning a static IP address can sometimes resolve persistent connectivity issues, but proceed with caution. Make sure to save the current network setting details before doing this procedure.
- Windows
- Open the Control Panel -> Network and Sharing Center.
- Click on "WiFi (Your Network Name)" or your WiFi connection.
- Click Properties.
- Select "Internet Protocol Version 4 (TCP/IPv4)" and click Properties.
- Select "Use the following IP address".
- IP address: Enter an available IP address within your router's IP range (e.g., 192.168.1.101 – check your router's configuration for the range. Typically, .1 is the router itself). It must be different from other devices on the network.
- Subnet mask: Usually 255.255.255.0.
- Default gateway: Your router's IP address.
- Preferred DNS server: Use 8.8.8.8 (Google's public DNS) or your ISP's DNS servers.
- Alternate DNS server: Use 8.8.4.4 (Google's public DNS) or your ISP's secondary DNS server.
- Click OK twice.
- macOS:
- In System Preferences > Network (or System Settings > Network), select your WiFi connection.
- Click Advanced…
- Go to the TCP/IP tab.
- From the "Configure IPv4" dropdown, select "Manually".
- IPv4 Address: An unused IP address on your network.
- Subnet Mask: Usually 255.255.255.0
- Router: Your router's IP address.
- DNS Servers: Enter the DNS server addresses (8.8.8.8 and 8.8.4.4 are recommended).
- Click OK and apply the changes.
Important: When setting a static IP, double-check that the chosen address is not already in use by another device on your network. IP conflicts can cause major connectivity issues. Check your router's connected device list.
5. Checking Your Router's Configuration: The Gateway's Gate
The router is the heart of your home network. Issues with its configuration can lead to IP-related problems.
- Accessing the Router: Open a web browser and type your router's IP address (usually 192.168.1.1 or 192.168.0.1 – you can find this in your laptop’s IP configuration). You’ll be prompted for a username and password (often “admin” for both, or the default password printed on the router itself).
- DHCP Settings: Ensure DHCP is enabled in the router's settings. Most routers enable this by default. Also, check the IP address range the router is assigning. Your static IP address should be within this range.
- Wireless Settings: Verify your
