how to connect lenovo laptop to wifi windows 10

Title: How to Fix Wi-Fi is Not Connecting to Lenovo Laptops Problem in Windows 1087 2025
Channel: FIXsage
How to Fix Wi-Fi is Not Connecting to Lenovo Laptops Problem in Windows 1087 2025 by FIXsage
how to connect lenovo laptop to wifi windows 10, how to connect lenovo laptop to wifi, how do you connect to wifi on a lenovo laptop
Lenovo WiFi Nightmare? FIX It Now! (Windows 10)
Lenovo WiFi Woes Vanishing Act: Conquer Connectivity Chaos on Windows 10!
Have you ever fumed at your Lenovo laptop, staring blankly at the WiFi icon, praying for a connection? That frustration, that digital disconnect, is all too common. Fortunately, you're not alone. Many Lenovo users face similar struggles. But fear not! We are here to help you reclaim your online life. This guide will help you fix those aggravating WiFi glitches.
The Phantom WiFi Phenomenon: Unmasking the Culprit
So, what’s causing these maddening WiFi problems? Several reasons are possible. One common culprit is outdated network drivers. These drivers are crucial for your laptop to communicate with your router. Consequently, old drivers can create connectivity issues. Then there’s the potential for software conflicts. This can sometimes interfere with your WiFi adapter's function.
Another area to consider is your network settings. Perhaps a setting has been incorrectly configured. This could be preventing your device from properly connecting. Also, your hardware might be the issue. Though less common, a failing WiFi card could be causing these problems. Therefore, let's explore solutions to these common issues.
Step 1: Diving into Device Manager – Driver Detox
First, we’ll address the driver issue. Think of your drivers as tiny translators. They help your laptop understand your WiFi adapter. You also need to keep them updated. Here’s how to do it:
- Right-click on your Start menu (the Windows logo) and select "Device Manager."
- Look for "Network adapters" and click the little arrow to expand it.
- Find your WiFi adapter (it might be labeled something like "Intel Wireless-AC" or "Qualcomm Atheros").
- Right-click on your WiFi adapter.
- Select "Update driver."
- Choose "Search automatically for drivers." Let Windows do its job.
Because you are now updating your drivers, the system will then search for the latest version. If it finds an update, it will install it. Then, it is best to restart your computer. If Windows can't find any updates, don’t worry. This isn't the end of the road. You can also manually update your drivers. Let's explore the next step.
Step 2: Manual Driver Mayhem – Taking Control
If updating through Device Manager doesn't work, you can try this:
- Visit the Lenovo support website.
- Enter your laptop's model number or serial number. This will help find the exact drivers for your machine.
- Navigate to the "Drivers & Software" section.
- Find the network or WiFi drivers. Download the latest version.
- Run the downloaded installer. Follow the on-screen prompts.
- Restart your laptop.
It may be beneficial to check the manufacturer's website beforehand. They may have specific instructions. The latest drivers can often fix many connectivity issues.
Step 3: Network Troubleshooter Tango – Letting Windows Waltz
Windows has a built-in troubleshooter. It can diagnose and fix network problems. It is quite easy to use:
- Type "troubleshoot" in the Windows search bar.
- Select "Troubleshoot settings."
- Click on "Network Adapter" and then "Run the troubleshooter."
- Follow the on-screen instructions. This will often suggest fixes.
The troubleshooter can sometimes identify common issues. Then it will help you resolve them quickly. This can save you a lot of time and effort.
Step 4: Airplane Mode Awakening – A Quick Reset
Sometimes, a simple reset can work wonders. Try toggling Airplane Mode.
- Click the WiFi icon in your system tray.
- Toggle Airplane Mode on.
- Wait a few seconds.
- Toggle Airplane Mode off.
This quick action can reset your WiFi adapter. That might just be all that is needed.
Step 5: Router Reboot Ritual – The Power of a Restart
Let's move on to your router. Try unplugging your router and modem. Then, wait about 30 seconds. Plug them back in. After they restart, check your Lenovo laptop. Sometimes, the issue is with the router. A simple reboot can kickstart your connection.
Step 6: Windows Update Wisdom – Keeping Everything Up to Date
Make sure your Windows 10 is up to date. Microsoft frequently releases updates. These updates often include fixes for network-related problems.
- Go to "Settings" (the gear icon in the Start menu).
- Click on "Update & Security."
- Select "Windows Update."
- Click "Check for updates."
- Install any available updates.
Regularly updating your system is essential for optimal performance. It can prevent many potential problems.
Step 7: Advanced Network Settings – Going Deeper
If the above steps don't work you can try:
- Type “Network Connections” in the search bar and open it.
- Right-click on your WiFi adapter.
- Select "Properties."
- In the "Networking" tab, make sure "Internet Protocol Version 4 (TCP/IPv4)" is checked. You can also try disabling and re-enabling it.
It is essential to adjust these settings to ensure a workable connection.
Step 8: Considering Hardware – When All Else Fails
If, despite all your efforts, your Lenovo still refuses to connect, there might be a hardware problem. In this case, consider taking your laptop to a professional. A technician can diagnose any potential issues with your WiFi card. If that is the case, consider a WiFi adapter replacement.
Wrapping Up: Reclaiming Your Connection
So, if your Lenovo WiFi is driving you crazy, don't despair. You now have a collection of solutions. You can troubleshoot these annoying problems. From driver updates to Airplane Mode resets, you are ready to fight those connectivity issues. By following these steps, you'll be back online in no time, ready to enjoy a seamless internet experience. Good luck, and happy browsing!
Mac to Phone WiFi: The Secret Trick Apple Doesn't Want You to Know!Lenovo WiFi Nightmare? FIX It Now! (Windows 10)
Hey everyone, welcome! Let’s face it, Wi-Fi woes on a Lenovo laptop can be a real pain. You're just trying to binge-watch that new series, finish a work project, or video chat with your family, and bam! The dreaded "No Internet" message stares you right in the face. We've all been there, haven't we? That frustrating moment when your connection disappears faster than a free donut at a coffee shop. But fear not, because we’re going to dive deep and tackle this Lenovo WiFi nightmare head-on, specifically for those of us rocking Windows 10. Consider this your official rescue mission, armed with the knowledge and tools to get you back online and connected faster than you can say "wireless router."
1. The Lenovo Wi-Fi Blues: What's the Deal?
Before we jump into solutions, let's understand the "why" of this Wi-Fi drama. Lenovo laptops, like any computer, can experience connection problems for a variety of reasons. It could be anything from a simple software glitch to a more complex hardware issue. Think of your Wi-Fi connection as a flowing river: sometimes the water is smooth and easy, and other times, there are rocks blocking the stream. We're going to find and remove those rocks!
2. Is It REALLY Your Lenovo? Ruling Out the Obvious Suspects
Before we start blaming Lenovo, let's do a quick check to make sure the problem isn't elsewhere. It would be like blaming your car if the problem is actually a flat tire.
Here's a checklist:
- Other Devices? Test your Wi-Fi on other devices (phone, tablet, another laptop). If they're all experiencing issues, the problem likely lies within your internet service or your router.
- Router Reboot: Unplug your router and modem for about 30 seconds, then plug them back in. This often works wonders, like a magic reset button!
- Check the Physical Connection: Is your router plugged in and powered on? Sounds silly, I know, but it happens!
3. Windows 10 & The Wi-Fi Connection: A Sometimes Rocky Relationship
Windows 10, while a powerful operating system, isn't perfect. Sometimes, it can have its own little squabbles with Wi-Fi connections. Updates can cause compatibility problems, or settings might get jumbled up. It’s like the operating system is having a bad hair day, and it’s impacting your connection.
4. Diagnostics First: Unveiling the Mystery of the Missing Internet
Windows 10 comes with a built-in network troubleshooter. Think of it as a digital detective, ready to solve your connection mystery. To use it:
- Right-click on the Wi-Fi icon in your system tray (usually in the bottom right corner).
- Select "Troubleshoot problems." Windows will automatically scan for and try to fix any issues.
5. The Airplane Mode Gambit: A Quick Reset for Your Wireless Card
Airplane mode is often overlooked, but it can be a simple fix. Turning it on and then off essentially resets your Wi-Fi card, giving it a fresh start. Imagine it as hitting the "restart" button for your wireless connection.
- Click on the Wi-Fi icon in your system tray.
- Toggle Airplane mode on (wait a few seconds) and then off.
6. Driver Dilemma: The Key to a Smooth Connection
Outdated or corrupted Wi-Fi drivers are a common culprit for connection problems. Think of drivers as the instructions for your hardware. If those instructions are wrong or missing, things won't work properly.
- Updating Your Drivers:
- Type "Device Manager" in the Windows search bar and open it.
- Expand "Network adapters."
- Right-click on your Wi-Fi adapter (it will likely have "Wireless" in its name).
- Select "Update driver." Choose "Search automatically for drivers."
- Reinstalling Drivers: If updating doesn't work, try uninstalling and reinstalling the drivers. In Device Manager, right-click on your Wi-Fi adapter and select "Uninstall device." Restart your laptop, and Windows will automatically try to reinstall the drivers.
7. The Power Management Paradox: Stop Your Wi-Fi From Snoozing
Windows has power-saving features that sometimes shut off your Wi-Fi adapter to conserve battery. This can create sporadic connection issues. Let's tweak these settings.
- In Device Manager (see step 6), right-click on your Wi-Fi adapter and select "Properties."
- Go to the "Power Management" tab.
- Uncheck the box that says "Allow the computer to turn off this device to save power."
8. Firewall Shenanigans: Blocking the Path to the Web
Your firewall, whether it's the Windows Firewall or a third-party one, can sometimes block your Wi-Fi connection. It's like having a gatekeeper at the door, and sometimes the gatekeeper isn't letting the right people (your internet traffic) in.
- Check your firewall settings: Ensure that your Wi-Fi network is allowed to communicate. You might need to temporarily disable your firewall to see if it's the problem. (Be cautious, and remember to re-enable it!)
9. The SSID Shuffle: Refreshing Your Network's Memory
Sometimes, your Lenovo laptop might be having trouble remembering your Wi-Fi network. It's like trying to recall a distant memory.
- Forget and Reconnect: Right-click on the Wi-Fi icon in the system tray.
- Click 'Network & Internet settings' > "Wi-Fi".
- Click "Manage known networks."
- Select your Wi-Fi network and click "Forget."
- Reconnect to your Wi-Fi network by entering the password.
10. DNS Discrepancies: Guiding Your Laptop to the Right Address
DNS (Domain Name System) servers translate website names (like google.com) into IP addresses. Sometimes, using a different DNS server can improve your connection speed or resolve connection issues. It's like using a different map for directions.
- Change Your DNS server:
- Right-click on the Wi-Fi icon in the system tray and select "Open Network and Sharing Center."
- Click on your Wi-Fi network connection.
- Click "Properties."
- Select "Internet Protocol Version 4 (TCP/IPv4)" and click "Properties."
- Select "Use the following DNS server addresses."
- Enter Google's DNS servers: Preferred DNS server: 8.8.8.8, Alternate DNS server: 8.8.4.4. You can also try Cloudflare's DNS: 1.1.1.1 and 1.0.0.1.
11. Router Interference: Navigating the Wireless Web
Other devices, walls, and even your microwave oven can interfere with your Wi-Fi signal. It's like trying to have a conversation in a crowded room.
- Placement matters: Move your laptop closer to the router.
- Change the Wi-Fi channel: Log into your router's settings (usually by typing the router's IP address into your web browser) and try changing the Wi-Fi channel. This can reduce interference.
12. Factory Reset: When All Else Fails (Use This As A Last Resort!)
If nothing else works, you might need to perform a factory reset of your Lenovo laptop. This will wipe your hard drive, so it's crucial to back up your important files first! It's like starting from scratch and building a brand new foundation.
- How to factory reset:
- Go to Settings > Update & Security > Recovery.
- Under "Reset this PC," click "Get started."
- Follow the on-screen instructions.
13. Consider Professional Help: When It's Time to Call in the Experts
If you've tried everything and your Lenovo Wi-Fi is still acting up, it might be time to seek professional help. A technician can diagnose hardware issues and ensure your laptop is running smoothly.
14. Lenovo Warranty Check: Take Advantage of Your Protection
Check your Lenovo warranty! You might be covered for repairs or replacements, especially if the problem is hardware-related. Don't let your warranty expire unused!
15. Preventive Measures: Keep Your Lenovo Connected and Secure
Prevention is always better than cure. Here are a few tips to keep your Lenovo Wi-Fi running smoothly in the future:
- Keep your Windows 10 up to date: Updates often include fixes for Wi-Fi issues.
- Regularly update your drivers: This includes your Wi-Fi adapter drivers.
- Use a strong password for your Wi-Fi network: This helps protect your connection from unauthorized access.
- Be careful about what you download: Malware can sometimes interfere with your Wi-Fi.
Closing Thoughts: Reclaiming The Digital Frontier
So there you have it – a comprehensive guide to tackling the Lenovo
Laptop WiFi Dead? Fix It NOW!How to Add Wireless Wifi Network Manually in Windows 10 PC or Laptop

By Discover You How to Add Wireless Wifi Network Manually in Windows 10 PC or Laptop by Discover You
How to solve Wi-Fi Not showing Problem in Windows 10 200 Fixed

By Rounak Verma How to solve Wi-Fi Not showing Problem in Windows 10 200 Fixed by Rounak Verma
Fix Lenovo Wi-Fi Not Working in Windows 1087 2025

By TechFixIT Fix Lenovo Wi-Fi Not Working in Windows 1087 2025 by TechFixIT
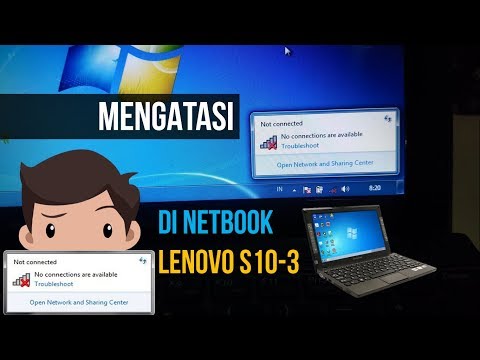
Title: Mengaktifkan Wifi yang No connection are available di Netbook Lenovo S10-3
Channel: IF Repair
Mengaktifkan Wifi yang No connection are available di Netbook Lenovo S10-3 by IF Repair
Working With Laptop
Lenovo WiFi Nightmare? FIX It Now! (Windows 10)
Are you wrestling with a Lenovo laptop plagued by persistent WiFi connection issues? Constant disconnections, painfully slow speeds, or outright refusal to connect can transform a productive day into a frustrating ordeal. We understand your pain. As experienced users and troubleshooters of Lenovo devices, we’ve meticulously documented a comprehensive guide to diagnose and conquer your WiFi woes on Windows 10. Follow our step-by-step instructions, and you'll be back online in no time.
Diagnosing the WiFi Problem: Pinpointing the Culprit
Before diving into fixes, let's accurately identify the source of your WiFi troubles. Is the problem specific to your Lenovo laptop, or are other devices experiencing similar connectivity issues? If your smartphone, tablet, or other computers are also struggling to connect to your home network, the problem likely originates with your router or internet service provider (ISP). However, if the WiFi connection on your Lenovo is the sole victim, we can focus on your laptop's settings and hardware.
Check the Physical WiFi Switch: Many Lenovo laptops have a physical switch, often located on the side or front edge of the laptop, dedicated to enabling or disabling the WiFi adapter. Make sure this switch is in the "On" position. It might seem obvious, but it’s a common oversight.
Verify the Airplane Mode: Airplane mode disables all wireless communication, including WiFi. Double-check your settings. Click on the WiFi icon in the system tray (bottom right corner of your screen) and ensure Airplane mode is turned off. You can also access this setting through the Action Center (the notification panel accessed via the icon on the right side of the taskbar).
Network Adapter Status: Explore your network adapters. Right-click the Start button and select "Device Manager." Expand the "Network adapters" section. Look for your WiFi adapter (it will likely be labeled "Wireless Network Adapter" combined with the manufacturer's name, such as Intel, Lenovo, or Realtek.) Is there a yellow exclamation mark or a red "X" displayed next to the adapter? This indicates a problem needing urgent attention. The yellow mark implies a driver issue, while the red X signifies a disabled adapter.
Run the Windows Network Troubleshooter: Windows 10 has a built-in troubleshooter designed to automatically detect and fix common network problems. Right-click the WiFi icon in the system tray and select "Troubleshoot problems." Let the troubleshooter scan for issues and apply any recommended fixes. Sometimes, this simple step resolves the problem.
Check for Interference: WiFi signals are susceptible to interference from other electronic devices. Ensure your Lenovo laptop is not positioned near microwave ovens, cordless phones, Bluetooth speakers, or other devices that emit radio waves. Relocating your laptop can sometimes dramatically improve the WiFi connection.
Driver Dilemmas: Updating and Reinstalling Your WiFi Adapter Drivers
Outdated, corrupted, or missing drivers are a frequent cause of WiFi connectivity failures. Ensuring your WiFi adapter drivers are up-to-date or reinstalling them can fix these problems.
Update Drivers via Device Manager: Navigate to Device Manager (as described above). Right-click on your WiFi adapter and select "Update driver." Choose "Search automatically for drivers." Windows will search for and install the latest drivers available.
Roll Back Drivers (if applicable): If the WiFi problems began recently after a driver update, you can roll back to a previous version. In Device Manager, right-click your WiFi adapter, select "Properties," and go to the "Driver" tab. If the "Roll Back Driver" option is available, click it. This will revert to the previously installed driver.
Reinstall Drivers: If updating doesn’t work, consider reinstalling the drivers. In Device Manager, right-click on your WiFi adapter and select "Uninstall device." In the confirmation window, check the box next to "Delete the driver software for this device" if available and click "Uninstall." Then, restart your Lenovo laptop. Windows should automatically attempt to reinstall the driver upon reboot. If not, you can download the drivers from Lenovo's support website.
Download and Install Drivers from Lenovo's Website: This is often the most reliable method. Visit the Lenovo support website and enter your laptop's model number. Navigate to the "Drivers & Software" section and download the latest WiFi adapter drivers for your Windows 10 version. Run the downloaded installation file and follow the on-screen prompts.
Network Configuration Tweaks: Fine-Tuning Your Connection
Beyond drivers, your network configuration on Windows 10 can also impact WiFi performance and stability. These settings tweaks can often resolve lingering connection problems.
Forget and Reconnect to Your WiFi Network: Sometimes, a corrupted connection profile can cause issues. Click the WiFi icon in the system tray. Right-click on your WiFi network and select "Forget." Then, click the network again, enter your password, and reconnect. This action often resolves network problems.
Modify Power Management Settings: Windows 10 might be putting your WiFi adapter to sleep to conserve power, which can result in the connection dropping. In Device Manager, right-click on your WiFi adapter, select "Properties," and go to the "Power Management" tab. Uncheck the box that says "Allow the computer to turn off this device to save power." Click "OK" to save the changes.
Disable the TCP/IP Auto Tuning: TCP/IP Auto Tuning can sometimes interfere with WiFi connections, especially with certain routers or in congested network environments. Open Command Prompt as an administrator (search for "cmd" in the Windows search bar, right-click on "Command Prompt," and select "Run as administrator"). Type the following command and press Enter:
netsh int tcp set global autotuninglevel=disabledRestart your laptop after executing this command. To re-enable auto-tuning, use the command:netsh int tcp set global autotuninglevel=normal.Change DNS Servers: By default, your computer uses your ISP's DNS servers, which can sometimes be slow or unreliable. Changing to a public DNS server, such as Google's (8.8.8.8 and 8.8.4.4), can improve connection speed and stability. Right-click the Start button and select "Network Connections." Click "Change adapter options." Right-click on your WiFi connection and select "Properties." Select "Internet Protocol Version 4 (TCP/IPv4)" and click "Properties." In "Use the following DNS server addresses," enter 8.8.8.8 in "Preferred DNS server" and 8.8.4.4 in "Alternate DNS server." Click "OK" to save the changes.
Router Reset and Firmware Check: Addressing Potential Router Issues
Your router plays a critical role in your WiFi connectivity. Sometimes, the problem resides with your router, not your Lenovo laptop.
Restart Your Router: This simple step often resolves many router-related issues. Unplug your router from the power outlet, wait for 30 seconds, and plug it back in. Wait for the router to fully boot up (usually a couple of minutes) before connecting to your laptop.
Check Your Router's Firmware: Outdated router firmware can lead to connectivity problems. Access your router's configuration page (usually by typing its IP address, such as 192.168.1.1 or 192.168.0.1, in your web browser; refer to your router's manual for details). Check for a firmware update. Download and install the latest firmware version provided by your router's manufacturer.
Router Channel Selection: WiFi routers broadcast on different channels. Some channels might be more congested than others, which can impact performance. Access your router's configuration page and experiment with different WiFi channels (usually in the "Wireless" or "WiFi" settings tab). Try channels 1, 6, and 11, as these tend to have the least interference.
Hardware Assessment: Investigating Potential Hardware Malfunctions
While software and configuration issues are more common, hardware problems can sometimes cause WiFi failures.
WiFi Adapter Replacement (advanced): If you've tried all other troubleshooting steps and still have problems, the WiFi adapter in your Lenovo laptop might be faulty. Replacing the adapter requires some technical skill and access to the internal components of your laptop. Consult your laptop's service manual or seek professional assistance if you're not comfortable with this procedure.
Antenna Check: Internal WiFi antennas can sometimes become disconnected or damaged. If you're comfortable taking apart your laptop, carefully check the antenna connections to the WiFi adapter. Ensure they are securely connected. This operation might void your warranty; check before you take apart your laptop.
Contact Lenovo Support: If you've exhausted all troubleshooting steps, your laptop might have a more serious hardware issue. Contact Lenovo support for further assistance. They can provide additional troubleshooting steps, or, if your laptop is still under warranty, they can arrange for repairs.
Preventative Measures: Maintaining Optimal WiFi Performance
After resolving your Lenovo WiFi issue, implement these preventative measure to ensure long-term stability:
Regularly Update Drivers: Set up automatic driver updates through Windows Update, or periodically check Lenovo's support website for the latest drivers for your laptop model.
Keep Your Router Updated: Regularly check and update your router's firmware to benefit from the latest
