cara sharing wifi dari laptop ke tablet

Title: CARA BERBAGI WIFI DARI LAPTOP KE HP TERBARU Pintu Tutorial
Channel: NDL TUTORIAL
CARA BERBAGI WIFI DARI LAPTOP KE HP TERBARU Pintu Tutorial by NDL TUTORIAL
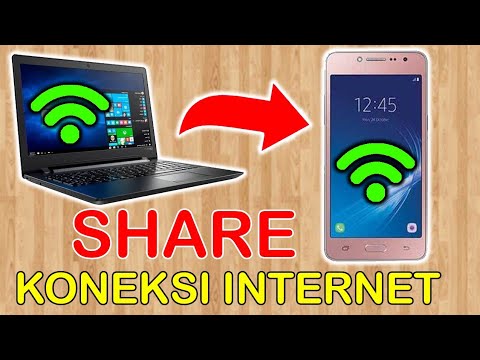
Unlock Your Tablet's Wi-Fi: The Laptop Hotspot Secret!
Unleash Wi-Fi Freedom: Your Laptop, Your Tablet's Savior!
Have you ever felt tethered to the limitations of your tablet’s Wi-Fi connectivity? Perhaps you’ve yearned for the freedom to browse, stream, or work remotely, yet found yourself stranded without a reliable internet connection. Well, fret no more! This isn’t just some tech tutorial. Let’s embark on a journey to unlock your tablet’s true potential.
The Wi-Fi Wilderness: Breaking Free From Limitations
Tablets, undoubtedly, are fantastic devices. They offer portability, convenience, and a user-friendly experience. However, their reliance on Wi-Fi can be a significant constraint. Think about those times when you're away from your home network. The inability to connect can truly be frustrating. It can stifle productivity and limit your entertainment options. Fortunately, there's a solution. We are going to explore a hidden superpower. This will allow you to create a personal Wi-Fi hotspot.
Your Laptop: The Secret Wi-Fi Conduit
Your laptop, often underutilized in this regard, actually holds the key. More accurately, it's the gateway to liberating access. Many modern laptops have built-in capabilities. These can transform them into Wi-Fi hotspots. This is a feature that often goes unnoticed. So, how does this work? Think of your laptop as a signal repeater. It receives the internet signal (either through Wi-Fi, Ethernet, or cellular data). Then, it rebroadcasts it as a Wi-Fi network. This is truly a technological marvel.
Setting Up Your Laptop Hotspot: A Step-by-Step Adventure
Now, let’s get practical. The setup process varies slightly depending on your operating system. However, the core principles remain the same. For Windows users:
- Navigate to your Settings.
- Select "Network & Internet".
- Choose "Mobile Hotspot".
- Turn on your Mobile Hotspot.
- Customize your network name and password. Doing this will secure your connection.
For macOS users:
- Go to System Preferences.
- Click on "Sharing".
- Select "Internet Sharing".
- Choose your internet connection (Wi-Fi, Ethernet, etc.).
- Select "Wi-Fi" in "Share your connection from".
- Click "Wi-Fi Options" to set a network name and password. This is for optimal security.
- Check the box next to "Internet Sharing".
Crucial Considerations: Safety and Efficiency
Before you begin browsing the digital wild, there are a few crucial considerations. Security is of utmost importance. Make sure your hotspot has a strong password. This will prevent unauthorized access. Also, be mindful of data usage. Streaming videos or large file downloads will consume data quickly. Therefore, monitor your data consumption. Consider purchasing a data plan if required. Keep an eye on your laptop’s battery. Creating a hotspot drains the battery faster than usual. Keep an eye on your battery levels.
Troubleshooting Troubles: Navigating Potential Roadblocks
Sometimes, things don't go perfectly. Don’t worry, though! Several common issues may arise. Firstly, your tablet might not be able to locate your hotspot. Double-check that the hotspot is properly enabled on your laptop. Also, verify that the network name is correct. Secondly, your internet connection might be slow. This is because the laptop is relaying the signal. Consider moving closer to the laptop! Finally, software conflicts can happen. Make sure your laptop's drivers are up-to-date. This will improve performance.
Beyond the Basics: Maximizing Your Mobile Wi-Fi Experience
This newfound ability opens a world of possibilities. Think about working remotely from a coffee shop. Imagine streaming your favorite shows on a long flight. Or perhaps, you simply need a reliable connection in a hotel room. In addition, you can connect multiple devices. Share the Wi-Fi with family members. Also, the process is simple and effective.
The Final Word: Embrace the Freedom
So, there you have it! You now have all the tools to transform your laptop into a powerful Wi-Fi hotspot. You're no longer beholden to the limitations of public Wi-Fi. You are free to roam the digital landscape. Embrace the newfound freedom and enjoy seamless connectivity. With a little know-how, you can make your tablet a true workhorse. Go out there and explore!
HP Laptop WiFi Antenna Cable: Fix Your Dead Wi-Fi NOW!Unlock Your Tablet's Wi-Fi: The Laptop Hotspot Secret!
Hey tech enthusiasts! Ever found yourself in a Wi-Fi dead zone with your trusty tablet, desperately craving that sweet, sweet internet connection? We’ve all been there. Picture this: stranded on a train, miles from civilization, or maybe nestled in a cozy café with notoriously unreliable Wi-Fi. You’ve got your tablet, brimming with potential, but crippled by a lack of connectivity. Sound familiar? Well, buckle up, because we're about to unlock a secret weapon: turning your laptop into a personal Wi-Fi hotspot, giving your tablet the freedom it deserves. It's like having a portable wireless router, always ready to save the day!
1. The Wi-Fi Wilderness: Recognizing the Modern-Day Internet Drought
Think of the internet as a life-giving river. We rely on it for work, entertainment, staying connected with loved ones, and even planning that epic weekend getaway. But what happens when the river runs dry? That's the reality when you're stuck without Wi-Fi. Public Wi-Fi can be spotty, unreliable, and, let's be honest, a bit of a security risk. Mobile data, while convenient, can quickly drain your precious (and often expensive) data allowance. This is where the laptop hotspot magic comes in.
2. Your Laptop: The Hidden Hero of Connectivity
Your laptop isn't just for spreadsheets and Zoom calls. It’s a powerful tool, capable of playing the role of a reliable Wi-Fi router. It's like your laptop is a superhero, and its hotspot capabilities are the cape and cowl! Most modern laptops come equipped with the necessary software and hardware to broadcast a Wi-Fi signal, transforming it into a personal hotspot with just a few clicks.
3. Unveiling the Secret: How to Turn Your Laptop into a Wi-Fi Hotspot (Windows Edition)
Let's get down to the nitty-gritty. First, we'll cover the procedure on Windows. It's remarkably simple, trust me. Think of it like making a virtual sandwich: you just have to follow some steps to get the sandwich.
- Step 1: Dive into Settings. Click on the Start button (the Windows logo) and then the gear icon (Settings).
- Step 2: Network & Internet. Select "Network & Internet".
- Step 3: Mobile Hotspot. Click on "Mobile Hotspot" from the left-hand menu.
- Step 4: Turn it ON! Toggle the "Share my internet connection from" option to your active internet source (e.g., Wi-Fi or Ethernet).
- Step 5: Customize. Click "Edit" and give your hotspot a name (SSID) and a strong password. Think of this as the secret handshake to get into your private Wi-Fi party.
- Step 6: Connect & Enjoy! On your tablet, search for Wi-Fi networks and select your newly created hotspot. Enter the password, and voila! You’re connected.
4. Apple Magic: How to Create a Hotspot with Your Macbook
Don't worry, Mac users! We've got you covered too. Creating a hotspot on a Macbook is just as straightforward.
- Step 1: Access System Preferences. Click the Apple menu (top-left corner of your screen) and choose "System Preferences."
- Step 2: Sharing. Click on "Sharing."
- Step 3: Internet Sharing. Select "Internet Sharing" from the left-hand menu.
- Step 4: Share your connection from. Choose your internet connection (e.g., Wi-Fi or Ethernet).
- Step 5: To computers using. Check the box next to "Wi-Fi."
- Step 6: Wi-Fi Options. Click "Wi-Fi Options…" to set a network name and password.
- Step 7: Start Sharing! Check the "Internet Sharing" box to enable the hotspot.
- Step 8: Connect & Celebrate! On your tablet, find your new Wi-Fi network, enter the password, and revel in the freedom of Wi-Fi on your tablet.
5. Beyond the Basics: Customizing Your Hotspot Experience
Now that you know how to set up a basic hotspot, let's explore some customization options. Tailoring your hotspot is like personalizing your coffee order -- it makes the experience even more enjoyable.
- Security is Paramount: Always use a strong password. Avoid easily guessable words or phrases. Think something complex, yet memorable.
- Bandwidth Management: If you're concerned about data usage, you can often limit the amount of data your hotspot shares. This is useful, particularly if your source internet connection is data capped.
- Power Savings: Keep an eye on your laptop's battery life. Running a hotspot can drain the battery faster. Consider plugging in your laptop when possible.
- Network Modes: Your laptop may give you the option to adjust settings such as whether your hotspot is accessible over 2.4 GHz or 5 GHz wireless radios. 5 GHz will be faster if your tablet supports it.
6. Troubleshooting Common Wi-Fi Hotspot Hiccups
Sometimes, things don't go as planned. Don't fret! Technical issues are like speed bumps on the highway. Here’s how to navigate the most common ones:
- Can't See the Hotspot?: Ensure your laptop's Wi-Fi adapter is enabled. Check your network adapter drivers too. Sometimes a simple restart can solve the problem.
- Connection Issues: Double-check the password. Ensure your tablet is close enough to the laptop for a strong signal.
- Slow Speeds: Consider moving closer to the laptop. Also, be aware that many devices connected to the same hotspot will, ultimately, reduce the connection speed.
- Data Usage Concerns: Monitor your data usage on your laptop.
7. The Mobile Data vs. Laptop Hotspot Showdown
Let's be honest: mobile data is convenient. However, a laptop hotspot often trumps it in several key areas.
- Data Costs: Mobile data can be expensive. Your laptop's hotspot, especially if you're connected to home or work Wi-Fi, is usually cost-effective.
- Speed and Stability: Laptop hotspots often provide more stable and faster connections, especially if you have a fast internet connection.
- Battery Impact: Your laptop might have significantly more battery capacity than your tablet, allowing for longer periods of hotspot use.
8. Expanding Your Horizons, Beyond the Basics: Advanced Uses
Let's explore some advanced ways you can use your laptop hotspot.
- File Sharing: You can use your laptop's hotspot to share files between your laptop and tablet, without needing an external storage device.
- Gaming: Enjoy online gaming on your tablet using the laptop's hotspot.
- Streaming: Stream videos and other content on your tablet.
9. The Laptop Hotspot: A Lifeline During Emergencies
In a world increasingly reliant on instant information, a laptop hotspot can become a crucial lifeline. Be it power outages or network disruptions, maintaining a constant internet connection can be a matter of emergency or business. Having the capacity to create a personal hotspot can assist in maintaining constant communication.
10. Security First: Safe Practices for Your Hotspot
Security should always be a priority for any online work.
- Encryption: Use WPA2 or WPA3 encryption on your hotspot for advanced security.
- Disable Unnecessary Sharing: Turn off file and printer sharing when you're using your hotspot.
- Regular Password Changes: Change your hotspot password periodically to maintain strong security.
- Be Aware of Public Networks: Avoid creating a hotspot on a network that you don't fully trust, as this could expose your data.
11. Optimize for Speed: Maximizing Your Hotspot's Performance
Here is a way to elevate your hotspot's performance:
- Location Matters: Place your laptop in a central location for best signal coverage.
- Minimize Interference: Keep your laptop away from microwave ovens, Bluetooth devices, and other wireless interference sources.
- Close Unused Applications: Close any applications on your laptop that consume bandwidth.
- Check Your Internet Connection: Is your laptop's own internet connection strong? A poor connection will affect your hotspot's performance.
12. Hotspot Etiquette: Sharing Responsibly
Even though you're in control of the hotspot, remember that it's your responsibility.
- Limit Usage: If you have a data cap, be mindful not to overdo it.
- Communicate with Users: If you're sharing your hotspot, set expectations about data usage and limitations.
- Be Considerate: Be aware of your environment and avoid hogging the bandwidth if it is being accessed by multiple users.
13. Beyond Smartphones: The Versatility of Laptop Hotspots
Laptop hotspots aren't only great for tablets. Consider these applications:
- Smart TVs: Connect your smart TV to the internet easily, even if you don't have your own router.
- Gaming Consoles: Create a wireless connection for your gaming consoles to play online.
- **Other Wi-Fi
CARA MEMBAGI JARINGAN WIFI DARI LEPTOPPC KE HP DENGAN MUDAH

By hari yudiman CARA MEMBAGI JARINGAN WIFI DARI LEPTOPPC KE HP DENGAN MUDAH by hari yudiman
Mudah Cara Membagikan Koneksi Internet dari Laptop ke Hp tanpa SoftwareAplikasi
By MCARYANGGAMVP Mudah Cara Membagikan Koneksi Internet dari Laptop ke Hp tanpa SoftwareAplikasi by MCARYANGGAMVP
Cara Membagikan Koneksi Internet Dari Laptop Ke HP Cara Menjadikan Laptop Sebagai Wifi

By Pelita Media Cara Membagikan Koneksi Internet Dari Laptop Ke HP Cara Menjadikan Laptop Sebagai Wifi by Pelita Media

Title: Cara Membuat Laptop Jadi Hotspot WiFi Di Windows 10 11
Channel: GAPTEK AMATIR
Cara Membuat Laptop Jadi Hotspot WiFi Di Windows 10 11 by GAPTEK AMATIR
Working With Laptop
Let's get started.
Title: The Ultimate Guide to Crafting the Perfect Sourdough Starter & Baking Magnificent Bread
Introduction: Embarking on a Sourdough Journey
We often find ourselves yearning to return to simplicity, to the tactile joy of creating something with our own hands. In the bustling symphony of modern life, the art of sourdough baking offers precisely that: a sanctuary of patience, a dance of ingredients, and the reward of a truly exceptional loaf. This guide serves as your trusted companion on this journey, from the very genesis of your sourdough starter to the final, triumphant bite. Whether you are a novice baker or a seasoned culinary professional, we aim to illuminate the path toward crafting a sourdough starter you can depend on and bread that will consistently amaze.
Part 1: Cultivating Your Sourdough Starter – The Foundation of Flavor
The sourdough starter, often referred to as the "mother," is not merely an ingredient; it is a living organism, a complex ecosystem of wild yeasts and beneficial bacteria. Nurturing this thriving colony is paramount to the success of your sourdough baking endeavors.
1.1 The Initial Embrace: Gathering Your Ingredients
The beauty of starting a sourdough starter lies in its simplicity. You'll need only two primary ingredients: unbleached, all-purpose flour or bread flour, and non-chlorinated water. Purified water is preferable, as chlorine can hinder the development of this living culture.
1.2 The First Steps: Mixing and Waiting
In a clean glass jar (a wide-mouthed mason jar works perfectly), combine equal parts of flour and water. A good starting point is 1/4 cup of each. Mix thoroughly until a thick, pancake-batter consistency is achieved. Cover loosely with a lid or cheesecloth secured with a rubber band to allow air circulation while preventing contamination. Store at room temperature (ideally between 70-75°F/21-24°C).
1.3 The Daily Rhythm: Feeding Your Starter
For the first few days, the process is predominantly the same. Each day, gently discard about half of the starter (you can use this discard in other recipes – more on this later!) and add fresh flour and water, in equal parts, to replenish the culture. Stir well. Early on, you may not see much activity. This is normal. Be patient.
1.4 Recognizing the Signs of Life: The Rise and Development
Within a few days to a week, you will begin to observe the telltale signs of fermentation: bubbles forming on the surface and within the starter, a slight sour aroma, and a slight rise in volume. The frequency of feeding may vary from once a day at the start to twice a day as the starter gets more mature.. This indicates the yeast and bacteria are actively consuming the flour and producing carbon dioxide, the gas responsible for the bread's airy structure.
1.5 The Maturation Process: Cultivating a Robust Starter
As your starter matures, the activity will become more pronounced. Observe your starter's behavior: the activity of the colony is key. Observe how the starter grows in volume after it's fed and how long it takes to double in size. When your starter consistently doubles in size within 4-8 hours after feeding at room temperature, and exhibits a pleasant, slightly tangy aroma, it is ready to bake with. This typically takes anywhere from one to three weeks, depending on environmental factors and the type of flour used.
1.6 Maintaining the Vitality: Ongoing Care
Once your starter is active, regular feeding is crucial to maintain its vitality. Feed your starter at least once a week if stored in the refrigerator, discarding half and adding equal parts of flour and water. When you're ready to bake, refresh the starter a few days before use by feeding it more frequently, typically once or twice a day, until it is bubbly and active.
Part 2: Mastering the Sourdough Baking Process
Now that you have a thriving starter, it's time to explore the magic of sourdough bread. The process involves several key steps that, when executed meticulously, yield a loaf that is both beautiful and delicious.
2.1 The Levain: Building Flavor and Strength
Before baking, it's generally beneficial to create a levain, a smaller portion of the starter used to leaven the bread. Mix a small amount of your active starter with flour and water, and allow it to ferment for several hours until it doubles in size and is bubbly. This pre-fermentation step enhances the flavor complexity of the bread and bolsters its structure.
2.2 The Autolyse: Hydrating the Dough
The autolyse is a simple, yet transformative step. Mix the flour and water for your bread recipe (reserve the salt at this stage) and let it rest, covered, for 30-60 minutes. This process allows the flour to fully hydrate, which strengthens the gluten network and improves the dough's extensibility.
2.3 Mixing, Incorporating the Levain, and Adding Salt
Add the levain to the autolysed dough. Knead the dough by hand or with a stand mixer until the levain is fully incorporated. Next, add the salt. Salt controls the yeast activity and enhances the flavor. Continue kneading (by hand or mixer) until you achieve a smooth dough, or until gluten development has occurred.
2.4 Bulk Fermentation: The Gentle Rise
Place the dough in a lightly oiled bowl and cover it. This is where the magic really happens. Bulk fermentation is where the yeast and bacteria do their work, slowly but surely developing flavor and structure. The duration of bulk fermentation will vary depending on factors such as the strength of your starter, the temperature of your kitchen, and your desired level of sourness. Typically, bulk fermentation lasts for 4-6 hours, with a series of "stretch and folds" every 30-60 minutes during the first half of the fermentation. This strengthens the dough and evenly distributes the gases produced by the yeast.
2.5 Shaping the Loaf: Artistry and Technique
Gently shape the dough into your desired form—a boule (round loaf) or a batard (oval loaf). Proper shaping is crucial for creating a strong, well-structured loaf. Avoid degassing the dough too much. After shaping, place the loaf in a banneton basket (a proofing basket lined with cloth) dusted generously with flour (rice flour is ideal) for the final proof.
2.6 Proofing: The Final Rest
Proofing is key to both flavor and structure. Proofing temperatures and times vary depending on the desired outcome and environmental factors. Refrigerate the proofed dough overnight, or proof at room temperature for a shorter time. The cold proof slows down fermentation, developing complex flavors.
2.7 Baking: The Transformation
Preheat your oven with a Dutch oven or baking stone inside to 450-500°F (232-260°C). Carefully remove the hot Dutch oven or baking stone. Gently invert the proofed loaf onto the hot surface. Score the top of the loaf with a lame or sharp knife. This allows the loaf to expand in a controlled manner during baking. Cover the loaf with the Dutch oven lid (if using) and bake for a specified time (typically 20 minutes covered, then 20-30 minutes uncovered, or until golden brown and the internal temperature reaches 200-210°F/93-99°C). Remove from the oven and let it cool completely on a wire rack before slicing and enjoying.
Part 3: Troubleshooting Common Sourdough Challenges
Even the most experienced bakers encounter setbacks. With a little troubleshooting, you can get back on track.
3.1 My Starter Isn't Bubbling:
- Solution: Your starter may need more time or a slightly warmer environment. Ensure it is receiving enough food (flour and water) and that the feeding cycle is appropriate.
3.2 My Bread Is Flat:
- Solution: The starter might not be active enough, or the dough may be under-proofed. Check the activity of your starter, ensure the dough has enough gluten development, and allow time for sufficient proofing.
3.3 My Bread Is Too Sour:
- Solution: The sourness is heavily controlled by the fermentation time and environment. If you're getting bread that is too sour, try shortening the bulk fermentation time or proofing in a cooler environment.
3.4 My Bread Is Dense:
- Solution: Under-proofing, weak starter, or insufficient gluten development. Ensure your is starter active, give the dough sufficient time for proofing, and properly develop the gluten.
3.5 My Bread Has a Hole or Tunnel at the Top:
- Solution: This can be caused by improper shaping, over-proofing, or uneven shaping. Ensure the dough is shaped correctly and that the proofing process is appropriate.
Part 4: Going Beyond: Diversifying Your Sourdough Repertoire
Once you've mastered the basics, explore the vast and exciting world of sourdough:
4.1 Sourdough Discard Recipes
Don't throw away that discard! It is essentially starter that is ready for use. It is full of the same flavors and texture the starter offers. Try making these: sourdough pancakes, crackers, pizza crusts, or even waffles.
4.2 Experimenting with Flours
Vary your flour types. Whole wheat, rye, and spelt will add different flavors and textures to your bread. They can also affect
