can i connect my phone to laptop wifi

Title: how to connect internet from mobile to Laptop via Bluetooth tethering android to pc
Channel: WebbyFan
how to connect internet from mobile to Laptop via Bluetooth tethering android to pc by WebbyFan
can i connect my phone to laptop wifi, can i connect my phone to laptop for internet, can i connect my phone to my laptop wirelessly, how do i connect my phone to my laptop wifi, can i connect my laptop to wifi using qr code, can i connect my laptop to wifi, connect my phone to laptop wifi, how do i connect my phone to my laptop wirelessly, can i connect my laptop to tesla wifi, how can i connect my laptop to wifi without password
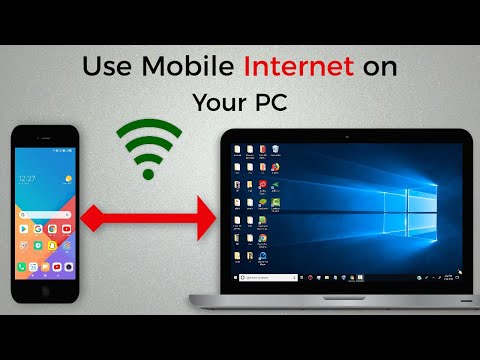
Phone to Laptop WiFi: The SHOCKINGLY Easy Trick!
Unleash Your Inner Tech Wizard: Effortlessly Connect Your Phone to Your Laptop's WiFi
Imagine, if you will, a world where internet access is as fluid and boundless as your imagination. A world untethered from the confines of physical cables or the whims of a spotty public Wi-Fi. That world is closer than you think. The simple, yet often overlooked, power of connecting your phone to your laptop's Wi-Fi is the key.
The Digital Symphony: Why This Trick Matters
We live in a hyper-connected age. Our mobile devices are extensions of ourselves, repositories of information and communication. Laptops, on the other hand, are our workhorses, our creative havens. However, what happens when you need to bridge the gap? What if you’re on the go and need to leverage your laptop’s processing power? You can quickly link both devices through a WiFi connection. It's not only incredibly convenient, but also a surprisingly fast workaround.
Decoding the Code: The Methodical Approach
Let's dive into the technicalities. The method, as such, is elegantly simple. It’s not a complicated procedure. First, you need to consider the operating systems on your phone and laptop. This will inform the precise steps you need. Therefore, the core principles remain consistent. You will often utilize your phone as a mobile hotspot. Your laptop then connects to this generated hotspot.
Step-by-Step: Making the Connection
Here’s how to generally get this done, regardless of your specific device setup:
On Your Phone: Activating the Hotspot. First, navigate to your phone's settings. Look for the "Hotspot" or "Personal Hotspot" option. The wording will vary on different phones. This likely resides under "Connections" or "Network & Internet". Flip the switch to "on".
Customizing Your Hotspot (Optional but Recommended). It is wise to personalize the settings of your hotspot. Consider creating a secure password. You might also change the network name. This will help to distinguish your hotspot from others. In this case, security should be the priority.
On Your Laptop: Finding the Signal. Next, grab your laptop. Locate the Wi-Fi icon. This can generally be found in the system tray (lower-right corner on Windows or the top-right on macOS). Click on the icon, similarly to how you would connect to any other Wi-Fi network.
Selecting and Connecting. You'll see a list of available Wi-Fi networks. Your phone's hotspot, with the name you chose, should appear. Then enter the password you created.
Confirm and Conquer. Once you confirm the password, your laptop should connect. You are then online.
Troubleshooting the Tech Tango: Potential Hiccups and Solutions
Sometimes, the digital dance has a few stumbles. However, don’t panic if you encounter a few issues. It's often easy to resolve them.
Connectivity Conundrums: If your laptop doesn't connect, double-check the password. Ensure you entered it precisely. Consequently, it might be a signal strength issue. Move your laptop closer to your phone.
Data Drain Dilemmas: Be mindful of data usage! Streaming videos or downloading large files might quickly consume your cellular data. Therefore, monitor your data plan.
Software Snags: Sometimes, the phone's software can be the problem. If you're still facing issues, restart both your phone and your laptop. Often, this is the simplest solution.
Beyond the Basics: Elevating Your Experience
Now you know the core function. But how can you maximize this trick?
Battery Boosters: Use a portable charger. This helps to keep your phone powered up.
Data Awareness: Keep track of your data. Check your mobile plan's limits.
Security First: Always use a strong password. Avoid public Wi-Fi for sensitive tasks.
The Grand Finale: Embracing the Freedom
Connecting your phone to your laptop's Wi-Fi is more than just a tech trick. It's freedom! It is about unlocking productivity on the move. It’s about staying connected, no matter where you are. This simple workaround is ultimately the key to a more flexible and adaptable digital life. So, go forth. Seamlessly integrate your devices. Become the master of your digital domain. You now have the secret weapon.
Dell D620 WiFi Driver: Download & Fix Your Connection NOW!Phone to Laptop WiFi: The SHOCKINGLY Easy Trick!
We all know the struggle. You're in a pinch, staring at your laptop with a blinking connection icon, and that urgent email needs to go out now. The library Wi-Fi is down again, your home internet is temperamental, and the coffee shop's signal is weaker than your willpower on a Monday morning. Sound familiar? Well, guess what? We have a ridiculously simple solution that's going to blow your mind and save you from countless internet-related meltdowns: using your phone as a Wi-Fi hotspot for your laptop. And trust me, it's easier than microwaving a Hot Pocket!
1. The "Why Didn't I Think of This Sooner?" Moment: Unveiling the Power of Phone-to-Laptop Wi-Fi
This seemingly small trick is a game-changer. Think of your phone as a tiny, pocket-sized internet router. It uses its cellular data connection to create a personal Wi-Fi network, which your laptop can then join. It's like having a miniature internet portal wherever you go! This is especially useful if you're a student cramming for exams, a freelancer needing to submit a last-minute project, or just someone who enjoys browsing the web in a park, far from the clutches of public Wi-Fi. It's the modern-day equivalent of a magical cloak of internet invisibility.
2. Setting the Stage: What You'll Need Before You Start
Before we dive into the nitty-gritty, let's gather our tools. You'll need two key players in this tech-savvy drama:
- Your Smartphone: Whether you're rocking an iPhone or an Android, your phone is the star of the show. Make sure you have a data plan and that you’re within range of a cell signal. Think of your phone as a data-filled treasure chest.
- Your Laptop: Your faithful companion, ready to receive the digital bounty. Ensure your laptop has Wi-Fi capabilities.
That's it! Seriously, the setup is that straightforward. Prepare to be amazed.
3. Android Users: Your Guide to Seamless Mobile Hotspot Magic
Android users, rejoice! Activating your personal hotspot is a breeze. Follow these simple steps:
- Step 1: Dive into Settings: Open your phone's settings app. It's usually a gear-shaped icon, like a mechanical version of a brain.
- Step 2: Find "Network & Internet" (Or Similar): The exact wording might vary depending on your Android version, but look for something related to networks or connections. Think of this section as the gatekeeper to the internet.
- Step 3: Locate "Hotspot & Tethering": This is where the real magic happens.
- Step 4: Enable "Wi-Fi Hotspot": Flip the switch! Your phone is now broadcasting a Wi-Fi signal.
- Step 5: Connect Your Laptop: On your laptop, search for available Wi-Fi networks. You should see your phone's name (or whatever you've named your hotspot). Click connect and enter the password (which you can usually find in your hotspot settings).
And voilà! You're surfing the web using your phone's data. It's like teaching your laptop to breathe.
4. iPhone Enthusiasts: Apple's Approach to Personal Hotspotting
Apple users, you're in for an equally easy ride. Here's how to connect your laptop:
- Step 1: Open Settings: Head to your iPhone's settings app.
- Step 2: Tap "Personal Hotspot": It's usually a prominent option.
- Step 3: Enable "Allow Others to Join": This is the key to unlocking the connection.
- Step 4: Connect Your Laptop: Just like with Android, find your iPhone's name in your laptop's Wi-Fi settings, enter the password, and connect.
See? Simple as pie! Or, in my case, simple as ordering pizza (because I can now do that from my laptop).
5. Customizing Your Hotspot: Security and Style
Don't be a digital pushover! While connecting to your phone's hotspot is simple, there are a couple of important things to customize:
- Name Your Hotspot: Give your hotspot a unique, memorable name. It’s more secure and easier to identify.
- Set a Strong Password: Don't use "password" or "12345678"! Create a strong, unique password to protect your data from prying eyes. Think of your password as the iron gate to your digital castle.
- Consider Data Limits: Be mindful of your data plan. Streaming videos or downloading large files can quickly eat up your data allowance. Most phones allow you to monitor your data usage or set limits.
6. Troubleshooting: When Things Don't Quite Connect
Let's face it: technology doesn't always cooperate. Here are a few common troubleshooting tips:
- Check Your Data: Make sure your phone has an active data connection. Turn off Wi-Fi on your phone to confirm you’re using cellular data.
- Restart Your Devices: Classic, but often effective. Restart both your phone and your laptop.
- Check the Password: Double-check that you're entering the correct password.
- Airplane Mode Foe: Ensure Airplane mode is disabled on both your phone and laptop.
- Software Updates: Sometimes, outdated software can cause connection issues. Make sure both your phone and laptop have the latest updates.
7. The Downside: The Data Drain (and How to Mitigate It)
While incredibly convenient, using your phone as a hotspot does come with a potential downside: data usage. Streaming videos, downloading large files, or simply browsing the web can quickly eat into your data allowance.
- Monitor Your Data Usage: Keep a close eye on how much data you're consuming. Most phones have built-in data usage trackers.
- Use Wi-Fi When Possible: If you're near a Wi-Fi network, switch to it to conserve your data.
- Optimize Your Settings: Close background apps, and adjust video streaming quality to lower settings. Think of it as switching to low-power mode for your internet.
- Consider a Larger Data Plan: If you regularly need to use your phone as a hotspot, you might want to consider upgrading your data plan.
8. Comparing Mobile Hotspot to Other Alternatives
How does phone-to-laptop Wi-Fi stack up against other internet options? Let's compare:
- Wi-Fi Hotspots: Public Wi-Fi can be slow, unreliable, and insecure. Your phone's hotspot offers a more private and often faster connection.
- Tethering (USB): Tethering your phone to your laptop via USB cable can offer a faster and more stable connection than Wi-Fi hotspot. But it requires a cable.
- Mobile Broadband: Mobile broadband devices provide dedicated internet access. It's reliable, but can be more expensive than using your phone's data.
9. Speed Test: How Fast is Your Phone-to-Laptop Connection?
Curious about the speed of your connection? There are plenty of online speed test tools that can measure your download and upload speeds. Just search "speed test" online and click your pleasure! How fast your connection is highly depends on your cell service.
10. Essential Tips for Maximizing Your Hotspot Experience
To make the most of your phone-to-laptop Wi-Fi, keep these tips in mind:
- Charge Your Phone: Using your phone as a hotspot will drain its battery faster. Make sure your phone is charged or plugged in. Carry a portable charger if you're reliant on using your hotspot all day.
- Security First: Always use a strong password and enable encryption to protect your data.
- Location, Location, Location: Your cell signal strength will affect your connection speed. Move to a location with better signal if possible.
- Turn Off Notifications: Avoid distracting notifications while browsing.
11. The Eco-Friendly Angle: Reducing Your Carbon Footprint (Sort Of)
Okay, this might be a stretch, but there's a small eco-friendly benefit to using your phone as a hotspot. Instead of using multiple devices that consume power, you're using just two: your phone and your laptop, which can mean a slight reduction in energy consumption.
12. Phone-to-Laptop Wi-Fi: Beyond the Basics (Advanced Tricks!)
Ready to level-up your hotspot game? Check out these advanced tips:
- Use a VPN: A Virtual Private Network adds an extra layer of security and privacy to your connection by encrypting your traffic.
- Wi-Fi Extenders: Some phone models have Wi-Fi extenders that help boost your signal strength.
- Data Saver Mode: Many phones have a built-in data saver mode that helps reduce data consumption.
- Split Tunneling: Some VPNs offer split tunneling, allowing you to send some traffic through your VPN while other traffic goes directly to the internet.
13. The Future of Mobile Hotspots: What's Next?
The future of mobile hotspots is bright. As 5G
Laptop Keyboard WiFi: The SHOCKING Secret Your Tech Guy Doesn't Want You To Know!How To Connect Internet from Mobile to PC or Laptop via hotspot
By WebbyFan How To Connect Internet from Mobile to PC or Laptop via hotspot by WebbyFan
how to connect a laptop with mobile hotspot

By Prity shots how to connect a laptop with mobile hotspot by Prity shots
How to Create Wifi Hotspot in Windows 10 Tutorial

By MDTechVideos How to Create Wifi Hotspot in Windows 10 Tutorial by MDTechVideos

Title: Tethering a Phone to a Laptop - Tech Tips from Best Buy
Channel: Best Buy
Tethering a Phone to a Laptop - Tech Tips from Best Buy by Best Buy
Wifi Not Found
The Art of Sourdough: From Starter to Sublime Loaf
The allure of a perfectly risen, crusty sourdough loaf is undeniable. The tangy aroma, the satisfying texture, and the complex flavor profile are a testament to the magic of fermentation. We, at [Your Bakery Name/Your Name], understand this enchantment intimately. For years, we’ve dedicated ourselves to mastering the art of sourdough, and we’re delighted to share our insights, experiences, and hard-earned secrets with you. Prepare to embark on a journey. Prepare to unlock the secrets. Prepare to bake sourdough bread that will leave you, and anyone who tastes it, utterly captivated.
Cultivating the Heart of Sourdough: The Starter
The foundation of any exceptional sourdough bread lies in its starter, often referred to as the "mother." This living culture of wild yeasts and beneficial bacteria is what gives sourdough its distinctive characteristics. Nurturing a robust and vibrant starter is a crucial first step.
Our starter, affectionately nicknamed "The Beast," is a testament to dedication and patience. We embarked on our starter-creation journey using organic, unbleached all-purpose flour and filtered water, the purest ingredients necessary to help create a thriving ecosystem. Initially, we combined equal parts flour and water in a clean glass jar, stirring vigorously to ensure everything was well incorporated. Over the next few days, we observed it carefully, noting subtle changes like the appearance of tiny bubbles, a faint sour smell, and a slight rise. These were promising signs of microbial activity, indicators the yeast and bacteria were already establishing themselves.
The feeding process is critical. We would discard a portion of the starter each day, typically half, before adding an equal weight of fresh flour and water. The ratio of flour to water in our feedings has evolved over time, but the goal remains constant: to provide the starter with ample nutrients while maintaining the right balance of hydration. We've found that a 1:1:1 ratio (starter:flour:water, all measured by weight) yields optimal results; this specific ratio is responsible for a healthy and active culture, capable of producing excellent bread.
Temperature plays a significant role in how a starter works. Warm temperatures speed up fermentation, and cold temperatures slow it down. During the warmer months, we store our starter at room temperature, typically around 70-75°F (21-24°C), resulting in a rapid rise and fall between feedings. During colder periods, we place the starter in a slightly warmer environment, like a utility room or a very lightly heated sunroom.
We watch for tell-tale signs. The starter should double in size, possibly triple, within a few hours after feeding. It should exhibit visible bubbles throughout, and the smell should transition from a slightly sweet or yeasty aroma to a distinctly tangy, slightly sour scent. A visual inspection is also important – the bubbles should be evenly distributed, and the starter should have a light, airy texture.
Mastering the Dough: A Symphony of Flour, Water, and Time
Once the starter is active and lively, the next step is to learn about your dough. This is where the transformation begins. The magic of sourdough lies in the interaction of flour, water, and time, so it pays to understand the fundamentals.
We begin our process by measuring the ingredients with precision. This is not a rough guide, or an approximation; it is a science. Our standard recipe starts with a combination of high-quality bread flour and a small percentage of whole wheat flour, providing structure and flavor. The hydration level, the ratio of water to flour, is of critical importance; we typically aim for a hydration level between 70% and 80%, depending on the flour and the desired crumb structure.
Autolyse is the next critical step. We combine the flour and water and let it rest, covered, for 30-60 minutes. This process allows the flour to fully hydrate, which develops gluten and improves elasticity. This stage is often overlooked, but the benefits are clear: improved dough extensibility, reduced mixing time, and a more open crumb.
After autolysing, we add the active starter and salt. Salt plays an important role in flavor development, dough strength, and controlling fermentation. We use fine sea salt, as it dissolves easily and is evenly distributed. We incorporate the starter and salt into the dough, using a series of folds and gentle kneading.
Bulk fermentation is the phase where the dough develops its flavor complexities. We place the dough in a lightly oiled container, covered, and let it rise at room temperature. This process can take anywhere from 4 to 6 hours, depending on the temperature and the activity of the starter.
During bulk fermentation, we perform a series of stretch and folds every 30-60 minutes during the initial hours. These folds help to strengthen the gluten structure and redistribute any gas bubbles. Each fold involves gently stretching a section of the dough and folding it over itself. This process is not about force, but rather about nurturing the dough's strength.
We monitor the dough closely throughout bulk fermentation, paying attention to the rise and the development of bubbles. The dough should increase in volume by about 50-75%. The surface should be smooth, and small bubbles should begin to form. We test it. We prod it. We feel it.
Shaping and Proofing: Sculpting the Perfect Loaf
Once bulk fermentation is complete, it's time to shape the dough into its final loaf form. We gently turn the dough out onto a lightly floured surface. We then shape the dough into either a round (boule) or an oblong (batard), depending on our preference and the intended baking vessel.
The shaping process is a combination of gentle handling and deliberate actions. We gently stretch and fold the dough, creating surface tension and forming a tight shape. This tension is essential for the loaf’s structure and its final rise. We pay attention to the seams, making sure they are sealed properly to prevent the loaf from collapsing during baking.
After shaping, we place the dough in a proofing basket (banneton) lined with floured linen. The basket provides support and helps the dough retain its shape while it proofs. We dust the loaf with flour before it goes into the basket. This creates a beautiful, patterned crust after baking.
Proofing, the final rise before baking, is critical. We proof the shaped loaf in the refrigerator for at least 12 hours. This cold proofing slows down the fermentation, which adds depth of flavor and improves crumb structure. We often proof our dough for up to 24 hours. This also makes the dough easier to handle and score.
Baking to Perfection: The Moment of Truth
The baking process requires precision and mastery of heat control. We prepare the oven at least an hour before baking, preheating a Dutch oven to 500°F (260°C). The Dutch oven creates a humid environment, which helps create a superior, crusty loaf.
We carefully remove the hot Dutch oven from the oven and gently place the proofed loaf into the Dutch oven. We score the loaf with a lame or a sharp knife, which helps to control the expansion of the dough in the oven and creates a beautiful design. We score the loaf at an angle. We score the loaf deeply enough.
We cover the Dutch oven and bake the loaf for 20 minutes, then remove the lid and bake for an additional 25-30 minutes, or until the crust is deeply golden brown and the internal temperature reaches 200-210°F (93-99°C).
The aroma fills the air, becoming mouthwatering. We check the bread. We listen to the sizzle.
After removing the loaf, we let it cool completely on a wire rack before slicing. This is the hardest part! The cooling allows the structure to set and prevents a gummy texture. It is a test of patience.
Troubleshooting and Refinement: The Path to Sourdough Mastery
Mastering sourdough takes practice, patience, and a willingness to learn from mistakes. Here are some common challenges and how we address them:
- Dense loaf: This can be caused by under-proofing, over-proofing, insufficient gluten development, or an inactive starter. Ensure your starter is active, your dough is fully fermented during bulk fermentation, and your proofing time is appropriate.
- Flat loaf: Often indicates a lack of strength in the dough. Ensure proper gluten development through the autolyse and stretch-and-fold techniques.
- Sour taste is too strong: Experiment with different feeding schedules for your starter, adjust the bulk fermentation time, and consider adding a touch of sweetness to your recipe.
- Weak crust: Make sure your oven is preheated to the correct temperature and that you are using a Dutch oven or a steam bath to create a humid environment during baking.
We encourage you to embrace the process, to experiment with different flours, hydration levels, and shaping techniques. Your journey will be unique, and the rewards – a warm, crusty loaf of sourdough, fresh from your own oven – are immeasurable.
