cara menyambungkan wifi ke laptop yang troubleshoot

Title: Cara atasi WiFi tidak bisa connect di laptop not connected
Channel: ijal tutorial
Cara atasi WiFi tidak bisa connect di laptop not connected by ijal tutorial
cara menyambungkan wifi ke laptop yang troubleshoot, cara menyambungkan internet ke laptop yang troubleshoot, cara enable wifi di laptop
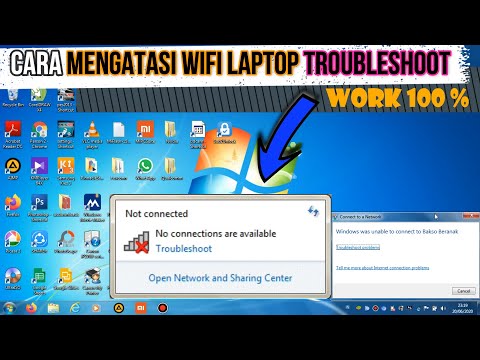
Laptop WiFi Not Connecting? FIX IT NOW!
Uh Oh! My Laptop's WiFi Is Playing Hide-and-Seek! Let's Find It!
It's the digital age, and we're all connected. Your laptop, however, seems to have developed a sudden aversion to the internet. Suddenly, your Wi-Fi connection has vanished like a magician’s rabbit. Panic might set in, but let’s not go there. We'll walk through this together, step by step. Let’s get your laptop back online.
Is It Really the Wi-Fi, or Is It a Case of Mistaken Identity?
Before you start furiously clicking, let's determine if the problem actually is your Wi-Fi. Check your other devices. Is your phone connected? Does your tablet have internet access? If everything else is working, you can confidently point the finger at your laptop. Otherwise, the issue could be with your internet service provider (ISP) or your router. So, before you proceed, verify the source.
Restarting: The Digital Equivalent of “Have You Tried Turning It Off and On Again?”
It sounds cliche, but it’s often the simplest solution. Restarting your laptop can magically resolve many software glitches that cause Wi-Fi woes. Moreover, it clears temporary files and refreshes its operational state. Do this now. Shut your laptop down completely. Wait a minute or two, and then power it back up. Now, see if your Wi-Fi is back in action.
Inspecting the Airplane Mode Switch: Are You Flying Solo?
Airplane mode is handy. It disables all wireless communications, including Wi-Fi. But it can also be your worst enemy when you need to connect. Ensure that airplane mode is off. Check your system tray or your settings menu. A quick glance will confirm its status. If it’s on, turn it off. That single action could bring back your connection. Sometimes the simplest solutions truly work.
Checking the Wi-Fi Adapter: Is It Awake and Ready?
Your Wi-Fi adapter is the unsung hero of your laptop’s connectivity. You should confirm it's enabled. First, go to your device manager. You can search for it in the Windows search bar. Look for “Network adapters.” Expand this section. You should see your wireless adapter listed. If it has a downward-facing arrow, it’s disabled. Right-click on it and select “Enable device.” Afterward, restart your laptop again for good measure.
Router Reset: Giving Your Gateway a Fresh Start
Even if your laptop is the only device affected, the issue could lie with your router. Try a simple router reset. Unplug your router from the power outlet. Wait about thirty seconds. Plug it back in. Allow it to fully boot up. This process can often resolve connection issues. Then, try connecting your laptop again. You should notice the difference.
Driver Drama: Are Your Drivers Up to Date?
Outdated or corrupted drivers can cause all sorts of problems, including Wi-Fi disconnections. You must check that your Wi-Fi adapter drivers are up to date. Go back to your device manager. Right-click on your Wi-Fi adapter. Then, select “Update driver.” Choose the option to search automatically for updated driver software. Windows will search for, download, and install any available updates. After that, again, restart your laptop.
Troubleshooting Built-in: Let Windows Be Your Guide
Windows has a built-in network troubleshooter. It is designed to diagnose and fix common connection problems. Search for “Network troubleshooter” or "Network and Internet settings" in the Windows search bar. Run the troubleshooter. It will automatically scan for issues and suggest fixes. Follow the prompts. This step might instantly bring back your connection.
IP Conflicts: A Clash of Digital Identities
Sometimes, your laptop might be trying to use an IP address already in use on your network. This causes a conflict. To fix this you can usually refresh your IP. Open the command prompt. Type “ipconfig /release” and press Enter. Then, type “ipconfig /renew” and press Enter. This asks your router for a new IP address.
Investigating the Physical Realm: A Matter of Distance
Walls, other electronic devices, and even microwaves can interfere with your Wi-Fi signal. Move your laptop closer to your router. If you are experiencing connectivity problems, consider this. Try a different location in your home. See if the signal improves. Sometimes you just need a better line of sight.
Contacting Support: When You Need an Expert
If you’ve tried all of the above and are still stuck, it's time to seek professional help. Contact your internet service provider. They can assess the situation from their end. They also have advanced diagnostic tools. Sometimes the problem is external. They can also troubleshoot your router. Or, take your laptop to a qualified technician. Don't hesitate, if you are stumped.
Wrapping Things Up: Staying Connected in the Digital World
Losing your Wi-Fi connection can be frustrating. However, it's also usually fixable. By following these steps, you can troubleshoot most common Wi-Fi issues. Remember, persistence is important. Don't give up! With a little patience, you'll be back online in no time. Now, go forth and reconnect!
Laptop WiFi Speed Killer: Homemade Antenna Booster!Laptop WiFi Not Connecting? FIX IT NOW!
Hey everyone! Ever stared blankly at your laptop screen, a digital wasteland because your Wi-Fi decided to take a vacation? I get it. We've all been there. It's a frustrating experience, like trying to hold a conversation at a rave – impossible! Today, we're diving deep into the world of Wi-Fi woes and, more importantly, how to conquer them. We'll tackle the common culprits, offer practical solutions, and get you back online faster than you can say "buffering."
1. The Dreaded "No Internet" Sign: Why is My Laptop Giving Me the Cold Shoulder?
Before we start throwing virtual wrenches at the problem, let's understand why your laptop might be snubbing your Wi-Fi. Think of your internet connection as a complex highway system. There are many points where a hiccup can occur, from the router directing traffic to your laptop’s internal receiver. This malfunction can happen anywhere. This is a lot like a chain reaction, remember, sometimes things go wrong, let’s figure out where your chain broke.
2. Is it the Wi-Fi, or Is It You? (Checking Your Connection Status)
First things first: rule out the easy stuff. Are you connected to the correct Wi-Fi network? Double-check the network name and the password. I once spent a solid hour troubleshooting only to realize I was trying to connect to my neighbor's network. Facepalm moment. Make sure "Airplane Mode" isn't switched on – a common culprit. Also, check your other devices – are they having trouble too? If your phone and tablet are also offline, the problem likely isn’t your laptop.
3. The Simple Reboot: Your Laptop's Digital Reset Button
This is the equivalent of turning it off and on again. It's often the first (and sometimes the only) fix you need. Restart your laptop. Restart your router. Restart your modem. These simple steps often clear up minor glitches. Think of it like hitting the "reset" button on a malfunctioning video game – sometimes, it’s all it takes to get back in the game!
4. The Router Rhapsody: Giving Your Router Some TLC
Your router is the bridge between your laptop and the internet. Just like a bridge needs maintenance, so does your router.
- Power Cycle: Unplug your router and modem, wait 30 seconds, and plug them back in. This forces them to reset their logic and rediscover your internet connection.
- Check the Lights: Are the lights on your router blinking as they should? Solid lights usually indicate the device is functioning. Flashing lights often denote activity. If the lights are off, that might suggest a power issue.
5. The Driver Dilemma: Updating Your Network Adapter Drivers
Your network adapter is like the translator that deciphers Wi-Fi signals. Outdated drivers can cause communication breakdowns.
- How to Update:
- Press the Windows key + X.
- Select "Device Manager."
- Expand "Network adapters."
- Right-click on your Wi-Fi adapter (it might say something like "Wireless Network Adapter").
- Select "Update driver."
- Choose "Search automatically for drivers." Windows will then attempt to find and install the latest driver.
6. The Firewall Frenzy: Is Your Firewall Blocking Your Wi-Fi?
Your firewall is like a security guard, but sometimes it can be a little too zealous, blocking legitimate traffic. Temporarily disabling your firewall can help determine if it’s at fault.
- Caution: Only disable your firewall temporarily for troubleshooting purposes. Always re-enable it afterward for security.
- How to Check Windows Firewall: Use the Windows search bar and type "Windows Defender Firewall," select "Turn Windows Defender Firewall on or off." Temporarily turn it off.
7. The IP Address Inquisition: Are Your Settings Correct?
Incorrect IP address settings can definitely cause problems. Don't worry, we'll keep is simple.
- Automatic IP: Ensure your Wi-Fi adapter is set to obtain an IP address automatically.
- Go to Network Connections (Type Network connections in the search bar)
- Right-click on your Wi-Fi adapter and select "Properties."
- Double-click on "Internet Protocol Version 4 (TCP/IPv4)."
- Make sure "Obtain an IP address automatically" and "Obtain DNS server address automatically" are selected.
8. The Physical Connection Conundrum: Checking Your Hardware
While Wi-Fi is wireless, your laptop's internal components aren't. A loose wireless chip can cause connectivity issues. Also, check around your laptop to ensure the wireless card is in place properly.
9. The DNS Detective: Solving Domain Name System Issues
DNS servers translate website names (like google.com) into IP addresses. Sometimes, the ones your laptop uses can be slow or unreliable.
- Try Google's DNS:
- In the IPv4 settings (see section 7)
- Use the following DNS server addresses: Preferred DNS server: 8.8.8.8, Alternate DNS server: 8.8.4.4.
10. The Bandwidth Battle: Is Your Wi-Fi Overloaded?
If you’re on a 2.4 GHz network, know that this band frequently has congestion. Have you got a lot of devices connected? Streaming multiple videos? If so, your Wi-Fi might be overloaded. This can cause slow speeds or connection dropouts. Try disconnecting some devices or switching to the less crowded 5 GHz band if your router supports it.
11. The Distance Delusion: Is Your Laptop Too Far Away?
Wi-Fi signals weaken over distance. Your laptop's range will depend on the router's power and obstacles, such as walls.
- Bring the Router Closer: Move your laptop closer to the router to see if the connection improves.
- Avoid Obstacles: Minimize the number of walls and other obstructions between your laptop and the router.
12. The Interference Intrusion: Battling Signal Disruptions
Microwaves, Bluetooth devices, and other electronics can interfere with Wi-Fi signals, sort of like radio stations competing for the same frequency.
- Reduce Interference: Move your router away from other electronic devices.
- Change Wi-Fi Channel: Log in to your router's settings (usually by typing its IP address into your web browser) and try changing the Wi-Fi channel. There's often a "Wireless" or "Wi-Fi" section where you can do this.
13. The Malware Menace: Is Your Laptop Infected?
Sometimes, malware can mess with your network settings, causing Wi-Fi problems.
- Run a Scan: Run a full scan with your antivirus software to check for infections.
14. Consider a Factory Reset (As a Last Resort!)
We're getting into the deep end of the pool here! A factory reset wipes your laptop clean, returning it to its original state. This will erase everything on your computer, so back up your important files before considering this!
- How to do a Reset: Search for "reset this PC" in the Windows search bar. Follow the on-screen instructions. Select the option to keep your files if you wish.
- Warning: This is a time-consuming process and should be a last resort.
15. When to Call in the Cavalry (Seeking Professional Help)
If you’ve tried everything and still can’t connect, it's time to call a professional.
- Contact Your ISP: Your internet service provider (ISP) can often troubleshoot problems with your modem and internet service.
- Seek IT Support: If the issue is with your laptop, an IT technician can diagnose hardware or software problems.
Conclusion: Back to the Digital Battlefield!
So, we've covered the gamut of Wi-Fi troubleshooting. From the simple reboot to more advanced techniques, you've got a arsenal of tools to fix your laptop's Wi-Fi woes. Remember, don't panic! Take it one step at a time, and you'll be back online in no time. Now go forth and conquer the digital world!
Principal Keywords: Laptop, WiFi, Not Connecting, Fix.
SEO Headline: Laptop WiFi Not Connecting? Quick Fix Guide!
Pathway: Laptop > WiFi > Fix
Meta Summary: Is your laptop WiFi not connecting? Don't panic! Learn quick fixes to get back online. Troubleshooting tips, step-by-step guides, and expert advice.
Image Alt Text: Frustrated person looking at a laptop with a Wi-Fi icon.
Image Caption: Troubleshooting Wi-Fi problems.
FAQs
Q1: Why does my laptop say "No Internet Access" even though I'm connected to Wi-Fi?
A1: This often means your laptop is connected to the Wi-Fi network, but it's not receiving an internet signal. Check your router, modem, and internet service itself. Try restarting all these devices.
Q2: My Wi-Fi was working fine yesterday, but not today. What happened?
A2: Several things could have
Laptop WiFi Dropping? This SHOCKING Fix Works Every Time!Cara Mengatasi Wifi Laptop atau PC Troubleshoot Problems
By Kawan Ikhwan Cara Mengatasi Wifi Laptop atau PC Troubleshoot Problems by Kawan Ikhwan
Cara Mengatasi Laptop Tidak Bisa Connect Wifi Windows 10, 8 & 7

By Jari Mungil Rayyan Cara Mengatasi Laptop Tidak Bisa Connect Wifi Windows 10, 8 & 7 by Jari Mungil Rayyan
Cara Atasi Wifi Mati, Wifi Tidak Mau Konek Not Connected Wifi Pada Windows 7

By asal ngelik Cara Atasi Wifi Mati, Wifi Tidak Mau Konek Not Connected Wifi Pada Windows 7 by asal ngelik

Title: Cara atasi WiFi tidak bisa connect di laptop not connected WiFi
Channel: Duan Dawon Channel
Cara atasi WiFi tidak bisa connect di laptop not connected WiFi by Duan Dawon Channel
Wifi On Laptop
Here is the title: The Definitive Guide to Choosing the Perfect Hiking Boots for Any Trail
The Definitive Guide to Choosing the Perfect Hiking Boots for Any Trail
Embarking on a hike is more than just a recreational activity; it's an immersion into the raw beauty of nature, a challenge to your physical limits, and a rejuvenation for the soul. However, the success of any hiking adventure hinges on the gear you bring. Among these essentials, the hiking boot stands paramount. It’s the foundation of your trek, the protector of your feet, and the very instrument that allows you to experience the trail firsthand. Selecting the perfect pair, however, can be a daunting task given the myriad of options available. This guide serves as your definitive resource, meticulously detailing every aspect of hiking boot selection to ensure you find the ideal fit for your unique needs and preferences.
Understanding the Core Components of a Hiking Boot
Before diving into specific types and features, a fundamental understanding of the key components of a hiking boot is essential. This knowledge will empower you to make informed decisions and discern the subtle differences that separate a good boot from a great one.
The Upper: This is the external part of the boot, encompassing the entire foot. Uppers are crafted from various materials, each offering unique advantages. Leather provides exceptional durability and water resistance (with proper care), ideal for rugged terrains. Synthetics, such as nylon and polyester, are lighter, quicker to dry, and often more affordable, a great choice for warmer conditions. Many boots utilize a combination of materials, seeking to balance durability, weight, and breathability.
The Midsole: Sandwiched between the upper and the outsole, the midsole is the primary cushioning and shock-absorbing layer of the boot. Materials here include EVA (Ethylene Vinyl Acetate), known for its lightweight properties and comfort, and polyurethane (PU), prized for its durability and support. The density of the midsole significantly impacts the boot’s stiffness and responsiveness. Firmer midsoles provide greater stability, suitable for carrying heavier loads, while softer midsoles offer superior comfort, perfect for lighter day hikes.
The Outsole: This is the contact point between the boot and the trail, responsible for traction and grip. Outsoles are made from rubber compounds, the most common being Vibram, which are renowned for their excellent grip and durability. The lug pattern (the design of the tread) is crucial. Aggressive lugs, deep and widely spaced, are designed for optimal grip in muddy or uneven terrains. Smoother lugs, closely spaced, are better suited for well-maintained trails.
The Insole: Also known as the footbed or sockliner, the insole provides cushioning and comfort directly under your foot. Insoles can be replaced to customize the fit, address specific foot needs (such as arch support), or to improve overall comfort.
Different Types of Hiking Boots for Various Terrains
The hiking boot landscape offers a diverse array of options, each meticulously engineered to perform optimally in different conditions. Recognizing the distinctions between these boot types is crucial in selecting the right pair for your intended adventures.
Lightweight Hiking Boots: Designed for day hikes and lighter backpacking trips on well-maintained trails, these boots prioritize agility and comfort. They typically feature synthetic uppers, lighter midsoles, and a lower cut around the ankle, promoting freedom of movement. They're excellent choices for fastpacking, trail running, and warmer weather hiking where breathability is a priority. They are not recommended for off-trail excursions or carrying heavy loads.
Midweight Hiking Boots: These boots serve as a versatile option, bridging the gap between lightweight boots and heavier backpacking boots. They provide more support and durability than lightweight boots, making them suitable for longer day hikes, shorter backpacking trips with moderate loads, and off-trail excursions. They commonly feature a higher cut around the ankle and a stiffer midsole than lightweight options, delivering enhanced stability. Leather uppers are common for their durability and water resistance.
Backpacking Boots: Engineered for extended backpacking trips, these boots prioritize durability, support, and load-carrying capacity. They typically feature a high cut, robust midsoles, and stiff construction. They are often constructed from leather or durable synthetic materials. They offer superior ankle support, protecting against injury when carrying heavy backpacks (50+ pounds) over challenging terrain. Backpacking boots are also known for their excellent water resistance.
Mountaineering Boots: These are the most specialized type of hiking boot, built for challenging mountaineering and alpine environments. They are typically made from rigid materials such as plastic or stiffened leather and feature a fully lugged outsole compatible with crampons. They offer exceptional ankle support, insulation, and water resistance to endure extreme conditions.
Key Considerations When Choosing Hiking Boots
Beyond the general boot type, several specific factors necessitate careful consideration to find the perfect match for your individual needs.
Fit: The fit is paramount. Ill-fitting boots can lead to blisters, discomfort, and potential injuries. Visit a reputable outdoor retailer and have your feet professionally measured. Try on boots at the end of the day, when your feet are more swollen, and wear the socks you plan to hike in. Ensure there’s adequate room in the toe box to prevent your toes from bumping the front of the boot on descents. Allow a thumb's width of space between the longest toe and the end of the boot. Pay attention to the heel hold; your heel should remain securely in place with minimal lift. Walk around the store in the boots for an extended period to assess their comfort and support.
Material: The choice of material influences durability, water resistance, breathability, and weight. Leather boots offer superior durability and water resistance, ideal for rugged environments, but require proper care. Synthetic materials are lighter, dry faster, and offer good breathability, a great option for warmer climates. Choose the material that aligns with your expected hiking conditions.
Waterproofing: If you anticipate encountering wet conditions, prioritize waterproof boots. Boots featuring a waterproof membrane, such as Gore-Tex, effectively repel water while allowing some breathability to prevent overheating. Remember that even waterproof boots can be overwhelmed in prolonged exposure to deep water.
Support and Stability: The level of support and stability needed depends on the terrain and the weight you carry. Stiffer boots with robust midsoles provide enhanced stability for backpacking with heavy loads. Softer boots offer more flexibility and comfort for day hikes.
Weight: The weight of the boot impacts your energy expenditure. Lighter boots are generally preferred for faster hiking, while heavier boots offer more support and durability. Consider the weight of the boot in relation to the length and difficulty of your hikes.
Caring for Your Hiking Boots
Proper care extends the lifespan of your hiking boots and ensures they perform at their best.
Cleaning: After each hike, remove dirt and debris from your boots. Use a brush and warm water to clean the uppers and outsoles. Avoid harsh chemicals that can damage the materials.
Drying: Allow your boots to dry naturally after each hike. Avoid direct sunlight or heat, which can damage the materials. Remove the insoles and place them in a well-ventilated area to dry separately.
Conditioning (Leather Boots): Leather boots require regular conditioning to maintain their suppleness and water resistance. Use a leather conditioner specifically designed for hiking boots, following the manufacturer's instructions.
Waterproofing: Reapply water repellent treatments as needed, especially after cleaning or when the boots start to lose their water resistance.
Storage: Store your boots in a cool, dry place, away from direct sunlight. Consider using boot trees to help maintain their shape.
Tackling Common Hiking Boot Problems
Even with careful selection and meticulous care, hiking boots can sometimes present challenges. Here's how to address some common issues.
Blisters: The bane of every hiker's existence. Preventing blisters involves proper fit, moisture management, and friction reduction. Wear moisture-wicking socks, use a blister-prevention balm, and identify hot spots before they become full-blown blisters. If a blister develops, treat it promptly with a bandage and padding.
Foot Odor: Foot odor is caused by bacteria. Combat this by washing your feet regularly, wearing moisture-wicking socks, and using odor-fighting insoles or foot powders.
Water Leaks: If your boots leak, assess the source of the leak. Waterproof membranes can degrade over time. Try reapplying water-repellent treatments to the upper. In extreme cases, the boots may need to be repaired or replaced.
Lack of Grip: If the outsole's grip diminishes, inspect for wear and tear. Outsoles wear down over time. Consider replacing the boots if the grip becomes compromised.
The Final Step – Hitting the Trail
Selecting the perfect hiking boot is a journey in itself, a process of self-discovery and careful consideration. With the knowledge provided in this guide, you are now equipped to venture out and explore the trails with confidence. Embrace the adventure, celebrate the challenge, and enjoy the freedom of the open trail. After taking the time to find the right boot, your feet will thank you with every step. Remember that this guide is a beginning, a foundation upon which you can build your own expertise through experience. Happy trails!
