como activar wifi en laptop dell windows 7

Title: Windows 7 no detecta wifi
Channel: Jorgue Robert
Windows 7 no detecta wifi by Jorgue Robert
como activar el wifi de mi laptop dell windows 10, como activar el wifi de mi laptop dell windows 7, wifi option not showing in windows 10 dell laptop, dell laptop wifi not working windows 7
Unlock Your Dell WiFi NOW! (Windows 7 Secret Trick)
Unleash Your Dell WiFi: A Windows 7 Hidden Treasure Trove
Ever found yourself staring longingly at your Dell laptop, craving a hotspot connection, yet feeling frustrated by the flickering WiFi icon? Indeed, it’s a familiar predicament. Don't despair! This is a scenario that many users face. Moreover, the fix might be simpler than you imagine. Ready to breathe new life into your Windows 7 Dell and its wireless capabilities?
The Elusive WiFi: A Tale of Two Troubles
Sometimes, the WiFi gremlins wreak havoc. Firstly, there's the pesky driver issue. Furthermore, outdated or corrupted drivers are often the culprits. Secondly, your hardware's settings could be playing tricks. Consequently, understanding these factors is the initial step to successful WiFi restoration. It's like diagnosing a patient before prescribing treatment.
Delving into the Driver's Realm: A Critical First Step
So, let's tackle the driver dilemma head-on. In fact, this is often the root of the problem. The good news? Resolving it is typically straightforward. You should go to the Dell support website. Search for your specific Dell model. Furthermore, be sure to specify your operating system as Windows 7. Locate the network adapter drivers. Now, download the most recent version for your WiFi hardware. After that, install it. Restart your machine. Afterward, your WiFi might spring back to life.
Navigating the Network Adapter Settings: Fine-Tuning Your Connection
Assuming the driver update didn’t magically work, let's explore the network adapter settings. Therefore, this entails checking your adapter’s configuration. Go to the "Network and Sharing Center" in the Control Panel. Now, click "Change adapter settings." Right-click on your wireless adapter. After that, select "Properties." Within the properties window, look for "Configure." You’ll now find settings specific to your WiFi adapter.
Unveiling the Power Management Mystery: Battery Life's Impact
Consider power management settings; they also have a role. Windows 7, by default, attempts to conserve battery. However, this can sometimes cripple network performance. Consequently, locate the "Power Management" tab within your adapter's properties. Ensure that the option to "Allow the computer to turn off this device to save power" is unchecked. This action often works wonders.
Troubleshooting Tip: The Wireless Network Troubleshooter
Furthermore, Windows 7 has a built-in troubleshooter. It's a helpful tool for diagnosing network problems. Access it via the "Network and Sharing Center." Click "Troubleshoot problems." Select the option related to the wireless network. The troubleshooter will examine your connection. Consequently, it will provide suggestions. It might even resolve the issue automatically.
Advanced Tactics: Exploring the Services Panel
Occasionally, the services supporting network connectivity might falter. Thus, let's investigate the "Services" panel. You can open it by typing "services.msc" in the Start menu search bar. Scan for services related to networking. One is "WLAN AutoConfig." Similarly, another is "DHCP Client." Guarantee these services are running. Furthermore, set their startup types to "Automatic."
The Registry Rescue: Advanced Tweaks for Experts
For advanced users, there are also registry tweaks. Please exercise extreme caution with this method. A minor mistake can destabilize your system. Create a system restore point before proceeding. Open the Registry Editor by typing "regedit" in the Start menu search. Navigate to the following key: HKEY_LOCAL_MACHINE\SYSTEM\CurrentControlSet\services\WlanSvc. Ensure the "Start" value is set to "2" (automatic). Also, verify the values of “Type” are 0x00000010 (16).
Maintaining Optimal Wireless Performance
So, staying connected involves more than just fixing the initial problem. You should periodically check for new driver updates. Moreover, you can regularly assess your network adapter's settings. Keeping your device secure is also critical. Therefore, enable a strong password for your WiFi network. Moreover, consider using WPA2 or WPA3 encryption.
Sealing Your WiFi's Success: A Recap
In summary, restoring your Dell WiFi on Windows 7 doesn't need to be a frustrating ordeal. So, begin your troubleshooting journey with driver updates. After that, fine-tune your adapter settings. Explore power management. Utilize the troubleshooter. Assess the services. Consider registry tweaks, if you’re capable. Maintaining a healthy network is also a must. With a methodical approach, you can revive your wireless connectivity. Finally, enjoy uninterrupted browsing and streaming. Now, go forth and conquer your Dell's WiFi woes!
Laptop WiFi Booster: Snapdeal's Unbeatable Deals!Unlock Your Dell WiFi NOW! (Windows 7 Secret Trick)
Hey fellow tech enthusiasts! Ever been in that frustrating situation: desperately needing to hop online, only to find your Dell laptop stubbornly refusing to connect to WiFi? It’s a universal experience, like finding your favorite ice cream flavor is suddenly out of stock. We’ve all been there! But fear not, because today, we're diving deep into a secret trick—a Windows 7 marvel—that can often breathe life back into your Dell’s WiFi connection. Let’s unlock your Dell WiFi, and get you back into the digital world!
1. The WiFi Woes: A Dell and Windows 7 Story
Let’s be honest, Windows 7 had its quirks. It was a trusty steed for many, but also prone to throwing the occasional temper tantrum. And when it came to WiFi on a Dell, the connection issues could be as unpredictable as a toddler’s mood. We’re talking dropped connections, networks that mysteriously vanish, and that dreaded "No connections are available" error message. It felt like you were stranded on a deserted island, except instead of coconuts, you craved cat videos.
2. Unveiling the Mystery: The Windows 7 Driver Dilemma
One of the biggest culprits behind Dell WiFi woes on Windows 7? Drivers, those tiny software programs that act like translators between your hardware (the WiFi card) and your operating system. Sometimes, the drivers are outdated, corrupted, or simply not playing nicely with your specific Dell model. It’s like having a bad connection at a restaurant; you'll be trying to communicate with a waiter, but, nobody seems to understand you.
3. Your Secret Weapon: Device Manager – The WiFi Decoder
Ready to get to the good stuff? The key to this is Windows 7's Device Manager. Think of it as the control panel for all your computer's hardware components.
- Accessing Device Manager: Hit the Windows key + R, type "devmgmt.msc", and press Enter. Or, right-click "Computer" (usually on your desktop or in the Start menu), select "Manage", and then click "Device Manager".
4. The Hunt for the Network Adapters
Within the Device Manager, you'll see a long list of hardware categories. Expand the "Network adapters" section. This is where your WiFi card resides (along with other networking components). It’s like finding the right aisle in a massive supermarket.
5. Spotting the Problem: Look for the Yellow Triangle
Now, here’s the tricky part. Do you see any entries under "Network adapters" with a yellow exclamation mark or a downward-pointing arrow? A yellow exclamation point means there's a driver issue or conflict. A downward-pointing arrow signals that the network adapter is disabled. Think of the yellow exclamation mark as a flashing warning light, and the arrow as a computer that's just gone to sleep for a long nap.
6. The Driver Update Dance: A Quick Fix
If you spot a problem, the first step is usually an update. Right-click on the problem device (the one with the yellow mark or arrow) and select "Update driver software." Windows will then try to find the latest driver for you online. This is the equivalent of getting a software update, like that new feature on your favorite app.
- Automatic Search: Let Windows search for the best driver.
- Manual Search: If automatic search doesn't work, you might need to find the driver yourself.
7. Dell's Driver Website: Your Digital Treasure Chest
If Windows can’t find a driver, head over to Dell’s support website. You’ll need your Dell service tag (found on the bottom of your laptop or on a sticker near the keyboard) to identify your specific model. Think of it as finding the right key to unlock a specific door. Once you enter your model, you can search for drivers, particularly network adapters, for Windows 7. Here's a common pathway:
- Go to Dell's support site.
- Enter your service tag.
- Select Drivers & Downloads.
- Filter by "Network" or "WiFi."
- Download and install the appropriate driver.
8. The Driver Rollback Option: Going Back in Time
Sometimes, a recent driver update might be the problem. If you recently updated your driver and your WiFi started acting up, try "rolling back" to the previous version. Right-click the device in Device Manager, select "Properties," go to the "Driver" tab and click "Roll Back Driver." This is like your computer's own personal time machine!
9. Enabling the Disabled: Waking Up Your WiFi
If the network adapter is disabled (indicated by a downward-pointing arrow), right-click on it and select "Enable." It’s like giving your WiFi card a caffeine shot!
10. Hardware Troubleshooting: The Physical Check
While this guide focuses on software, it's worth giving your hardware a quick glance. Make sure your WiFi switch (if your Dell has one) is turned on. Sometimes those simple things can lead to the problem!
11. Restart and Reconnect: The Moment of Truth
After trying any of these fixes, it's crucial to restart your computer. This gives everything a fresh start. Then, try reconnecting to your WiFi network.
12. A Network Reset: A Fresh Start
If all else fails, consider resetting your network settings. This can sometimes resolve stubborn connection issues.
13. Addressing Network Conflicts: The Firewall Factor
Sometimes, firewalls or security software can interfere with WiFi connections. Temporarily disabling your firewall (ensure you re-enable it afterward!) or checking your security software can sometimes resolve these types of conflicts.
14. Troubleshooting Tips: The WiFi Whisperer's Handbook
- Check your router: Ensure your router is working correctly. Try restarting it as well!
- Forget and reconnect: "Forget" your WiFi network in Windows settings and try connecting again.
- Run the Network Troubleshooter: A handy built-in tool in Windows 7 that can automatically diagnose and fix common problems.
15. The Victory Lap: Achieving WiFi Nirvana
After going through these steps, you should have a functional WiFi connection on your Dell laptop. It’s a great feeling, like finally getting that puzzle piece to fit.
Closing Thoughts
So there you have it! We’ve explored a simple yet effective trick to unlock your Dell WiFi on Windows 7. Finding the right driver or troubleshooting in Device Manager can often get you back online in minutes. Remember, technology can be finicky, but with a little detective work, you can usually solve most WiFi problems. Now go forth, and enjoy your newly restored internet access!
Frequently Asked Questions (FAQs)
Why is my Dell WiFi not connecting after a Windows 7 update? Often, updates can introduce driver conflicts. Try rolling back your WiFi adapter driver in Device Manager to the previous version.
Where can I find the drivers for my Dell laptop? The best place to find drivers is on Dell's official support website. You’ll need your service tag to find the drivers specific to your model.
My WiFi adapter is not showing up in Device Manager. What should I do? This could indicate a hardware issue. First, restart your computer. Check the BIOS settings to ensure the WiFi adapter is enabled. If that doesn’t work, the adapter may need to be serviced.
What if the "Roll Back Driver" option is grayed out? This means you haven't installed a previous version of the driver yet. You might need to try downloading and reinstalling the driver from Dell's support website.
My WiFi still doesn't work. What are my next steps? If the fixes listed don't work, consider contacting Dell support or a local computer repair shop. They can diagnose any hardware issues that may need attention.
- Principal Keywords: Dell WiFi Windows 7 Fix.
- SEO Headline: Dell WiFi Fix: Simple Windows 7 Secret
- Pathway: /dell-wifi-fix
- Meta Summary: Stuck with Dell WiFi problems on Windows 7? Learn a secret trick using Device Manager for a quick fix! Get your laptop back online fast!
- Image Alt Text: A Dell laptop displaying a WiFi signal, with a Windows 7 interface and network adapter fixes being highlighted.
how to connect wifi to Dell laptoptrending viral like information dell computer 4k

By Hasan ki how to connect wifi to Dell laptoptrending viral like information dell computer 4k by Hasan ki
How to Install SIM Card In Laptop In Windows 10 Dell Latitude 7490
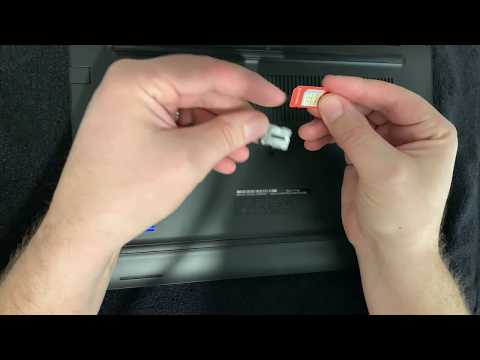
By Logan Dunning How to Install SIM Card In Laptop In Windows 10 Dell Latitude 7490 by Logan Dunning
Fix Dell Laptop Wi-Fi is Not Working Problem in Windows 1087 2025

By FIXsage Fix Dell Laptop Wi-Fi is Not Working Problem in Windows 1087 2025 by FIXsage

Title: How to enable your network connection in Windows 7
Channel: MHELP2U
How to enable your network connection in Windows 7 by MHELP2U
Wifi Not Found
Here's the article:
Title: The Definitive Guide to Mastering the Art of Sourdough Baking: From Starter to Slice
We've all seen them: those perfectly scored, artisan sourdough loaves gracing the tables of our favorite cafes and gracing our Instagram feeds. The slightly tangy aroma, the crackling crust, the airy, open crumb – sourdough baking has captured the hearts (and stomachs) of bakers worldwide. But the journey to sourdough success can seem daunting. Fear not, aspiring bakers! This comprehensive guide will walk you through every step of the process, from cultivating a thriving starter to enjoying the fruits of your labor: a truly exceptional sourdough loaf.
Cultivating a Flourishing Sourdough Starter: The Foundation of Excellence
The cornerstone of any remarkable sourdough creation is, without a doubt, the starter. This living culture of wild yeasts and beneficial bacteria is what gives sourdough its unique flavor profile, characteristic rise, and extended shelf life. Forget pre-packaged options; crafting your own starter is a rewarding endeavor.
The Initial Stages: Days 1-7
Day 1: The Genesis. Begin by combining equal parts by weight of unbleached all-purpose flour (or a blend of whole wheat and all-purpose for added complexity) and filtered, lukewarm water in a clean glass jar. A ratio of, say, 50 grams flour to 50 grams water (or a comfortable measure for scaling later) works well. Mix thoroughly until a shaggy dough forms. Cover loosely with a lid or cheesecloth secured with a rubber band to allow for air circulation while preventing contamination. Place it in a warm spot, ideally between 70-75°F (21-24°C), away from direct sunlight.
Days 2-3: Early Activity. Observe the mixture. You might notice tiny bubbles beginning to form. This is a sign that the wild yeasts are starting to colonize. Discard about half the mixture and feed it again with equal parts flour and water, stirring vigorously. The discarding process maintains the ratio of nutrients to the growing colony.
Days 4-7: The Rise and Fall. The activity will intensify. The starter may double or even triple in size, becoming bubbly, and perhaps developing a slightly sour aroma, which is a positive sign. Continue discarding half and feeding daily. The scent will change over time. Do not be alarmed if it has a slightly unpleasant smell initially, such as nail polish remover or the initial stages of fermentation.
Nurturing the Starter: The Ongoing Care
Once the starter is consistently doubling in size within a few hours of feeding, it’s ready to bake. At this stage, you'll want to adjust the feeding schedule based on your baking frequency and environmental conditions.
- Feeding Schedules: If you bake frequently (multiple times a week), the starter can thrive in the refrigerator, fed weekly with equal parts flour and water. Let it come back to room temperature and be active before using it for baking. For less frequent baking, keep it in the refrigerator and feed it every one to two weeks.
- The Smell Test: A healthy starter should have a pleasant, tangy aroma, reminiscent of yogurt or ripe fruit. If it smells off-putting or shows signs of mold, discard it and begin again.
Crafting the Perfect Sourdough Loaf: A Symphony of Flour, Water, and Time
With a robust starter, now we're ready to embark on the main event: baking the sourdough loaf.
The Recipe: Precision and Patience
The following recipe is a reliable starting point. Don’t be afraid to experiment with different flours and hydration levels as you gain experience.
Ingredients:
- 100 grams active sourdough starter (fed and bubbly)
- 350 grams bread flour (high-protein flour is crucial for structure)
- 50 grams whole wheat flour (for added flavor and texture)
- 300 grams lukewarm water (around 80-85°F / 27-29°C)
- 10 grams salt
Equipment:
- Large mixing bowl
- Bench scraper
- Dough scraper
- Linen-lined proofing basket (banneton)
- Dutch oven
The Process: Detailed Steps
- Autolyse (The Pre-Mix): In the large mixing bowl, combine the flours and water. Mix gently with your hands or a spatula until just combined. Cover and let it rest for 30-60 minutes at room temperature. This allows the flour to fully hydrate, which improves dough extensibility and gluten development.
- Adding the Starter: Add the active starter to the autolysed dough. Mix with your hands, squeezing and folding the dough until the starter is fully incorporated.
- Incorporating Salt: Add the salt and mix until it's incorporated. Salt controls fermentation.
- Bulk Fermentation (The Rise): Allow the dough to rest at room temperature (typically 70-75°F / 21-24°C). During bulk fermentation, which can last from 4-6 hours, carry out a series of stretch-and-folds every 30-60 minutes for the first 2-3 hours. Reach under the dough, gently lift a section, stretch it upwards, and fold it over the center. Repeat this around the bowl. This strengthens the gluten structure, which helps the dough retain gas during the rise.
- Proofing and Shaping: After bulk fermentation, gently turn the dough onto a lightly floured surface. Shape the dough into your desired form (round or oval). Place the shaped dough seam-side up in the linen-lined proofing basket that has been dusted with rice flour. Cover the dough and proof in the refrigerator (39-45°F / 4-7°C) for 12-24 hours. The cold environment retards the fermentation, creating richer flavor. This is a crucial step.
- Baking: Preheat your Dutch oven in the oven to 450°F (232°C) for at least 30 minutes. Carefully remove the hot Dutch oven. Gently remove the proofed dough from the proofing basket and place it into the preheated Dutch oven. Score the top of the loaf (use a lame or a sharp knife) to control the expansion during baking. Scoring helps with the presentation and allows gases to escape. Cover the Dutch oven with the lid and bake for 20 minutes. Then remove the lid and bake for another 25-30 minutes, or until the crust is deeply golden brown and the internal temperature reaches 200-210°F (93-99°C).
- Cooling: Remove the loaf from the Dutch oven and transfer it to a wire rack to cool completely before slicing and enjoying. This allows the internal structure to set, preventing a gummy texture.
Troubleshooting Common Sourdough Challenges
Even with the best intentions, sourdough baking can present challenges.
- Dough Doesn’t Rise: This is often caused by a weak starter. Ensure your starter is doubling in size after feeding. Review the temperature of the proofing environment. Consider the quality of your flour.
- Flat Loaf: Under-proofing or over-fermentation can lead to a flat loaf. Monitor the dough's behavior and adjust bulk fermentation times accordingly.
- Dense Crumb: Under-proofing and also insufficient gluten development can cause a dense crumb. Ensure adequate folding and proofing times. Use a high-protein flour.
- Sourness: If your loaf is too sour, reduce the amount of starter used or shorten the bulk fermentation and proofing times.
- Burnt Crust: Lower the oven temperature slightly. Avoid using a Dutch oven with a dark-colored interior, as it absorbs heat more quickly.
The Art of Scoring: Unveiling the Magic
Scoring is more than just aesthetics; it controls the expansion of the loaf during baking, influencing the final crust and crumb.
- Tools: Use a lame (a specialized scoring tool with a razor blade) or a very sharp knife.
- Techniques: Experiment with different scoring patterns. A diagonal slash is a classic choice. Curved slashes, cross-hatches, and artistic designs can also be employed. Score with confidence and a single, fluid motion.
The Flavor Profile: Beyond the Tang
The complex flavors of sourdough are due to the interplay of lactic acid bacteria and wild yeasts.
- Flavor Development: The type of flour, the fermentation time, and the starter’s age all influence the flavor. A long, cold proof in the refrigerator enhances the flavor development.
- Experimentation: Play with different flours (rye, spelt, etc.) to change the flavor and texture. Add seeds, herbs, or spices.
Preserving Your Sourdough: Enjoying the Fruits of Your Labor
Once baked, sourdough can be preserved to savor its taste longer.
- Storage: Store the cooled loaf in a bread bag, a cloth bag, or a loosely covered container at room temperature for a few days.
- Freezing: For longer storage, wrap the loaf tightly in plastic wrap and then in a freezer bag or in a freezer container before freezing. Thaw at room temperature.
- Reheating: Reheat slices in a toaster, oven, or on
