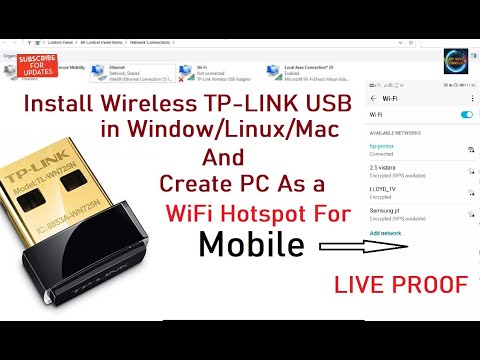
how to create wifi hotspot in laptop with dongle

Title: How to Create Wifi Hotspot in Windows 10 Tutorial
Channel: MDTechVideos
How to Create Wifi Hotspot in Windows 10 Tutorial by MDTechVideos
Unlock Your Laptop's Hidden Hotspot Power: Easy Dongle Setup!
Unleash Your Laptop's Inner Wireless Wizard: Master the Dongle Hotspot!
Ah, the digital frontier! Isn't technology amazing? You've likely experienced internet woes at some point. Your laptop, a powerful tool, often hides untapped potential. Today, let’s explore a surprisingly simple way to unlock it. We’re diving into your laptop's hotspot capabilities. Forget frustrating Wi-Fi dead zones. Embrace the liberty of a personal wireless network. This utilizes a humble yet potent device: the dongle.
The Dongle's Delight: Your Portable Internet Portal
Imagine this: you’re traveling. You desperately need a connection. Public Wi-Fi can be risky. It’s slow, too! Or perhaps you're at home. Your primary internet is down. A dongle swoops in like a digital superhero! A dongle, essentially, is a portable modem. It gets you online wherever there’s cellular service. So, it transforms your laptop into a mobile hotspot. This is a game-changer, truly.
Getting Started: The Simple Dongle Setup
The setup is delightfully straightforward. First find a compatible dongle. Research thoroughly. Consider your data needs. The best dongles support 4G or even 5G. These offer blazing-fast speeds. Buy one from a reputable provider. Next, insert the dongle into your laptop's USB port. It’s a simple physical connection. Now, insert the SIM card. Most dongles require a SIM card. It allows them to connect to a cellular network.
Software Symphony: Installing and Configuring Your Dongle
Software is key. Most dongles come with software. Install this. It usually includes drivers and management tools. Follow the on-screen prompts. This part is easy. The software allows you to manage your connection. It shows data usage and signal strength. It also lets you set up your hotspot. However, this is where the magic happens.
Creating Your Hotspot: Broadcasting Your Wireless Signal
Open the dongle’s software. Look for the "hotspot" or "Wi-Fi" settings. There is normally a section dedicated to this. You’ll need to set up a network name (SSID). Choose something recognizable. Next, secure your network with a strong password. This prevents unwanted access. Select a secure encryption method. WPA2 or WPA3 are ideal. Then, enable the hotspot function.
Connecting Your Devices: The Wireless Embrace
Once your hotspot is active, it’s time to connect. On your other devices, find the Wi-Fi settings. Scan for available networks. Your laptop’s hotspot should appear. Select it. Then, enter the password you created. Connect, and experience the freedom. You can now connect your phone, tablet, or other devices. Enjoy your new personal internet zone.
Troubleshooting Tango: Dancing with Potential Pitfalls
Things can go wrong sometimes. Don’t worry; it’s usually fixable. Is the dongle not connecting? Double-check the SIM card insertion. Ensure you have a network signal. Try restarting your laptop and the dongle. If problems persist, consult the dongle’s manual. Also, check your data plan. Perhaps you’ve used up your monthly allowance.
Data Usage Dance: Monitoring Your Wireless Footprint
Data usage matters. Keep an eye on it. The dongle software usually tracks your usage. Be mindful of bandwidth-intensive activities. Streaming videos or large downloads will consume more data. Also, consider data caps. Avoid unexpected overage charges.
Advanced Awesomeness: Enhancing Your Hotspot Experience
Ready to level up? Some dongles offer more advanced features. For example, some support multiple connected devices. Others provide guest network options. Experiment with these settings. This allows for greater customization. Explore the dongle’s settings. Tailor it to your specific needs. Moreover, consider signal boosters. These can improve reception in weak signal areas.
The Dongle Advantage: Embrace the Wireless Revolution
Your laptop and a dongle bring connectivity. The process is convenient. The benefits are undeniable. Freedom from unreliable Wi-Fi is liberating. So, embrace your laptop’s untapped potential. Experience the power of a personal hotspot. You're no longer tethered to your desk. You're in control of your connection. Therefore, go forth, connect, and conquer the digital world!
Laptop Ignoring Your WiFi Printer? THIS Secret Fix Works!Let's dive in!
Unlock Your Laptop's Hidden Hotspot Power: Easy Dongle Setup!
Hey there, tech enthusiasts! Ever find yourself in a coffee shop, a park, or even at a friend's house, desperately needing internet and your laptop is your only lifeline? We've all been there! Imagine, the Wi-Fi gods are not on your side, the connection is weaker than a kitten's purr, or worse, there's no Wi-Fi at all. This is where your laptop's hidden superpower comes into play – turning it into a blazing-fast mobile hotspot using a simple device: a dongle! And trust me, setting it up is easier than making your morning coffee. Let's unlock this hidden gem together.
1. The Wi-Fi Woes: Why You Need Your Laptop Hotspot Now!
Think about it – the modern world practically runs on the internet. Whether it’s catching up on emails, streaming your favorite series, or just staying connected with loved ones, a reliable internet connection is crucial. But Wi-Fi isn’t always reliable, right? It can be spotty, slow, or simply absent. And sometimes, you're just outside the house, and using your phone data is a no-no. That's when the magic of your laptop hotspot, fueled by a dongle, really shines. It’s like having a personal Wi-Fi router wherever you go.
2. What's a Dongle Anyway? Demystifying the Tech Talk
So, let's get a grip on what we're dealing with. A dongle, in this context, is essentially a small, portable device that plugs into your laptop's USB port. Think of it as a tiny antenna that connects to the cellular network. It's like giving your laptop superpowers, allowing it to receive and transmit data, turning it into a Wi-Fi hotspot, capable of sharing the internet connection with other devices, such as your phone, tablet, or even another laptop. It's a quick fix.
3. Choosing the Right Dongle: A Beginner's Guide
Okay, so you're sold on the idea. Now comes the fun part – choosing the right dongle! It's not as complicated as it sounds. Here's a simplified breakdown:
- Compatibility: Make sure the dongle is compatible with your laptop's operating system (Windows, macOS). This is a must! This is one of the first few parameters you have to check, or you will be facing a lot of issues and not be able to surf the internet from your laptop.
- Network Coverage: Check the dongle's supported networks (4G, 5G, etc.). Consider your location and which networks offer the best coverage in your area.
- Data Plans: Look at the provider's data plans. Choose a plan that fits your usage needs – unlimited, or a few gigabytes per month? Consider the price.
- Speed: Faster speeds are generally better! Check the advertised download and upload speeds.
Do your research, compare different providers, and read reviews before making your purchase. Think of it as picking the right superhero sidekick for your laptop.
4. Setting Up Your Dongle: The Super Simple Steps
Now for the exciting part: setting it up! Seriously, it's easier than assembling IKEA furniture. Here’s the gist:
- Insert the SIM Card: Most dongles require a SIM card (similar to your phone). Insert the SIM card into the designated slot.
- Plug it In: Plug the dongle into your laptop's USB port.
- Install the Software: The dongle typically comes with software that needs to be installed. Follow the on-screen instructions.
- Connect to the Network: Once the software is installed, you should be able to connect to the cellular network.
- Create Your Hotspot: Your software will usually have an option to create a Wi-Fi hotspot. Set a strong password to keep your connection secure. This step is crucial.
And that's it! You’ve successfully created a mobile hotspot! Pat yourself on the back; you are a technical wizard.
5. Securing Your Hotspot: Protecting Your Data
Just like any Wi-Fi network, your laptop hotspot needs to be secure. This means using a strong password and keeping your network hidden. Here are some key tips:
- Strong Password: Use a complex password with a mix of upper and lowercase letters, numbers, and symbols. Avoid using easily guessable passwords like your birthday or pet's name.
- Network Name: Choose a unique and memorable network name, but don't include any personal information.
- Encryption: Enable WPA2 or WPA3 encryption for enhanced security.
- Monitor Connected Devices: Keep an eye on the devices connected to your hotspot and kick off any suspicious devices.
6. Sharing the Love: Connecting Your Devices
Once your hotspot is up and running, connecting other devices is simple:
- Find the Network: On your phone, tablet, or other laptop, go to your Wi-Fi settings and look for your hotspot's network name.
- Enter the Password: Enter the password you created.
- Start Surfing! You are connected. Enjoy your internet access!
7. Troubleshooting Common Dongle Issues
Not everything always goes perfectly, right? Sometimes you run into issues. Here's how to troubleshoot some common problems:
- No Connection: Check the SIM card is inserted correctly, and the dongle has a good signal. Restart your laptop and the dongle.
- Slow Speeds: Check the network coverage in your area. Try moving to a different location. Close any bandwidth-intensive applications.
- Software Issues: Reinstall the dongle software. Contact the dongle provider's customer support.
- Limited Data: Monitor your data usage and avoid streaming videos or downloads if you have a limited data plan.
8. Data Usage Awareness: Streaming vs. Surfing
Understanding your data usage is critical to a good experience. Streaming videos, especially in high definition, consumes a lot of data. Surfing the web and checking emails use much less. Keep an eye on your data plan through the dongle's software. It's better to be careful with your data plan so you don't run out of data in the middle of something super-important.
9. Dongle vs. Phone Hotspot: Which is Better?
Both a dongle and your phone's hotspot can turn your device into a Wi-Fi hotspot. Dongles often offer more robust connectivity and better signal strength in certain areas. However, phone hotspots are convenient and readily available. The best choice depends on your individual needs. Testing them out is the way to go.
10. Battery Life Basics: Powering Your Hotspot
Creating a hotspot does consume battery power. Always charge your laptop and/or keep the dongle plugged in when using it for extended periods. This minimizes the chance of the hotspot shutting down unexpectedly.
11. Dongle's Role in Remote Work and Travel
Dongles have become indispensable for people who are always on the move or work remotely. Having a reliable internet connection is critical for video calls, cloud-based work, and staying connected.
12. Dongles for Gamers: High-Speed Hotspot?
While dongles are not as fast as wired broadband, they provide a decent gaming experience. If you’re a gamer, consider choosing a dongle with high speeds and low latency for the best possible gaming experience.
13. Staying Connected on the Go: Dongle Mobility
The beauty of using a dongle is its mobility. You can use it in a car, in a train, or wherever cellular coverage is available. Be sure to ensure the dongle is secure when using it in a moving vehicle.
14. Maximizing Your Dongle's Signal Strength
To get the best signal strength, position your laptop and dongle near a window or a location with optimal cellular coverage. Avoid obstructions that may block the signal. Experiment with different positions to find the best results.
15. Future of Dongles: Staying Ahead of the Curve
The future of dongles is secure. They are constantly evolving with faster speeds, better coverage, and improved security features. Staying updated and researching new options can help to choose the best dongle.
Closing Thoughts
So, there you have it! Unlocking your laptop's hidden hotspot power with a dongle is not just easy; it is a game-changer for staying connected in today's digital world. From setting up your hotspot to securing your connection, we've covered everything you need to know. So, go forth, explore, and enjoy the freedom of internet connectivity wherever you go! Now, that coffee shop trip won't be so dreadful.
FAQs: Your Burning Dongle Questions Answered!
1. Can I Use Any Dongle With Any Laptop?
Not exactly. You need to ensure the dongle is compatible with your laptop's operating system (Windows, macOS, etc.). Check the dongle's specifications before buying.
2. How Much Data Does a Dongle Use?
Data usage depends on your online activity. Streaming videos and downloading large files consume the most data. Surfing the web and checking emails require minimal data. Monitor your plan to avoid surprise over
HP Wifi Symbol Mystery Solved: Get Your Laptop Online NOW!How To Create wifi hotspot on pc or laptop using WIFI USB adapter

By Stech Anfo How To Create wifi hotspot on pc or laptop using WIFI USB adapter by Stech Anfo
How To Make Laptop WiFi Hotspot Without Any Software to Share LAN

By NeSky India How To Make Laptop WiFi Hotspot Without Any Software to Share LAN by NeSky India
How to Add Wireless Wifi Network Manually in Windows 10 PC or Laptop

By Discover You How to Add Wireless Wifi Network Manually in Windows 10 PC or Laptop by Discover You
Title: How to Create a Mobile Hotspot with Windows PC Live Test Share Internet from PC to Mobile
Channel: Study Worlds Technology
How to Create a Mobile Hotspot with Windows PC Live Test Share Internet from PC to Mobile by Study Worlds Technology
Laptop Working
Here's the title: "The Definitive Guide to Brewing the Perfect Cup of Coffee at Home"
The Definitive Guide to Brewing the Perfect Cup of Coffee at Home
We all crave that perfect cup. The one that awakens the senses, fills the kitchen with an irresistible aroma, and sets the stage for a productive and pleasurable day. But for many, the quest for coffee perfection remains elusive, trapped behind the gates of overly complicated brewing methods and inconsistent results. No more. This guide serves as your passport to coffee nirvana, providing a comprehensive roadmap to crafting exceptional coffee at home, every single time. We’ll explore every facet of the process, from bean selection and equipment choices to the intricacies of brewing techniques, empowering you to become your own in-house barista.
Choosing Your Coffee: The Bean's the Thing
The journey to exceptional coffee begins with the foundation: the bean. Just as a painter needs quality pigments, a coffee brewer requires high-quality coffee beans. The vast world of coffee offers a plethora of options, each with its unique characteristics. Consider these critical aspects when making your selection:
- Origin: Coffee beans, like fine wines, are profoundly influenced by their terroir – the environment in which they are grown. Beans from Ethiopia, often referred to as the birthplace of coffee, tend to exhibit fruity and floral notes, while those from Sumatra offer a bolder, earthy profile. Exploring different origins is key to discovering your personal preferences. Look for single-origin beans to experience the specific characteristics of a particular region.
- Roast Level: The roast level dictates the bean's flavor profile. Light roasts generally accentuate the bean's origin characteristics, offering bright acidity and complex flavors. Medium roasts strike a balance, showcasing both origin and roasting nuances. Dark roasts, on the other hand, develop smoky, bitter notes due to extended roasting times. Consider the brewing method you intend to use when selecting the roast level; pour-over methods often shine with lighter roasts, while espresso can benefit from a bolder roast.
- Freshness: Coffee is at its peak flavor within a few weeks of being roasted. Always check the roast date on the bag, and ideally, purchase beans that have been roasted within the last one to three weeks. Avoid purchasing beans from bulk bins, as their freshness and quality are often compromised.
- Whole Bean vs. Ground: Always purchase whole bean coffee. Grinding beans immediately before brewing unlocks the freshest flavors. Pre-ground coffee loses its aromatic oils and flavor compounds rapidly, resulting in a diminished cup of coffee.
Essential Equipment for the Home Coffee Brewer
Investing in the right equipment is crucial for consistency and precision. While elaborate and expensive setups exist, a solid foundation of essential tools can deliver outstanding results.
- Grinder: A burr grinder is non-negotiable. Burr grinders use two revolving abrasive surfaces to grind the beans evenly, producing consistent particle sizes and allowing for optimal flavor extraction. Blade grinders chop the beans unevenly, leading to bitter and under-extracted coffee.
- Scale: A digital kitchen scale with a resolution of 0.1 grams is vital for accurately measuring coffee beans and water. Precise measurements ensure consistent brewing results.
- Kettle: A gooseneck kettle offers unparalleled control over the water pour, essential for pour-over methods. A standard electric kettle is sufficient for immersion methods like French press.
- Brewing Device: The choice of brewing device is largely a matter of personal preference and brewing style. Popular options include:
- Pour-Over: (e.g., Hario V60, Chemex) This method offers exceptional clarity and highlights the nuances of the coffee. It requires a gooseneck kettle and a steady hand.
- French Press: A simple and versatile method that produces a full-bodied, rich cup. It requires a coarse grind.
- AeroPress: A portable and versatile brewing method that produces a concentrated coffee, suitable for espresso-style drinks or diluted Americanos.
- Filters: Choose filters that are compatible with your chosen brewing device. For pour-over methods, consider paper filters. For French press, the integrated metal filter is standard.
- Cups: High-quality ceramic mugs will enhance your coffee moment. The right mug can contribute to the overall enjoyment.
The Alchemy of Brewing: Mastering the Techniques
With your beans and equipment in place, it's time to master the brewing techniques. Each method demands specific attention to detail to unlock the full potential of your coffee.
Pour-Over Brewing: Precision and Patience
Pour-over brewing is a ritual that rewards patience and precision.
- Preparation: Heat filtered water to the appropriate temperature for your roast level (around 200°F/93°C for light roasts, slightly cooler for darker roasts). Rinse your filter in the pour-over device with hot water to eliminate any paper taste. Discard the rinse water.
- Grind: Grind your beans to a medium-fine consistency, similar to coarse sand.
- Weigh: Measure the appropriate amount of coffee beans for your chosen ratio (a common ratio is 1:15 coffee to water, meaning 1 gram of coffee for every 15 grams of water).
- Bloom: Place the ground coffee in the filter and gently saturate the grounds with twice the amount of water as the coffee (e.g., 20 grams of water for 10 grams of coffee). Allow the coffee to bloom for 30-45 seconds. This process releases trapped CO2 and prepares the coffee for optimal extraction.
- Pour: Slowly and steadily pour the remaining water over the grounds in a spiral motion, ensuring all the grounds are saturated. Maintain a consistent pour rate and avoid pouring directly onto the filter walls.
- Brew Time: The total brew time should be between 2:30 and 3:30 minutes, depending on the grind size and the coffee.
- Enjoy: Once the brewing is complete, discard the filter and grounds. Serve immediately and savor the meticulously crafted cup.
French Press Brewing: Bold and Flavorful
The French press offers a straightforward brewing experience, resulting in a full-bodied, rich cup.
- Preparation: Heat water to around 200°F/93°C.
- Grind: Grind your beans to a coarse consistency, similar to sea salt. Finer grinds will lead to over-extraction and a muddy cup.
- Measure: Add the appropriate amount of ground coffee to the French press. A common ratio is 1:15 coffee to water.
- Bloom: Pour a small amount of hot water over the grounds to saturate them. Allow the coffee to bloom for 30 seconds.
- Pour: Pour the remaining water over the grounds and stir gently to ensure all the grounds are submerged.
- Steep: Steep the coffee for 4 minutes.
- Plunge: Slowly and evenly plunge the filter to the bottom of the French press.
- Serve: Pour immediately to prevent over-extraction. Enjoy the rich, full-bodied coffee.
AeroPress Brewing: Versatility and Control
The AeroPress is a versatile and portable brewing method.
- Preparation: Heat water to the appropriate temperature.
- Grind: Grind your beans slightly finer than for drip coffee.
- Assemble: Insert a paper filter into the cap.
- Coffee and Water: Place the AeroPress body on a sturdy mug. Add ground coffee to the chamber. Pour hot water over the coffee, covering the grounds.
- Stir: Stir briskly for a few seconds.
- Brewing: Place the plunger into the chamber and gently press down, extracting the coffee.
- Serve: Enjoy the concentrated coffee, or dilute with hot water for an Americano-style drink.
Water Quality: The Unsung Hero
Water is the foundation of your coffee, and its quality directly impacts the final result. Use filtered water for the best flavor. Avoid using distilled water, as it lacks the minerals needed for proper extraction. Pay attention to the mineral content of your water as it can be a factor in the taste and quality of the final result.
Experimentation: The Pathway to Personalization
The journey to the perfect cup is an ongoing process of experimentation and refinement. Don't be afraid to adjust your grind size, brewing time, and water temperature to find what best suits your taste and the coffee beans you are using. Keep a journal to track your experiments, making notes on the origin of the beans, the roast date, the grind size, water temperature, brewing time, and your overall impression of the final cup. This will allow you to repeat successes and learn from your mistakes. The more we experiment, the more we personalize, the more we learn.
Troubleshooting Common Coffee Brewing Issues
Even with the best equipment and techniques, issues can arise. Here are some common problems and their solutions:
- Sour Coffee: This indicates under-extraction. Try grinding finer, brewing for longer, or using hotter water.
- Bitter Coffee: This indicates over-extraction. Try grinding coarser, brewing for shorter, or using cooler water.
- Weak Coffee: Increase the coffee-to-water ratio, use a finer grind, or increase brewing time.
- Muddy Coffee: Use a coarser grind, ensure the gr
