connecting laptop to mobile phone via wifi

Title: Tethering a Phone to a Laptop - Tech Tips from Best Buy
Channel: Best Buy
Tethering a Phone to a Laptop - Tech Tips from Best Buy by Best Buy
how to connect laptop to mobile phone internet via bluetooth, connect laptop to mobile phone internet, connect laptop to smart tv via wifi, can i connect my phone wifi to my laptop
Laptop to Phone WiFi: The SHOCKINGLY Easy Trick You NEED!
Unlocking Instant Connectivity: The Secret WiFi Hack You Didn't Know You Needed!
Ever felt tethered to your home or office WiFi, yearning for the freedom to work or stream anywhere? The answer is closer than you think. This isn't some complicated tech jargon. This is a game-changer. I'm talking about a shockingly simple trick. It’s the key to turning your phone into a WiFi portal for your laptop. Get ready to ditch those frustrating public networks.
The Frustration of Limited Connectivity
We’ve all faced it. You're stuck in a coffee shop with weak WiFi. Maybe you are on a train with spotty internet. The frustration mounts as your work grinds to a halt. Streaming buffers endlessly. Your productivity plummets. Furthermore, connecting to public WiFi can be risky. It's like playing with fire, security-wise. You need a solution, and fast.
The Magic Revealed: Your Phone as a WiFi Hotspot
Believe it or not, the solution lies within your phone. Almost every smartphone possesses the built-in capability to share its internet connection. This is essentially turning your phone into a mobile WiFi hotspot. It's an incredibly easy process. It's so simple, it will leave you wondering why you haven’t tried it sooner! Just a few taps on your phone, and you’re good to go.
Step-by-Step Guide: Activating Your Phone's Hotspot
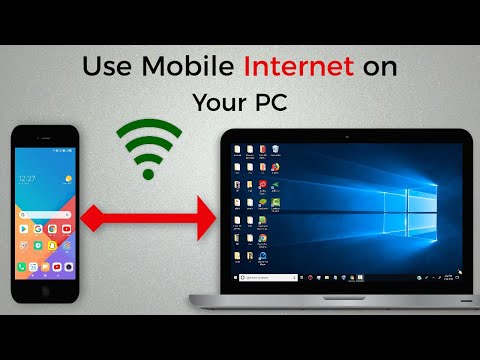
Let’s dive into the process. The steps are generally consistent across both Android and iOS devices. First, locate your phone's settings app. It looks like a gear icon. Then, find the "Network & Internet" section. This might vary slightly based on your phone's manufacturer. Next, tap on "Hotspot & Tethering." You should see an option labeled "WiFi Hotspot." Toggle it on.
Alternatively, on most phones, you can simply swipe down from the top of your screen. This reveals the quick settings panel. Look for an icon that looks like a WiFi symbol with a bar radiating from it. Tap this icon; the hotspot will activate instantly. So, activating your phone's hotspot is a breeze.
Connecting Your Laptop: The Seamless Experience
Once you've enabled the hotspot on your phone, connecting your laptop is straightforward. On your laptop, navigate to your WiFi settings. Your phone's hotspot should appear in the list of available networks. Select your phone's hotspot. You'll likely be prompted to enter a password. This password is typically displayed on your phone's hotspot settings screen. Enter the password, and voila! You're connected. Now you can enjoy the internet, even without traditional WiFi.
Addressing Potential Hiccups: Troubleshooting Tips
Sometimes, things don't go smoothly. Don't fret! It's usually something simple. Check a few things if you have issues. First, verify that your phone has an active internet connection. If your phone doesn’t, neither will your laptop. Second, confirm the hotspot password is correct. Double-check for typos. Third, ensure both your phone and laptop are within range of each other. Typically, a few feet is best. Finally, restart both devices. This often resolves minor glitches.
Data Usage Considerations: Staying Smart
While the convenience is undeniable, be mindful of your data usage. Streaming videos, downloading large files, and video calls can consume significant data. Before you start browsing, check your data plan. Consider your monthly data allowance. Think about setting data limits on your phone’s hotspot. It’s a wise move to prevent unexpected charges.
Beyond the Basics: Exploring Advanced Options
For those who crave more control, there are advanced settings to explore. On your phone’s hotspot settings, you can customize the network name (SSID) and password. This provides increased security. Some phones also allow you to restrict the number of devices that can connect. This is helpful if you are worried about data usage. Explore these options; you may discover some nifty features.
The Freedom of Mobile WiFi: Reclaiming Your Time
This simple trick unlocks a world of possibilities. Embrace the freedom of working from anywhere. Enjoy internet access on the go. Stream your favorite shows without buffering. Now you can transform your downtime into productive time. You'll become the envy of your WiFi-starved friends.
The Takeaway: It's Easier Than You Think!
In conclusion, transforming your phone into a WiFi hotspot is unbelievably easy. It offers a convenient solution to limited internet access. The benefits are substantial. So, embrace this simple trick and unlock instant connectivity. You’ll wonder how you ever lived without it. Go ahead; try it today.
Download WiFi Software for Windows 7: The Fastest, Easiest Way!Laptop to Phone WiFi: The SHOCKINGLY Easy Trick You NEED!
Hey everyone! Let's be honest, we've all been there. You're on-the-go, maybe stuck in a coffee shop with that dodgy Wi-Fi connection, or worse, you're smack-dab in the middle of nowhere, staring longingly at your laptop screen and wishing you could get online. Then it hits you: your phone has data, and it's happily chomping away at its monthly allowance. But how do you get your laptop to use that data? Well, buckle up, because this isn't just a trick; it's a game-changer, and it's way easier than you think!
1. The Frustration of Limited Connectivity: A Story We All Know
Remember that epic presentation you had to give, the one you knew was going to blow everyone away? Then, just as you were about to click "share screen," BAM! The Wi-Fi dies. Or maybe you're just trying to binge-watch your favorite show on a long train ride, but the signal keeps cutting out. The struggle is real, folks. We've felt the sting of limited and unreliable Wi-Fi. This lack of connectivity is a modern-day curse, a digital roadblock that can bring productivity and entertainment to a screeching halt. But fear not! We're here to dismantle that roadblock and pave the way for seamless, on-the-go internet access.
2. Unveiling the Secret: The Magic of Personal Hotspot!
The solution, my friends, is simpler than brewing a cup of coffee (and trust me, I need lots of coffee). It's the personal hotspot feature on your phone. Think of it as your phone becoming a mini-Wi-Fi router, broadcasting its data connection for your laptop (and other devices) to connect. It’s like your phone’s saying, "Hey laptop, come on over! I've got the internet party right here."
3. Phone Compatibility: Which Phones Play Nice?
This beauty works on almost every smartphone nowadays. Whether you're rocking an iPhone, a Samsung Galaxy, a Google Pixel, or any other Android device (and let's be real, there are tons of them!), you're almost certainly already set up. Checking compatibility is a breeze; dive into your phone's settings, and look for "Personal Hotspot" or something similar. You'll probably find it in the network or connection settings. If you can't find it, a quick search on Google with your phone’s model number and "personal hotspot" will set you on the right path.
4. The Android Setup: A Step-by-Step Guide
Okay, Android users, let's get you connected:
- Step 1: Open Settings. Find the gear icon on your home screen or in your app drawer.
- Step 2: Navigate to Connections. This might be called "Network & Internet" or something similar.
- Step 3: Find "Mobile Hotspot and Tethering." The phrasing varies a bit depending on your Android version, but it's usually easy to spot.
- Step 4: Select "Mobile Hotspot."
- Step 5: Toggle it ON.
- Step 6: Configure Your Hotspot (Optional but Recommended). You can change the network name (SSID) and password in this area. Make it something memorable but secure!
- Step 7: Connect Your Laptop. On your laptop, search for Wi-Fi networks, find the one you just created, and enter the password. Boom! You're online.
5. The iPhone Setup: Simplicity at Its Finest!
iPhone users, you're in for a treat. Apple makes this process incredibly smooth:
- Step 1: Open Settings.
- Step 2: Select "Personal Hotspot." If you don't see this option, make sure your cellular data is enabled and that your cellular plan supports personal hotspots (most do).
- Step 3: Toggle "Allow Others to Join" ON.
- Step 4: (Optional) Change Your Password. The default password is usually fine, but you can customize it for a little extra security.
- Step 5: Connect Your Laptop. Just like Android, your laptop will see your iPhone's Wi-Fi network. Select it and enter the password. Done and done!
6. Security First: Protecting Your Data and Privacy
It's crucial to remember that using a personal hotspot does use your phone's data allowance. So, keep an eye on your data usage! Also, ensure your hotspot is password-protected. Leaving it open is like leaving your front door wide open – anyone can walk in!
7. Data Usage: The Price of Freedom (and How to Manage It)
Streaming videos, downloading files, and video calls will chew through your data quickly. Browsing, checking emails, and light work will consume less data. Consider disabling auto-updates on your laptop while using a hotspot to prevent unexpected data consumption. Setting a data limit on your phone is also a great idea, to prevent overages.
8. Battery Blues: Power Up Your Connection
Using a hotspot drains your phone's battery faster. Keep your phone plugged in whenever possible, especially if you need to stay online for longer periods. Portable power banks are your best friends here.
9. Beyond the Basics: Wi-Fi vs. USB Tethering
While personal hotspots are fantastic, there are alternative connection methods, too. USB tethering (connecting your phone to your laptop with a USB cable) can be more stable and sometimes faster. Plus, it charges your phone while you're connected! It is, however, less convenient.
10. Troubleshooting Time: When Things Go Wrong
If you're having trouble connecting, here's a quick troubleshooting checklist:
- Check your data plan: Make sure you have data available and that your provider allows tethering.
- Restart your devices: A simple reboot can fix many connection problems.
- Check your password: Double-check that you're entering the correct Wi-Fi password.
- Update your software: Ensure your phone and laptop have the latest software updates.
11. Boost Your Signal: Maximizing Performance
The further you are from your phone, the weaker your signal will be. Keep your laptop and phone close to each other. This may sound obvious, but hey, details matter!
12. When Is a Hotspot the BEST Choice?
Hotspots are fantastic for emergencies, remote work, when traveling, or for quick internet access. They're a lifesaver when Wi-Fi is spotty or unavailable.
13. Wi-Fi vs. Mobile Data: Weighing the Pros and Cons
Wi-Fi is generally faster and unlimited, but hotspots provide internet anywhere you have a cell signal. Think of it like this: Wi-Fi is a luxury, personal hotspot is freedom!
14. The Future of Connectivity: What's Next?
Technology is constantly evolving. We can expect even more seamless integration between our phones and laptops, including improved Wi-Fi speeds, battery efficiency and even data-saving features.
15. Unleash Your Digital Nomad Within!
Armed with the knowledge of personal hotspots, you're now one step closer to becoming a digital nomad. Work from anywhere, stay connected, and stop being a slave to unreliable Wi-Fi!
Closing Thoughts: Stay Connected, Stay Free!
So, there you have it. The shockingly easy trick to connect your laptop to your phone's Wi-Fi. It's not just a clever hack; it's a gateway to productivity, entertainment, and freedom. Go forth and conquer the digital world, one hotspot at a time! Remember to use those power banks, keep an eye on your data, and enjoy the boundless possibilities that come with being connected.
5 FAQs: Your Burning Questions Answered!
1. Is using a personal hotspot secure?
Yes, as long as you use a strong password! Always protect your hotspot with a password to keep your data safe.
2. Does using a hotspot drain my phone's battery super fast?
Yes, it does. Keep your phone plugged in whenever possible or use a portable power bank.
3. What happens if I run out of data?
Your internet access will either slow down significantly (throttling) or be cut off entirely, depending on your data plan and provider.
4. Can I connect multiple devices to my hotspot?
Absolutely! Most phones let you connect multiple devices, such as laptops, tablets, or another phone. However, this will use data faster.
5. Is USB tethering better than a personal hotspot?
Sometimes. USB tethering can be more stable and charges your phone. But, it’s less convenient. Choose what works best for you at that moment.
- Principal Keywords: Laptop Phone WiFi Trick Easy
- SEO Headline: Laptop to Phone WiFi: The Easy Trick You NEED!
- Pathway: Laptop WiFi Setup
- Meta Summary: Unlock instant internet! Discover the SHOCKINGLY EASY trick to connect your laptop to your phone's WiFi. Perfect for work, travel & more!
- **Image Alt
How To Share Internet From Laptop To Mobile Via WiFi in Windows 11

By EasyTechGeek How To Share Internet From Laptop To Mobile Via WiFi in Windows 11 by EasyTechGeek
How To Connect Internet from Mobile to PC or Laptop via hotspot
By WebbyFan How To Connect Internet from Mobile to PC or Laptop via hotspot by WebbyFan
how to control Android phone from PCLaptop

By NETVN82 how to control Android phone from PCLaptop by NETVN82

Title: Bagikan Internet dari PC ke ponsel Android melalui Bluetooth
Channel: BTH
Bagikan Internet dari PC ke ponsel Android melalui Bluetooth by BTH
Laptop Wifi Hotspot
The prompt is: "The Definitive Guide to Mastering Sourdough Bread Baking at Home"
The Definitive Guide to Mastering Sourdough Bread Baking at Home: From Starter to Stunning Loaf
Sourdough bread. The very words conjure images of rustic kitchens, the comforting aroma of baking, and the satisfying tang of a perfectly crafted loaf. But the journey from simple flour and water to a crusty, chewy masterpiece can seem daunting. This definitive guide will demystify the process, equipping you with the knowledge and confidence to embark on a sourdough baking adventure that culminates in bread that will delight your senses and impress your friends and family. We will navigate every step, from nurturing your own vibrant starter to mastering the critical techniques that separate good sourdough from truly exceptional sourdough.
Laying the Foundation: Cultivating a Flourishing Sourdough Starter
The heart and soul of any sourdough bread lies in its starter, a living culture of wild yeasts and beneficial bacteria. Creating a healthy and active starter is paramount. Forget the pre-made options; the true magic lies in nurturing your own.
The Initial Mix: Begin by combining equal parts by weight of unbleached, all-purpose flour and filtered, non-chlorinated water in a clean glass jar. A ratio of approximately 50 grams of each is a good starting point. Mix thoroughly until a slurry forms, covering the mixture loosely with a lid or a piece of cheesecloth secured with a rubber band. This allows air to circulate while preventing contamination.
The First Four Days: Patience and Observation: Place your jar in a relatively warm spot in your kitchen, ideally between 70-75°F (21-24°C). Over the next four days, discard half of the starter each day and replenish it with equal parts of fresh flour and water, maintaining the initial ratio. Observe the changes closely. Initially, you might see very little activity. This is perfectly normal. The first few days are about establishing the environment for fermentation.
Signs of Life: Recognizing Activity: By day two or three, you may start to notice subtle bubbles forming on the surface and along the sides of the jar. The mixture may also begin to thicken slightly. This indicates that the wild yeasts and bacteria are beginning to colonize and establish their presence.
The Flour Choice: Feeding the Beast: The type of flour you use to feed your starter significantly impacts its performance. While all-purpose flour works, whole wheat flour offers more nutrients for the starter to thrive. Experiment with a blend of all-purpose and whole wheat for optimal results.
The Feeding Schedule: Consistency is Key: After the first four days, reduce the feeding frequency to once a day, ideally at the same time each day. This establishes a consistent rhythm for your starter. The goal is to keep your starter active and ready to bake. Discard half of the starter before each feeding to prevent overgrowth.
Beyond the First Week: Refining Your Starter: After a week or two, your starter should be noticeably bubbly and increase in volume after feeding, often doubling in size within a few hours. It should also develop a slightly sour aroma. Taste it! A hint of tang is a telltale sign of a healthy starter.
Troubleshooting: Addressing Common Issues:
- Lack of Bubbles: If your starter fails to bubble after a week, check the temperature of your kitchen. A temperature too low (below 65°F) will slow down fermentation. Consider moving the starter to a warmer location. Ensure the water you use is not chlorinated, as chlorine can inhibit the growth of the starter.
- Weak Rise: If your starter rises but doesn't double, your feeding might be too much for the starter. Try feeding it twice a day.
- Off-Putting Smell: A strong, vinegary smell can indicate an imbalance in the bacterial culture. Continue feeding daily, and the aroma should improve. If the smell is putrid or mold appears, it's best to discard the starter and start over.
Formulating Your Sourdough Recipe: A Balanced Approach
Once your starter is consistently doubling in size after feeding, it's time to formulate your first sourdough recipe. The beauty of sourdough lies in its adaptability. While the core principles remain consistent, the ratio of ingredients and the timing can be adjusted to suit your preferences.
The Basic Formula: A Solid Starting Point: A simple starting formula, often referred to as "The 1:2:3" ratio, is a great foundation:
- 1 part active sourdough starter (by weight)
- 2 parts water (by weight)
- 3 parts flour (by weight)
- 2-3% salt (by weight of flour)
Example: If you use 50 grams of active starter, you would use 100 grams of water, 150 grams of flour, and approximately 3-4 grams of salt.
Flour Selection: Exploring Options: The type of flour significantly influences the final loaf's texture and flavor.
- Bread Flour: High in protein, bread flour is ideal for creating a strong gluten structure, resulting in a loaf with good oven spring and a chewy crumb.
- All-Purpose Flour: A good all-rounder, all-purpose flour can be used, but the resulting loaf may have less volume.
- Whole Wheat Flour: Adds a hearty flavor and texture. Be aware, however, that whole wheat flour absorbs more water.
- Rye Flour: Incorporates a distinct flavor and produces a more dense loaf.
Water Temperature: Optimizing Hydration: The water temperature impacts the rate of fermentation. Use lukewarm water to promote yeast activity.
Salt: The Flavor Enhancer and Structure Builder: Salt is crucial for both flavor and structure in sourdough. It slows down yeast activity, which enhances the flavor profile, and it strengthens the gluten network.
Autolyse: Enhancing Gluten Development: Before adding the salt and starter, combine the flour and water and allow them to rest, covered, for 30-60 minutes. This process, called autolyse, hydrates the flour, promoting gluten development and improving the final loaf's texture.
The Essential Techniques: Mastering the Art of Sourdough Baking
Beyond the ingredients, the techniques employed throughout the sourdough process determine the final outcome. These skills are vital for baking a consistently good loaf.
Mixing and Developing the Dough:
- Initial Mixing: Combine the starter, water, and flour in a large bowl. Mix until a shaggy dough forms.
- Autolyse Phase: Cover the bowl and let the dough rest for 30-60 minutes.
- Adding Salt: Incorporate the salt after the autolyse phase. It helps to add the salt after the autolyse period.
- Kneading: While you can knead dough by hand, a stand mixer with a dough hook simplifies the process. Knead until the dough becomes smooth and elastic. However, be careful not to overmix.
- Bulk Fermentation: Transfer the dough to a bulk fermentation container, a lightly oiled bowl such as a clear straight-sided container. Cover the container and let the dough rise at room temperature.
Folding and Strengthening the Dough:
- The Importance of Folding: During bulk fermentation, perform a series of stretch and folds.
- Folding Technique: Gently stretch a portion of the dough from one side and fold it over the center. Repeat this around the entire circumference of the dough.
- Frequency: Perform a set of folds every 30-60 minutes for the first 2-3 hours of bulk fermentation.
- Benefits: Folding strengthens the gluten structure, incorporates air, and helps the dough develop a better texture.
Bulk Fermentation Time: Determining Readiness:
- Observation: The bulk fermentation time varies depending on the temperature. Ideally, you want the dough to increase by approximately 30-50%
- The Window: The dough should be puffy and airy, and it should have the presence of small bubbles.
- Poke Test: Gently poke the dough with a wet finger. If the indentation slowly springs back, the dough is ready. If it springs back quickly, it needs more time. If it doesn't spring back at all, it may be overproofed.
Shaping Your Loaf: Building Structure and Tension:
- Pre-Shaping: Gently turn the dough out onto a lightly floured surface. Shape it loosely into a round or oval.
- Bench Rest: Let the pre-shaped dough rest for 20-30 minutes, covered.
- Final Shaping: Gently stretch and shape the dough into its final form, building surface tension for a good oven spring.
- Banneton or Bowl: Place the shaped loaf in a well-floured banneton basket or a bowl lined with a floured kitchen towel, seam-side up.
Proofing: The Final Rise:
- Cold Proofing: Most sourdough loaves benefit from cold proofing in the refrigerator for 12-24 hours. This slows down the fermentation process, enhancing the flavor and improving the oven spring.
- Room Temperature Proofing: If you want to bake the same day, proof the shaped loaf at room temperature until it has a light, airy feel.
Baking: Transforming Dough into Perfection:
- Preheating the Oven: Preheat your oven with a Dutch oven inside to 450-500°F (232-260°C).
