replace laptop wifi adapter

Title: WiFI Card vs USB WiFi Adapter Check out this comparison
Channel: ADVANTI
WiFI Card vs USB WiFi Adapter Check out this comparison by ADVANTI
replace laptop wifi adapter, change laptop wifi adapter, replace laptop wifi card, replace laptop wifi card with ssd, upgrade laptop wifi card to 5ghz, remove laptop wifi card, replace dell laptop wifi card, replace wifi adapter dell laptop, can i change my laptop wifi adapter, can you replace a wireless network adapter
Laptop WiFi Dead? This FIX Will SHOCK You!
Laptop WiFi Woes? Prepare for a Reboot Revelation!
Have you ever felt that sudden, frustrating disconnect? Your laptop, once a portal to the digital world, stares back blankly, the WiFi signal a cruel illusion. It's a universal tech nightmare, isn't it? Then again, take heart! The solution isn't always a complex, expensive fix. It may be simpler than you think. In fact, this article reveals some shockingly easy steps. These can revitalize your dormant WiFi connection.
The Frustration of the Frozen Signal
Picture this: you're poised to send that crucial email. The deadline looms! You need to research an important topic. Moreover, the WiFi icon taunts you. It displays a dreaded 'no connection' message. Understandably, this can trigger a rush of annoyance. This feeling of helplessness is familiar to us all. It’s a modern-day digital dilemma. More importantly, the seemingly random nature of WiFi failure adds to the frustration. Sometimes, it's a fleeting glitch. At other times, it's a persistent problem. Consequently, it can make you feel powerless.
Decoding the Digital Dark Ages: Initial Troubleshooting
Before you panic and call in the tech cavalry, let's explore some preliminary steps. First things first, check the basics. Is your modem or router plugged in? Is it powered on? Furthermore, does the indicator light suggest an active internet connection? You would be surprised by how often the simplest solutions work. Next, restart your router. This is like giving your internet a fresh start. This simple act often resolves numerous connectivity issues. If it doesn't, don't despair! There are more solutions ahead.
Unveiling the Unexpected: The Airplane Mode Antidote
Here comes a trick you might not know. Your laptop has an "Airplane Mode" setting. It's designed to disable all wireless communication. Think of it as a quick off switch for your WiFi. However, sometimes, this mode can get stuck. Consequently, it blocks your WiFi connection even when it appears to be off. To fix this, try toggling it on and off. Locate the Airplane Mode icon in your system tray. Then, click it. Switch it on, wait a few seconds, and then switch it off. That often does the trick!
Driver Dilemmas and Digital Doctors: A Windows Whisperer
Sometimes, outdated or corrupted drivers are to blame. These are the software components that allow your computer to communicate with hardware. For your WiFi adapter, the driver acts like an interpreter. It lets your laptop "speak" the language of the internet. You will need to update these drivers. This is particularly true if you recently updated your operating system. First, right-click the Windows start button. Then, select "Device Manager". Expand the "Network adapters" section. There, look for your WiFi adapter. Right-click on it and select "Update driver". Follow the prompts. This can be a straightforward process.
The Nuclear Option (Relatively Speaking): Network Reset
If all else fails, consider resetting your network settings. This is a more advanced step. It will erase all saved WiFi passwords and network settings. It's a bit like hitting the reset button in a game. However, it can often clean up underlying software issues. Go to your system settings. Search for "Network reset". Confirm your action. Your computer will restart. After the restart, reconnect to your WiFi and enter your password. Hopefully, this resolves the issue.
The Hardware Houdini: Physical Considerations
While software glitches are the usual suspects, hardware problems aren’t impossible. Is your laptop's WiFi adapter working correctly? The adapter is usually a small card inside the laptop. A loose connection would be a problem. Similarly, physical damage could also hinder performance. However, this is less common. If you suspect a hardware issue, it's best to consult a qualified technician. They will diagnose and resolve it.
Preventative Measures: The Proactive Path
Once your WiFi is back online, consider preventative measures. Regularly update your operating system. These updates often include crucial driver updates. Also, keep your software secure. Run a reputable anti-malware program. These basic precautions will keep your system performing at its best. Make sure to periodically check your WiFi connection. This helps to identify potential problems.
A Final Word: Staying Connected
Losing WiFi is incredibly frustrating. The good news is that fixing it doesn't have to be complicated. Now you know some simple yet effective troubleshooting steps. These steps are designed to get you back online fast. Try these tactics. Don't give up! Be persistent. Remember, even the most perplexing tech problems have solutions. In most cases, with a little patience and these steps, you'll regain your connection. Enjoy your revived WiFi and get back to what matters most!
Unlock Your Laptop's WiFi Secrets: Track Usage Like a Pro!Laptop WiFi Dead? This FIX Will SHOCK You!
We’ve all been there. You’re on a roll, the creative juices are flowing, or you’re finally about to binge-watch that show everyone's been raving about, and bam! The Wi-Fi decides to stage a rebellion. Your laptop, once a portal to the digital world, transforms into a stylish, yet regrettably offline, paperweight. "Laptop WiFi dead?" the dreaded message pops up, and despair begins to creep in. Don’t worry, friend, we’ve got your back. We're diving deep into this frustrating problem and arming you with solutions. Before you throw your perfectly good laptop out the window (we understand the urge!), let’s explore the common culprits and, more importantly, how to fix them. Prepare for a surprise – the fix might be simpler than you think!
1. The Silent Saboteur: Understanding Why Your Wi-Fi Went AWOL
First things first, let’s play detective. What exactly happened? Did your Wi-Fi suddenly vanish mid-stream, or has it been intermittent, like a moody teenager? Understanding the symptoms is crucial. Is it all devices, or just your laptop? Knowing whether the problem is isolated to your machine or a widespread network issue is the first step toward a solution. Think of it like diagnosing a car; you wouldn't assume what's wrong without checking under the hood! We’ll walk through some common reasons, starting with the most obvious and working our way to the more obscure.
2. The Obvious Suspect: Checking Your Wi-Fi Switch and Airplane Mode
Okay, let’s start with the embarrassingly simple (we’ve all been there!). Is your Wi-Fi switch turned on? Yes, I know, it sounds silly, but we’ve all accidentally flipped that switch off or even pressed the function keys on the keyboard that disable the wireless adapter. Also, double-check that Airplane Mode is off. Airplane Mode, as its name suggests, shuts down all wireless communications. It's like putting your laptop into a digital isolation chamber. Make sure it's deactivated. These are usually the low-hanging fruits, the easiest fixes, those quick wins that make you feel like a digital wizard.
3. The Router's Revenge: Restarting Your Modem and Router
Ah, the classic. Sometimes, your router is just… having a bad day. It's been tirelessly battling the internet currents, and it needs a little rest. Think of it like you after a long day at work. Give it a reboot! Unplug your modem and router, wait about 30 seconds (yes, count them down!), plug the modem back in, let it fully boot up (this might take a minute or two, the lights will flash), and finally plug in the router. This simple restart often works wonders, like a digital reset button for your internet connection.
4. The Driver Dilemma: Updating or Reinstalling Your Wireless Network Adapter Driver
Okay, this is where things get a little technical, but don't worry; we'll keep it simple. Your network adapter’s driver is like the translator between your laptop and the Wi-Fi. If the driver is outdated, corrupted, or missing, your laptop won't speak the same language as the internet.
- Updating the Driver: Right-click the Start button (the Windows logo), select “Device Manager.” Expand “Network adapters.” Right-click on your wireless network adapter (it might have a name like "Intel Wireless," "Realtek," etc.) and select "Update driver." Let Windows search for updated drivers automatically.
- Reinstalling the Driver: If updating doesn't work, try uninstalling the driver, restarting your laptop, and then letting Windows automatically find and reinstall it. Sometimes, a fresh start is all it needs.
5. The Network Troubleshooter: Letting Windows Be Your Support Agent
Windows has a built-in network troubleshooter. Think of it as a handy helper for your Wi-Fi woes. To access it, right-click on the Wi-Fi icon in your system tray (usually in the bottom right corner of your screen) and select "Troubleshoot problems." Windows will then diagnose the issue and, hopefully, offer a solution. It's like having a tech support person in your laptop!
6. The Static Surprise: Checking Your IP Address Settings
Sometimes, your Internet Protocol (IP) address settings can cause problems. Your computer needs an IP address to communicate on the network. If these settings are incorrect, it can lead to connection issues.
- Automatic IP: Most often, your settings should be set to "Obtain an IP address automatically." Check this in your network connection settings (search for "Network Connections" in the Windows search bar, right-click on your Wi-Fi connection, select "Properties," double-click "Internet Protocol Version 4 (TCP/IPv4)"). If it's set manually, try switching it to automatic.
7. The Hardware Hurdle: Is Your Wireless Adapter Physically Damaged?
Rarely, the wireless adapter itself could be damaged. Maybe your laptop has taken a tumble, or perhaps the adapter has simply reached the end of its life. This is less common but still possible. If everything else fails, consider having your laptop inspected by a qualified technician. They can check the internal hardware and determine if a replacement is necessary.
8. The Software Snag: Conflicts & Interference
Sometimes, other software can interfere with your Wi-Fi connection. It could be a firewall, antivirus program, or even another network utility. Temporarily disabling these programs one by one to see if it resolves the issue. This is like identifying the villain in a mystery novel – you check each suspect until you find the guilty party. Keep an eye on background processes that might consume resources.
9. The Hidden Host: Other Devices Clogging the Network
Is everyone else in your house connected and streaming? Like a crowded highway, if too many devices are using your network simultaneously, it can slow things down or even cause connection dropouts. Try temporarily disconnecting some devices to see if that improves performance. Sometimes, you just need to free up some bandwidth.
10. The Location Lock: Router Placement and Interference
Your router’s placement matters! Keep it in a central location, away from walls, microwaves, and other electronic devices that might cause interference. Think of it like choosing the best seat in a concert hall – you want to be in a spot where you can get a clear signal. Physical obstructions can weaken your Wi-Fi signal, so make sure the area around your router is open and clear.
11. The Channel Change: Dealing with Wireless Congestion
Your router broadcasts Wi-Fi on a specific channel. In crowded areas, these channels can become congested. Access your router’s settings (usually by typing its IP address into your web browser) and consider changing the Wi-Fi channel. Look for a channel scanner that suggests the least congested channels.
12. The Security Showdown: Check Your Wi-Fi Password
Have you recently changed your Wi-Fi password? It sounds simple, but it’s worth double-checking that your laptop has the correct password saved. A mistyped password can easily block your access. It's a basic step that's often overlooked, but it can solve the problem immediately.
13. The DNS Detective: Checking Your DNS Settings
Domain Name System (DNS) servers translate website addresses into IP addresses. Sometimes, your DNS settings can be the problem. You can try switching to a public DNS server, like Google's (8.8.8.8 and 8.8.4.4). This is like using a different phone book – it can sometimes lead to better service.
14. The Firmware Fix: Updating Your Router's Firmware
Your router's firmware is the software that runs it. Outdated firmware can lead to all sorts of problems, including Wi-Fi dropouts. Check your router manufacturer's website for firmware updates and install them. It's like upgrading your car's engine for better performance.
15. The Absolute Last Resort: Resetting Your Laptop to Factory Settings
This is a drastic step, so only consider it as a last resort. Resetting your laptop to factory settings wipes all your data, so back up anything important first! This is like hitting the big reset button on your laptop, starting from scratch. It might resolve persistent software issues that are causing your Wi-Fi problems, but it's a time-consuming process.
Conclusion: Back in the Game!
So there you have it: a comprehensive guide to troubleshooting your dead laptop Wi-Fi! We've covered the common culprits, from the easy fixes to the more intricate solutions. Hopefully, one of these steps will get you back online and enjoying the digital world in no time. Remember, tackling tech problems can feel daunting, but with patience and these tips, you're well-equipped to conquer the Wi-Fi gremlins. Now go forth and conquer the internet!
Frequently Asked Questions (FAQs)
1. My Wi-Fi works on other devices, but not my laptop. What does this mean?
This strongly suggests the issue is specific to your laptop, likely a driver problem, a hardware malfunction, or a software conflict on your machine. Start with driver updates and troubleshooting steps specific to your laptop.
2. What if I've tried everything, and my Wi-Fi still doesn't work?
If you've exhausted all the troubleshooting steps
Dell WiFi Down? Get It Back ONLINE Now!Replacing WiFi & BT Card on HP 840 G1 & G2
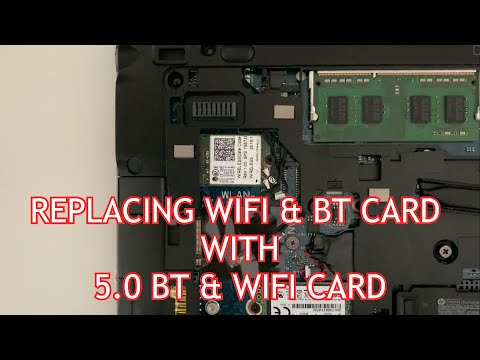
By Unifixer's Guides Replacing WiFi & BT Card on HP 840 G1 & G2 by Unifixer's Guides
Tutorial penggantian kartu WLAN HP PAVILION DV6000 Peningkatan WIFI - dengan subjudul

By Laptop Repair Tutorial penggantian kartu WLAN HP PAVILION DV6000 Peningkatan WIFI - dengan subjudul by Laptop Repair
How to Wi-Fi card replacement on Samsung QX410 laptop

By How-FixIT How to Wi-Fi card replacement on Samsung QX410 laptop by How-FixIT

Title: Cara Memperbaiki Perubahan Upgrade Kartu Wifi Laptop Wireless Local Area Network WLAN Di Laptop Apa Pun
Channel: HealMyTech
Cara Memperbaiki Perubahan Upgrade Kartu Wifi Laptop Wireless Local Area Network WLAN Di Laptop Apa Pun by HealMyTech
Working With Laptop
Title: The Ultimate Guide to Brewing the Perfect Cup of Coffee at Home
The aroma. The ritual. The inimitable, comforting warmth of a freshly brewed cup. For many, coffee is more than just a beverage; it's a daily necessity, a source of pure joy, and a gateway to productivity. However, the journey from bean to cup is a nuanced and fascinating art form, often shrouded in mystery. This comprehensive guide peels back the layers of coffee brewing, empowering you to craft the perfect cup at home, every single time.
Choosing Your Coffee: The Foundation of Greatness
The foundation of exceptional coffee lies in the quality of the beans themselves. Forget pre-ground, stale options. Embrace the adventure of buying whole bean coffee, and the world of flavor will open up before you.
- Bean Origins: A World of Flavors: The origin of your coffee beans significantly impacts the final cup. Ethiopian Yirgacheffe beans, celebrated for their bright acidity and floral notes, offer a vastly different experience than the rich, chocolatey profiles of Sumatran Mandheling. Consider exploring beans from Colombia, Kenya, Costa Rica, or even the lesser-known regions like Panama and Rwanda. Experimentation is key!
- Roast Levels: Decoding the Color: Roasting directly influences the flavor profile. Light roasts highlight the origin characteristics, showcasing bright acidity and subtle nuances. Medium roasts strike a balance, offering a well-rounded experience. Dark roasts, on the other hand, develop bolder, often smoky or bittersweet flavors, with lower acidity. Choose based on your preference:
- Light Roast: Bright acidity, floral and fruity notes, delicate flavors, less body.
- Medium Roast: Balanced acidity, sweetness, and body, versatile flavors.
- Dark Roast: Bold, smoky, sometimes bitter flavors, low acidity, full body.
- Freshness: The Enemy of Flavor: Coffee beans, like all ingredients, degrade over time. Buy beans in smaller quantities to ensure freshness. Look for a roasted-on date rather than a "best by" date. Ideally, use your beans within two to three weeks of roasting.
- Storage: Preserving the Aroma: Store your whole bean coffee in an airtight container, away from light, heat, and moisture. Avoid storing coffee in the refrigerator or freezer, as this can introduce moisture and negatively impact the flavor. A cool, dark pantry is ideal.
- Grinding Your Beans: This is probably the single most important factor to have a great cup of coffee. The finer your grind, the more flavor will get extracted.
The Art of Grinding: Unleashing the Full Potential
Grinding is a crucial step, a pre-brewing imperative often overlooked. The size of your grind must match your brewing method.
- The Right Grinder Matters: Invest in a burr grinder, not a blade grinder. Blade grinders chop the beans unevenly, leading to inconsistent extraction and a subpar cup. Burr grinders, on the other hand, grind the beans evenly, maximizing flavor.
- Grind Size Guidelines:
- French Press: Coarse grind (similar to sea salt)
- Pour Over/Drip Coffee: Medium-coarse to medium grind (similar to coarse sand)
- Espresso: Fine grind (similar to table salt)
- Aeropress: Fine to medium grind (between table salt and sand)
Mastering the Brewing Methods: Unveiling the Brewing Techniques
There is a plethora of ways to brew coffee. The perfect method often depends on your equipment and preferences.
- Pour Over Perfection: Pour over methods, such as the Hario V60 or Chemex, provide exceptional control over the brewing process.
- Rinse the Filter: Before anything else, rinse your paper filter with hot water to eliminate any papery taste and preheat your brewing vessel.
- Grind & Dose: Grind your beans to a medium-coarse consistency. A general rule of thumb is a 1:16 coffee-to-water ratio (e.g., 20 grams of coffee to 320 grams of water).
- Bloom the Grounds: Pour a small amount of hot water (about twice the weight of your coffee) over the grounds to saturate them. Allow them to bloom for 30-45 seconds. This releases trapped carbon dioxide and enhances the flavor.
- The Pour: Slowly and steadily pour the remaining water over the grounds in a circular motion, ensuring even saturation.
- Brew Time: Aim for a brew time of around 2.5-3 minutes. Adjust your grind size to achieve the desired brew time.
- French Press Elegance: The French press delivers a full-bodied, immersive coffee experience.
- Preheat: Heat your French press with hot water before adding the grounds to ensure all those coffee flavors will not be lost.
- Grind & Dose: Use a coarse grind with a 1:15 coffee-to-water ratio.
- The Bloom: Pour hot water over the grounds and let bloom for 30 seconds.
- The Plunge: After 4 minutes, slowly press the plunger down until it reaches the bottom. Pour the coffee immediately to avoid over-extraction.
- Drip Coffee Simplicity: Automatic drip coffee makers offer an uncomplicated, consistent brewing experience.
- Water Quality: Use filtered water of good quality.
- Grind Size: Use a medium grind.
- Correct Ratio: Maintain a 1:15 or 1:16 coffee-to-water ratio.
- Espresso Mastery: Espresso brewing is an art form, but achievable at home with the right equipment.
- Fresh Grinding: Grind your coffee beans immediately before brewing.
- Tamping: Tamp the ground coffee evenly and firmly into the portafilter.
- Extraction Time: The extraction time should be approximately 25-30 seconds for a double shot.
- Brewing: Use the correct temperature (between 195-205 degrees Fahrenheit).
- Water Pressure: Keep the water pressure between 9 and 10 bars.
- Aeropress Versatility: The Aeropress is a versatile, portable brewing device.
- Preheat: Heat your Aeropress with hot water.
- Grind Size: Use a fine to medium grind.
- Inverted Method: Consider using the inverted method, allowing for a longer brewing time.
- Immersion Brewing: Submerge the grounds in water for a specified time (typically 1-2 minutes).
- Plunge: Press down to extract the coffee.
Water Temperature: The Unsung Hero
Water temperature is a critical factor often overlooked.
- The Ideal Range: The ideal water temperature for brewing coffee is between 195-205 degrees Fahrenheit (90-96 degrees Celsius). Too cold, and the coffee will be under-extracted and sour. Too hot, and it will be bitter.
- Using a Thermometer: Investing in a thermometer is recommended to ensure accuracy.
- Boiling Point: Allow the water to come off a boil briefly before pouring, or use a temperature-controlled kettle.
The Importance of Water Quality
The water you use determines over half of the flavor of your cup of coffee.
- Filtered Water is Essential: Always use filtered water to remove impurities that can negatively impact the taste.
- Avoid Distilled Water: Distilled water lacks the essential minerals needed for proper extraction.
The Coffee-to-Water Ratio: Striking the Perfect Balance
The coffee-to-water ratio is a fundamental concept.
- Standard Ratios:
- Pour Over/Drip: 1:16 or 1:15 (coffee to water)
- French Press: 1:15 (coffee to water)
- Espresso: 1:2 (coffee to espresso)
- Adjust to Your Preferences: Adjust the ratio to suit your taste. Stronger coffee requires more coffee, while weaker coffee requires less.
- Use a Scale: A digital kitchen scale is essential for accurate measurements.
Troubleshooting Common Coffee Issues
Even the most experienced brewers encounter challenges.
- Sour Coffee: The coffee is under-extracted. Grinding finer, increasing brewing time, or using hotter water will typically correct this issue.
- Bitter Coffee: The coffee is over-extracted. Grinding coarser, decreasing brewing time, or using cooler water will often solve this.
- Weak Coffee: Increase the coffee-to-water ratio or grind finer.
- Muddy Coffee: Use a coarser grind.
Cleaning and Maintenance: Ensuring Longevity and Taste
Maintaining your equipment is critical for the longevity of your coffee makers and the quality of your coffee.
- Rinse After Each Use: Rinse your brewing devices immediately after each use to prevent coffee oils from building up.
- Regular Cleaning: Use a coffee machine cleaner to degrease and descale your equipment regularly.
- Burr Grinder's Cleaning:
