how to use my laptop internet as wifi hotspot

Title: How to use Your Laptop as WiFi Hotspot
Channel: Ricardo Gardener
How to use Your Laptop as WiFi Hotspot by Ricardo Gardener
Laptop Internet to WiFi Hotspot: The SHOCKINGLY Easy Trick!
Turn Your Laptop into a Wi-Fi Hotspot: The Surprisingly Simple Secret!
Ever find yourself in a Wi-Fi wasteland? We’ve all been there. You desperately need internet. You may be stuck with only your laptop. Forget the frustration. Indeed, there’s a surprisingly easy way to turn that laptop into a Wi-Fi hotspot! This is a secret most people don’t know. It's a game-changer. So, prepare to be amazed at how simple it is.
Unveiling the Hidden Power of Your Laptop
Your laptop is more than a device. It's a powerful tool. Therefore, it can share its internet connection. This is especially useful. You can share it with your phone or tablet. And this is all achievable without any extra hardware. This is a real lifesaver. Moreover, it’s ideal for travel. Or maybe you have a temporary internet outage at home.
Bridging the Gap: The Magic of Internet Sharing
The core principle is simple. Your laptop receives the internet from a cable. Then, it rebroadcasts it as Wi-Fi. Think of it as a translator. It takes one form of internet. Afterwards, it shares it in another. This utilizes your computer's built-in capabilities. Frankly, It’s a hidden gem. This is a powerful function.
Step-by-Step: Making it Happen on Windows
Ready to become a Wi-Fi wizard? Let’s do this. The process varies slightly depending on your operating system. Because most people use Windows. So, we'll start there. First, go to the Settings app. You can find this in your Start menu. Afterwards, click on "Network & Internet".
Next, select "Mobile hotspot". You'll see a switch. Turn it "On". Afterward, you'll see a few options. You can change your network name. You can also set a password. Choose a strong password. This protects your hotspot. Decide what works best for you. Now, you’re sharing your connection. That's easy, right? But this is just the beginning.
Making it Happen: A Mac-Friendly Approach
Don’t worry, Mac users! We haven’t forgotten you. The steps are slightly different. First, click the Wi-Fi icon in your menu bar. Now, choose "Open Network Preferences". You'll find this at the top. Afterward, select "Internet Sharing". Check the box next to "Share your connection from". Choose your internet connection source. Then, in the "To computers using" section, check "Wi-Fi". Customize your network settings. Similarly to Windows, you'll choose a name and password. Tap "Start". Now, your Mac is broadcasting Wi-Fi.
Troubleshooting Common Hurdles
Sometimes, things don't go perfectly. So, let’s tackle some common issues. If your hotspot isn’t working, first, check your internet connection. Also, make sure your laptop’s Wi-Fi adapter is enabled. Verify the settings on your devices. Ensure your password is correct. Finally, restart your laptop. These steps typically fix the problem.
Enhancing Your Hotspot Experience
Want to take things to the next level? Definitely, follow these tips. Consider your data usage. Streaming video, for instance, consumes a lot. Moreover, keep your laptop plugged in. This avoids battery drain. Monitor the number of connected devices. Too many connections can slow things down. In addition, know your data limits. If you’re using a mobile connection. Be mindful of how you share your internet.
The Benefits: Beyond the Basics
The advantages go beyond simply sharing the internet. This technique offers flexibility. Additionally, it provides you with security. You have control over your network. Further, it’s cost-effective. No need for extra Wi-Fi equipment. Consider where you are. Sometimes, public Wi-Fi is unreliable. Sharing from your laptop is often safer. In fact, you can create your own secure network.
Embrace the Freedom: Your Laptop, Your Wi-Fi
You now possess a powerful skill. You can convert your laptop into a Wi-Fi hotspot. You're prepared to bridge the internet divide. This is a simple yet valuable trick. This is especially true whether you use Windows or a Mac. So, the next time you're in need, remember this guide. And finally, enjoy the freedom of always being connected. Don't be caught without internet again.
Laptop Ignoring Your WiFi? This One Weird Trick Fixes It!Laptop Internet to WiFi Hotspot: The SHOCKINGLY Easy Trick!
Hey tech enthusiasts, fellow travelers, and anyone who’s ever found themselves staring at a blank screen, desperate for a Wi-Fi signal! We've all been there, right? Stuck in a hotel room with a ridiculously slow connection, stranded at an airport with a dying phone, or perhaps just trying to get some work done in the park, only to be thwarted by the lack of readily available internet. But what if I told you there's a secret weapon, a ridiculously easy trick, to turn your trusty laptop into a personal Wi-Fi hotspot? You wouldn’t believe it! Buckle up, because we’re diving headfirst into the liberating world of laptop-powered Wi-Fi.
1. The Internet Drought: A World Without Connectivity
Let's paint a picture. Imagine you’re traveling. You’re in a new city, brimming with excitement for exploration and new experiences. You're itching to share that incredible sunset photo, check your emails, or just navigate your way through the city using Google Maps. Suddenly, bam, the dreaded internet drought hits! The hotel Wi-Fi is slower than a snail in molasses, the coffee shop is packed, and your phone's data plan is dwindling like a melting ice cream cone on a hot summer day. Sound familiar? It's a frustrating reality for many of us, but it doesn’t have to be!
2. Cracking the Code: Your Laptop as a Wi-Fi Liberator
Here’s the mind-blowingly simple secret. Your laptop, that powerful machine you already own, can act as a Wi-Fi hotspot! Think of it as your personal internet genie, ready to grant your connected wishes. We'll walk you through the steps, and trust me, it’s easier than making instant noodles (and far more rewarding!). No more scrambling for Wi-Fi codes or battling spotty public networks. You gain control!
2.1. Windows' Hidden Gem: The Mobile Hotspot Feature
Windows, in its infinite wisdom, has gifted us with the Mobile Hotspot feature. Think of it as a built-in Wi-Fi transmitter cleverly disguised within your operating system. This feature allows your laptop to share its internet connection with other devices, essentially creating its own mini-network. It’s like having your own personal Wi-Fi router, ready to deploy on a whim.
2.2. Unleashing the Power: Step-by-Step Guide (Windows)
Alright, let’s get practical. Firing up your laptop to create a Wi-Fi hotspot is as simple as following these steps:
- Step 1: Open Settings. Click the Start button (that Windows logo in the bottom left corner) and then click the settings cogwheel.
- Step 2: Network & Internet. Click on the "Network & Internet" option.
- Step 3: Mobile Hotspot. A new window will open. Click the "Mobile Hotspot" option.
- Step 4: Share your internet connection from. Choose which connection you want to share. This is usually your Ethernet connection if you are plugged in, or your Wi-Fi connection if you are connected to another Wi-Fi network.
- Step 5: Share your internet connection with other devices. Turn the "Share my internet connection with other devices" toggle ON.
- Step 6: Edit the Network Name (SSID) and Password. Click "Edit" to change your network name and password to something memorable and secure. Treat this like you would your home Wi-Fi!
- Step 7: Connect your devices! On your phone, tablet, or other device, find your new Wi-Fi network (it'll be the name you chose) and enter the password you set. Boom. You're connected!
2.3. Troubleshooting Common Windows Issues
Sometimes, like any technological marvel, things can go a little sideways. Here’s a quick cheat sheet for common Windows hotspot hiccups:
- "Can't share this internet connection" error: Ensure your adapter is properly configured; update your network drivers. Maybe your network card is disabled.
- Slow speeds: The connection speed of your hotspot will be limited by the speed of the internet connection your laptop is using.
- Devices can't connect: Double-check the password and make sure the Wi-Fi adapter is enabled.
- Limited data usage: Keep an eye on how much data your devices are using, particularly if you’re on a limited data plan on your laptop.
3. Mac Magic: Turning Your Macbook Into a Hotspot
Fear not, Apple aficionados! Your MacBooks are just as capable of becoming Wi-Fi powerhouses. The process is slightly different, but equally user-friendly.
3.1. The Mac's Internet Sharing Feature
Macs use "Internet Sharing," which, like Windows' Mobile Hotspot, lets you share your internet connection with other devices. It’s a simple yet powerful tool hidden within your system preferences.
3.2. Mac Hotspot: A Simple Recipe
Here's how to conjure up a Wi-Fi hotspot on your Mac:
- Step 1: Open System Preferences. Click the Apple menu (top left) and choose "System Preferences".
- Step 2: Sharing. Select the "Sharing" option.
- Step 3: Internet Sharing. Select "Internet Sharing" from the left-hand menu.
- Step 4: Share your connection from. Choose the internet connection your Mac is currently using (e.g., Wi-Fi or Ethernet).
- Step 5: To computers using. Check the box next to "Wi-Fi".
- Step 6: Wi-Fi Options. Click "Wi-Fi Options…" to set your network name and password.
- Step 7: Start Sharing. Enable the checkbox next to "Internet Sharing" on the left-hand side.
- Step 8: Connect! Grab your phone, tablet, or other device, select the Wi-Fi network you just created, and enter the password.
3.3. Mac Troubleshooting Tips
- No internet access: Make sure your Mac is connected to the internet through Wi-Fi or Ethernet.
- Can’t find the network: Ensure Wi-Fi is enabled on your Mac and that you've configured the sharing correctly.
- Password issues: Triple-check the password or re-enter it on your other device.
4. Security First: Protecting Your Digital Castle
Creating a Wi-Fi hotspot opens up a world of connectivity, but it's crucial to prioritize security. Think of it like securing your digital castle.
4.1. Why Security Matters
Protecting your newly-created hotspot is vital to prevent unauthorized access to your internet connection and potentially to your devices. Imagine someone using your hotspot to perform illicit activities; that can lead back to YOU.
4.2. Strong Passwords: Your First Line of Defense
Always use a strong, unique password for your hotspot. Avoid easily guessable passwords like "password123" or your pet's name. Aim for a mix of uppercase and lowercase letters, numbers, and symbols.
4.3. Firewall and Antivirus: Additional Layers of Protection
Ensure your laptop's firewall and antivirus software are active and updated. This adds an extra layer of security against potential threats.
4.4. Monitor Device Connections: Staying Vigilant
Keep an eye on the devices connected to your hotspot. If you see a device you don’t recognize, block it immediately.
5. Beyond the Basics: Unleashing the Wi-Fi Superpowers
Now that you're a Wi-Fi hotspot guru, let’s explore some cool things you can do.
5.1. Travel Companion: Stay Connected on the Go
This is the primary use case. Whether you're a digital nomad, a frequent traveler, or just someone who likes to stay connected, the laptop-to-hotspot trick is invaluable.
5.2. The Data Saver: Sharing Your Data Plan
Got a generous data plan on your phone? Use your laptop as a hotspot to share that data with other devices when you need it.
5.3. Emergency Backup: The Lifeline in Times of Need
Think of it as your emergency Wi-Fi kit. When public Wi-Fi fails, your laptop hotspot fills the void.
6. Ethical Considerations: Be a Good Network Citizen
While creating a hotspot is a fantastic tool, it's essential to be mindful of ethical considerations.
6.1. Respecting Data Limits
If you're using a data plan on your laptop, be mindful of your data usage. Streaming videos or downloading large files can quickly eat up your data allowance.
6.2. Being Considerate of Others
Avoid sharing your hotspot in crowded areas or for excessive periods. Be fair to others who might also need a connection.
7. The Future is Now: Wi-Fi Evolution
The world of Wi-Fi is ever-evolving. The techniques we've discussed today are likely to adapt over time, with advancements in hardware and software.
7.1. The Rise of 5G and Beyond
The rollout of 5G and future generations of mobile networks will further improve internet speeds.
7.2.
Nest Wifi Nightmare? Solved! (Laptop Connection Trick)How To Share Internet From Laptop To Mobile Via WiFi in Windows 11

By EasyTechGeek How To Share Internet From Laptop To Mobile Via WiFi in Windows 11 by EasyTechGeek
Use PC as WiFi Hotspot with Ethernet
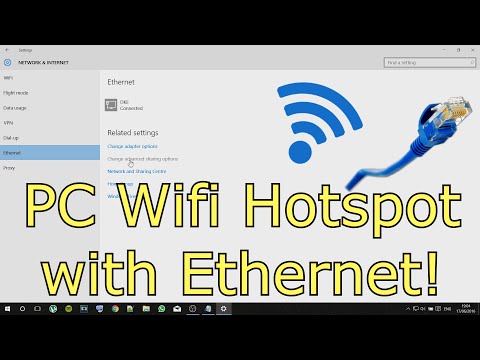
By Tech4Time Use PC as WiFi Hotspot with Ethernet by Tech4Time
How to Use PC Internet in Mobile Using Hotspot Wireless-2020

By MJ Tube How to Use PC Internet in Mobile Using Hotspot Wireless-2020 by MJ Tube

Title: How to Create Wifi Hotspot in Windows 10 Tutorial
Channel: MDTechVideos
How to Create Wifi Hotspot in Windows 10 Tutorial by MDTechVideos
Wifi On Laptop
Here is the article title: The Ultimate Guide to Crafting Delicious Sourdough Bread at Home
The Alchemy of Sourdough: A Journey into Baking Excellence
We embark on a culinary adventure, a deep dive into the captivating world of sourdough bread. This isn't merely a recipe; it’s an exploration of a time-honored craft, a testament to patience, and a rewarding experience that will transform your kitchen into a fragrant haven. We often hear the word "sourdough" and envision complex techniques, daunting processes, and years of practice. However, the reality is within reach for every home baker. We'll navigate the essential steps, demystify the sourdough starter, and uncover the secrets to crafting loaves that rival the finest artisan bakeries. Every element is a carefully considered step towards the perfect loaf – from the meticulous care of your starter, to the precise folding techniques, and the artful scoring that enhances both the beauty and the texture of the final product.
Building Your Sourdough Starter: The Foundation of Flavor
The heart of sourdough bread lies in its starter, a living culture of wild yeasts and beneficial bacteria. Unlike commercial yeast, the starter is a living organism, a micro-ecosystem that's fed and nurtured to ensure its vitality. This symbiotic relationship between yeast and bacteria is what produces the distinctive tang and complex flavors that set sourdough apart.
Our journey begins with the creation of this vital culture. We will start with a simple mixture of equal parts unbleached, all-purpose flour and non-chlorinated water. We will combine these ingredients in a clean glass jar, stirring them together until well incorporated. We will then cover the jar loosely with a lid or a piece of breathable cloth, like cheesecloth secured with a rubber band. This permits air circulation and prevents mold growth.
For the initial five to seven days, we will observe the mixture daily. As fermentation begins, the mixture will start to bubble and expand. This signifies the activity of naturally occurring yeasts in the flour and the surrounding air. Each day, we will discard roughly half of the starter and feed it with a fresh batch of flour and water. Consistency is key – we will achieve a 1:1:1 ratio by weight (starter:flour:water). This feeding process is crucial to provide the starter with fresh nutrients and prevent it from becoming overly acidic.
As the days progress, the starter will undergo significant changes. We will observe the formation of bubbles, a sourdough aroma that intensifies, and, eventually, a rise and fall, signifying peak activity. Once the starter doubles in size within 4-8 hours after feeding, it's ready for its inaugural baking adventure. The appearance of the starter is also a guide; it should be light, fluffy, and exhibit a pleasant, slightly tangy scent. At this stage, it is a living treasure, a testament to the power of nature and patience.
The Flour: Choosing the Right Grain for Your Bread
The choice of flour is a paramount aspect of sourdough baking. It is the canvas upon which we will paint our culinary masterpiece. We will explore different types of flour and their impact on the final product.
Unbleached all-purpose flour is a versatile starting point. It offers a good balance of protein and gluten, contributing to structure and rise. However, to elevate our creations, we will venture into the world of bread flour. Bread flour, with its higher protein content, provides a stronger gluten network, resulting in a more robust loaf with a chewier crumb.
We will further enhance the complexities of our bread by incorporating other types of flour. Whole wheat flour adds a distinct, earthy flavor and a coarser texture. Rye flour, with its characteristic tang and moist crumb, contributes to a more complex profile. Spelt flour, another ancient grain variety, adds a subtle sweetness and a slightly nutty flavor.
Experimentation is key. We will explore different flour combinations to determine the perfect blend for achieving the desired characteristics in our bread. We may opt for a blend of bread flour, whole wheat, and rye to achieve the right mix of texture and flavor. The flour's moisture content should also be considered; we can use a kitchen scale to weigh the flour for accuracy, which will help us fine-tune our hydration ratios.
The Hydration Equation: Water and Flour in Harmony
Hydration, the ratio of water to flour, is a critical factor in sourdough baking. It determines the dough's consistency, the crust's crispiness, and the internal crumb's openness.
A higher hydration level, which means a greater water to flour ratio, results in a more open crumb, a more airy texture, and a thinner, more delicate crust. Conversely, a lower hydration level tends to lead to a denser crumb and a thicker crust. We will start with a moderate hydration level, gradually adjusting it to achieve the desired outcome.
We will begin by calculating the hydration percentage, noting the weight of flour and the weight of water. If we are using 500 grams of flour and 350 grams of water, the hydration is 70% (350/500 = 0.70).
During the mixing process, we will carefully observe the dough's consistency. It will become more elastic as the gluten develops. We may need to adjust the hydration level slightly, adding a small amount of water at a time if the dough is too stiff, or adding a bit of flour if it is too sticky.
The Autolyse and Bulk Fermentation: Unlocking Flavor Potential
Before the addition of the starter, we will initiate an autolyse. This crucial step involves mixing the flour and water, without the starter or salt, and letting the dough rest. The autolyse period allows the flour to fully hydrate, which improves gluten development and yields a more extensible dough, which will be easier to handle and shape.
The autolyse period can range from 30 minutes to several hours. We will cover the dough and rest it at room temperature. After the autolyse, we will add the starter and salt to the mixture. The salt not only enhances the flavor but also helps to regulate the fermentation process.
We will gently incorporate the starter and salt into the dough. We will knead the dough, or perform a series of folds, until it becomes smooth and elastic.
Following the addition of the starter and salt, begins bulk fermentation. During this process, the dough is left to rise at room temperature. Bulk fermentation is where the dough develops its flavor, the yeast produces carbon dioxide, and the gluten network continues to develop. We will closely monitor the dough's progress, and this includes its volume, and the development of bubbles throughout its structure. The bulk fermentation time varies depending on the environment, starter activity, and hydration level.
We will also incorporate "stretch and folds" throughout the bulk fermentation process. These gentle folds strengthen the gluten network and redistribute the gases produced by the yeast. Every 30-60 minutes, we will gently stretch a portion of the dough and fold it over itself. This will be repeated for several hours.
Shaping and Proofing: Crafting the Perfect Loaf
Once the dough has sufficiently risen during bulk fermentation, it is ready to be shaped. The shaping technique dramatically influences the loaf's final form and structure. We will delicately handle the dough to preserve its integrity and the gas produced during fermentation. We will gently turn the dough out onto a lightly floured surface.
We have two primary shaping methods to consider: the round boule and the oblong batard. To shape a boule, we gently stretch the dough into a round, then fold the edges into the center, gradually forming a tight round. To shape a batard, we will shape the dough into a rectangle and roll it into a log, sealing the seam.
Once shaped, the loaf needs to proof. Proofing is the process of letting the shaped dough rise further before baking. We can use a banneton basket, a proofing basket, lined with flour to prevent sticking. If we don't have a banneton, we can use a bowl lined with a floured cloth. We will gently place the shaped dough into the basket, seam-side up (for boules) or with the seam downward (for batards).
Proofing can be done at room temperature or in the refrigerator for an extended period, leading to a more complex flavor. Cold proofing allows for a more controlled fermentation, slowing down the yeast activity and allowing the dough to develop a deeper flavor.
Baking: From Dough to Golden Crust
The baking process is where all our hard work culminates. We will preheat the oven with a Dutch oven inside, to a high temperature, such as 450°F (232°C). The Dutch oven creates a humid environment, which is vital for producing a beautifully crusty loaf.
We will carefully remove the hot Dutch oven from the oven and gently place the proofed loaf inside. We will then score the loaf using a lame or a sharp knife. Scoring is crucial; it controls the loaf's expansion in the oven and creates beautiful patterns.
We will cover the Dutch oven with its lid and bake the loaf for a certain amount of time, such as 20 minutes. Next, we will remove the lid of the Dutch oven and continue baking, reducing the oven temperature slightly. This allows the crust to develop a deep golden brown color.
The baking time will vary depending on the size of the loaf. We can use a digital thermometer to ensure it has reached an internal temperature of at least 200°F (93°C).
Once baked, we will let the loaf cool completely on a wire rack. This is essential for allowing the internal structure to fully set and for the flavors to fully develop.
**Troubleshooting and Tips for
