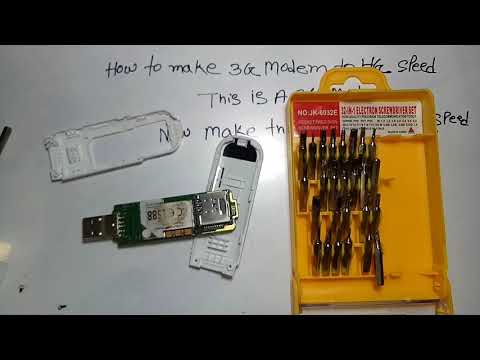
creating a wifi hotspot from laptop using a 3g dongle

Title: How to make 3G4G USB Dongle as WiFi Hotspot
Channel: UniqueTutorials
How to make 3G4G USB Dongle as WiFi Hotspot by UniqueTutorials
Unlock Blazing-Fast WiFi Anywhere: Laptop Hotspot Secret Revealed!
Unleash Your Digital Nomad Dreams: Transform Your Laptop into a WiFi Powerhouse!
Ever dreamt of streaming your favorite shows, attending crucial video calls or simply browsing the web seamlessly from anywhere? You're not alone. The struggle for reliable, high-speed internet access, especially when on the go, is a universal one. Fortunately, a powerful, often overlooked solution exists: your laptop. It's time to unlock the secret of turning your portable companion into a blazing-fast WiFi hotspot.
The Laptop Hotspot: Your Personal WiFi Fortress
Let’s be honest: public WiFi can be a gamble. It's slow, unreliable, and often riddled with security concerns. This is where your laptop steps in to save the day. It's your personal WiFi fortress, ready to provide a secure and speedy internet connection wherever you are. Essentially, your laptop, with the right configuration, can broadcast its internet connection, creating a private network that your other devices, like phones and tablets, can connect to. This is a game-changer for travelers, remote workers, and anyone seeking dependable internet access.
Setting Up Your Laptop Hotspot: A Smooth Ride
The process of setting up a laptop hotspot is surprisingly straightforward, despite what you may think. The exact steps vary slightly depending on your operating system, but the core principles remain the same. First, you will need a device that has internet access—this could be a wired Ethernet connection, or more often, a cellular data plan with a mobile broadband modem/USB dongle.
For Windows Users:
Open your settings page. Then select "Network & Internet." Then select "Mobile Hotspot" in the sidebar. Switch "Share your Internet connection with other devices" to "On." Finally, choose the internet connection you wish to share. You can also change the network name and password.
For macOS Users:
Navigate to "System Preferences." Next, choose "Sharing." Check the box next to "Internet Sharing." Select your internet connection from the "Share your connection from" dropdown menu. From the "To computers using" dropdown, choose "Wi-Fi." Click "Wi-Fi Options" to set up your network name and password. Start the sharing process.
Optimizing Your Hotspot for Peak Performance
Creating the hotspot is just the beginning. To truly unlock its potential, consider these optimization tips. First, ensure you have a strong internet connection to begin with. Your hotspot's speed is limited by the speed of its source connection. Also, move your laptop to an open space, away from obstructions like walls and metal objects, to optimize wireless signal range. Secondly, limit the number of connected devices. Each device consumes bandwidth. Therefore, the fewer devices sharing, the faster the connection.
Advanced Tips for the Savvy Hotspot User
Going beyond the basics, there are some advanced techniques to enhance your experience. Consider using a 5 GHz Wi-Fi band. Although it has a shorter range than the 2.4 GHz band, it generally offers a faster, less congested connection. Ensure your drivers are updated. Outdated network drivers can significantly impact performance. Also, regularly check your data usage to avoid exceeding your data plan limits, especially if you are relying on a cellular data connection. Finally, consider using a virtual private network (VPN). A VPN encrypts your internet traffic, thereby adding an extra layer of security when using your hotspot, especially on public networks.
Troubleshooting Common Hotspot Hiccups
Even with the best setup, you might encounter a few snags. If your devices can't find your hotspot, double-check that it is enabled and the network name is correct. If you are experiencing slow speeds, try the optimization steps mentioned previously. Also, reboot your laptop and connected devices. This simple action often resolves connectivity issues. Verify your data plan’s usage and limits. It is possible you've exceeded your data allowance. If issues persist, ensure your network drivers are up-to-date as well.
Embracing the Freedom of WiFi Anywhere
In conclusion, transforming your laptop into a WiFi hotspot is more than just a tech trick. It's a gateway to freedom, providing you with the power to stay connected on your terms, regardless of your location. Moreover, it empowers you to work, play, and communicate. You can do so with security and confidence in the ever-evolving digital world. So go ahead, embrace the convenience, unlock the power of your laptop, and embark on your journey to a world where seamless internet access is always within reach.
Unlock Myanmar Net WiFi on Your Laptop: The Secret Trick!Unlock Blazing-Fast WiFi Anywhere: Laptop Hotspot Secret Revealed!
Hey there, fellow digital nomads, remote workers, and anyone who's ever wrestled with a sluggish internet connection! Prepare to ditch the frustrating buffering circles and embrace seamless connectivity, because today, we're diving deep into a super-secret (okay, not so secret anymore) weapon: turning your laptop into a blazing-fast WiFi hotspot. We'll unlock how to have reliable internet access practically anywhere, turning your laptop into a personal internet powerhouse.
1. Introduction: The WiFi Wilderness – Are You Lost?
Let's be honest, the internet is as essential these days as air. Imagine trying to navigate a bustling city without a map – frustrating, right? That’s how it feels when you’re stuck in the WiFi wilderness, hunting for a signal that's as elusive as a unicorn. Coffee shop WiFi is a gamble, airport hotspots can be painfully slow, and hotel internet? Well, let’s just say it’s often a test of patience. We've all been there – staring at the spinning wheel of doom, desperately needing to send that email, join that video call, or simply breathe. This is where your laptop steps in, ready to become your personal WiFi superhero.
2. The Laptop Hotspot Superhero: Your Digital Sidekick
Think of your laptop as a Swiss Army knife of computing. It's a word processor, a video player, a communication hub, and, yes, a powerful WiFi extender. When you transform it into a hotspot, you’re essentially creating your own personal WiFi network, using your laptop's existing internet connection to share it with other devices. No more hunting for public WiFi, no more data limits (well, mostly – we'll get to that later!), and no more frustration.
3. Unveiling the Magic: How Does This Laptop Hotspot Thing Work?
The concept is simple, but the execution is brilliant. Your laptop connects to the internet via one of its methods – Ethernet cable, existing WiFi, or even a mobile broadband connection (think USB dongle or a tethered phone). Then, it broadcasts that internet connection as a new WiFi signal, which other devices (your phone, tablet, another laptop) can connect to. It's like a relay race, with your laptop as the middle runner, passing the internet baton to your other devices.
4. Windows vs. Mac: The Hotspot Showdown
The good news? Both Windows and macOS support hotspot functionality. The slightly less exciting news? The process differs a bit between the two operating systems. Don’t worry, though; we'll break down how to set up a hotspot on both platforms.
5. Windows: Your Step-by-Step Hotspot Guide
- Step 1: Check Your Connections: Before you start, make sure your laptop is connected to the internet. This could be via WiFi, Ethernet, or even a USB tethered phone.
- Step 2: Open Settings: Click on the Windows Start Menu (that little Windows icon), and then click on the Settings gear icon.
- Step 3: Go to Network & Internet: In Settings, click on "Network & Internet."
- Step 4: Mobile Hotspot: On the left-hand side, you'll see "Mobile hotspot." Click on that.
- Step 5: Enable the Hotspot: Toggle the "Share my internet connection with other devices" slider to "On."
- Step 6: Customize Your Hotspot (Optional): Click "Edit" to change your network name (SSID) and password. Make it something memorable (or a password you can remember, to be safe!).
- Step 7: Connect Your Devices: On your phone, tablet, or other device, go to your WiFi settings and find your newly created hotspot network (the one you named in step 6). Enter your password, and voila! You’re connected!
6. macOS: The Apple Approach to Hotspots
- Step 1: Check Your Internet Connection: Just like with Windows, make sure your Mac has an active internet connection.
- Step 2: Open System Preferences: Click on the Apple icon (top left corner of your screen) and then select "System Preferences." Alternatively, click the Network icon in the Control Center.
- Step 3: Select "Sharing": In System Preferences, click on "Sharing."
- Step 4: Internet Sharing: In the left-hand sidebar, click on "Internet Sharing."
- Step 5: Configure Sharing:
- In the "Share your connection from:" dropdown, select the internet connection you're using (e.g., Wi-Fi, Ethernet).
- Check the box next to "Internet Sharing" to enable the feature.
- Click "Wi-Fi Options…" to set up your network name and password. This is what your other devices will see when they search for a WiFi network.
- Step 6: Start Sharing: Check the box beside "Internet Sharing" on the left side of the Sharing window to activate the hotspot. Your Mac is now acting as a hotspot!
- Step 7: Connect Your Devices: Grab your other devices, go to their WiFi settings and connect to the newly created network.
7. Beyond the Basics: Advanced Hotspot Tweaks
Once you've mastered the basic setup, you can delve into some advanced tweaks:
- Data Limits: A Balancing Act: Many devices nowadays provide easy monitoring of data usage. The trick is to keep a watchful eye on your data consumption.
- Security First: Password Protection is Key: Always set a strong password for your hotspot. Avoid using easily guessable passwords or leaving your network open (unless you really want to share!).
- Signal Boosting: Antenna Awareness: Laptop antennas aren’t the strongest. Try to position your laptop in an open space for the best signal strength.
8. The Benefits: Why You Need This Knowledge Now
- Instant Connectivity: No more hunting for WiFi; access your internet when you need it, without delay.
- Freedom to Roam: Work from anywhere – a park, a train, a coffee shop (even if their WiFi is terrible!).
- Cost Savings: Avoid expensive data plans or the need to buy extra WiFi devices.
- Enhanced Productivity: Stay connected and keep your workflow uninterrupted.
9. Data Usage Considerations: Tread Lightly!
Remember that when you're using your laptop as a hotspot, you're essentially consuming data from your primary internet connection. Watch your data usage, particularly if you have a limited data plan. Streaming videos, downloading large files, and video conferencing can quickly eat up your data allowance.
10. Security Concerns: Keeping Your Connection Safe
Secure your hotspot with a robust password. Avoid using easily guessed passwords. Consider enabling encryption (like WPA2/WPA3) to protect your data from prying eyes.
11. The Practical Applications: Where Your Hotspot Shines
- Travel Adventures: Perfect for staying connected on the go.
- Emergency Situations: A reliable backup connection when needed.
- Home Backup: Provides additional bandwidth in the event of a primary network failure.
- Conference Calls and Remote Work: Maintain a fast and stable connection for video meetings.
12. Troubleshooting Troubles: Fixing the Fumbles
Not working? Here are some common troubleshooting tips:
- Restart Everything: Reboot your laptop and the device you're trying to connect. Simple solutions often work!
- Check Your Internet Connection: Ensure your laptop is, in fact, connected to the internet.
- Password Check: Double-check that you're entering the correct WiFi password.
- Firewall Fun: Make sure your firewall isn't blocking the hotspot functionality.
13. Maximizing Speed: Tips for a Blazing-Fast Hotspot
- Location, Location, Location: Place your laptop in an area with good WiFi reception.
- Minimize Interference: Keep your laptop away from other electronic devices that could interfere with the signal.
- Close Unnecessary Apps: Close down any apps that are using a lot of bandwidth.
14. When To Avoid Using Your Laptop Hotspot
- Data Limitations: The Restrictive Pact: If you have data restrictions then be cautious about your usage. It is best to avoid streaming movies and gaming on a limited budget.
- Battery Drain Considerations: The laptop drains the battery quickly. Charge and ensure the power supply is connected before usage.
15. The Future of Wireless: Beyond the Hotspot
As technology evolves, expect even more sophisticated solutions. 5G advancements promise lightning-fast speeds everywhere. We're moving toward a world where access is seamless.
Wrapping Up: Unleash Your Inner WiFi Wizard!
So there you have it! You are all now equipped with the skills to transform your laptop into a WiFi powerhouse. You can now set up a blazing-fast WiFi connection wherever adventure calls. Now go forth, connect, and conquer the digital world! Remember, it’s about staying connected on your terms.
Frequently Asked Questions (FAQs)
1. Is it safe to use my laptop as a hotspot?
Yes, but you need to take precautions. Always use a strong password and consider enabling encryption (WPA2/WPA3
Laptop with Lightning-Fast WiFi & Cellular: Untethered Productivity!How to share 3G dongle internet to other laptops through your laptop

By Akash Rajguru How to share 3G dongle internet to other laptops through your laptop by Akash Rajguru
Don't Throw Your Old Usb Wifi Internet Modem Get Free Internet Anywhere

By Test Tech Lab Don't Throw Your Old Usb Wifi Internet Modem Get Free Internet Anywhere by Test Tech Lab
how to make 3g modem to 4g using 4g wifi antena wifi haking Electro Bhai
By Unique Electro UA how to make 3g modem to 4g using 4g wifi antena wifi haking Electro Bhai by Unique Electro UA
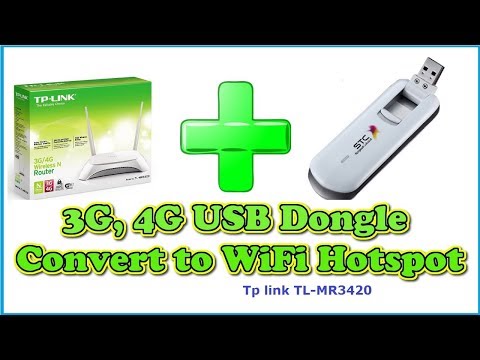
Title: 3G 4G Dongle Convert to wifi
Channel: Laya Bro
3G 4G Dongle Convert to wifi by Laya Bro
Laptop Wifi Hotspot
Here is the title: The Ultimate Guide to Choosing the Perfect Wedding Photographer
The Ultimate Guide to Choosing the Perfect Wedding Photographer
The pursuit of the perfect wedding day often feels like navigating a sea of decisions. From the grandest details, like selecting the venue, to the seemingly smaller ones, such as choosing the right shade of blush for the bridesmaids' dresses, each choice contributes to the symphony of your special day. Among these crucial decisions, few hold as much enduring significance as selecting the wedding photographer. The photographs serve as the tangible legacy, the visual narrative that you will revisit for decades to come, allowing you to relive the joy, the laughter, and the love that permeated every moment. Choosing correctly ensures that these memories are preserved with artistry and precision; choosing poorly can leave you with regrets that linger far longer than the honeymoon. This guide aims to assist you through this crucial process, providing a roadmap to finding the photographer who will capture the essence of your wedding day with unparalleled skill and creativity.
Defining Your Vision: Understanding Your Photographic Desires
Before you even begin your search, take time to delve into your photographic preferences. Consider what styles resonate with your personal aesthetic and reflect the overall tone of your wedding. Are you drawn to the classic elegance of traditional photography, with its formal poses and timeless compositions? Or do you prefer the candid, documentary approach, capturing fleeting moments of genuine emotion as they unfold naturally? Perhaps you envision a more artistic style, incorporating elements of fine art photography to create images that are both visually stunning and emotionally evocative.
Explore various photographic genres. Photojournalism focuses on capturing the story of the day as it happens, with minimal intervention, prioritizing authentic moments over staged poses. Fine art photography emphasizes artistic vision, often employing dramatic lighting, creative compositions, and post-processing techniques to create images that resemble paintings. Editorial photography borrows techniques from fashion and magazine photography, producing sophisticated and stylish images. Contemporary wedding photography is a more inclusive term encompassing various styles, often blending elements of different genres to offer a unique perspective. Study different photographers' portfolios. What catches your eye? Do you appreciate the soft, romantic glow of natural light, or do you prefer the crisp, controlled precision of artificial lighting? Does their editing style appeal to you? Some photographers favor vibrant colors, others lean towards muted tones, and still others embrace black and white imagery.
Beyond style, consider the scope of coverage you require. Will you need your photographer to capture the rehearsal dinner, the getting-ready process, the ceremony, the reception, and any post-wedding events? Determine how many hours of coverage you need and what specific moments are most important to you. Create a detailed shot list, including any specific family portraits, candid shots, or stylistic preferences you have. Having a clear understanding of your desires will streamline the selection process and help you find a photographer whose skills and vision align with your needs. This step is vital, the foundation upon which a successful relationship with your chosen photographer will be built.
Researching and Vetting Potential Wedding Photographers
With a clear vision in mind, begin your search for potential photographers. Start by asking for recommendations. Friends, family members, wedding planners, and even vendors (such as florists and venue managers) are valuable sources of referrals. They can provide firsthand accounts of a photographer's professionalism, reliability, and artistic abilities. Explore online platforms and directories specifically dedicated to wedding photography. Websites like The Knot, WeddingWire, and Style Me Pretty offer extensive listings, portfolios, and reviews of photographers in your area.
Carefully review each photographer's portfolio. Look beyond the individual images and assess the consistency of their work. Do their images showcase a cohesive style? Do they consistently capture flattering portraits and genuine moments? Examine their posing techniques, their use of light, and their ability to capture a range of emotions. Check to see how they handled various light settings and how they captured images. A skilled photographer should be able to deliver quality no matter the lighting conditions. Pay close attention to their editing style. Does it complement your vision? Does it feel timeless or trendy?
Read client testimonials and reviews. These offer invaluable insights into their professionalism and customer service. Look for comments about their communication, their punctuality, their responsiveness, and their ability to work seamlessly with other vendors. Pay attention to the overall tone of the reviews. Are they overwhelmingly positive? Do any recurring criticisms appear?
When you’ve narrowed down your list, schedule consultations with your top choices. This is a crucial step. You'll meet face-to-face (or virtually) to get a feel for their personality, experience, and approach. Prepare a list of questions to ask:
- Experience: How long have they been photographing weddings? How many weddings have they photographed? What experience do they have working at your chosen venue?
- Style and Approach: How would they describe their photographic style? How do they approach capturing the day? Do they prefer a more hands-off or hands-on approach?
- Packages and Pricing: What packages do they offer? What is included in each package (e.g., hours of coverage, number of images, album, prints)? What is their pricing structure? Are any travel fees or additional charges involved??
- Equipment and Backup: What equipment do they use? Do they have backup equipment in case of emergencies?
- Insurance: Do they carry professional liability insurance and equipment insurance?
- Contract and Terms: Can you view their contract? Understand the terms, including payment schedules, cancellation policies, and image usage rights.
- Workflow and Delivery: How long will it take to receive your finished photographs? How will they be delivered (e.g., online gallery, USB drive)? Will they offer print services or album design?
Finally, trust your intuition. Choose a photographer whose personality and approach resonate with you. You'll be spending a significant amount of time with them on your wedding day, so it's essential that you feel comfortable and confident in their abilities.
Understanding Wedding Photography Packages and Pricing
Wedding photography packages vary significantly, so it's necessary to understand what is included and what is not. Basic packages typically include a set number of hours of coverage, digital files of the edited images, and often an online gallery for viewing and sharing. More comprehensive packages may include engagement sessions, albums, prints, canvas wraps, and additional hours of coverage.
Consider your budget. Wedding photography can be a significant investment. Determine how much you are willing to spend. Be wary of extremely low prices, as they may indicate a lack of experience, low-quality equipment, or limited services. Remember that the photographer's time, expertise, equipment, and post-production work all contribute to the cost.
Carefully compare the offerings of different photographers, paying close attention to what is included and what is not. Ask for a detailed breakdown of the costs. Look for any hidden fees or additional charges. Clarify the payment schedule and cancellation policies.
Consider the value you receive. While price is a factor, it shouldn't be the only one. Invest in a photographer whose work you love and whose services meet your needs. Remember that the photographs are a long-term investment, preserving memories that you will cherish for a lifetime.
Key Considerations for Your Wedding Day
Once you've selected your photographer and signed a contract, communication is key to a successful wedding day. Share your wedding timeline, shot list, and any important details with your photographer well in advance. Be clear about your expectations and preferences.
Communicate with your photographer on the day. Introduce them to your key family members and wedding party members. Ensure they have access to the necessary locations and are aware of any potential challenges. Create a comfortable and relaxed atmosphere for candid moments.
Be flexible and embrace the unexpected. Wedding days can be unpredictable. Weather, timing, and other factors may require adjustments. Trust your photographer's expertise and judgment and be willing to adapt if necessary.
Allow time for portraits. Schedule adequate time for posed portraits, especially with family and the wedding party. Ensure you have a designated location with good lighting and a clear background.
Most importantly, enjoy your wedding day! Relax, be present in the moment, and let your photographer capture the joy, laughter, and love that fills the air.
Post-Wedding: Receiving and Preserving Your Photographs
After your wedding, your photographer will begin the process of editing and retouching your photographs. The turnaround time for receiving your finished images can vary, so inquire about the estimated timeline in advance.
Once you receive your photographs, carefully review them. Ensure they meet your expectations and that all the important moments are captured. If you have any concerns, address them with your photographer promptly.
Preserve your photographs. Backup your digital files on multiple devices (e.g., hard drives, cloud storage). Consider creating an album, which will protect your photographs and allow you to enjoy them for years to come. Choose high-quality prints and archival materials to ensure your photographs remain in excellent condition.
Finally, cherish your memories. Your wedding photographs are a testament to the love you share and the beginning of a beautiful journey together. Return to them regularly, to relive the magic of your wedding day, for many years to come.
