cara membuat modem menjadi wifi tanpa laptop
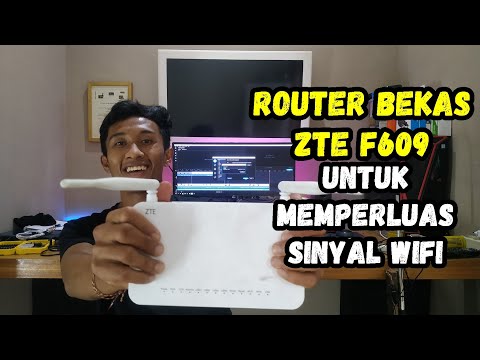
Title: Memanfaatkan Router Bekas ZTE F609 Untuk Memperluas Sinyal WIFI
Channel: Bayad Teknik
Memanfaatkan Router Bekas ZTE F609 Untuk Memperluas Sinyal WIFI by Bayad Teknik
Turn Your Modem into a WiFi Hotspot INSTANTLY (No Laptop Needed!)
Unlock Instant WiFi: Ditch the Laptop and Connect Now!
Are you tired of juggling multiple devices and scrambling for a decent internet connection? Isn't it frustrating when your laptop's needed, but you only have your phone or tablet? Well, prepare yourself. Because the answer is simpler than you think. Forget everything you thought you knew about setting up a WiFi hotspot. Today, we're diving into a solution that lets you bypass the laptop altogether. You can transform your modem into a dedicated WiFi hotspot. It's a game-changer.
The WiFi Hotspot Revelation: Your Modem's Hidden Power
Often overlooked, your modem is more powerful than you realize. Specifically, it’s a direct conduit to the internet. Consequently, it holds the latent ability to broadcast its connection wirelessly. But, how can you actually do it? We'll explore that in detail. Furthermore, we’ll discover how you can make your modem the primary source of your home's WiFi. It eliminates the dependency on your laptop. This makes your internet access much more versatile.
Gearing Up: Essential Tools for Seamless Setup
Before you begin, assemble the necessary items. First, you need a compatible router. Not just any router will do. Make sure it's specifically designed for WiFi. Secondly, you require an Ethernet cable. It's the crucial link between your modem and router. In addition, you'll benefit from a screwdriver. This could be handy for securing connections. Also, have the modem and router's power adapters accessible. And, if you need it, a user manual for both devices is always helpful.
The Straightforward Connection Process: Step-by-Step Guide
The setup is surprisingly easy. Initially, turn off your modem. Next, disconnect the existing Ethernet cable, if any, from the modem. Now, connect one end of the Ethernet cable to the modem. Then, connect the other end to the WAN (Wide Area Network) port on your router. Afterward, plug in both the modem and the router. Also, turn them on. Wait for them to boot up completely. This usually takes a couple of minutes.
Configuring Your Router: The Key to Wireless Bliss
Once the hardware is running, you must configure the router. This is where magic happens. Most routers have default IP addresses and usernames. You can usually find these on the router itself or in its manual. Type that address into your web browser. Then, log in using the default credentials. Next, navigate to the setup or configuration section. Find the options for creating a wireless network. Choose a unique network name (SSID) and also set a strong password. Finally, save your settings.
Security First: Fortifying Your WiFi Network
Security is paramount. Therefore, take some precautions. First, choose a strong, complex password. This is the first line of defense. Next, enable WPA2 or WPA3 encryption. These are current security protocols. Subsequently, consider changing your router's default admin username and password. This significantly lowers the risk of unauthorized access. Beyond that, regularly update your router's firmware. Updates often include crucial security patches.
Troubleshooting Common Issues: Solutions at Your Fingertips
Encountering problems? Don't panic! Here are some common fixes. Firstly, double-check all your cable connections. Often, the solution is that simple. Also, ensure both your modem and router are powered on. Moreover, restart your modem and router. This frequently resolves minor glitches. Next, verify your internet connection. If necessary, contact your internet service provider. Finally, consult your router's manual for more specific troubleshooting tips.
The Benefits Unveiled: Why This Matters
The benefits are compelling. First, you gain constant WiFi access without a laptop. Second, you can connect multiple devices simultaneously. Besides, you enjoy a more stable and dedicated internet connection. Further, this setup simplifies your home network. Finally, this solution provides a backup internet source. So, it keeps you connected even if your laptop is unavailable.
Beyond the Basics: Advanced Customization Options
Ready to level up your setup? Many routers offer advanced options. You can manage bandwidth allocation. Furthermore, you can set parental controls. You can also create a guest network. Experiment with these features to customize your WiFi experience. Explore these settings to optimize your home network.
Conclusion: Embracing Instant WiFi Freedom
In conclusion, turning your modem into a WiFi hotspot is a brilliant solution. It's quick, easy, and it frees you from laptop dependence. By following these straightforward steps, you can create a robust, reliable, and secure wireless network. So, embrace the freedom of instant WiFi! Enjoy the seamless connectivity and the added convenience. Begin your journey to a more connected life today.
Laptop to WiFi: The SHOCKINGLY Easy Trick You NEED!Turn Your Modem into a WiFi Hotspot INSTANTLY (No Laptop Needed!)
Alright, tech explorers, let's talk WiFi. Specifically, let's talk about how to broadcast that sweet, sweet internet signal from your modem without needing to lug around a clunky laptop. Remember those days? The laptop, like a digital Sherpa, hauled your internet connection wherever you went? Well, those days are (thankfully) fading into the digital sunset. We’re diving headfirst into the modern, streamlined world of instant WiFi hotspots, and trust me, it’s easier than assembling IKEA furniture (and probably less stressful).
1. The WiFi Liberation: Why Ditch the Laptop?
Before we get our hands dirty (metaphorically speaking, of course), let's ponder the why. What's the big deal about cutting the laptop cord and creating a WiFi hotspot directly from your modem? Think about it: we're aiming for speed, efficiency, and a touch of digital freedom. Imagine this: you're hosting a small gathering, and suddenly, everyone needs to check their emails, share photos, or (gasp!) update their Instagram feeds. Instead of tethering everyone to your laptop, you can create a dedicated, laptop-free WiFi zone, leaving your precious laptop to… well, whatever you want it to do. It's the digital equivalent of handing out freshly baked cookies instead of making everyone elbow their way to the oven.
2. The Gear You'll Need: Keeping it Simple
Don't worry, this isn't a high-tech spy mission. You won't need to break the bank or brush up on your engineering degree. Here's what you'll generally need:
- Your Modem: The heart of the operation. This is the box that receives your internet signal from your internet service provider (ISP).
- A WiFi Router: This is the magic box that broadcasts the internet signal as a WiFi signal. Think of it as the megaphone for your modem.
- Ethernet Cables (RJ45 Cables): These are the unsung heroes of networking. They’re the wires that physically connect your modem to your router. You might already have these lying around, but it's always a good idea to have a spare or two.
- Power Outlets: Essential for keeping everything humming.
3. Unboxing the Magic: Router Setup 101
Okay, let's unbox this mystery gadget - the WiFi Router. Most routers come with a simple setup guide, but we'll get you through the basics. This is where the Ethernet cables come into play.
- Connect the Modem to the Router: Take one Ethernet cable and plug one end into the Ethernet port on your modem. Locate the "WAN" (Wide Area Network) or "Internet" port on your router and plug the other end of the Ethernet cable there. This is usually a differently colored port.
- Power Up: Plug both your modem and your router into power outlets. Let them both power on completely. This can take a few minutes, so grab a coffee (or tea, if that's your jam).
- Access Router Settings (The Digital Control Panel): This depends on your router. Most routers have a default IP address (like 192.168.1.1 or 192.168.0.1) that you can type into the address bar of a web browser on any device connected to your modem with the ethernet cable. You will access the router's settings here.
- Configure Your WiFi Network: Find the WiFi settings within your router's control panel. This is where you'll set up your network name (SSID - Service Set Identifier) and your password. Choose a secure password (something with a mix of letters, numbers, and symbols).
4. The Security Dance: Protecting Your Digital Fortress
Now that you've got your WiFi network set up, let's talk security. Because, let’s be honest, the internet can be a wild place. Here are a few simple steps to make sure your new WiFi hotspot isn’t an open invitation to digital freeloaders or worse:
- Strong Password: As mentioned earlier, use a strong, unique password. Think of it as the drawbridge to your digital castle. The longer and more complex, the better.
- WPA3 (if supported): If your router supports WPA3 encryption, enable it. It's the latest and most secure way to protect your WiFi network. WPA2 is still good too!
- Disable WPS (Wi-Fi Protected Setup): WPS is a feature that's designed to make it easy to connect devices to your WiFi, and it's been known to have some security vulnerabilities. Disable it in your router settings.
5. Troubleshooting Tango: When Things Go Sideways
Even the best-laid plans can go off-kilter. If your WiFi isn't working, don't panic. Here are a few simple things to check:
- Check the Lights: On both your modem and router, look for the status lights. Are they lit up, blinking, or off? This can give you a clue about what's wrong. Check your router's manual to grasp the meaning of the lights.
- Restart Everything: Sometimes, the simplest solution is the best. Unplug your modem and router, wait 30 seconds, and plug them back in.
- Check Your Connections: Make sure all the Ethernet cables are securely plugged in.
- Contact Your ISP (If all else fails): If you've exhausted all other options, it might be an issue with your internet service. Contact your internet service provider.
6. The Great Range Debate: Where Does Your Signal Go?
The range of your WiFi signal depends on your router. Entry-level routers are typically good for a house or apartment, but larger spaces may need a high-performance router or extra WiFi access points. Walls, obstacles, and interference from other electronic devices can all affect the signal's reach.
7. Maximizing Your WiFi Speed: Tips and Tricks
Once your WiFi is up and running, why not ensure your network operates as quickly as possible? There are a few things you can do to optimize your WiFi speed, like:
- Router Placement: Place your router in a central, elevated location, away from walls and metal objects.
- Channel Selection: Most routers automatically select the best WiFi channel, but check to ensure your router is using the least congested channel.
- Update Router Firmware: Keep your router's software up to date. Updates often include performance improvements and security patches.
8. Guest Network Goodness: Keeping It Separate
Do you want to share your WiFi with guests, but not give them access to things on your network? A guest network is your answer. Most routers offer this feature, which allows you to set up a separate WiFi network for guests, that is isolated from the rest of your home network. This is a great way to maintain your privacy and security.
9. The Parental Controls Power-Up: Protecting the Little Ones
If you have kids who are using the WiFi, parental controls are your friend. Most routers offer parental control features, such as filtering inappropriate content and setting time limits for internet usage.
10. Expanding Your Horizons: WiFi Extenders and Mesh Networks
If your WiFi signal isn't reaching every corner of your home, it may be time to consider a WiFi extender or a mesh network.
- WiFi Extenders: Simple and affordable, WiFi extenders receive the WiFi signal from your router and rebroadcast it, extending its range.
- Mesh Networks: More advanced, and typically more expensive, mesh networks use multiple access points, placed around your home, to create a unified WiFi network. This leads to more consistent coverage.
11. The Digital Nomads' Delight: Take It With You!
Think about your travel adventures. Creating a personal WiFi hotspot from your modem lets you have your own secure connection, regardless of whether you're at a hotel, Airbnb, or a co-working space. This is especially useful in places with unreliable or unsecured public WiFi.
12. Smart Home Harmony: The Internet of Things Connection
Your WiFi hotspot becomes the central hub of your smart home. From smart TVs and streaming devices to smart lighting, thermostats, and security systems, your devices can all seamlessly connect and communicate.
13. The Data Consumption Dance: Bandwidth Awareness
Be mindful of how much data you're using, especially if you have a data cap. Streaming videos, downloading large files, and playing online games all consume significant bandwidth. Monitor your data usage to avoid any surprises on your monthly bill.
14. Maintaining Your WiFi Oasis: Regular Checkups
Keeping your WiFi hotspot in top condition requires some periodic maintenance. Regularly perform the following:
- Check for Router Firmware Updates: Routers often release firmware updates to fix bugs, improve performance, and enhance security.
- Password Updates: Change your WiFi password every few months to maintain security.
- Monitor Your Network: Keep an eye on your network usage. This helps you identify any potential problems, like devices that aren’t performing as expected.
15. Embrace the Convenience: WiFi Freedom
The greatest benefit of setting up a WiFi hotspot directly from your modem (no laptop!) is convenience. You can connect your devices quickly and easily, wherever and
**Download HP Pavilion G Series WiFi Drivers INSTANTLY! (Free)**Memanfaatkan Modem bekas Indihome menjadi Pemancar Wi-Fi

By RHP Project Memanfaatkan Modem bekas Indihome menjadi Pemancar Wi-Fi by RHP Project
Gunakan Komputer Anda Sebagai Router WiFi Tanpa Perangkat Lunak Apa Pun

By A2MTech Gunakan Komputer Anda Sebagai Router WiFi Tanpa Perangkat Lunak Apa Pun by A2MTech
Tanpa LaptopPC - Perluas WiFi dengan Modem Router Bekas HUAWEI HG8245H5 sebagai Access Point

By Yazid Hybrid Tanpa LaptopPC - Perluas WiFi dengan Modem Router Bekas HUAWEI HG8245H5 sebagai Access Point by Yazid Hybrid

Title: BARANG BEKAS JADI WIFI Cara membuat router bekas menjadi WiFi Acces point
Channel: Dunia Review
BARANG BEKAS JADI WIFI Cara membuat router bekas menjadi WiFi Acces point by Dunia Review
Wifi On Laptop
Here's the article:
The Ultimate Guide to Mastering Cold Brew Coffee: From Bean to Brew
Coffee. The very word conjures images of steaming mugs, invigorating aromas, and that perfect jolt of energy to kickstart your day. While countless brewing methods exist, each offering a unique flavor profile, the allure of cold brew coffee has steadily grown, captivating coffee aficionados and casual drinkers alike. This guide provides comprehensive insights into every facet of cold brew, transforming you from a novice into a cold brew connoisseur ready to curate a truly exceptional cup.
Understanding the Essence of Cold Brew: Why It's Different
Unlike traditional hot brewing methods, which extract flavor in minutes, cold brew employs a slow, patient steeping process, typically lasting 12-24 hours. This extended contact with cold water gently coaxes the coffee's complexities, resulting in a smoother, less acidic brew. This characteristic makes cold brew an excellent choice for those sensitive to the bitterness often associated with hot coffee. The low acidity also allows for a more nuanced appreciation of the coffee’s inherent flavors, revealing notes that might be masked in a traditionally brewed cup. Cold brew is a concentrate, requiring dilution with water or milk to achieve drinking consistency. The resulting beverage is exceptionally versatile, lending itself to a wide array of serving styles and flavor combinations, from simple iced coffees to elaborate coffee cocktails.
Choosing Your Coffee Beans: The Foundation of Flavor
The selection of coffee beans is paramount to crafting a superior cold brew. While any coffee bean can be used, the best results are generally achieved with medium- to dark-roasted beans. These roasts possess a robust character that shines through the cold brewing process. The roasting profile significantly impacts flavor; lighter roasts tend to produce a more acidic and less complex cold brew, while very dark roasts can sometimes yield a smoky or burnt taste.
Origin Matters: Single-origin coffees, where beans are sourced from a specific region, allow you to appreciate the distinct terroir characteristics of the coffee. For example, beans from Ethiopia often impart fruity and floral notes, while those from Sumatra offer earthy and full-bodied flavors. Blend coffees, a mix of different beans, can provide a balanced and complex flavor profile, often combining the best attributes of various origins. Experimentation is key to discovering your preferred bean and roast combination. Consider trying beans from different continents, such as South America, Central America, Africa, and Asia, to see what flavors resonate well with you.
Grind Size: The Key to Optimal Extraction:
The ideal grind size is coarsely ground, resembling the consistency of coarse sea salt. This prevents the coffee from over-extracting during the lengthy steeping process, minimizing bitterness. A burr grinder, preferred over a blade grinder, ensures a consistent grind, delivering uniform extraction across all coffee particles. Inconsistent grind sizes result in uneven extraction, leading to a muddled and unbalanced flavor profile. If you are using a blade grinder, be careful not to over grind the beans to avoid making it too fine.
The Cold Brew Process: Step-by-Step Instructions
Required Equipment:
- Coffee Beans: Your preferred roast and grind size.
- Filtered Water: Cold, fresh water is essential for extraction. Tap water, due to its contaminants, negatively impacts the taste.
- Container: A large glass jar, French press, or specialized cold brew maker.
- Filter: Cheesecloth, a fine-mesh strainer, or a paper coffee filter.
- Scale (optional): For precise measurement of coffee and water.
The Brewing Steps:
- Measure Coffee and Water: A common ratio is 1:4, one part coffee to four parts water. For example, use 1 cup of coarsely ground coffee for 4 cups of filtered water. Adjust the ratio to suit your personal preference, experimenting with a slightly stronger or weaker concentration.
- Combine Coffee and Water: Place the ground coffee in your chosen container. Pour the cold water over the grounds, ensuring all the coffee is fully saturated. Stir gently to ensure there are no dry clumps of coffee.
- Steep: Cover the container and allow the mixture to steep in the refrigerator for 12-24 hours. The longer the steep, the more intense the flavor, but avoid over-steeping, which can lead to bitterness. Adjust the steeping time based on your preference and the intensity of the coffee beans used.
- Filter: Once the steeping is complete, filter the coffee concentrate. If using a French press, slowly press the plunger down, separating the grounds from the concentrate. For other methods, carefully pour the mixture through a cheesecloth-lined strainer or a fine-mesh filter. Alternatively, you can use a paper coffee filter, but this may take longer.
- Dilute and Enjoy: Dilute the cold brew concentrate with water, milk, or your preferred beverage to taste. Experiment with different ratios to find your perfect strength. The concentrate keeps for up to two weeks in the refrigerator.
Refining Your Cold Brew: Tips for Perfection
Water Quality is Crucial: The quality of the water directly impacts the flavor of your cold brew. Use filtered water to eliminate undesirable compounds and enhance the natural flavors of the coffee.
Temperature Control: Cold water is essential for cold brewing, ensuring a smooth and balanced flavor profile. Ensure your water and container are both cold before starting the brewing process.
Experiment with Ratios: The coffee-to-water ratio is a crucial factor in determining the final strength of your cold brew. Try different ratios to find the ideal balance for your preferred taste.
Storage Matters: Store the finished cold brew concentrate in an airtight container in the refrigerator. This helps to preserve freshness and flavor.
Troubleshooting Common Issues:
- Bitter Cold Brew: The coffee may have over-extracted. Reduce the steeping time or use a coarser grind.
- Weak Cold Brew: The coffee may have under-extracted. Increase the steeping time or coffee-to-water ratio, or use a finer grind.
- Cloudy Cold Brew: The filter may not be fine enough. Use a finer filter, such as a paper coffee filter, or consider double-filtering.
- Lack of Flavor: Experiment with coffee bean origin, roast, and grind size.
Serving Suggestions: Elevating Your Cold Brew Experience
Cold brew is remarkably versatile, offering endless possibilities for customization.
Classic Iced Coffee: Simply dilute the cold brew concentrate with cold water and add ice. Customize the sweetness and creaminess with your favorite sweeteners and milk or cream.
Cold Brew with Milk: The velvety smoothness of cold brew perfectly complements various types of milk. Experiment with oat milk, almond milk, soy milk, or regular dairy milk.
Cold Brew Cocktails: Combine cold brew with spirits like whiskey, rum, or vodka to create sophisticated coffee cocktails. Try a cold brew old fashioned or a coffee-infused white Russian.
Flavor Infusions: Elevate your cold brew with flavor infusions. Add vanilla beans, cinnamon sticks, or citrus zest during the steeping process for a unique twist.
Cold Brew Concentrate for Baking: Incorporate the concentrated flavor of cold brew into baked goods such as coffee cake, brownies, or tiramisu.
Beyond the Basics: Exploring Advanced Cold Brew Techniques
Concentrate Variations: Experiment with varying the coffee-to-water ratio to achieve different strengths and flavor profiles. You can make a highly concentrated cold brew that can be enjoyed as a shot of espresso-like intensity, or a more diluted version that is ready to drink.
Nitrogen Infusion: Infusing cold brew with nitrogen gas creates a creamy, cascading effect similar to that of a draft beer. This process enhances the mouthfeel and reduces acidity.
Cold Brew Concentrate Recipes: Explore recipes using cold brew concentrate as a base for sauces, dressings, and marinades, adding depth and complexity for cooking.
Cold Brew Kegerators: Consider investing in a cold brew kegerator for a convenient and stylish way to serve cold brew on tap.
Conclusion: Embrace the Cold Brew Revolution
Mastering the art of cold brew is an enriching journey, rewarding you with a delicious and refreshing coffee experience. By understanding the fundamentals, experimenting with different variables, and embracing your creative spirit, you can craft a truly exceptional cold brew that is sure to become a morning ritual. The simplicity of the process, combined with the depth of flavor, makes cold brew a perfect canvas for your coffee explorations. Enjoy the journey of learning and brewing, and savor the fruits of your labor.
