can i use my laptop as a wifi extender

Title: How to make any Windows computer or laptop as WiFi Repeater or WiFi Extender
Channel: UniqueTutorials
How to make any Windows computer or laptop as WiFi Repeater or WiFi Extender by UniqueTutorials
can i use my laptop as a wifi extender, can i use my laptop as a wifi booster, use laptop as wifi extender
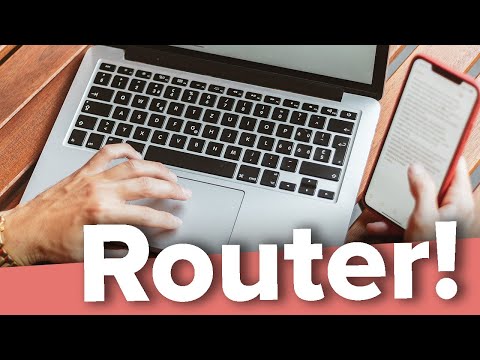
Laptop as WiFi Extender? This SHOCKING Trick Works!
Turn Your Laptop Into a Wi-Fi Superhero: The Secret You NEED to Know
Ever find yourself wrestling with a weak Wi-Fi signal? Frustrated by dead zones that kill your streaming buzz? You're not alone. The struggle is real. But what if I told you a hidden solution resides within your own laptop? Prepare to be amazed. This isn't some tech guru's secret anymore. This shocking trick will transform your laptop into a powerful Wi-Fi extender.
The Wi-Fi Wilderness: Where Signals Go to Die
We all know the feeling. You're trying to catch up on your favorite show. Suddenly, the dreaded buffering wheel appears. Your hopes and dreams of a relaxing evening vanish. Maybe you're working from home. That unstable Wi-Fi can lead to lost productivity and mounting frustration. It's a digital desert out there. Several factors contribute to weak Wi-Fi. Distance from the router is a primary enemy. Obstacles like thick walls also play a significant role. Interference from other devices can also make a mess of the signal. Therefore, achieving robust Wi-Fi can feel like searching for buried treasure.
Unleashing Your Laptop's Hidden Power
Your laptop is more capable than you realize. It can act as a Wi-Fi extender. This clever trick leverages your laptop's wireless capabilities. Consequently, you can boost your Wi-Fi range with ease. Forget buying expensive extenders. With this method, you're essentially creating a portable signal booster.
A Simple Setup: Bridging the Gap
Getting started is surprisingly straightforward. Firstly, you'll need a laptop with Wi-Fi capabilities. Secondly, access to a Wi-Fi connection is crucial. Thirdly, follow these easy steps:
Open Your Network Settings: Navigate to your network and sharing center. You can usually find it in your control panel.
Set Up a Mobile Hotspot: Look for options to create a mobile hotspot. Windows usually has this feature built-in.
Configure Your Hotspot: Set a network name (SSID). Choose a strong password. This secures your new extended Wi-Fi network.
Share Your Internet Connection: Select the Wi-Fi connection you're currently using. Then, choose to share it with your hotspot.
Start the Hotspot: Once you've configured everything, enable the hotspot. Your laptop will now act as a Wi-Fi extender.
Expanding Your Wi-Fi's Reach: Practical Applications
So, how does this work in the real world? Imagine your router lives on the first floor. But you need a strong signal upstairs. Place your laptop on the second floor. Then, connect your other devices to the laptop's hotspot. Therefore, you've effortlessly extended your Wi-Fi coverage. Alternatively, think about a hotel room with a spotty connection. Your laptop can become a personal Wi-Fi hub. This setup is extremely useful for travel. It's also a great solution for temporary events or gatherings.
Troubleshooting Your Wi-Fi Enhancement
Sometimes, things don't go perfectly. Fortunately, common problems have easy solutions. If your hotspot isn't working, double-check your settings. Ensure you've shared your internet connection. Verify your password. Furthermore, your laptop must have enough battery life. Consider plugging it in for extended use. If connected devices experience slow speeds, try moving your laptop closer to the problem area. Restarting your laptop can also resolve minor glitches. However, if the problem persists, it is worth troubleshooting.
Beyond the Basics: Optimizing Your Extender
You can fine-tune your laptop-as-extender for even better performance. First, keep your laptop in a clear space. Avoid obstructions. Second, consider the placement of your laptop. Experiment with different locations to find the strongest signal. Moreover, monitor the number of devices connected to the hotspot. The more devices, the slower the speed. Lastly, consider updating your laptop's Wi-Fi drivers. Outdated drivers can limit performance.
The ROI of a Wireless Boost: Saving Money and Sanity
This trick offers significant advantages. Firstly, it saves you money. You bypass the need to buy a separate Wi-Fi extender. Secondly, it's incredibly convenient. The setup is quick and easy. Thirdly, it's a lifesaver in a pinch. Therefore, you can create a Wi-Fi hotspot in a matter of minutes. Most importantly, it eliminates Wi-Fi dead zones. Say goodbye to buffering and hello to seamless connectivity.
Embrace the Power: Take Control of Your Wi-Fi
You've now unlocked a powerful Wi-Fi secret. You can transform your laptop into a Wi-Fi extender. Therefore, you can expand your coverage. You can eliminate those annoying dead zones. So, why wait? Unleash the potential of your laptop today. You'll wonder how you ever lived without it. Go forth and conquer your Wi-Fi woes. The digital world awaits!
Laptop WiFi Nightmare? Solved in 60 Seconds!Laptop as WiFi Extender? This SHOCKING Trick Works!
Ever been stuck in a Wi-Fi dead zone, staring longingly at your laptop while your signal struggles to crawl along? We've all been there! You're streaming a movie, trying to finish a work presentation, or simply wanting to browse, and BAM! The dreaded buffering wheel rears its ugly head. But what if I told you that the very laptop you're using could be your savior, the knight in shining armor of your Wi-Fi woes? Yes, you heard that right! Let's dive into how your laptop can act as a WiFi extender – a surprisingly easy trick that'll have you ditching those expensive repeaters in a heartbeat.
1. The Wi-Fi Wasteland: Identifying the Problem
First things first, let's establish if you even need this trick. Are you constantly battling weak Wi-Fi signals? Do certain rooms in your house feel like digital no-man's-lands? Maybe you're in a hotel, and the Wi-Fi barely reaches your room's corner. If the answer is a resounding yes, then you're in the right place. We're talking about those moments where your connection feels like it's running through molasses, leaving you frustrated and longing for a stronger signal.
2. Forget Expensive Repeaters: Your Laptop to the Rescue!
We're not going to lie; setting up a traditional Wi-Fi extender can be a pain. You've got to buy the hardware, plug it in, configure it… the whole shebang. But your laptop? It's already perfectly poised to step up and become your personal Wi-Fi superhero. Think of it as an underutilized tool, like a Swiss Army knife packed with hidden Wi-Fi superpowers.
3. Understanding the Magic: How Does This Work?
Essentially, we're turning your laptop into a Wi-Fi hotspot. Your laptop, with its built-in Wi-Fi adapter, can receive a Wi-Fi signal and then rebroadcast it, creating a new Wi-Fi network. It's like your laptop is a digital relay runner, grabbing the Wi-Fi baton and passing it on to your other devices. This extends the range of your initial Wi-Fi connection. Brilliant, right?
4. Windows to the Wi-Fi World: Setting Up a Hosted Network
If you're a Windows user, setting up your laptop as a Wi-Fi extender is remarkably straightforward. Here's the basic approach.
Step 1: Open Command Prompt (Admin). Search for "cmd" in your Windows search bar, right-click on "Command Prompt," and select "Run as administrator." This gives you the permissions you need.
Step 2: Enable Hosted Network. In the Command Prompt, type
netsh wlan set hostednetwork mode=allow ssid="YourNewNetworkName" key="YourSecurePassword"and press Enter. Remember to replace "YourNewNetworkName" with a name you'll recognize and "YourSecurePassword" with a strong password.Step 3: Start the Hosted Network. Type
netsh wlan start hostednetworkand press Enter. This is the command that actually kicks things into gear.Step 4: Share Your Internet Connection. Go to Network Connections (search for it in your Windows search bar). Right-click on your active Wi-Fi connection (the one that's receiving the internet) and select "Properties." In the "Sharing" tab, check the box that says "Allow other network users to connect through this computer's internet connection." Choose your new hosted network you have created from the drop-down menu.
That’s it! Your laptop is now acting as a Wi-Fi extender. Go on, test it!
5. macOS Mavericks? No Problem: Internet Sharing on Mac
Mac users, don't feel left out! Apple makes it incredibly easy to share your internet connection.
Step 1: Open System Preferences. Click the Apple icon in the top-left corner of your screen and select "System Preferences."
Step 2: Head to Sharing. Click on the "Sharing" icon.
Step 3: Select Internet Sharing. In the left-hand sidebar, click "Internet Sharing."
Step 4: Configure Internet Sharing. From the "Share your connection from" dropdown, select your active Wi-Fi connection. Then, check the box next to "Wi-Fi." Click "Wi-Fi Options…" and configure your network name (SSID) and password.
Step 5: Start Sharing. Check the box next to "Internet Sharing" on the left-hand side, and click "Start."
Voila! Your Mac is now a Wi-Fi extender.
6. Boosting the Range: Strategic Placement is Key
Just like with a regular Wi-Fi extender, where you place your laptop matters. Ideally, position it somewhere between your router and the Wi-Fi dead zone. Think of it as a messenger, positioned to relay the signal effectively. The closer your laptop can be to the router while still reaching the problematic area, the better. A good analogy is trying to hear while standing far apart; the person in the middle can help amplify the sound, so you can both hear it.
7. The Limitations: What to Expect
While this method is incredibly convenient, it's not without its limitations. Your laptop's performance is directly dependent on the strength of the initial Wi-Fi signal it receives. Don't expect miracles. You'll also inevitably experience some speed reduction as the signal gets rebroadcast.
8. Security Considerations: Protecting Your Network
Always use a strong password for your new Wi-Fi network. This is crucial to prevent unauthorized access. Think of it as locking your front door – you wouldn't leave it open, would you? Keep your network secure!
9. Troubleshooting Common Issues
Encountering problems? Here are a few common issues and their solutions:
Network Not Showing Up: Double-check your network name and password. Make sure Wi-Fi is enabled on both your laptop and the device trying to connect. The solution is to look for any mistakes and solve them at once.
Slow Speeds: Remember that you'll experience some speed reduction. Try moving your laptop closer to the router or improving the initial Wi-Fi signal it receives.
Connection Dropping Frequently: Ensure your laptop's Wi-Fi drivers are updated. Try restarting your laptop and your primary router.
10. The Power of Your Laptop: A Multi-Tasking Marvel
Your laptop is more than just a device for work or entertainment. It's a powerhouse of potential, capable of things you might not even realize. This Wi-Fi extender trick is a perfect example. It shows that your laptop is a versatile tool, constantly evolving with technological advancements.
11. Battery Life Matters: Powering Up for Longevity
Running your laptop as a Wi-Fi extender will drain your battery faster. Consider plugging it into a power outlet for longer-lasting Wi-Fi extension. This is especially true if you plan to use it as an extender for an extended period.
12. Software Interference: Keeping Things Smooth
Sometimes, other software can interfere with your laptop's ability to act as a Wi-Fi extender. Make sure no other programs are designed to take over your Wi-Fi.
13. When to use this trick?
Hotels and Temporary Setups: Great for expanding Wi-Fi in hotel rooms or for guests.
Dead Zones at Home: Perfect for reaching those spots where your primary router struggles.
Testing Router Capability: A temporary solution to test your router's power and range.
14. Beyond the Basics: Advanced Tweaks (Optional)
For more advanced users, there are other options to tweak your Wi-Fi extender setup. You can adjust the channel your laptop is broadcasting on to avoid interference, improving speed and connection stability. You can also look into dedicated Wi-Fi extender software, even though the built-in methods already described are typically sufficient.
15. From Wi-Fi Woes to Wireless Wonders: Embrace the Hack!
The ability of your laptop to act as a Wi-Fi extender is a testament to the ingenuity of modern technology. It's a simple, effective, and budget-friendly solution to a common problem. Feel the freedom of a strong, reliable Wi-Fi connection.
Closing Thoughts: Unleashing Your Laptop's Wi-Fi Power!
So, there you have it! Your laptop – that everyday workhorse – has a hidden talent. It can step up and banish those Wi-Fi dead zones, all while saving you money and the hassle of installing extra hardware. We hope this guide empowers you to take control of your Wi-Fi experience. Go forth and enjoy a stronger, more reliable connection! And remember, the digital world is always evolving, and the secret to success is learning and adapting. Now go connect!
Image Alt Text: A laptop acting as a WiFi extender, radiating wireless signal waves, symbolizing the power of the hidden technological capabilities of modern electronics.
Image Caption: Your laptop – a Wi-Fi superhero in disguise!
FAQs
1. Is this method safe for everyday use?
Yes, it's a safe method, provided you use a strong password for your hosted network to prevent unauthorized access. However, your laptop will
Laptop WiFi Nightmare? FIX It NOW!Dont Waste Money on WiFi Repeaters

By GGSheed Dont Waste Money on WiFi Repeaters by GGSheed
Turn Windows 10 Laptop As WiFi Range Extender

By Sandeep Singh Turn Windows 10 Laptop As WiFi Range Extender by Sandeep Singh
Use Your PC or Laptop as a Wireless Router
By Guiding Tech Use Your PC or Laptop as a Wireless Router by Guiding Tech

Title: Best Way To Improve Wi-Fi Connection On PCLaptop 2022
Channel: EasyTechGeek
Best Way To Improve Wi-Fi Connection On PCLaptop 2022 by EasyTechGeek
Laptop Working
Here's the title of the article: The Ultimate Guide to Mastering Watercolor Painting: Techniques, Tips, and Inspiration
The Ultimate Guide to Mastering Watercolor Painting: Techniques, Tips, and Inspiration
From the delicate bloom of a wet-on-wet wash to the crisp precision of a dry brush stroke, watercolor painting offers a world of artistic possibilities. It's a medium that demands both discipline and a spirit of adventure, a dance between water, pigment, and paper. This comprehensive guide will serve as your trusted companion, helping you navigate the exciting landscape of watercolor and unlock your full potential as an artist.
Embarking on Your Watercolor Journey: Essential Supplies
Before diving into the captivating world of watercolor, it's essential to gather the right tools. Quality supplies significantly impact your painting experience and the resulting artwork. Let's unravel the must-haves for a solid foundation:
The Right Watercolor Paints:
Choosing the right paint is paramount. Consider the following:
- Pigment Quality: Look for paints with high pigment concentration. This leads to vibrant colors and excellent lightfastness, meaning your paintings will resist fading over time. Professional-grade paints, with names like Daniel Smith, Winsor & Newton, and Schmincke Horadam, often provide the best pigment quality.
- Form: Watercolors are available in pans (dried cakes) and tubes. Pan watercolors are convenient for portability, ideal for plein air painting or travel. Tube watercolors provide a more concentrated and readily available paint source, allowing for greater control over mixing and color intensity.
- Color Palette: Start with a basic palette of essential colors: a warm and cool red (e.g., cadmium red and alizarin crimson), a warm and cool yellow (e.g., cadmium yellow and lemon yellow), a warm and cool blue (e.g., ultramarine blue and cerulean blue), and a neutral like burnt sienna. From these, you can mix a wide range of hues.
Paper Power: Choosing the Perfect Watercolor Paper
Watercolor paper is not created equal. Its absorbency, surface texture, and weight significantly affect the painting process:
- Weight: Paper weight is measured in pounds per ream (a ream is 500 sheets). For beginners, 140 lb (300 gsm) paper is a good starting point, as it's less likely to buckle and can handle multiple washes. Experienced artists often opt for 300 lb (640 gsm) paper, which requires less stretching before painting, but it is more expensive.
- Surface: Watercolor paper surfaces vary: hot-pressed, cold-pressed, and rough. Hot-pressed paper is smooth, ideal for detailed work and crisp lines. Cold-pressed paper has a slightly textured surface, suitable for a broader range of techniques and textures. Rough paper, with its pronounced texture, is excellent for creating dramatic effects.
- Material: Look for 100% cotton rag paper. Cotton fibers absorb water evenly, preventing buckling and allowing for vibrant color mixing and layering.
Brushes: Your Artistic Extensions
Your brushes are your primary tools for translating vision to paper.
- Types and Shapes: Round brushes are versatile, good for details and washes. Flat brushes are useful for creating straight lines, broad strokes, and precise edges. Filbert brushes (a combination of round and flat) offer versatility.
- Materials: Natural hair brushes (e.g., sable or squirrel) hold a lot of water and create smooth washes. Synthetic brushes offer durability and affordability.
- Sizes: A good starting set includes a variety of round brushes (sizes 2, 6, and 10) and a flat brush (sizes ½ inch). A large wash brush (like a mop brush) is beneficial for covering large areas.
Additional Essentials:
Besides the core materials, consider adding these to your studio:
- Palettes: A palette is indispensable for mixing colors. Choose one with deep wells for mixing and a flat surface for color testing. White ceramic palettes are ideal.
- Water Containers: Have two or three water containers to keep clean and dirty water separate.
- Masking Tape: Use artist's tape to secure your paper to a board and create clean borders.
- Pencils and Erasers: Sketching beforehand is essential. Use a soft pencil (2B or softer) for sketching and a kneaded eraser for lifting excess graphite without disturbing the paper.
- Spray Bottle: A spray bottle is helpful for rewetting paints and keeping your paper moist.
Mastering Fundamental Watercolor Techniques
Once you have your supplies ready, learn some key watercolor techniques:
Wet-on-Wet Techniques: Embracing the Flow
This technique involves applying paint to wet paper. The paper's wet surface allows the paint to spread and blend, creating soft edges and fluid transitions:
- Graded Wash: Apply a wash of color, gradually adding water to lighten the hue as you move across the paper.
- Wet-into-Wet Blending: Apply different colors to a wet surface; blend and fuse as they mix.
- Lifting Out: Use a clean, damp brush to lift paint from the wet surface, creating highlights or subtle variations.
Wet-on-Dry Techniques: Precision and Control
This technique entails applying paint to dry paper. The dry surface provides greater control, resulting in crisp lines and defined shapes:
- Flat Wash: Apply an even layer of color over a dry surface. Ensure even coverage by working quickly and avoiding overbrushing.
- Dry Brush: Use a brush with minimal water to create textured effects. This technique is excellent for depicting fur, foliage, or rough surfaces.
- Layering: After one layer is dry, apply additional layers to build up color intensity or create depth. Allow each layer to dry completely before adding the next.
Advanced Techniques: Elevating Your Watercolor Skills
As you progress, explore these more advanced techniques:
- Lifting: Use a clean, damp brush or paper towel to lift color from the paper, creating highlights or correcting mistakes.
- Masking Fluid: Apply masking fluid to areas you want to protect from paint. Once dry, paint over the masked areas, and then gently remove the masking fluid to reveal the pristine paper.
- Salt Technique: Sprinkle salt on wet paint to create interesting textures. Experiment with different types of salt and amounts.
- Sponging: Use a natural sea sponge to create textured effects, perfect for rock, foliage, or abstract backgrounds.
- Pouring: Pour diluted paint onto wet paper for fluid and unpredictable effects.
Color Mixing Mastery: Unlocking the Spectrum
Understanding color mixing is fundamental to watercolor painting.
- Primary Colors: The foundation of all colors are red, yellow, and blue. Experiment with mixing these to create secondary (orange, green, and violet) and tertiary colors.
- Color Temperature: Understand warm (reds, yellows) and cool (blues, greens) colors. Use color temperature to create depth and atmosphere in your paintings.
- Mixing Principles: Mix colors in a controlled manner. Start with small amounts, and gradually add more of one color to modify the hue. Test your mixes on a separate piece of paper before applying them to your painting.
- Creating Shades and Tints: Add black or a complementary color to create shades (darker hues). Add water or white to create tints (lighter hues).
Composition and Design: Structuring Your Art
A strong composition is as crucial as mastering your watercolor techniques.
- Rule of Thirds: Divide your painting into thirds both horizontally and vertically. Place the focal point of your painting at the intersections of these lines or along the lines to create visual interest.
- Leading Lines: Use lines to guide the viewer's eye through your composition, drawing attention to important elements.
- Balance: Balance the elements in your painting. Use contrasting colors, values, and shapes to create visual equilibrium.
- Negative Space: Don't be afraid of negative space (the areas around your subject). It can enhance the impact of your subject and create a more dynamic composition.
Finding Inspiration and Developing Your Style
Watercolor painting is a journey of exploration.
- Study Masterpieces: Examine the works of renowned watercolor artists. Analyze their techniques, color palettes, and compositions. Artists include Winslow Homer, John Singer Sargent, and Georgia O’Keeffe.
- Plein Air Painting: Paint outdoors to observe nature's light and colors. This will deepen your understanding of perspective, color, and value.
- Sketch Regularly: Fill sketchbooks with studies of landscapes, portraits, or still lifes. Practice your observation skills and experiment with different techniques.
- Experiment with Different Subjects: Explore various subjects, including landscapes, portraits, still lifes, and abstract designs.
- Develop Your Voice: Let your personal preferences and experiences influence your art. Develop your unique style. It takes time, patience, and a willingness to experiment.
Troubleshooting Common Watercolor Challenges
Encountering some common challenges is normal. Here's how to address them:
- Muddy Colors: Overmixing colors typically results in muddy hues. Prevent this by using clean water, wiping your brush regularly, and mixing colors carefully.
- Buckling Paper: If your paper buckles, stretch it before painting. Soak the paper in water, then tape it to a board and let it dry flat.
- Overbrushing:
