how do i turn off wifi on my asus laptop

Title: How to Fix WIFI not Connecting Not Showing in Windows 10 Asus Laptops
Channel: FIXsage
How to Fix WIFI not Connecting Not Showing in Windows 10 Asus Laptops by FIXsage
Asus WiFi OFF: The SHOCKINGLY Easy Trick!
Unlock Your ASUS WiFi's Hidden Power: A Simple Game Changer!
Imagine yourself, utterly engrossed in your favorite game, the digital world blurring into real life. Then, BAM! Lag spikes hit, ruining all the fun. Or perhaps you’re in a crucial video call, and the connection chooses that exact moment to falter. Frustrating, right? You’re not alone. These woes often stem from one surprisingly simple culprit: your ASUS WiFi’s constant broadcast. But don’t fret! There’s a ridiculously easy trick to regain control, a hidden lever you can pull to optimize performance.
The Silent Killer: Why Your WiFi Affects Your Performance
Your ASUS router is a hard worker. It’s constantly chattering with devices, pinging for signals. This relentless activity, though seemingly innocent, can be a drain on resources. Consequently, it consumes power, and bandwidth, and potentially interferes with other tasks. Think of it like this: You wouldn’t yell at the top of your lungs constantly while trying to focus. Your router operates similarly; it broadcasts signals, thus, affecting overall performance. So you need to gain some control.
Meet the Secret Weapon: The ASUS WiFi Off Switch (Almost!)
While there isn't a literal "off switch" in the traditional sense, we can achieve a similar effect. The key is understanding how your ASUS router communicates and learning to control it. We're not talking about disabling the entire WiFi network. Instead, we can optimize specific functions. You see, many ASUS routers boast advanced settings. These, when tweaked cleverly, can significantly boost performance. The process isn't complex, but it requires a little finesse.
Step 1: Accessing the Router's Command Center
First, you must access your router’s settings. This is usually done through your web browser. Simply type your router's IP address into the address bar. Typically, this address is something like 192.168.1.1 or 192.168.0.1. This information can also be found in your router's manual. Furthermore, you might locate it on a sticker on the router itself. Once you've entered the IP and hit “Enter,” the login screen should appear. There, enter your username and password. Remember to keep these details safe.
Step 2: Navigating the Labyrinth of Settings
Now, you're in! The interface might look daunting initially, but don't be alarmed. ASUS routers offer remarkably intuitive interfaces. You want to find the "Wireless" or "WiFi" settings section. The exact wording may vary slightly depending on your router model. So, take a moment to explore. Find the relevant tabs. Look for options related to "Wireless Scheduler," "Wireless Radio," or something similar.
Step 3: Unleashing the Power of Scheduled Silence
Here's where the magic happens. Wireless schedulers allow you to control when your WiFi broadcasts. Therefore, you can set specific times when it's active and inactive. For instance, imagine you play games primarily in the evenings. You can set your WiFi to "off" during the day. And, it can switch "on" automatically just before your gaming session. This clever technique frees up resources, guaranteeing optimal performance during your "prime time." Many routers offer flexible scheduling options, allowing you to customize the times to suit your lifestyle.
Step 4: Precision Optimization: Fine-Tuning Your Settings
Beyond scheduling, there are other settings to optimize. Investigate the "Wireless Radio" settings. Disable features you don't need. For instance, if you aren't using the 2.4 GHz band, switch it off. This reduces unnecessary broadcasting. Furthermore, you can adjust channel settings. Choosing a less congested channel can improve signal strength and reduce interference. Experiment and find the ideal configuration for your environment. Consequently, your overall performance should increase. So, you need to find what's best.
Step 5: The Ultimate Test: Experiencing the Difference
After implementing these changes, the proof is in the pudding. Conduct a speed test. Play your favorite game or enjoy uninterrupted video calls. Immediately you should notice an improvement. The lag should be reduced. The connection should become more stable. Celebrate your victory! You've unlocked the hidden potential of your ASUS router. You've tamed it, allowing it to work for you.
Conclusion: Taking Control of Your Digital Domain
The "shockingly easy trick" is not a single button. It's a process of understanding and control. Moreover, it emphasizes smart usage. By scheduling your wireless activity and optimizing router settings, you regain control of your digital world. Therefore, you enhance your online experiences. So now you can enjoy faster speeds. Additionally, you can experience improved stability. You have the power to make your ASUS router work for you. Embrace these tips. Subsequently, you’ll enjoy a smoother, more enjoyable online experience. Take back control, unleash the potential, and enjoy online freedom.
Windows 8 WiFi Setup: The SHOCKINGLY Easy Trick You NEED!Asus WiFi OFF: The SHOCKINGLY Easy Trick!
Hey everyone! Ever wished you could instantly and effortlessly kill your Asus router's Wi-Fi signal? Maybe you're trying to focus, want to save a bit of power, or perhaps you just need a digital detox. Whatever the reason, we've all been there. And guess what? Turning off your Asus Wi-Fi is surprisingly easy! Forget wrestling with complicated settings or rebooting your router. We're diving into the shockingly simple trick that'll have you back in control of your wireless network in seconds. Trust me, this is way easier than untangling Christmas lights (which, let's be honest, is like a Herculean task!).
1. Why Bother Turning Off Your Asus WiFi? The Perks You Might Be Missing!
Before we get into the juicy details, let's talk about why you'd even want to turn off your Wi-Fi. Sometimes, the answer isn't immediately obvious, but the benefits are real. Think of it like this: your Wi-Fi is like an energetic puppy. It's constantly buzzing, sniffing around, and expending energy. Here are a few key perks of temporarily "putting the puppy in its crate" and turning off your Asus WiFi:
- Focus Mode Activated: Need to buckle down and get some serious work done? No more distracting notifications or the temptation to scroll. Turning off the Wi-Fi is like silencing your phone and creating a digital sanctuary.
- Power Saving Champ: Did you realize your router is constantly using power, even when no one's connected? Turning it off, especially overnight or when you’re on vacation, conserves electricity and saves you a few bucks on your bill. It might seem small, but every little bit counts!
- Parental Control Unleashed: Need to limit your kids' screen time or enforce internet curfews? This is your secret weapon. It's way easier (and less accusatory) than constantly monitoring devices.
- Network Troubleshooting Made Simple: Suspecting a device is slowing down your internet? Turning off Wi-Fi isolates the problem, making it easier to pinpoint the culprit.
- Digital Detox Delight: Let's face it, we're all a little addicted to being connected. Turning off the Wi-Fi allows you to disconnect, breathe, and reconnect with the world (or at least your family) around you.
2. Unveiling the Secret Weapon: The Physical Button (Yes, Really!)
Ready for the big reveal? Drumroll, please… The shockingly easy trick to turn off your Asus Wi-Fi is… the physical button! That's right, many Asus routers, particularly the newer models, have a dedicated Wi-Fi on/off button. It’s usually located on the front or back of the router and is often marked with a Wi-Fi symbol. It's like a secret switch that puts the power in your hands.
3. Finding Your Button: A Router Safari (It's Easier Than You Think!)
Now, I know what you’re thinking: "Where is this mythical button?" Don't worry; we'll embark on a little "router safari" to find it.
- Check the Front: This is the most common location. Look for the Wi-Fi symbol, usually near the power button, or another light indicator.
- Inspect the Back: Some routers place the button on the back panel.
- Consult the Manual (If All Else Fails): If you're struggling, dig out your router's manual. It will pinpoint the exact location (It’s usually tucked away in a drawer or online after you've lost it – don't worry, we’ve all been there!).
Think of it as a treasure hunt, with the ultimate treasure being instant Wi-Fi control!
4. The Magic of the Button: How It Actually Works
Here's the techy bit (but don't worry, we'll keep it simple!). When you press the Wi-Fi button, it disables the radio transmitters within your router. These transmitters are what broadcast the wireless signal. Turning them off is like flipping a switch for the entire Wi-Fi network—poof! No signal. Simple, yet effective.
5. What If Your Router Doesn't Have a Physical Button? Don't Panic!
Okay, so your router doesn’t have a physical button. This is less common with newer models, but it's still possible. Fear not! We have other options.
6. The Software Route: Accessing the Router's Interface
Every Asus router has a web-based interface (a fancy term for a settings page). This is where you can manage all sorts of things, including your Wi-Fi settings.
- Find Your Router’s IP address: This is how you access the settings. The most common IP addresses are 192.168.1.1 or 192.168.50.1. You'll usually find this on a sticker on the router itself.
- Log In: Type your router's IP address into your web browser. You'll be prompted for a username and password (usually "admin" for both, or the credentials you set up).
- Navigate to Wireless Settings: The exact location varies slightly between models, but you'll generally find it under "Wireless," "Wi-Fi," or something similar.
- Disable the Wireless Network: Look for an option to "Enable" or "Disable" the Wi-Fi radio. Click "Disable."
It's a slightly more technical process, but still manageable. And hey, you're learning!
7. The ASUS Router App: WiFi Control at Your Fingertips
ASUS also offers a handy mobile app that lets you manage your router from your smartphone or tablet. This is a super-convenient way to turn off your Wi-Fi.
- Download the App: Search for "ASUS Router" or "ASUS Router App" in your app store.
- Log In: Use your ASUS account or your router's credentials.
- Find the Wi-Fi Control: This is usually a simple on/off switch on the main dashboard.
The app is like a remote control for your router, simplifying everything!
8. Troubleshooting: What to Do If It's Not Working!
Sometimes, even the simplest tricks can hit a snag. Here's how to troubleshoot if your Wi-Fi won’t turn off:
- Double-Check the Button: Make sure you’re pressing the correct button and that it's not malfunctioning.
- Restart the Router: A classic solution. Unplug the router, wait 30 seconds, and plug it back in. This often clears up temporary glitches.
- Check for Firmware Updates: Outdated firmware can sometimes cause problems. Log into your router's interface and check for updates.
- Contact ASUS Support: If all else fails, contact ASUS support. They're experts and can provide specific guidance.
Don't be deterred; technology can be finicky.
9. Beyond the Basics: Advanced WiFi Customization
Once you've mastered turning off your Wi-Fi, you can explore other advanced options within your router's interface:
- Schedule WiFi On/Off Times: Set up automated schedules to turn your Wi-Fi on and off at specific times. Perfect for limiting access to certain hours or encouraging bedtime.
- Guest Network Management: Create a separate guest network and toggle it on/off independently.
- Channel Selection: Experiment with different Wi-Fi channels to optimize performance.
10. Safety First: Securing Your Network
Before you start toggling your Wi-Fi on and off, ensure your network is secure:
- Strong Password: Use a strong, unique password for your Wi-Fi network.
- WPA3 Encryption (If Available): This is the most advanced encryption protocol, providing better security.
- Firewall Protection: Make sure your router's firewall is enabled.
Protecting your network is like guarding your home – essential!
11. The Power of Limited Connectivity: Why It's Good for You
We live in an age of constant connectivity. Sometimes, a break is necessary. Purposefully turning off your Wi-Fi can create a sense of calm amidst the storm.
12. The Benefits of Reduced Digital Distractions: A Focus on Health
Reduced digital distractions can lead to increased focus, improved sleep, and reduced stress. This can improve your physical and mental well-being.
13. WiFi OFF: A Tool For Enhanced Productivity
Turning off WiFi is a great way to regain control and enhance productivity. You can concentrate on what matters most, without distractions.
14. The Future of WiFi: What to Expect
The future of WiFi is constantly evolving. Expect faster speeds, increased security, and more user-friendly features.
15. Embrace the Off Switch: Your Digital Life Companion
Learning how to turn off your Asus Wi-Fi is more than just a tech skill; it's a step toward taking control of your digital life. Embrace the off switch; it's a digital life companion.
Closing Thoughts: Welcome to a Less Connected, More Focused You!
And there you have it! The shockingly
Unlock Your WiFi Password NOW: Secret Laptop Trick Revealed!How To Enable & Disable WiFi In ASUS VIVOBOOK 14
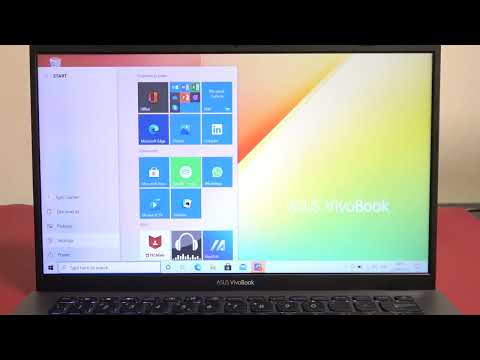
By HardResetPro How To Enable & Disable WiFi In ASUS VIVOBOOK 14 by HardResetPro
How To Enable & DIsable WiFi on Asus Zenbook

By HardReset.Info How To Enable & DIsable WiFi on Asus Zenbook by HardReset.Info
Wifi option not showing in windows 11 asus laptop

By IT Magics Wifi option not showing in windows 11 asus laptop by IT Magics

Title: How to Fix Wireless Network Problems on ASUS Laptops ASUS SUPPORT
Channel: ASUS Support
How to Fix Wireless Network Problems on ASUS Laptops ASUS SUPPORT by ASUS Support
Working With Laptop
Here's the title for the article: The Ultimate Guide to Mastering the Art of Sourdough Bread Baking at Home
The Alchemy of Flour and Water: Unveiling the Secrets of Sourdough
For centuries, the whisper of sourdough has echoed through kitchens, a testament to the enduring power of simple ingredients transformed by the magic of fermentation. More than just bread, sourdough represents a return to the roots of baking, a celebration of slow food and the profound satisfaction of creating something truly exceptional. We invite you on a journey that will unlock the secrets of crafting crusty, flavorful loaves from the heart of your own home. This isn't just about following a recipe; it's about understanding the delicate dance between flour, water, and the living culture that brings sourdough to life.
Crafting Your Liquid Gold: Cultivating a Thriving Sourdough Starter
The cornerstone of any exceptional sourdough experience is a robust and vibrant starter. Often affectionately called "the mother," your starter is a living colony of wild yeast and beneficial bacteria, thriving in a symbiotic relationship that gives sourdough its unique characteristics. The first crucial step is creating your own starter. The process involves a simple mixture of equal parts flour and water, typically unbleached all-purpose or whole wheat flour. The type of flour you use will impact the starter's flavor profile. Whole wheat will generally feed the starter faster due to the presence of bran and germ.
Start with a clean jar. Add 50 grams of flour and 50 grams of lukewarm, non-chlorinated water. Mix it thoroughly until there are no lumps. Cover the jar loosely with a lid or plastic wrap and leave it at room temperature (ideally between 70-75°F/21-24°C).
For the first few days, you may see little activity. This is normal. The initial stages can be a bit unpredictable. On day two or three, you might start observing small bubbles. Discard about half of the starter and feed it again with 50 grams of flour and 50 grams of water. This process of discarding and feeding is crucial for maintaining a balanced environment for the yeast and bacteria to thrive. Continue this process daily for the first week, observing the activity. As the days progress, you should notice a significant rise and fall, with increasing amounts of bubbles and a slightly sour aroma. Don't be alarmed by the initial funkiness; it's part of the process.
After about a week, your starter should be noticeably active, doubling (or even tripling) in size within a few hours of feeding. It might also develop a more pleasant aroma, reminiscent of yogurt or tangy fruit. This is the indication that your starter is almost ready. Once it’s consistently doubling in size, you can begin incorporating it into your sourdough recipes.
Remember, consistency is key. Maintaining a regular feeding schedule is crucial to keeping your starter happy. If you use your starter frequently, feed it daily. If you bake less often, you can store it in the refrigerator. Before baking, take your starter out of the fridge and feed it, allowing it to come to room temperature and become active before incorporating it into your dough. This could take anywhere from 4 to 12 hours, dependent on the temperature and the volume of the feed.
Choosing Your Weapons: Mastering the Ingredients and Equipment
The beauty of sourdough lies in its simplicity. The core ingredients are few, but each plays a vital role in the final product. High-quality flour is paramount. Bread flour, with its higher protein content (typically around 12-14%), develops a stronger gluten structure, resulting in a more defined crumb and better oven spring. All-purpose flour can be used but will yield a slightly less airy loaf. Experimenting with different flours, such as rye or whole wheat, will introduce unique flavors and textures.
Water is another essential element. Use filtered, non-chlorinated water to ensure that you haven’t inhibited the growth of your starter. The water temperature should be appropriate for the environment your bread is being proofed in. If the surroundings are warm, room temperature water is usually the most suitable. If the proofing area is cooler, use tepid water to help encourage the fermentation process.
In addition to the basics, you'll need a few essential pieces of equipment. A digital kitchen scale is vital for accurate measurements. Use a large bowl, preferably glass or stainless steel, for mixing. A banneton basket (a proofing basket) provides structure and shape during the final proofing stage. A Dutch oven is the key to achieving that coveted crust. A lame (a specialized baker's knife) or a sharp razor blade is for scoring the dough, which will control the expanding gases and create beautiful patterns.
The Symphony of the Dough: Mixing, Bulk Fermentation, and Shaping
The sourdough process is far more than just combining ingredients. It’s a carefully orchestrated series of steps that transform the simple to the sublime. The initial mixing process is crucial for good gluten development. In a large bowl, combine the water with your active starter. Add the flour and mix until just combined. Don’t overmix at this stage.
Autolyse, a resting period after the initial mixing, allows the flour to fully hydrate and initiates gluten development. Cover the dough and let it rest for 30-60 minutes. This step dramatically improves the texture of your bread.
Next comes bulk fermentation, where the dough rests and ferments. This stage is critical for flavor development. During this time, you’ll perform a series of folds to strengthen the gluten structure. Gently stretch a portion of the dough from one side, folding it over onto itself. Rotate the bowl and repeat. Do this every 30-60 minutes for the first 2-3 hours of bulk fermentation. The frequency of these folds depends on the flour and environmental temperature. The target fermentation temperature is usually around 75-80°F (24-27°C).
The duration of bulk fermentation varies depending on the temperature of your environment and the activity of your starter. Observe the dough closely. It should increase in size by around 30-50% and develop some bubbles on the surface. Gently poke the dough. It should spring back slowly.
Once the bulk fermentation is complete, it’s time to shape your loaf. Gently turn the dough out onto a lightly floured surface. Form it into the desired shape—round, oval, or batard (oblong). Use a bench scraper to help shape the dough and create surface tension. Place the shaped dough in a well-floured banneton basket, seam-side up, for the final proof.
The Art of the Proof: Patience and Precision in the Final Stage
The final proof is another crucial stage for developing the flavor and structure of your sourdough. The length of this proofing period is determined by the dough's readiness and the desired results. For a more sour flavor and a well-developed crumb, proof the dough in the refrigerator for 12-24 hours. This slow, cold fermentation allows the flavors to develop, and it also makes scoring easier.
Alternatively, you can proof the dough at room temperature. However, in this case, you must monitor the dough very closely. The proof is usually about 2-4 hours, dependent on environmental conditions. A correctly proofed dough will have a gentle spring back when poked. If the dough is over-proofed, it will collapse. If it’s under-proofed, you will have poor oven spring.
The Grand Finale: Baking Your Masterpiece to Perfection
Before baking, preheat your Dutch oven in your oven to 450-500°F (232-260°C). The high heat and enclosed environment of the Dutch oven helps to create steam, which is essential for a crispy crust. Gently remove the hot Dutch oven from the oven. Carefully remove the loaf from the banneton basket and place it in the preheated Dutch oven. The scoring of the dough is critical at this stage. Use a lame or a sharp razor blade to score the top of the loaf. This allows the dough to expand in a controlled way, preventing it from bursting unevenly. Experiment with different scoring patterns for aesthetic appeal.
Cover the Dutch oven and bake for 20 minutes. Then, remove the lid and bake for another 25-35 minutes, or until the crust is deeply golden brown and the internal temperature reaches 200-210°F (93-99°C).
Once baked, remove the loaf from the Dutch oven and let it cool completely on a wire rack. This is a crucial step. Resist the temptation to slice into the loaf while it’s still warm. Allow the bread to cool completely for at least two hours. This allows the starches to set, resulting in a better crumb structure.
Troubleshooting and Tips: Addressing Common Sourdough Challenges
Even seasoned bakers encounter challenges. Here are solutions to some frequently encountered issues:
- Flat Loaf: This is often caused by under-proofed dough or an under-active starter. Ensure your starter is doubling consistently and rising adequately. Adjust the proofing time.
- Dense Crumb: This could be due to a weak gluten structure, under-fermentation, or improper shaping. Ensure that you are stretching and folding the dough during bulk fermentation effectively.
- Sour Taste Too Strong: The level of sourness is directly linked to the bulk fermentation process. Try shortening the bulk fermentation time or reducing the amount of starter.
- Crumbly Crust: If the crust is too crumbly, the dough might have been over-proofed.
**Expanding Your Sourdough Repertoire
