i can't find my wifi on my laptop windows 10

Title: Fix WiFi Not Showing in Settings On Windows 10 Fix Missing WiFi 2025
Channel: Sandeep Singh
Fix WiFi Not Showing in Settings On Windows 10 Fix Missing WiFi 2025 by Sandeep Singh
i can t find my wifi on my laptop windows 10, i can't find my wifi network on my laptop windows 10, i can't see my wifi network on my laptop windows 10, how can i see my wifi password on my laptop windows 10, i can't see the wifi icon on my laptop windows 10, how do i find my wifi password on my laptop windows 10, why can't i see my wifi network on windows 10, why can't i see my wifi network on my laptop, can't find wifi network on my laptop
Laptop WiFi Vanished? Windows 10 Fix (Guaranteed!)
Laptop WiFi Woes? Conquer Windows 10's Connectivity Crisis!
Have you ever stared into the abyss of a blank screen? Your laptop, once a portal to endless possibilities, now feels like a useless paperweight. The culprit? That pesky, ever-elusive Wi-Fi signal, seemingly vanished into thin air. Fear not, intrepid digital explorer! You're not alone, and, more importantly, there's a fix – a guaranteed one, at least in our experience.
The Vanishing Act: Decoding the Mystery of Lost WiFi
First things first, let's acknowledge the sheer frustration. One minute you're streaming, the next… nothing. The WiFi icon, usually a cheerful symbol of freedom, is now a defiant little X. Before you hurl your laptop across the room (tempting, we know!), let's troubleshoot. Consider this a digital detective's guide. We're going to uncover the reasons behind this sudden disappearance. Often, the solution is simpler than you might believe.
Step 1: The Obvious Suspects – Quick Checks!
Before we get technical, tackle the easy stuff. After all, sometimes the simplest solutions are the best. Firstly, double-check the physical switch on your laptop. On many models, there's a dedicated Wi-Fi on/off button, often located on the keyboard or side of the device. Is it enabled? Secondly, take a peek at your router. Is it powered on? Are the lights blinking as they should? A simple restart of your router can work wonders. It’s a common fix, believe it or not. Also, consider the distance. Are you too far from the router? Move closer, and see if that fixes the problem.
Step 2: Diving Deeper: Troubleshooting Windows 10
Okay, you've tried the basics. Still no luck? Time to delve into the Windows 10 depths. Windows 10, despite its occasional eccentricities, usually provides the tools we need.
2.1. Network Adapter Diagnostics: Your First Line of Defense
Windows has built-in diagnostic tools. They can often identify and resolve common network issues. To access them, right-click the Wi-Fi icon in your system tray. Select "Troubleshoot problems". Windows will then run diagnostics automatically. It will suggest fixes if it finds anything. In addition, it will provide valuable insights.
2.2. Adapter Troubleshoot!
Sometimes, network adapters malfunction. They might need resetting. The first step is to open the "Device Manager". You can search for it in the Windows search bar. Expand the "Network adapters" section. Locate your Wi-Fi adapter (it might have a name like "Wireless Network Adapter"). Right-click on it, and select "Disable device". Wait a few seconds, and then right-click again and select "Enable device". This often resolves temporary glitches. Besides that, consider updating your network adapter driver.
2.3. Updating Your Wi-Fi Driver: Keeping Things Fresh
Outdated drivers are common culprits. They can cause connectivity issues. To update your driver, go back to Device Manager. Right-click your Wi-Fi adapter. Choose "Update driver". Select "Search automatically for drivers". Windows will then search for and install the latest driver. Moreover, you should also check the manufacturer's website. Download the latest drivers from there, too.
Step 3: Power Cycling: A Reboot for Everything
Power cycling your modem and router is another powerful technique. Unplug both devices. Wait for about 30 seconds. Plug the modem in first and wait for it to fully power up. Then, plug in the router. This process refreshes the entire network connection. Consequently, this solves many connectivity issues.
Step 4: Advanced Troubleshooting - If All Else Fails
If the above steps don't work, you can try more advanced solutions. Firstly, check your Windows settings. Go to "Settings" > "Network & Internet". Ensure Wi-Fi is enabled. Secondly, check your IP configuration. Sometimes, the IP address assigned to your computer can cause problems. You can try renewing it. Open Command Prompt (search for "cmd" in the Windows search bar) and type: ipconfig /renew. Similarly, you need to reset your network settings. This resets your network adapter settings.
Step 5: The Nuclear Option (But Don't Panic!)
As a last resort (before calling a professional!), consider resetting your network settings. However, note that this removes saved Wi-Fi passwords. Go to "Settings" > "Network & Internet" > "Status". Scroll down and click "Network reset". Follow the prompts. Afterward, your computer will restart. It will revert to its default network settings. You'll need to reconnect to your Wi-Fi network.
The Guarantee: A Realistic Perspective
We can't guarantee a 100% fix for every scenario. The digital world is complex. But, going through these steps greatly increases your chances of success. By exploring these options, you'll be better equipped. You can hopefully solve your Wi-Fi woes and get back to surfing. Don't give up! Persistence usually pays off in the tech world. Finally, remember to backup your data. Enjoy your restored internet connectivity!
**Toshiba Laptop WiFi Connected, But NO Internet? (Solved!)**Laptop WiFi Vanished? Windows 10 Fix (Guaranteed!)
Hey everyone! Ever stare at your laptop screen, utterly bewildered, because that precious WiFi symbol – the one that connects you to the world – has vanished into thin air? We’ve all been there. One minute you're streaming cat videos, the next, poof – internet oblivion. Don't panic! We're going to tackle this head-on and, hopefully, bring your WiFi back from the dead. Trust me, I've seen it all, from the mysterious "no networks found" messages to the frustrating "limited connectivity" woes. Think of it as a digital emergency room, and we're the doctors, equipped with the tools to resuscitate your internet connection.
1. The Great WiFi Disappearance: What Happened?
Before we jump into the fix-it factory, let's try to understand the "why." Knowing what might have caused the issue helps us target the solution. Was there a Windows update recently? Did you accidentally (or intentionally!) mess with your network settings? Did the gremlins in your electrical outlet have a field day? Sometimes, it's as simple as a momentary hiccup. Other times, it’s a bit more involved. Like a detective, we'll start by eliminating the obvious suspects.
2. Checking the Obvious: The Basic WiFi Troubleshooting Checklist
Alright, Sherlock, before we dive into the technicalities, let's run through the basic checks. Think of this as your pre-flight checklist.
- Is WiFi switched on? Sounds silly, right? But hey, it happens! Many laptops have a physical switch or a function key (usually with an airplane icon) that disables WiFi. Double-check that switch!
- Airplane mode? This one’s a sneaky culprit. Ensure airplane mode is off.
- Restart your laptop: The classic "turn it off and on again" trick. It works surprisingly often. It's like giving your computer a fresh start.
- Check your router: Is it powered on? Are other devices connected to it? If your router’s acting up, that's the root cause.
3. Diving Deeper: Troubleshooting Windows 10 Network Settings
Okay, if the basics didn't work, let's get our hands a little dirty. We’re entering the Windows 10 network settings zone.
3.1 Network Adapter Status: Your First Stop
Go to your Windows settings (search for "settings" in the start menu). Then, navigate to "Network & Internet" and then "Change adapter options." Here, you'll see your network adapters. Is your WiFi adapter enabled? If it's disabled, right-click and "Enable" it. If it's already enabled, try disabling and then re-enabling it. This sometimes gives the connection a jolt.
3.2. Updating Your Network Adapter Driver: The Digital Mechanic
Think of your network adapter as the engine of your WiFi. It needs regular tune-ups, and that means updating the driver.
- Right-click the Windows start button and select "Device Manager."
- Expand "Network adapters."
- Right-click your WiFi adapter (it might be called something like "Wireless Network Adapter" or "Intel Wireless").
- Select "Update driver." Choose "Search automatically for drivers."
- Let Windows do its thing. If it finds an update, install it and restart your laptop.
3.3. Running the Windows Network Troubleshooter: The Digital Detective
Windows has a built-in troubleshooter that can often sniff out the problem.
- Go to "Settings" > "Network & Internet" > "Status."
- Click "Troubleshoot network problems."
- Follow the on-screen prompts. Windows will attempt to diagnose and fix the issue.
4. Advanced Troubleshooting: Things Get a Little More Technical
If the above didn’t work, we need to level up our troubleshooting.
4.1. Resetting Your Network Settings: A Digital Do-Over
This is a more drastic step, so back up your important network settings (if you know how!) before proceeding.
- Go to "Settings" > "Network & Internet" > "Status."
- Scroll down and click "Network reset."
- Follow the prompts and restart your laptop. This resets your network settings to their defaults.
4.2. Checking for Conflicting Software: The Digital Saboteurs
Certain software, especially security programs like firewalls or VPNs, can sometimes interfere with your WiFi. Temporarily disable these programs to see if it resolves the issue. Remember to re-enable them afterward!
5. The Router Roulette: Does the Router Deserve the Blame?
We often blame our laptops, but the real culprit might be the router. It's like that unreliable friend who always cancels plans.
5.1. Router Reboot: The Nuclear Option (Sometimes)
Unplug your router and modem for about 30 seconds, then plug them back in. This is often the magic bullet.
5.2. Check Router Firmware: The Digital Brain’s Update
Make sure your router's firmware is up-to-date. Router manufacturers often release updates to fix bugs and improve performance. Check your router's manual for instructions on how to update the firmware.
6. Still No WiFi? Contacting Support: When to Call in the Cavalry
If you've tried everything and still no WiFi, it's time to call in the pros. Contact your internet service provider (ISP) or the manufacturer of your laptop. They can provide more specific troubleshooting assistance. Think of them as the WiFi SWAT team.
7. Prevention is Key: Tips to Keep Your WiFi Running Smoothly
Once you've fixed the problem, let's talk about staying fixed.
- Keep Windows updated: Regular updates often include driver updates and bug fixes related to networking.
- Keep your drivers updated: Regularly update your network adapter driver.
- Secure your WiFi: Use a strong password and enable encryption on your router.
- Consider a WiFi extender: If you have a large house or a poor signal, a WiFi extender can boost your signal strength.
8. Identifying Common WiFi Problems
Let’s talk about typical problems.
8.1 "No Networks Found"
This is a message of doom! It often means your WiFi adapter is disabled, the drivers have issues, or the wireless radio of your laptop is not working.
8.2 "Limited Connectivity"
You are connected to the network but lack internet access. This may be a DNS issue.
9. Step-by-Step Guide to Windows Network Troubleshooting
Let's revisit a simplified, guided approach.
- Check Basic Connections: Power, Switch, Airplane Mode.
- Restart your laptop, simple and quick.
- Update Drivers.
- Run the Windows Troubleshooter
- Reset Network Settings, as a final measure
10. Optimizing Your WiFi Signal for Faster Speeds
Let’s maximize that speed!
10.1. Router Placement Matters: Find the Sweet Spot
Place the router in a central location, free from obstructions, like walls and metal objects. Elevate it.
10.2. Channel Interference and Optimization
Change the WiFi channel on your router.
11. Troubleshooting Common Hardware Issues
Sometimes, your adapter may be damaged.
11.1. Internal Hardware Troubles
If your WiFi adapter is failing, it may need replacing.
12. Dealing with Driver Conflicts and Errors
Driver conflicts make the system unstable.
12.1. Resolving Driver Conflicts
Reinstall all the drivers in safe mode.
13. How to Fix ISP Related Issues
Sometimes, the fault may not be yours.
13.1. Contacting Technical Support
Contact your ISP, they can identify the problem.
14. Utilizing Network Diagnostics Tools
We need to properly use the tools.
14.1. Using Command Prompt for Network Checks
Use commands. Type ipconfig in the command prompt. You can get your IP address and other details.
15. Final Thoughts: Back to Being Connected
Closing Thoughts
And there you have it! We've journeyed through the labyrinth of Windows 10 WiFi woes, armed with knowledge, a healthy dose of troubleshooting, and a dash of humor. Remember, don't let a vanished WiFi signal get you down. With a little patience and the steps we’ve outlined, you can reclaim your internet connection and get back to doing what you love – streaming, working, connecting, and everything in between. We've tackled the problem, dissected every facet, and put your WiFi back on the same page as you. Now, go forth and conquer the internet!
FAQs
Why does my WiFi keep disconnecting in Windows 10?
Several factors can cause this: a weak signal, driver problems, outdated firmware, or conflicting software. Follow the troubleshooting steps outlined above, starting with the basics and working your way up to more advanced solutions.
What if I can see my WiFi network, but it won't connect?
This is a common problem. Ensure your
Cara Memperbaiki WiFi Tidak Muncul di Windows 10 - Bagaimana cara mengatasinya

By Howtosolveit Cara Memperbaiki WiFi Tidak Muncul di Windows 10 - Bagaimana cara mengatasinya by Howtosolveit
Semua Tapi Jaringan WiFi Saya Tidak Muncul Terpecahkan tahun 2020

By Simplify Semua Tapi Jaringan WiFi Saya Tidak Muncul Terpecahkan tahun 2020 by Simplify
Cara Memperbaiki Tidak Dapat Melihat Komputer Lain di Jaringan jendela 1011
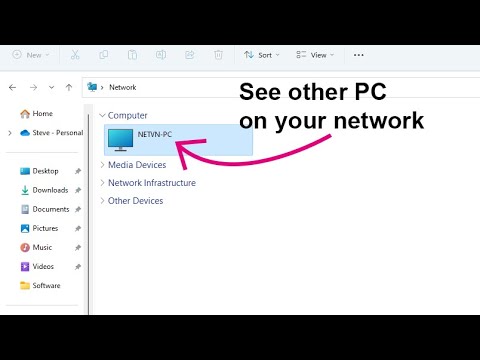
By NETVN82 Cara Memperbaiki Tidak Dapat Melihat Komputer Lain di Jaringan jendela 1011 by NETVN82

Title: 7 Cara Memperbaiki Komputer yang Tidak Dapat Menemukan atau Terhubung ke Wifi Laptop & Desktop Windows 10
Channel: Ask A Computer Geek
7 Cara Memperbaiki Komputer yang Tidak Dapat Menemukan atau Terhubung ke Wifi Laptop & Desktop Windows 10 by Ask A Computer Geek
Wifi On Laptop Phone
Here's the article:
The Ultimate Guide to Mastering Italian Espresso: From Bean to Barista
The pursuit of the perfect espresso is a journey, a quest that demands precision, passion, and a deep understanding of the subtle nuances that separate a good shot from an exceptional one. This comprehensive guide will serve as your compass, leading you through every facet of Italian espresso, from the selection of the finest beans to the art of pulling a flawless shot and appreciating the exquisite crema. We'll delve into the traditions, the techniques, and the tools that will empower you to create café-quality espresso in the comfort of your own home.
Understanding the Essence: The Italian Espresso Philosophy
At the heart of Italian espresso lies a philosophy: a dedication to quality, speed, and a ritualistic appreciation of the coffee experience. Unlike the leisurely brewing methods of other coffee cultures, Italian espresso emphasizes an instant, concentrated burst of flavor, a shot that is meant to be savored quickly and with intention. It’s a moment of pure coffee bliss, a perfectly balanced dance of acidity, sweetness, and bitterness. The Italian approach values consistency and precision. Every element, from the grind size to the water temperature, is meticulously controlled to ensure a predictable and delightful outcome. This commitment is what sets Italian espresso apart and makes it a global benchmark for coffee excellence.
Selecting the Gems: Choosing the Right Espresso Beans
The foundation of any great espresso lies in the beans. While personal preferences vary, the ideal espresso blend typically consists of a blend of Arabica and Robusta beans. Arabica beans are prized for their complex flavor profiles, offering a range of notes like floral, fruity, and chocolatey. Robusta beans, on the other hand, provide a stronger body, a richer crema, and a higher caffeine content.
Key Considerations for Bean Selection:
- Roast Level: Darker roasts generally produce a bolder, more intense flavor profile, often associated with more bitterness and body. Lighter roasts tend to highlight the acidity and complexity of the bean, offering a brighter, more nuanced experience. Experiment to find your personal preference.
- Origin: Different regions and growing conditions impart unique characteristics to the beans. Explore beans from Ethiopia for floral and citrusy notes, or those from Sumatra for earthy and full-bodied flavors.
- Freshness is Paramount: Always seek out freshly roasted beans. Ideally, use beans within 2-3 weeks of their roast date. Look for a roast date stamped on the bag, not a “best by” date.
- Blend Composition: The ratio of Arabica to Robusta significantly affects the final espresso. A higher proportion of Robusta will result in a stronger, more robust shot with a thicker crema.
Consider sourcing your beans from a local roaster who can provide detailed information about the origin, processing, and roast profile of their coffee. This allows you to not only support local businesses but also receive expert guidance on choosing the perfect beans for your espresso machine.
Mastering the Grind: The Crucial Role of the Grinder
A quality grinder is as crucial as the espresso machine itself. The grind size is the single most important factor in determining the extraction process. Too coarse, and the water will flow through the grounds too quickly, resulting in a weak, sour, and under-extracted shot. Too fine, and the water will struggle to pass through, leading to a bitter, over-extracted shot. Espresso requires a very fine, consistent grind, like finely ground table salt.
Essential Grinder Features:
- Burr Grinder: Avoid blade grinders, which chop the beans unevenly. Burr grinders use two revolving abrasive surfaces to crush the beans consistently.
- Conical vs. Flat Burr: Conical burr grinders are generally more affordable and produce more fines, which can enhance the body of the shot. Flat burr grinders are often considered superior, providing a more uniform grind and potentially better flavor clarity.
- Grind Adjustment: Look for a grinder with a wide range of grind size adjustments, allowing you to fine-tune the grind for your specific beans and machine.
- Dosing: A grinder with a built-in dosing system simplifies the process of measuring the correct amount of ground coffee for each shot.
Invest in a grinder that allows for micro-adjustments to the grind size. This level of precision is essential for dialing in your espresso and achieving the perfect extraction.
The Espresso Machine: Your Gateway to Perfection
The espresso machine is the heart of your setup. From simple pump-driven machines to sophisticated semi-automatic and fully automatic models, the choices are vast. The key is to select a machine that fits your needs and budget.
Key Features to Consider:
- Pump Pressure: Espresso machines generally operate at 9 bars of pressure. Ensure the machine is capable of maintaining this pressure consistently.
- Temperature Stability: Temperature stability is critical for consistent extraction. Look for machines with a PID (Proportional-Integral-Derivative) controller, which allows for precise temperature control and prevents temperature fluctuations.
- Portafilter: The portafilter is the handle that holds the ground coffee. A well-designed portafilter provides a comfortable grip and contributes to the overall experience.
- Boiler Size: A larger boiler is beneficial for multiple shots and steaming milk.
- Durability and Construction: Choose a machine that is built to last, with high-quality components and a solid construction.
Research different machine types, read reviews, and consider what the best style of machine will best suit you. This will help you to assess which machine best aligns with your brewing style and skill level.
The Art of Extraction: Pulling the Perfect Shot
Pulling a perfect espresso is a process that requires precision and attention to detail. The following steps are essential:
- Preparation: Preheat your espresso machine and portafilter. Ensure your water reservoir is full.
- Grind and Dose: Grind the coffee beans to the correct fineness using your burr grinder. Place the portafilter on a digital scale and dose out the desired amount of ground coffee (typically 18-20 grams).
- Tamping: Distribute the ground coffee evenly in the portafilter. Using a tamper, compress the grounds with approximately 30 pounds of pressure. Ensure a level and consistent tamp.
- Extraction: Insert the portafilter into the group head. Start the extraction. The first drops should begin to flow after approximately 8-10 seconds.
- Timing and Volume: Aim for a shot that flows for 25-30 seconds, yielding approximately 36-40 grams of espresso (a 1:2 coffee-to-espresso ratio).
- Observe the Crema: A rich, golden-brown crema is a hallmark of a well-extracted espresso. It should be thick, dense, and persistent.
- Taste and Adjust: Taste the espresso immediately. If it’s sour, the grind is too coarse. If it’s bitter, the grind is too fine. Adjust the grind accordingly and try again.
Keep a detailed journal of your extraction times, weights, and tasting notes. This will allow you to track your progress and make adjustments to the grind and dose as needed.
Milk Magic: Steaming and Texturing Milk for Lattes and Cappuccinos
Perfecting your milk steaming technique is essential for crafting lattes, cappuccinos, and other espresso-based drinks. The goal is to create microfoam, a velvety texture with tiny, evenly distributed bubbles.
Steps for Steaming Milk:
- Prepare the Milk: Use cold, fresh milk. Whole milk is generally preferred for its rich texture and flavor.
- Purge the Steam Wand: Before steaming, purge the steam wand to remove any condensation.
- Position the Wand: Submerge the steam wand just below the surface of the milk, slightly off-center in the pitcher.
- Aeration: Introduce air into the milk by lowering the wand slightly, creating a gentle “shhh” sound for approximately 3-5 seconds. This stretches the milk, creating volume and incorporating air.
- Texturing: Once the milk has reached the desired volume, lower the wand further, keeping the tip just beneath the surface to create a vortex. This swirls the milk, breaking down the larger bubbles and creating a smooth, silky texture.
- Temperature: Heat the milk to approximately 140-150°F (60-65°C).
- Cleaning: Immediately wipe the steam wand clean and purge it to remove any milk residue.
- Pouring: Pour the steamed milk over the espresso, incorporating the microfoam to create a beautiful and flavorful beverage.
Experiment with different milk types and steaming techniques to find what works best for you. Practice makes perfect.
Troubleshooting Common Espresso Problems
Even the most experienced baristas encounter problems from time to time. The following are some of the most common issues and their solutions:
- Sour Espresso: The coffee is under-extracted. Either the grind is too coarse, the dose is too low, or the extraction time is too short. Adjust the grind finer, increase the dose, or extend the extraction time.
- Bitter Espresso: The coffee is over-extracted. Either the grind is too fine, the dose is too high, or the extraction time is too long. Adjust the grind coarser, decrease the dose, or shorten the extraction time.
- Weak Espresso: The shot is flowing
