cannot connect to wifi on laptop windows 7

Title: Not connected no connections are available windows 7 laptop
Channel: IT Magics
Not connected no connections are available windows 7 laptop by IT Magics
cannot connect to internet on laptop windows 7, laptop cannot connect to wifi windows 7, laptop can t connect to wifi windows 7, my laptop cannot connect to wifi windows 7, hp laptop cannot connect to wifi windows 7, laptop won t connect to wifi windows 7, how to fix wifi connection on laptop windows 7, why is my windows 7 laptop not connecting to wifi, why is my windows 7 not connecting to wifi
Windows 7 WiFi Nightmare? FIX IT NOW!
Windows 7 WiFi Woes: Conquering the Connectivity Calamity
Ever wrestled with Windows 7 WiFi? It can feel like a digital Gordian Knot, right? You click, you refresh, you pray. But the bars remain stubbornly empty. Then, frustration bubbles over. However, breathe deeply. We’re going to untangle this. We’ll unravel the mystery behind your wireless woes. Because, really, you deserve a seamless online experience.
The Silent Struggle: Decoding Your WiFi's Silence
First things first, verify the obvious. Is your WiFi switch on? Seriously, it happens. Check your physical switch on your laptop. Also, inspect the function keys. Many laptops use it for WiFi toggling. Next, are other devices connected? If your phone works, the problem is localized. If not, it’s likely your router. Moreover, rebooting is often the initial solution. Turn off your router. Then, unplug it for a full minute. After that, plug it back in. Finally, give it a few minutes to restart. Give your Windows 7 machine the same treatment.
Drivers: The Unsung Heroes of Wireless Networking
Driver issues are common. They can be a stealthy culprit. Outdated or corrupted drivers can easily cripple your WiFi. Thus, you need to update your network adapter drivers. Navigate to your Device Manager. You can search for it in the Start Menu. Right-click on your network adapter. Choose "Update driver". Select "Search automatically". Consequently, Windows will search for updates.
Alternatively, download the latest drivers from the manufacturer's website. Download them to a USB drive. Transfer them to your Windows 7 machine. Then, repeat the steps in Device Manager to update. Be mindful. Before making changes, create a restore point. This acts as a safety net. It lets you revert to a previous state if something goes awry.
Network Troubleshooting: Unmasking the Culprits
Windows 7 includes a built-in troubleshooter. It can be a surprisingly effective ally. Right-click the network icon in your system tray. Choose "Troubleshoot problems". Windows will then run diagnostics. It will search for and suggest fixes. Often, it'll suggest a solution. However, be prepared to follow its advice. You might have to restart your computer.
Next, consider the possibility your Network card is disabled. In the device manager, if the network card has a small downward arrow, it’s disabled. Right-click it. Select "Enable". After that, see if your WiFi works. In addition, you can also try resetting your network settings. You must note that this will delete saved passwords.
Security Protocols: Compatibility Considerations
Windows 7 might not always play nicely with newer security protocols. Your router's security settings could be too advanced. Consequently, your Windows 7 machine can't connect. Access your router's configuration page. Usually, you can access this through your web browser. Type in your router's IP address. It’s often 192.168.1.1 or 192.168.0.1.
Look for the wireless security settings. Specifically, check the encryption type. WPA2-PSK is generally a good setting. Then, check if it's compatible with your Windows 7 device. If it’s not, you might need to adjust. You may need to switch to WPA encryption. But, be aware of security implications. WEP is outdated and highly vulnerable.
Environmental Interference: Invisible Enemies
WiFi signals are susceptible to interference. Many things can cause this. Think about microwaves, walls, and other devices. Consequently, your WiFi performance might suffer. Try moving your laptop closer to the router. Or, move the router to a more central location. If that's not possible, consider relocating the router. Try to get it away from other electronic devices. The placement makes a huge difference. Moreover, physical barriers can degrade the signal.
IP Configuration: A Deep Dive into Numbers and Settings
Your IP address is crucial for network communication. Sometimes, it encounters issues. Ensure your network adapter is configured correctly. Go to Network and Sharing Center, accessed via the Control Panel. Click on “Change adapter settings”. Right-click your wireless adapter. Select "Properties."
Choose "Internet Protocol Version 4 (TCP/IPv4)." Click "Properties." Ensure “Obtain an IP address automatically” is selected. Also, ensure “Obtain DNS server address automatically” is selected. If these aren't set up this way, your connection won’t function. If they are already set to automatic, then manually inputting some common DNS servers can resolve the issue. Use Google’s DNS: 8.8.8.8 and 8.8.4.4. Finally, if nothing works, consider a system restore to an earlier point.
The Ultimate Victory: Enjoying Seamless WiFi
Once you’ve worked through these steps, you should have WiFi again. You are no longer subject to the Windows 7 WiFi nightmare! It's a satisfying feeling. Finally, you can browse the internet and do as you please. Thus, you can browse freely. Furthermore, you can stream your favorite shows. You can connect with friends and family. Enjoy the benefits of a reliable connection. Ultimately, you’ll remember this article as a lifesaver. Therefore, relax and enjoy your regained connectivity.
Is Your WiFi Speed TORTURING You? (Find Out NOW!)Windows 7 WiFi Nightmare? FIX IT NOW!
Hey there, fellow tech travelers! Ever felt like your Wi-Fi connection on your trusty Windows 7 machine was acting up, turning your internet experience into a slow, frustrating crawl? Maybe your videos buffer endlessly, webpages refuse to load, or you're just plain getting disconnected at the worst possible moment? Sound familiar? Trust me, we've all been there. It’s like trying to build a sandcastle on a windy beach – just when you think you've got everything in place, poof – it all crumbles. But don’t you worry! The good news is that a Wi-Fi nightmare on Windows 7 doesn’t have to be a permanent reality. We’re going to dive deep and find some solutions to get you happily surfing the web again, fast.
1. The Silent Saboteur: Why Your Windows 7 Wi-Fi Is Giving You the Blues
Let's face it, Windows 7 is a bit of an old friend now. It's like that comfortable, well-worn pair of jeans you love to wear. But just like your jeans, it might need a little TLC to keep things running smoothly, especially when it comes to Wi-Fi. Several things can cause your Wi-Fi to be a pain. Think of it like a symphony orchestra where one instrument (your Wi-Fi) is out of tune:
- Outdated Drivers: This is often the culprit! Your network adapter drivers are the "translators" between your computer and your router. If they're old, they may not play well with modern Wi-Fi technology.
- Router Issues: Sometimes the problem isn't your computer at all, but the router itself. It can be overloaded, have outdated firmware, or just be in a bad mood.
- Interference: Wi-Fi signals are like invisible superheroes. They fight against other signals like microwaves, other routers, and even thick walls that can weaken their strength.
- Software Conflicts: Programs running in the background can sometimes hog your bandwidth or even interfere with your Wi-Fi connection.
- Windows 7 Bugginess: Yes, Windows 7, despite being a classic, can have its own little quirks and bugs that can impact networking.
2. Driver Detective: Updating Your Network Adapter Drivers
First up: the drivers! This is usually the easiest fix, and often the most effective. Think of this like giving your computer's Wi-Fi a fresh set of eyes so it sees the internet properly. Here's how to update your network adapter drivers:
- Open Device Manager: Click the Start button, type "Device Manager" in the search box, and hit Enter.
- Find Your Network Adapter: Expand the "Network adapters" category. You'll probably see a few entries, like "Wireless Network Adapter" or something similar.
- Update the Driver: Right-click on your Wi-Fi adapter and select "Update driver software."
- Automatic or Manual Search: You can choose "Search automatically for updated driver software." Windows will try to find the latest drivers online. If that doesn't work, you can try downloading the drivers directly from your computer or adapter manufacturer's website.
Tip: Before you update, it’s always a good idea to create a System Restore Point. That way, if something goes wrong, you can easily revert back to how things were.
3. Router Resuscitation: Rebooting and Rebooting Again!
Okay, let's hop over to the router. This is often the first step in troubleshooting any Wi-Fi issue, and it's incredibly simple. We're talking about a good, old-fashioned reboot. Think of it as a mini-reset button for your entire network.
- Unplug Your Router: Unplug your router and modem from the power outlet.
- Wait a Minute: Give them a good 60 seconds (or longer, if you like). This gives them time to fully discharge.
- Plug Everything Back In: Plug the modem back in first, wait for it to connect, and then plug the router back in. Wait for both to fully boot up before you try connecting.
Believe me, you’d be amazed at the number of times this tiny task solves the issue.
4. Channel Surfing: Finding the Best Wi-Fi Channel
Imagine your Wi-Fi signals as radio stations. If everyone is broadcasting on the same channel, it’s like trying to listen to a conversation at a crowded party – things can get muddled. Your router broadcasts on a specific channel, and other devices can cause interference.
- Access Your Router's Settings: Open your web browser and type your router's IP address into the address bar (often 192.168.1.1 or 192.168.0.1). You'll need your router's username and password to log in.
- Find the Wi-Fi Channel Settings: Look for a setting related to "Wireless," "Wi-Fi," or "Channel."
- Switch Channels: Experiment with different channels. Try channels 1, 6, and 11, as these are generally less congested. Some routers have an "Auto" setting, which can select the best channel automatically.
You might need to do some trial and error, but this can significantly improve your connection.
5. Interference Fighters: Shielding Your Wi-Fi Signal
Think about your Wi-Fi signal like a delicate plant. You want to protect it from the wind, sun, and other disruptive elements. Similarly, your Wi-Fi signal is susceptible to interference. Let's put on our protective gear:
- Microwaves and Cordless Phones: Keep your router away from microwaves and cordless phones, as they can interfere with Wi-Fi signals.
- Physical Obstructions: Walls, especially thick ones, can weaken your signal. Try to position your router in a central location with fewer obstructions.
- Other Wireless Devices: Devices like Bluetooth speakers or other Wi-Fi networks can also cause interference.
6. Bandwidth Bandits: Identifying Resource-Hogging Programs
Sometimes, the problem isn't your Wi-Fi itself, but what's using it. Some programs can constantly eat up your bandwidth in the background. We need to find those bandwidth bandits and stop them:
- Monitor Your Network Usage: Open Task Manager (press Ctrl + Shift + Esc). Go to the "Performance" tab and then click on the "Open Resource Monitor" link.
- Check Network Activity: In Resource Monitor, click the "Network" tab. You will see a list of programs and how much bandwidth they're using.
- Close Resource Hogs: If you see a program using a lot of bandwidth and you don't need it, close it!
It's like finding the person at the buffet who's taking all the crab legs. Let’s get them to share or leave!
7. Power Saving Shenanigans: Adjusting Power Options
Windows 7 has power-saving settings that might be throttling your Wi-Fi adapter. Think of it like putting your Wi-Fi on a strict diet. You want to make sure it's getting enough "energy" to perform properly.
- Open Power Options: Click the Start button, type "Power Options," and select the corresponding result.
- Change Power Plan Settings: Choose your current power plan (e.g., "Balanced") and click "Change plan settings."
- Advanced Settings: Click "Change advanced power settings."
- Wireless Adapter Settings: Expand the "Wireless Adapter Settings" section and then "Power Saving Mode."
- Set to Maximum Performance: Change the setting to "Maximum Performance."
8. Network Reset: A Fresh Start for Your Connection
If all else fails, it might be time for a network reset. This will reset your network settings to their default values, which can sometimes resolve stubborn Wi-Fi issues. This is like hitting the reset button on a toy – it's a drastic measure, but it can work.
- Open Command Prompt as Administrator: Click the Start button, type "cmd," right-click on "Command Prompt," and select "Run as administrator."
- Run the Netsh Commands: Type the following commands one by one, pressing Enter after each:
netsh winsock resetnetsh int ip resetipconfig /releaseipconfig /renew
- Reboot Your Computer: After running these commands, reboot your computer.
This is a powerful step, so make sure you understand what you're doing, or have a backup plan!
9. Security Check: Ensuring Your Network is Secure
While we're talking about Wi-Fi, it's a good idea to make sure your network is secure. Are you using a strong password?
- Check Your Router's Security Settings: Log in to your router's settings.
- Enable WPA2 or WPA3 Encryption: Make sure your network is using WPA2 or, preferably, WPA3 encryption for the best security.
- **Choose a
Windows was unable to connect wifi windows 7 Laptop and Desktop

By IT Magics Windows was unable to connect wifi windows 7 Laptop and Desktop by IT Magics
Windows 7 wifi connection problem Fix

By Being Selftech Windows 7 wifi connection problem Fix by Being Selftech
Wireless Network Connection Enabled but Not connected Fix Windows 7
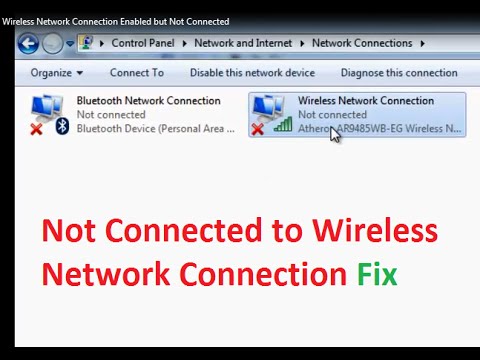
By troubleshooterrors Wireless Network Connection Enabled but Not connected Fix Windows 7 by troubleshooterrors

Title: Windows was unable to connect to wifi windows 7 laptop and dekstop
Channel: Ani Saja
Windows was unable to connect to wifi windows 7 laptop and dekstop by Ani Saja
Wifi On Laptop
Windows 7 WiFi Nightmare? FIX IT NOW!
Have you found yourself staring at that dreaded WiFi icon on your Windows 7 machine, only to be met with intermittent connectivity, excruciatingly slow speeds, or worse, complete WiFi failure? You are not alone. Many users have battled with WiFi woes on this still widely-used operating system. But fret no longer! We understand your frustration and have meticulously compiled a comprehensive guide to banish your wireless connectivity headaches. Let’s dive in and get your internet back up and running smoothly.
Understanding the Root of the Problem: Windows 7 WiFi Challenges
Before we jump into solutions, it’s crucial to grasp the underlying reasons behind the WiFi issues you might be facing. Windows 7, while a robust OS, has its quirks, especially when it comes to wireless networking. Some common culprits include outdated drivers, compatibility problems with newer routers, conflicts with other software, and even hardware limitations. Often, the issue isn't a singular problem but a combination of several factors. This detailed exploration will provide troubleshooting options with specific steps to diagnose and resolve your specific situation.
Troubleshooting Your Windows 7 Wireless Connection: A Step-by-Step Guide
We'll tackle your WiFi issues methodically, providing detailed instructions at each step. Begin by working through these troubleshooting strategies, and you will most likely restore your internet connection.
1. Driver Delights: Updating and Reinstalling Your Wireless Network Adapter Drivers
Outdated or corrupted network adapter drivers are frequently the root of WiFi troubles. Think of drivers as the translators between your hardware and your operating system. If the translation is off, connectivity suffers.
Step 1: Accessing Device Manager. Click the Start button and type "Device Manager" in the search box. Select "Device Manager" from the results. Alternatively, right-click "Computer" (or "This PC") on your desktop or in the Start menu and choose "Manage", then select "Device Manager" from the left-hand menu.
Step 2: Locating Your Network Adapter. In Device Manager, expand the "Network adapters" section. You'll see a list of installed network adapters, including your wireless adapter (it might be labeled "Wireless Network Adapter," "WiFi Adapter," or something similar).
Step 3: Updating the Driver. Right-click on your wireless adapter and select "Update driver software." Choose the option to "Search automatically for updated driver software." Windows will attempt to find and install the latest drivers. If successful, restart your computer and test your WiFi connection.
Step 4: Manual Driver Update (If automatic update fails). If the automatic update doesn't work, you'll need to manually update the driver. Go to the website of your computer manufacturer (e.g., HP, Dell, Lenovo) or the manufacturer of your wireless adapter (e.g., Intel, Broadcom, Realtek). Search for drivers for your specific model and Windows 7. Download the latest driver and manually install it. After installation, restart your computer.
Step 5: Reinstalling the Driver. If updating the driver doesn't resolve the issue, try reinstalling it. Right-click on the wireless adapter, select "Uninstall," and confirm. Restart your computer. Windows should automatically attempt to reinstall the driver upon startup. If not, you can follow the manual driver update steps above.
2. Router Reboot: Refreshing Your Internet Gateway
Sometimes, the answer is as simple as restarting your router. It's the equivalent of a computer reboot for your internet.
Step 1: Power Down. Unplug your router and modem (if they are separate devices) from the power outlet. Wait at least 30 seconds. This pause allows them to fully reset.
Step 2: Power Up. Plug in your modem first, wait for it to fully boot up (usually indicated by solid lights), and then plug in your router and wait until it's fully powered on.
Step 3: Test the Connection. After the router reboots, check your Windows 7 machine's WiFi connection.
3. Network Diagnostics: Letting Windows Diagnose the Problem
Windows 7 includes built-in troubleshooting tools that can often identify and fix common connection issues.
Step 1: Accessing the Troubleshooter. Right-click on the WiFi icon in your system tray (the area in the bottom-right corner of your screen).
Step 2: Run the Troubleshooter. Select "Troubleshoot problems." Windows will scan for issues and suggest solutions. Follow the on-screen prompts.
4. Changing Wireless Security Settings: Exploring Encryption Compatibility
Incompatible security settings between your Windows 7 machine and your router can prevent a successful WiFi connection.
Step 1: Access your Router's Configuration Page. Log in to your router's configuration page. This is usually done by typing your router's IP address (e.g., 192.168.1.1 or 192.168.0.1) into your web browser's address bar. You'll need your router's username and password (often found on a sticker on the router itself or in the router's documentation).
Step 2: Check the Wireless Security Settings. Navigate to the wireless security settings within your router's configuration. Look for options like "Security Mode" or "Encryption."
Step 3: Try Different Security Protocols.
WPA2-PSK (AES): This is the most secure and recommended option. Make sure your router and Windows 7 adapter support WPA2-PSK with AES encryption.
WPA-PSK (TKIP/AES): This is an older, less secure standard, but sometimes it can be helpful if your network adapter does not support WPA2.
WEP (Wired Equivalent Privacy): This is an outdated and highly insecure encryption standard. Avoid using it unless absolutely necessary.
Experiment with the available options. For example, if currently using WPA2-PSK, try WPA-PSK, ensuring your Windows 7 device also supports the same standard.
Step 4: Save Changes and Restart. Save the changes in the router settings and restart your router.
5. Power Management Settings for Your Wireless Adapter
Sometimes, Windows 7’s power-saving features can interfere with your wireless connection.
Step 1: Access Device Manager (Refer to Step 1 in "Driver Delights").
Step 2: Locate Your Wireless Adapter (Refer to Step 2 in "Driver Delights").
Step 3: Access Properties. Right-click on your wireless adapter and select "Properties."
Step 4: Power Management Tab. Click on the "Power Management" tab.
Step 5: Uncheck the Power Saving Option. Uncheck the box labeled "Allow the computer to turn off this device to save power."
Step 6: Apply and Test. Click "OK" and test your WiFi connection.
6. Firewall Interference: Allowing Network Access
Your Windows Firewall or third-party security software (e.g., antivirus programs) might be blocking your wireless connection.
Step 1: Check Windows Firewall.
Step 1a: Access Windows Firewall. Click the Start button and type "Windows Firewall" in the search box, then select "Windows Firewall" from the results.
Step 1b: Allow a Program or Feature through Windows Firewall. In the left pane, click "Allow a program or feature through Windows Firewall."
Step 1c: Verify Internet Connection Programs. Ensure that programs related to your internet connection (e.g., web browsers, file-sharing software, game clients) are allowed to communicate through the firewall. Look for entries such as “Google Chrome”, etc. If the box is not checked next to the program name, it is blocked by the firewall.
Step 2: Check Third-Party Security Software.
Consult the documentation for your security software (e.g., McAfee, Norton, Avast) and check its firewall settings. Ensure that your web browser and related applications are allowed to access the internet.
Temporarily disable your security software (if you trust the source and know the risks) to see if it resolves the WiFi issue. If it does, it means the software is the cause. Reconfigure the software to allow your internet traffic. Do not permanently disable the software without appropriate consideration.
7. IP Address Configuration: Ensuring the Correct Settings
Incorrect IP address settings can prevent your computer from connecting to the network.
Step 1: Open Network and Sharing Center. Click the Start button, then click “Control Panel.” In the search box, type "Network and Sharing Center", and select "Network and Sharing Center."
Step 2: Change Adapter Settings. In the left pane, click "Change adapter settings."
Step 3: Access Wireless Network Properties. Right-click on your wireless network connection and select "Properties."
Step 4: Configure IP Settings. Double-click "Internet Protocol Version 4 (TCP/IPv4)."
Step 5: Obtain IP Address Automatically. Select "Obtain an IP address automatically" and "Obtain DNS server address automatically." This is the preferred configuration, as it allows your
