how to convert laptop as wifi router

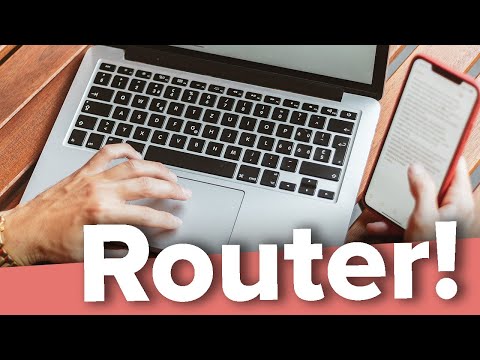
Title: Use Your Computer As WiFi Router Without Any Software
Channel: A2MTech
Use Your Computer As WiFi Router Without Any Software by A2MTech
how to use laptop as wifi router, how to use laptop as wifi hotspot, how to use laptop as wifi hotspot using command prompt, how to use laptop net as wifi hotspot, how to use my laptop as wifi hotspot, how to use laptop lan connection as wifi hotspot, how to turn laptop into wifi access point, can i use my laptop as a wifi router, how to make laptop as wifi router, can i use my laptop as a router
Laptop to WiFi Hotspot: The SHOCKINGLY Easy Trick You NEED!
Unleash Your Laptop's Hidden Power: Transform It Into a WiFi Hotspot Instantly!
Ever found yourself stranded? Your internet connection is down, but you desperately need to be online. You have data on your phone, but your laptop is WiFi-less. Frustrating, right? Well, hold onto your hats, because I'm about to unveil a secret. It's a shockingly easy trick that will change your life. You can transform your laptop into a WiFi hotspot, instantly!
The Unexpected Savior: Your Laptop's Secret Weapon
Let's face it. We rely on the internet. Whether for work, entertainment, or staying connected, it's essential. But what happens when your primary WiFi fails? Don't panic! Your laptop, surprisingly, holds the key. It can become a personal WiFi hotspot. This allows you to share your internet connection with other devices. Think of it as your digital Swiss Army knife. It's versatile and always ready for action.
Simple Steps, Maximum Impact: The Setup Simplified
Setting this up is deceptively simple. It's almost too good to be true. I walk you through this effortlessly. First, you need to access your laptop's settings. Where you go next depends on your operating system. For Windows users, this usually involves navigating to the network settings. Then, look for the "Mobile Hotspot" option. Toggle it "on." This is remarkably easy.
Now, you will want to customize the hotspot. Give it a name. Choose a strong password. Strong passwords are critical for security. They protect your connection from unwanted access. You can also set up the type of network you are sharing. Once you have configured the settings, you are ready to connect.
For Mac users, the process is equally straightforward. It's found in system preferences, then "Sharing." Select "Internet Sharing." Choose your internet connection to share. Pick the devices that will connect. Make sure you also create a password. Then switch it on. It's a piece of cake.
Connecting the Dots: Sharing Your Internet Magic
Once your hotspot is active, the real fun begins! Grab your phone, tablet, or any other WiFi-enabled device. Search for available WiFi networks. Your laptop's new network will appear. Select it, and enter the password that you created. Voila! You're connected. Indeed, your other devices are now surfing the web. Imagine the possibilities.
Now, you can work from anywhere. Stream videos, check emails, or just browse. This gives you freedom. It also gives you control. You can extend your internet reach.
Security First: Protecting Your Digital Fortress
While creating a hotspot is easy, security should remain a top priority. Always use a strong password. Avoid using easily guessable words or phrases. Update your laptop's operating system regularly. This will help patch security vulnerabilities. Also, be mindful of public WiFi networks. They can be riskier than your private, password-protected hotspot.
Think about this: only share your password with trusted individuals. Monitor your connections. If you notice any suspicious activity, immediately change your password. This is smart. You protect your data.
Beyond the Obvious: Exploring the Benefits
The benefits of this simple trick expand beyond emergency internet access. Think about traveling. You can create a personal network. This makes it easy to connect all your devices. You can also share files between your devices. It is convenient. It is powerful.
Consider temporary situations. Perhaps you are working remotely. You might need an extra connection. Or, maybe you can't get a stable signal. Creating a temporary hotspot can be a great solution.
Troubleshooting Triumphs: Common Hiccups and Fixes
Sometimes, things don't work perfectly. Don't worry. There are common troubleshooting steps. If your hotspot isn't working, first check your internet connection. Make sure your laptop is connected to the internet. Now, restart your device. It can often fix many problems.
Double-check your hotspot settings. Ensure the name and password are correct. Verify that your device is within range of the hotspot. Consider updating your network drivers. These updates can solve any compatibility problems.
Embracing the Power: The Takeaway
In conclusion, turning your laptop into a WiFi hotspot is a simple, yet powerful trick. It provides flexibility. It provides connectivity. It offers you peace of mind. It's a skill worth mastering. You now have a ready-made solution. Embrace it. Get connected.
Laptop WiFi Hotspot: The SHOCKINGLY Easy Trick You NEED to Know!Laptop to WiFi Hotspot: The SHOCKINGLY Easy Trick You NEED!
Alright, folks, let's be real. We've all been there. Stranded. Lost in a digital desert. Your Wi-Fi's gone rogue, your phone's data plan is teetering on the brink, and you desperately need internet access. Maybe you're trying to work from your favorite coffee shop, and their Wi-Fi is slower than a sloth on a Sunday. Or perhaps you're on a road trip, the kids are screaming for their favorite YouTube show, and that hotel Wi-Fi is a mythical beast you can't seem to tame. Sound familiar?
But guess what? You've got a secret weapon. A digital Swiss Army knife that lives right inside your laptop: a Wi-Fi hotspot. And setting it up? It's easier than making instant ramen (and arguably more rewarding!). We’re talking about transforming your laptop into a Wi-Fi powerhouse, freeing you from the shackles of unreliable networks and data-hogging woes. Let's dive in!
1. Understanding the Magic: What IS a Laptop Wi-Fi Hotspot?
Think of your laptop as a broadcast station. It takes your existing internet connection (usually from an Ethernet cable or your mobile data via a USB dongle or connected phone) and rebroadcasts it as a Wi-Fi signal. It's like creating your own mini-router, letting you connect other devices – your phone, tablet, another laptop, even a smart TV – to the internet. It's like having a personal Wi-Fi bubble wherever you go!
2. Why This Trick Matters: The Benefits Beyond Belief
Okay, you might be thinking, "Well, I just use my phone's hotspot." Fair enough. But sometimes, your laptop hotspot is the superior choice. Here’s why:
- Stronger Signal: Laptops often have more powerful Wi-Fi antennas than phones. This translates to a wider range and a more stable connection.
- Better Battery Life (Potentially!): Depending on your setup, using your laptop as a hotspot can be more battery-efficient than constantly draining your phone's battery.
- Ease of Use: Setting up a hotspot on your laptop is frequently simpler and offers more customization options than doing so on a phone, especially with the right software.
- (Let's be honest) Data Savings: Using your laptop's hotspot, if it's connected to a stable Ethernet or USB-tethered connection, prevents you from burning up your precious mobile data allowance.
It's a game-changer, truly.
3. Windows Warriors: The Built-In Method (Easy Peasy!)
If you're a Windows user, get ready to be amazed. Microsoft has made setting up a hotspot shockingly simple. Follow these steps:
- Step 1: Opening the Settings App: Click the Windows Start menu (the little Windows icon in the bottom left) and select the "Settings" icon (it looks like a gear).
- Step 2: Navigating to Network & Internet: In the Settings window, click on "Network & Internet."
- Step 3: Mobile Hotspot Magic: On the left-hand side menu, click on "Mobile Hotspot."
- Step 4: Activation and Customization: Toggle the "Share my internet connection with other devices" switch to "On." Then, click "Edit" to customize your hotspot's name (SSID) and password. Make them something you'll remember. Think of it like naming your digital "fortress."
- Step 5: Sharing from: You can select 'Share My Internet Connection From' to specify whether you want to share it through Ethernet, Wi-Fi, or your phone's data.
And boom! You're broadcasting Wi-Fi.
4. macOS Mavericks: Creating a Hotspot on Your Mac
Mac users not to worry, creating a Wi-Fi hotspot on your Apple device is just as straightforward. Here’s how:
- Step 1: Opening System Preferences: Click the Apple menu (the Apple logo in the top-left corner of your screen) and select "System Preferences."
- Step 2: Navigating to the Sharing Pane: Click on "Sharing."
- Step 3: Enabling Internet Sharing: In the left sidebar, check the box next to "Internet Sharing."
- Step 4: Choose the Connection: Select the internet connection you want to share. Usually, this will be your Ethernet connection, Wi-Fi, or a USB tether to your phone.
- Step 5: Configuring the Connection: Click on the dropdown menu next to "Share your connection from:" and choose the connection you wish to share, then at the bottom 'To computers using' box select 'Wi-Fi'.
- Step 6: Wi-Fi Options: Click the "Wi-Fi Options…" button. Enter a name for your hotspot (SSID) and create a password. Click "OK."
- Step 7: Start the Hotspot: Make sure the "Internet Sharing" checkbox is checked, and your Mac will start broadcasting Wi-Fi.
Easy, right?
5. USB Tethring: Supercharge Your Connection When Needed
Imagine your laptop is like a powerful truck, and your phone’s data is like the fuel. USB tethering is like directly hooking up a fuel line. It's often significantly faster and more stable than using your phone as a simple hotspot.
Here’s how:
- Connect Your Phone: Plug your phone into your laptop using a USB cable.
- Android: On most Android phones, go to Settings > Network & internet > Hotspot & tethering/Tethering, and enable "USB tethering." You might need to tap a notification to allow the connection on your phone.
- iPhone: On your iPhone, go to Settings > Personal Hotspot and turn it on. Make sure your iPhone is connected to the laptop via USB and your laptop will auto-detect it, and start using the connection.
- Laptop's Side: Your laptop should automatically connect to the internet using your phone's data. On windows, this will usually enable through the network and internet settings. On macOS it is configured via system preferences > network.
6. Troubleshooting Troubles: Got Wi-Fi Woes?
Sometimes, things go wrong. Don't panic! Here are some common fixes:
- No Internet Access: Double-check your laptop's internet connection. Is it connected to Wi-Fi or Ethernet? Try restarting your laptop and phone.
- Can't Connect: Make sure you're entering the correct password. Check the network name (SSID) on the connecting device.
- Slow Speeds: Wi-Fi is subject to interference. Try moving your laptop to a location with fewer obstructions. Also, consider the other devices connected. The more devices, the slower the speed.
- Not Seeing the Hotspot: Ensure Wi-Fi is enabled on both your laptop and the device you're trying to connect. Then make sure the Wi-Fi is broadcasting via your laptop's settings.
7. Security First: Protecting Your Digital Fortress
Just like you'd lock the doors to your house, you need to secure your hotspot. Use a strong password (at least 12 characters with a mix of letters, numbers, and symbols). Avoid using easily guessable information like your name or birthday. Change your password regularly. Consider using the WPA2 or WPA3 security protocols (they’re more secure than WEP).
8. Data Usage Awareness: Keeping Track of Your Bytes
Sharing your internet connection means sharing your data allowance. Keep an eye on your data usage to avoid unexpected overage charges, especially if you're using mobile data. On Windows, go to Settings > Network & Internet > Data Usage to see how much data different apps are consuming. On macOS, you can use the Activity Monitor (search for it in Spotlight) to monitor network activity.
9. Third-Party Software: Expanding Your Capabilities
While Windows and macOS have built-in hotspot features, third-party software can offer more control and features. Consider looking into tools like:
- Connectify Hotspot (Windows): Offers advanced features like a built-in ad blocker and the ability to share different types of connections (Wi-Fi, Ethernet, and even other hotspots).
- MyPublicWiFi (Windows): Another useful tool.
- Virtual Router Plus (Windows): Simple and easy to use.
- iTether (Mac): It's a paid solution that will help you create personal hotspots with an easy interface.
These apps can provide additional customization and control over your connections.
10. Ethernet Advantage: Level Up Your Hotspot Performance
Running an Ethernet cable from your laptop to the internet (if available) gives you a serious speed boost. It's like upgrading your Wi-Fi signal to warp speed. This is perfect for streaming video, playing online games, or downloading large files. It’s the gold standard for a laptop hotspot!
11. Battery Best Practices: Conserving Power While Broadcasting
Creating a hotspot can drain your laptop's battery faster. Here's how to conserve power:
- Plug In When Possible:
Use Your PC or Laptop as a Wireless Router
By Guiding Tech Use Your PC or Laptop as a Wireless Router by Guiding Tech
How to make any Windows computer or laptop as WiFi Repeater or WiFi Extender

By UniqueTutorials How to make any Windows computer or laptop as WiFi Repeater or WiFi Extender by UniqueTutorials
Turn old PC into a Powerful Router NETVN

By NETVN82 Turn old PC into a Powerful Router NETVN by NETVN82

Title: Ubah Router WiFi Anda menjadi Perangkat Penyimpanan Cloud atau NAS GRATIS
Channel: Torogi Pro
Ubah Router WiFi Anda menjadi Perangkat Penyimpanan Cloud atau NAS GRATIS by Torogi Pro
My Laptop Work
Here is the title: "The Ultimate Guide to Planning a Trip to Italy: From Rome to the Amalfi Coast"
The Ultimate Guide to Planning a Trip to Italy: From Rome to the Amalfi Coast
Italy. The very word conjures images of sun-drenched landscapes, ancient ruins, tantalizing aromas wafting from trattorias, and a vibrant culture that has captivated travelers for centuries. From the hallowed halls of the Colosseum to the breathtaking beauty of the Amalfi Coast, Italy offers an unparalleled travel experience. This guide serves as your comprehensive companion, meticulously crafted to transform your Italian dream into a seamless and unforgettable reality. We'll delve into every aspect of planning your Italian adventure, ensuring you're equipped with the knowledge and insights needed to navigate this enchanting country with confidence and ease.
Phase One: Crafting Your Italian Itinerary: A Foundation of Discovery
The cornerstone of any successful trip to Italy is a well-defined itinerary. This isn't simply a list of places to visit; it's a meticulously orchestrated plan that aligns your interests, time constraints, and budget. Begin by identifying what fuels your wanderlust. Are you drawn to art and history, the allure of culinary delights, the thrill of outdoor adventures, or perhaps a blend of all three? Your answer will shape your overall itinerary.
Target Zones and Duration: Consider the duration of your trip. A week will allow you to explore a single region, such as Tuscany or the Veneto. Ten days to two weeks opens up opportunities to combine regions, perhaps including Rome, Florence, and Venice. Longer trips allow for more in-depth exploration and the addition of destinations like the Amalfi Coast, Sicily, or the Italian Riviera.
Region-Specific Exploration:
Rome & Lazio: Immerse yourself in the grandeur of ancient Rome, exploring the Colosseum, Roman Forum, and Vatican City. Allow ample time for experiencing the local Roman lifestyle. Consider day trips to charming towns like Tivoli and Castel Gandolfo.
Tuscany: Embrace the rolling hills, vineyards, and medieval towns of Tuscany. Florence, Siena, and San Gimignano are essential stops. Indulge in wine tasting experiences in the Chianti region and savor the region's rustic charms.
Veneto: Discover the romantic canals of Venice, the Renaissance art of Verona, and the vibrant atmosphere of Padua. Consider visiting the Dolomites for stunning mountain scenery.
Amalfi Coast: Experience the dramatic beauty of the Amalfi Coast, a UNESCO World Heritage site. Explore the towns of Positano, Amalfi, and Ravello, and soak in the Mediterranean views.
Southern Italy: Explore the distinctive culture and history of Southern Italy, from the volcanic landscapes of Naples to the Greek heritage of Sicily. Embrace the relaxed pace of life, savor local specialties, and uncover the unique character of this region.
Accommodation Considerations: Decide on your preferred accommodation style. Boutique hotels provide a luxurious and localized experience. Authentic guesthouses (agriturismi) offer an intimate connection with local culture. Vacation rentals such as Airbnbs offer more flexibility and convenience, especially for longer stays. Consider the location of your accommodation in relation to the attractions you plan to visit and the ease of public transportation.
Travel Style and pace: Decide your travel style. Are you an explorer who wants to take in as much as possible, or are you someone who takes their time to appreciate the area? Allow a reasonable amount of time for travel between destinations, and factor in downtime for relaxation and improvisation. Avoid an overpacked schedule; the Italian experience is best enjoyed at a leisurely pace.
Phase Two: Logistics and Essential Planning: Paving the Way
Once you have established your itinerary, the following steps are crucial in preparing you for your journey.
Transportation Mastery: Italy offers a comprehensive transportation network.
Flights: Book your flights well in advance, particularly if traveling during peak season (May-September). Consider flying into a major airport like Rome Fiumicino (FCO) or Milan Malpensa (MXP) and out of a different airport to maximize your touring time.
Trains: High-speed trains (Frecciarossa, Frecciargento) connect major cities with speed and efficiency. The regional trains are more affordable and serve a wider network, but the trains may be slow. Reserve train tickets online in advance, using the Trenitalia website.
Cars: Renting a car is ideal for exploring rural areas and the Amalfi Coast. Be aware of driving regulations, particularly Limited Traffic Zones (ZTLs) that restrict access to city centers. Ensure that you have an International Driving Permit.
Ferries: Ferries are essential for reaching islands like Sicily and Sardinia, and for travel along the Amalfi Coast. Book your tickets in advance, especially during peak season.
Visa and Passport Protocols: Prior to your departure, confirm your passport's validity, it must be valid for at least six months beyond your planned return date. Review visa requirements based on your citizenship. Citizens of many countries do not need a visa for stays of up to 90 days; however, it is essential to verify the most current visa rules.
Budgeting Brilliance: Establish a realistic budget, incorporating expenses such as flights, lodging, transportation, food, activities, and souvenirs. Research prices for your chosen destinations and activities to develop precise cost estimates. Account for unexpected expenditures. Consider using a travel budget tracking app to monitor your expenses.
Health & Safety Preparation:
Travel Insurance: Invest in comprehensive travel insurance which covers medical emergencies, trip disruptions, and lost or stolen belongings.
Health Precautions: Consult your doctor about any necessary vaccinations or medications. Pack a basic first-aid kit with essential medications. Familiarize yourself with local health services.
Safety Awareness: Be aware of your surroundings and take precautions against petty theft, particularly in crowded tourist areas. Secure your passport and valuable possessions.
Phase Three: The Italian Experience: Cultural Immersion and Sensory Delights
Your planning is complete, and it's time to experience the magic of Italy. This is where your preparation transforms into a treasured trove of memories.
Embracing the Culture:
Language Basics: Learn a few essential Italian phrases. Locals admire the effort and are more likely to be helpful.
Etiquette: Familiarize yourself with Italian customs. Dress modestly when visiting churches and religious sites. Greet people with a "Buongiorno" (good morning), "Buonasera" (good evening), or "Ciao" (hello/goodbye), and a smile.
Mealtimes: Embrace the Italian dining culture. Meals can be a leisurely affair. Restaurants typically open for lunch from 12:30 pm to 3:00 pm and for dinner from 7:30 pm to 11:00 pm.
Art & History: Immerse yourself in Italy's rich artistic and historical heritage. Book tickets in advance for popular attractions like the Uffizi Gallery in Florence and the Borghese Gallery in Rome to avoid lengthy queues.
Culinary Adventures:
Regional Flavors: Italy is a culinary paradise. Each region boasts its unique specialties. From Tuscany's hearty ribollita soup to the Amalfi Coast's fresh seafood, delve into the local cuisine.
Food Markets: Explore local food markets to experience the authentic flavors of Italy. Florence's Mercato Centrale and Palermo's Ballarò Market are prime examples.
Cooking Classes: Consider taking a cooking class to learn Italian culinary techniques and discover the joy of preparing traditional dishes.
Gelato: Indulge in Italy's famous gelato. Sample different gelato flavors and discover your favorites.
Accommodation & Lifestyle:
Choosing The Right Hotel Consider the types of amenities that are available, such as free breakfast, Wi-Fi, and parking.
Local Experiences: Venture beyond the traditional tourist trail. Visit local markets, attend a festival, or participate in a local event to encounter the genuine Italian lifestyle.
Phase Four: Post-Trip Reflections and Future Travels
Your Italian adventure culminates in a tapestry of memories that you'll treasure for a lifetime.
Recalling the Journey:
Documenting Your Experiences: Keep a travel journal, take photos, and collect souvenirs to document your experiences.
Sharing Your Memories: Share your experiences with loved ones and consider writing a blog or posting on social media.
Planning for the next Italian escapade: Start planning for your next Italian adventure. Consider visiting regions you didn't visit on this trip, such as Puglia, Sardinia, or the Italian Riviera.
Concluding thoughts: Italy offers an unparalleled blend of history, culture, cuisine, and natural beauty. By carefully planning your trip and embracing the local culture, you can create an experience that will stay with you long after you return home. Embrace the Italian way of life, savor every moment, and create memories for a lifetime.
