how to connect laptop to chromecast without wifi

Title: Chromecast using Hotspot No Wi-Fi Router - One Phone - Updated Method
Channel: SamCambetis
Chromecast using Hotspot No Wi-Fi Router - One Phone - Updated Method by SamCambetis
how to connect chromecast to hotel wifi without laptop, can you connect to chromecast without wifi, how do i chromecast without wifi, cast to laptop without wifi, can you screen mirror to laptop without wifi
Laptop to Chromecast: Ditch the Wi-Fi! (Secret Trick Inside)
Stream Like a Pro: Ditching Wi-Fi for Flawless Chromecast Magic!
Ever wanted to enjoy your laptop’s content on the big screen, but frustrating Wi-Fi interruptions ruined the experience? You're not alone. Lag, buffering, and dropouts are infuriating. However, there’s a secret trick to bypass Wi-Fi and stream directly to your Chromecast. Prepare to be amazed.
The Wi-Fi Bottleneck: Why It Fails You
Let’s face it, Wi-Fi isn't always the most reliable. Therefore, think about all the factors that can interfere. Distance from your router affects your signal strength. Other devices compete for bandwidth, consequently slowing everything down. Walls, furniture, and even your microwave can be Wi-Fi's enemy. Consequently, your Chromecast might struggle to maintain a stable connection. That's where this game-changing solution comes in.
Direct Connection: The Chromecast Ethernet Advantage
Fortunately, there’s a better way. Indeed, you can connect your Chromecast directly to your router via an Ethernet connection. Consequently, you eliminate Wi-Fi interference. This is a game-changer. Ethernet offers a much more stable and faster connection. Therefore, it provides superior streaming performance.
What You'll Need: Gathering Your Arsenal
So, what do you require to make this magic happen? Firstly, you'll need a Chromecast (obviously!). Next, you'll need an Ethernet adapter. These adapters connect to your Chromecast’s power supply. They also have an Ethernet port. Lastly, you'll need an Ethernet cable. Consider the length needed based on your setup. You have everything you need to get started.
Setting Up for Success: Step-by-Step Guide
Alright, let's get started. Begin by unplugging your Chromecast from your TV. Now, plug the Ethernet adapter into the Chromecast’s power supply. Following this, securely connect the Ethernet cable to the adapter. Finally, connect the other end of the Ethernet cable to your router. Now, plug the Chromecast back into your TV. Turn on your TV and select the appropriate HDMI input. However, make sure your TV is plugged in.
Navigating Your Chromecast Settings: The Crucial Tweaks
Your setup isn’t quite done yet. Now, open the Google Home app on your smartphone or tablet. Make sure your device is connected to the same Wi-Fi network as your Chromecast. Find your Chromecast in the list of devices. Tap on it to access its settings. Scroll down and tap on “Device Info.” You should then see your Chromecast's settings. Look for the Ethernet connection status. It should say "connected" or similar. If not, troubleshoot your connection. Check the Ethernet cable and your router's settings. Therefore, verify all connections are secure. You should then be ready for flawless streaming.
The Streaming Revelation: Unleashing the Power
You’re now ready to experience lag-free streaming. Open your favorite streaming app on your laptop. Play your chosen content. Cast it to your Chromecast. Prepare for an enhanced viewing experience. Notice the difference immediately. The picture is clearer, and buffering is a thing of the past. Moreover, you can now relish your movies and shows without interruption.
Troubleshooting Tips: Solving Common Hiccups
Sometimes, things don't go perfectly at first. If you encounter issues, here are a few quick fixes. Firstly, ensure your router's Ethernet port is active. Furthermore, try a different Ethernet cable. Reboot your router and Chromecast. Reset your Chromecast to factory settings if needed. This should resolve most problems.
Beyond Streaming: Other Applications
This Ethernet connection method benefits more than just streaming video. Consider gaming. You can cast games directly to your TV. The more stable connection reduces lag in gaming. Furthermore, you can use it for screen mirroring. This is superb for presentations or sharing content with others.
The Final Verdict: Embrace the Wired Revolution
In conclusion, ditching Wi-Fi for your Chromecast transforms your viewing experience. It’s a simple, inexpensive upgrade. The Ethernet connection provides a stable, high-quality stream. Enjoy seamless playback and kiss buffering goodbye. Start streaming more productively today. So, enjoy the enhanced experience. The secret is now out.
HP Laptop WiFi Nightmare? FIX This NOW!Let's dive in!
Laptop to Chromecast: Ditch the Wi-Fi! (Secret Trick Inside)
You ever been there? You're all ready for movie night, popcorn's popped, the couch is calling your name, but the streaming gods are fickle. Your Wi-Fi decides to take a vacation, buffering like it’s personally offended by your entertainment choices. Sound familiar? We’ve all been there, pulling our hair out as a spinning wheel of doom taunts us from our screen. But guess what? There's a way to bypass that Wi-Fi misery and get your laptop's content straight to your Chromecast, even if your internet is playing hide-and-seek. Today, we're tearing down the walls of Wi-Fi dependency and exploring how to stream from your laptop to Chromecast directly!
1. The Wi-Fi Whisperer: Why Ditching Wi-Fi Matters
Think of your Wi-Fi as that friend who's always flaky. Sometimes they're amazing, giving you a smooth ride. Other times, they’re late, unreliable, and generally a pain. Wi-Fi connections can be affected by a myriad of things: distance, interference, the number of devices hogging the bandwidth, even your microwave (seriously!), which can turn your movie night into a buffering marathon. By directly connecting your laptop to your Chromecast, you're cutting out the middleman, removing a significant potential point of failure, and guaranteeing a (mostly) flawless streaming experience. This is especially crucial if you’re a gamer, where lag can be the difference between victory and a rage quit.
2. Anatomy of the Connection: How Chromecast Usually Works
Let's break down how Chromecast usually gets its groove on. Normally, your laptop sends content to your Wi-Fi router. The router then beams that content to your Chromecast, which in turn dances across your TV screen. It's a three-step shuffle, and each step is a potential bottleneck. When we ditch the Wi-Fi, we’re changing the dance partners!
3. The Secret Weapon: Turning Your Laptop into a Hotspot
Here's where the magic happens. The "secret trick" we're talking about involves turning your laptop into a Wi-Fi hotspot. Think of this as your laptop taking on the router's role. Instead of relying on your home Wi-Fi, your Chromecast will connect directly to your laptop's newly created hotspot. The content then flows directly from your laptop to the Chromecast, bypassing the often-temperamental home Wi-Fi.
4. Setting the Stage: What You’ll Need
Before we dive into the how-to, let’s gather our tools:
- A Laptop: Obviously. Make sure it has Wi-Fi capabilities!
- A Chromecast: The streaming star of our show.
- Your TV: To display all the lovely content.
- A Little Patience: We've all been there; technical glitches might sneak up on you!
5. Windows Users: Creating Your Laptop's Hotspot
Here’s the step-by-step for Windows users:
- Step 1: Open Settings: Click that Start menu and select the gear icon (Settings).
- Step 2: Network & Internet: Click on "Network & Internet".
- Step 3: Mobile Hotspot: Select "Mobile hotspot" from the left-hand menu.
- Step 4: Turn it On: Toggle "Share my Internet connection with other devices".
- Step 5: Edit Connection: Click "Edit" to name your hotspot and set a password. Choose something memorable but secure.
- Step 6: The Internet Connection: From the "Share my internet connection from" drop-down choose "Wi-Fi" if you're currently connected via Wi-Fi.
- Step 7: Connect the Chromecast: Go to your Chromecast settings and connect it to the Wi-Fi network you just created on your laptop.
6. Mac Mavericks: Hotspot Setup on Your MacBook
Mac users, follow these steps:
- Step 1: Open System Preferences: Click the Apple menu and select "System Preferences."
- Step 2: Sharing: Click on the "Sharing" icon.
- Step 3: Internet Sharing: In the left sidebar, check the box for "Internet Sharing."
- Step 4: Share Your Connection From: Select "Wi-Fi" or the connection you are using.
- Step 5: To Computers Using: Select “Wi-Fi.”
- Step 6: Wi-Fi Options: Click the "Wi-Fi Options…" button.
- Step 7: Name and Password: Give your hotspot a name and create a secure password.
- Step 8: Start Sharing: Check the "Internet Sharing" box again to start the hotspot.
- Step 9: Connect the Chromecast: Go to your Chromecast settings and connect it to the Wi-Fi network you just created on your laptop.
7. Connecting Chromecast to Your New Hotspot: The Final Link
Once your laptop hotspot is up and running:
- Grab Your Chromecast: Go to your TV and navigate to your Chromecast’s settings (you might need to use the Google Home app on your phone for this).
- Find the Wi-Fi Settings: Within your Chromecast's settings, look for the Wi-Fi network list.
- Select Your Hotspot: Choose the hotspot you created on your laptop (the one you named).
- Enter the Password: Enter the password you created.
- Chromecast Connects: Your Chromecast will then connect to your laptop’s Wi-Fi, and the streaming begins!
8. Playing Content: Casting from Your Laptop
Now for the fun part! Casting from your laptop:
- Open Your Content: Start playing whatever you want to watch – a movie, a YouTube video, anything!
- Find the Cast Icon: Look for the Chromecast icon (it looks like a TV with a Wi-Fi symbol radiating from the bottom left corner) in your browser (usually Chrome).
- Select Your Chromecast: Click the icon, and select your Chromecast from the list of available devices.
- Enjoy the Show! Your content should now be streaming directly to your TV!
9. Common Pitfalls and Troubleshooting
Let's anticipate some potential bumps in the road:
- No Hotspot Option: If you can't create a hotspot, double-check your laptop's Wi-Fi drivers are updated.
- Chromecast Not Finding the Hotspot: Make sure you've entered the hotspot's name and password correctly, and they match on both your laptop and the Chromecast.
- Buffering Still Happening: This might indicate a problem with your laptop's performance. Try closing unnecessary applications to free up resources.
- Slow Streaming: Check your laptop’s internet connection (if you're also using it for internet access via the same Wi-Fi – though that kind of defeats the purpose of ditching it!). If you're sourcing content from online (and not just your local hard drive), your source download speeds are the issue.
10. The Benefits: Why Bypassing Wi-Fi Rocks
So, what are the upsides of ditching Wi-Fi?
- Reliability: Less reliance on your often-unpredictable home Wi-Fi equals fewer interruptions.
- Faster Streaming (Potentially): By removing a potential bottleneck, your streaming might be noticeably smoother.
- Flexibility: Stream from anywhere, regardless of your Wi-Fi situation (think hotel rooms or camping!).
- Peace of Mind: That feeling of knowing your movie night is secure, even if your internet is acting up, is priceless.
11. Gaming on Chromecast: A New Arena
For gamers, this direct connection can be a game-changer (pun intended). Reduced lag means a more responsive experience, which is essential in fast-paced games. Think of it as upgrading your gaming setup on a budget!
12. Beyond Movies: Creative Uses
The direct connection has applications beyond streaming movies:
- Presentations: Run slick presentations from your laptop to a TV without internet dependence.
- Photo Sharing: Share photos and videos directly from your laptop without fuss or Wi-Fi hangups.
- Screen Mirroring: Show your laptop’s screen on the big screen for work or play.
13. Limitations to Know
Like any system, the direct connection has limitations:
- Internet Dependence (For Streaming Online Content): If streaming content from the internet, you’ll still need some internet connection. The laptop hotspot only connects the Chromecast, not provides the internet.
- Laptop Battery Life: Constantly running a hotspot can quickly drain your laptop's battery. Be sure to have your charger handy.
- The Need for a Second Device (Phone or Tablet): While you’re still likely to need your phone or tablet to control Chromecast settings.
14. Security Considerations: Keeping Your Hotspot Safe
- Strong Passwords: Always use strong, unique passwords for your hotspot.
- Keep Your Laptop Updated: Make sure your operating system and security software are up-to-date.
- Monitor Connected Devices: Most laptops allow
How to connect a computer and a projector with no cables- Send image wifi without cable. Chromecast
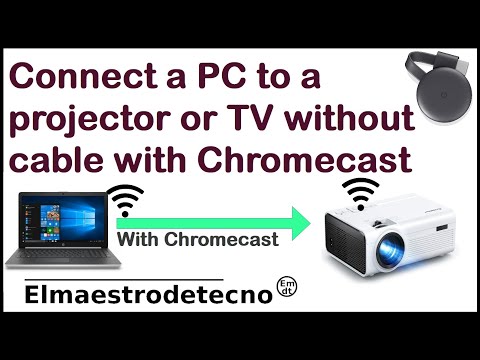
By elmaestrodetecno How to connect a computer and a projector with no cables- Send image wifi without cable. Chromecast by elmaestrodetecno
How to Fix Cast Device not Showing in Chrome
By usemybox How to Fix Cast Device not Showing in Chrome by usemybox
CHROMECAST SETUP & CONNECT TO MOBILE HOTSPOT NO WIFI ROUTER

By TampaTec CHROMECAST SETUP & CONNECT TO MOBILE HOTSPOT NO WIFI ROUTER by TampaTec

Title: Chromecast Without WiFi, Does It Work
Channel: Genie Guide
Chromecast Without WiFi, Does It Work by Genie Guide
Wifi Not Found
Laptop to Chromecast: Ditch the Wi-Fi! (Secret Trick Inside)
We've all been there. You're eager to share your laptop screen with your TV, perhaps to showcase a presentation, stream a movie, or simply browse the web on a larger display. Chromecast, Google's clever little streaming device, seems like the perfect solution. But then, the dreaded Wi-Fi gremlins strike. Buffering, dropouts, and lag become the unwelcome guests at your viewing party. But what if we told you there's a way to bypass the Wi-Fi altogether? To forge a direct, reliable connection between your laptop and Chromecast, ensuring a seamless viewing experience that's truly worthy of your time? Welcome to the future of screen mirroring, where frustrating Wi-Fi woes are a thing of the past.
The Wi-Fi Bottleneck: Understanding the Problem
Before we unveil the secret, let's understand why Wi-Fi can be such a pain point. Wi-Fi, while convenient, is susceptible to numerous factors that can impede its performance. Interference from other electronic devices (microwaves, Bluetooth speakers, even your neighbor's Wi-Fi router) can wreak havoc on the signal. Distance from your router is another critical factor; the further you are, the weaker the signal becomes. And finally, network congestion – too many devices simultaneously vying for bandwidth – can grind even the fastest Wi-Fi connections to a halt. These issues, amplified when streaming high-definition video, often result in the dreaded buffering wheel, frustration, and ultimately, a poor viewing experience. We have observed these issues ourselves, experiencing the same frustrating glitches.
The HDMI Advantage: A Direct Connection
The solution lies in the tried-and-true technology of HDMI. HDMI, or High-Definition Multimedia Interface, provides a direct, digital connection capable of transmitting both audio and video signals at incredible speeds. Unlike Wi-Fi, HDMI isn't susceptible to interference or bandwidth limitations. It's a dedicated pipeline, ensuring a pristine signal from your laptop to your TV. The key here is that Chromecast itself has a hardware limitation. It lacks a direct HDMI-in port, so we’re going to use a workaround, but the overall outcome is still better than Wi-Fi. This is our starting point for the secret trick.
Unveiling the Secret: The HDMI-to-Ethernet Adapter with Power Delivery
The secret weapon is an HDMI-to-Ethernet adapter that includes Power Delivery (PD). We'll explain why in more detail, but simply put, this ingenious little device allows you to create a wired connection between your laptop and your TV, bypassing Wi-Fi altogether, a significant advantage! Here’s how it works, step by step:
Step 1: Gather Your Supplies
- Your Laptop: Make sure your laptop has an HDMI output port.
- HDMI-to-Ethernet Adapter with Power Delivery (PD): This is the core of the solution. Choose a reputable brand to ensure reliability. Search for adapters specifically marketed as "HDMI-to-Ethernet with PD".
- Ethernet Cable: A standard Ethernet cable of sufficient length to connect your laptop to your TV or Chromecast. We recommend Cat 6 or higher for optimal performance.
- Chromecast: Ensure you have a Chromecast device.
- USB-C Power Adapter (if needed): If your HDMI-to-Ethernet adapter requires it, have a USB-C power adapter on hand. Review the product documentation!
- HDMI Cable: To be connected between your TV and the HDMI-to-network adapter.
Step 2: Wire Everything Correctly
- Connect the HDMI-to-Ethernet Adapter: The HDMI cable from your laptop plugs into the HDMI-to-Ethernet adapter.
- Connect the Ethernet Cable: Plug one end of the Ethernet cable into the Ethernet port on your HDMI-to-Ethernet adapter and the other end into the Ethernet port of your TV, or a suitable port on your Chromecast or other device.
- Power it up: If your HDMI-to-Ethernet adapter requires power, plug the USB-C power adapter into the adapter. Some adapter also support Power Delivery to the Chromecast. You might not want to plug your Chromecast into the USB-C of your TV, as this sometimes does not provide enough power.
- HDMI connection to your TV: Make sure you have an HDMI cable running from your HDMI-to-Ethernet adapter to your TV.
- Prepare your Chromecast: Some Chromecast devices have an Ethernet port. Locate the port and connect the Ethernet cable to it. Ensure your Chromecast is actively powered.
Step 3: Configure Your Laptop
- Connect to your network: Ensure your laptop is connected to your home internet network via Wi-Fi or Ethernet to install and use the Chrome browser.
- Open Chrome: Launch the Google Chrome browser on your laptop.
- Cast from Chrome: Start streaming from Chrome. Click the three vertical dots in the top right corner of your Chrome browser. Choose "Cast…" from the options.
- Select your display: A list of available devices will appear, including your Chromecast. Select your Chromecast. Note that no matter how you look at it, your Chromecast device is an HDMI device only.
- Choose your source: You can choose to "cast a tab" to mirror a single browser tab or "cast the desktop" to mirror your entire screen.
- Begin mirroring: Your laptop screen should now appear on your TV.
The Advantages of a Wired Connection
This method offers several significant advantages over using Wi-Fi:
- Uninterrupted Streaming: Experience smooth, buffer-free playback. The direct HDMI connection eliminates the lag and dropouts commonly associated with Wi-Fi.
- Superior Video Quality: Enjoy high-definition video without compression artifacts or quality degradation. The HDMI connection preserves the integrity of the video signal.
- Reduced Latency: Minimize the delay between your laptop's actions and what you see on your TV. This is especially beneficial for interactive applications like gaming.
- Increased Reliability: Eliminate the frustration of unstable Wi-Fi connections. The wired connection is far more reliable, ensuring a consistent viewing experience.
- Bypass Wi-Fi issues: You do not have to be concerned with issues such as Wi-Fi interference, signal strength, or network congestion.
Troubleshooting Common Problems
- No signal: Double-check all your connections, ensure the HDMI cable is securely plugged into both your laptop and the adapter, and double-check the power of the Chromecast.
- Poor video quality: Check the resolution settings on your laptop and ensure they're compatible with your TV. Try a different HDMI cable.
- Audio problems: Ensure the audio output on your laptop is set to HDMI. Check the volume levels on both your laptop and your TV. Also, confirm that your TV or Chromecast can handle the audio format being sent from your laptop.
Beyond the Basics: Advanced Uses
This setup opens up a world of possibilities beyond simple screen mirroring:
- Gaming: Experience your favorite games on the big screen with minimal lag. The direct HDMI connection provides the responsiveness needed for a smooth gaming experience.
- Presentations: Deliver professional-looking presentations with crisp visuals and seamless transitions.
- Multi-Monitor Setup: Extend your laptop's display to a second screen for enhanced productivity.
- Watch TV shows and movies: Enjoy TV shows and movies without the interruption of Wi-Fi.
Why the HDMI-to-Ethernet Adapter is the Key
Why does this specific adapter work so well? It’s because it cleverly bridges the gap between your laptop's HDMI output and your TV or Chromecast. By converting the HDMI signal to Ethernet, it effectively bypasses Wi-Fi, creating a reliable and high-performance connection. This also ensures that your TV or Chromecast receives a constant stream of data, ensuring a consistent level of video and audio quality. This is one of many secrets that will make you satisfied with the results.
Future-Proofing Your Setup
As technology evolves, consider these future-proofing tips:
- Upgrade Ethernet Cables: Invest in high-quality Ethernet cables (Cat 6 or higher) to ensure optimal bandwidth.
- The latest HDMI standards: Ensure your adapter and cables support the latest HDMI standards for the best possible picture quality.
- Update Firmware: Keep your Chromecast and other devices updated with the latest firmware for improved performance and compatibility.
Conclude with Confidence: Enjoy Seamless Screen Mirroring
By embracing the HDMI-to-Ethernet adapter strategy, you can finally ditch the Wi-Fi headaches and unlock the true potential of screen mirroring. Enjoy crisp, clear video, smooth playback, and a truly immersive viewing experience. Say goodbye to buffering and hello to the future of entertainment. With this secret trick in your arsenal, you can confidently share your laptop screen with your TV and enjoy a seamless and enjoyable viewing experience every time.
