laptop wifi power settings

Title: How to Improve Wi-Fi Signals in Windows Laptop Speedup Wi-Fi
Channel: MJ Tube
How to Improve Wi-Fi Signals in Windows Laptop Speedup Wi-Fi by MJ Tube
laptop wifi power settings
Laptop WiFi: Unleash the Hidden Power!
Dominate Your Digital Domain: Unlocking Your Laptop's WiFi Potential
Here we are, ready to dive into the often-overlooked powerhouse within your laptop: its WiFi. For many, WiFi is just… there. It connects. It works. But are you truly harnessing its full potential? I'm saying no! Let's embark on a journey to transform your laptop from a mere web-browsing device into a digital command center.
Decoding the Wireless Web: A Primer on WiFi's Inner Workings
First, let's understand the basics, shall we? WiFi, at its core, is a radio technology. In fact, it’s a magic portal of sorts. It transmits data over radio waves. Your laptop’s WiFi adapter acts as a receiver and transmitter. Consequently, it lets you connect to the internet wirelessly. Essentially, this is what links you to the digital world. However, the strength and efficiency of this connection depend.
Boosting Your Signal: Strategies for a Stronger Connection
So, how can you improve your WiFi performance? Several factors play a role. For a start, physical obstructions matter. Walls, furniture, and even appliances can interfere with the signal. Consequently, placing your laptop closer to your router is an obvious solution. But there's more. Elevate your router. Position it strategically, away from interference. Try moving it to a central location.
Optimizing Your Hardware: WiFi Adapter Upgrades and Configuration
Next, let's talk hardware. Some older laptops might have outdated WiFi adapters. Replacing yours can dramatically improve speed and reliability. Moreover, check your router's firmware. Outdated firmware can cause performance issues. Therefore, regular updates are crucial. Also, explore your laptop's WiFi settings. Configure them for optimal performance.
Channel Surfing: Finding the Best WiFi Frequency
Furthermore, frequency selection is critical. Most routers broadcast on 2.4 GHz and 5 GHz bands. Therefore, these bands offer different advantages. The 2.4 GHz band has a longer range. However, it's also more susceptible to interference. Conversely, the 5 GHz band offers faster speeds. However, its range is shorter. So, consider factors. Choose the band that best suits your needs and environment.
Security First: Protecting Your WiFi Network
Security is paramount. Strong passwords are essential. Encrypt your WiFi network with WPA2 or WPA3. Also, disable WPS (Wi-Fi Protected Setup). WPS is often vulnerable to attacks. Therefore, it is a good practice. Keep your router's firewall enabled. Finally, regularly check for router firmware updates.
Troubleshooting Common WiFi Issues
Let's address common problems. Is your connection slow? Consider the devices connected. Many devices can consume bandwidth at once. Restarting your router and modem often helps. Is your WiFi dropping frequently? Furthermore, check the signal strength. Interference could be the culprit. Try changing your router's channel. Additionally, you can reset your network adapter.
Beyond the Basics: Advanced WiFi Techniques
Now, let’s explore more advanced options. Can your router use beamforming? Beamforming helps direct the WiFi signal. It concentrates it toward your laptop. Also, consider QoS (Quality of Service). QoS prioritizes network traffic. Consequently, gaming or video streaming improves. Explore the possibilities. Furthermore, experiment with different settings.
The Future of WiFi: Trends and Technologies
Finally, let's look ahead. WiFi is constantly evolving. WiFi 6 and WiFi 6E offer significant improvements. They deliver faster speeds and greater efficiency. So, explore newer technologies if you can. They often provide significant benefits. Therefore, keep an eye on the latest developments. WiFi will continue to shape our digital lives.
Conclusion: Mastering Your Wireless World
So, you see? Your laptop’s WiFi is more than just a connection. It's a complex system. It’s a vital tool. By understanding its inner workings, you can optimize it. Consequently, you can enjoy a faster and more reliable internet experience. With a little effort, you can truly unlock the hidden power of your laptop’s WiFi. Therefore, take control of your digital destiny.
Connect Your Laptop to ATT WiFi: The Ultimate Guide (Solved!)Here's your optimized article on "Laptop WiFi: Unleash the Hidden Power!":
Laptop WiFi: Unleash the Hidden Power!
Ever feel like your laptop's Wi-Fi connection is as reliable as a politician's promise? One minute it's blazing fast, downloading everything you need in a blink; the next, it's buffering a cat video, leaving you staring blankly at the screen, muttering under your breath. We've all been there. But what if I told you that you weren't helpless? What if you could actually unlock the hidden potential of your laptop's Wi-Fi? Buckle up, because we're about to dive deep into the often-overlooked world of wireless networking and transform your frustrating connection into a high-speed lifeline.
1. The Wi-Fi Whisperer: Why Understanding Matters
Before we start tweaking settings and diagnosing problems, let's get on the same page. Think of your Wi-Fi as a highway for data. Your laptop is a car, and the router is the on-ramp. The stronger the signal (the wider the road), the faster you can travel. Different Wi-Fi standards (like 802.11a/b/g/n/ac/ax) are like different generations of cars – each getting faster and more efficient. Understanding these basics gives you the power to troubleshoot. It's like knowing the difference between a flat tire and a broken engine.
2. The Router's Role: Your Wi-Fi's Gatekeeper
Your router is the central hub that dishes out internet access. It’s the traffic controller, deciding who gets bandwidth and when. Its placement, age, and even the number of devices connected to it can significantly affect your Wi-Fi performance. Remember the good old days when your router was tucked away behind the sofa? Not ideal. Think of it like a radio transmitter; it needs a clear line of sight and minimal interference to transmit the signal effectively.
3. Location, Location, Location: Optimizing Router Placement
Just like choosing a home, the location of your router is paramount. Walls, especially those made of brick or concrete, are like kryptonite to Wi-Fi signals. Place your router in a central, elevated, and open location. Think of it like a lighthouse: the higher and more unobstructed it is, the further its light (Wi-Fi signal) will reach. Experiment with different spots and test the signal strength with a Wi-Fi analyzer app on your smartphone. This is essential.
4. Signal Strength Showdown: Identifying Weak Spots
Not all signals are created equal. Sometimes the problem isn't your router, but the distance or the obstacles between it and your laptop. Run a Wi-Fi analyzer app or use your laptop's built-in Wi-Fi diagnostic tools (search for "Wi-Fi settings" in your operating system) to identify areas with weak signals. If you consistently experience slow speeds in a particular room, you know where to focus your efforts.
5. Channel Surfing: Finding the Least Congested Lane on the Wi-Fi Highway
Routers operate on specific channels, like radio stations. If multiple routers in your neighborhood are using the same channel, it can lead to congestion, slowing your connection. Most routers automatically select a channel, but you can manually change it in your router's settings. Find the least crowded channel using a Wi-Fi analyzer. It's like switching lanes on the highway to avoid traffic.
6. The Hardware Hustle: Upgrading Your Router and Adapter
Sometimes, technology outgrows itself. An old router can be a significant bottleneck to your Wi-Fi speed. Modern routers, especially those supporting the latest Wi-Fi standards (like Wi-Fi 6 or Wi-Fi 6E), offer improved performance and range. Similarly, your laptop's Wi-Fi adapter might be outdated. Check its specifications and consider upgrading it to a newer model. It’s like replacing the engine in your car for a boost of power.
7. The Bandwidth Battle: 2.4 GHz vs. 5 GHz
Routers broadcast signals on two main frequency bands: 2.4 GHz and 5 GHz. The 2.4 GHz band offers wider range but is more prone to interference. The 5 GHz band offers faster speeds but has a shorter range. Think of it like this: 2.4 GHz is a wide, crowded road good for longer distances, while 5 GHz is a faster, less congested highway for closer destinations. Experiment with switching between them.
8. Security First: Securing Your Wireless Network
Never underestimate the importance of security! An unsecured Wi-Fi network is like leaving your front door wide open. Make sure your router is using a strong password and WPA2 or WPA3 encryption. This prevents unauthorized access to your network and protects your data. Change it frequently, and don't use obvious passwords!
9. Speed Test Smackdown: Monitoring Your Connection
How do you know if your changes are making a difference? Regularly run speed tests (e.g., using websites like Speedtest.net) both before and after making adjustments. This will give you concrete data on your download and upload speeds, allowing you to track your progress and identify the best settings for your setup. It’s like checking the speedometer of your car.
10. The Great Disconnect: Troubleshooting Common Wi-Fi Problems
Wi-Fi issues can range from simple to complex. Start with the basics: restart your router and laptop. Ensure your laptop's Wi-Fi is turned on. Check for driver updates for your Wi-Fi adapter. If all else fails, try resetting your router to its factory settings. This is like rebooting your entire system.
11. The Interference Inferno: Minimizing Wireless Clutter
Microwaves, Bluetooth devices, and even certain appliances can interfere with your Wi-Fi signal. Try to minimize the proximity of these devices to your router and laptop. Keep electronics away from your router to reduce issues. It's like cleaning the air to breathe easily.
12. Prioritizing Performance: Quality of Service (QoS) Settings
Many routers offer Quality of Service (QoS) settings. These allow you to prioritize certain types of network traffic. For example, you can prioritize video streaming or online gaming to ensure a smoother experience. This is like giving priority to emergency vehicles on the highway.
13. Extending Your Reach: Wi-Fi Extenders and Mesh Networks
If your Wi-Fi signal doesn't reach every corner of your home, consider a Wi-Fi extender or a mesh network. Extenders amplify your existing Wi-Fi signal, while mesh networks create a network of access points that work together to provide seamless coverage. It’s like adding extra lanes to your Wi-Fi highway through your house.
14. The Laptop's Secret Weapon: Optimizing Laptop Power Settings
Believe it or not, your laptop's power settings can impact your Wi-Fi performance. In Windows, you can go to "Power & Sleep settings" and ensure you're set to "Best performance" or change the settings. In macOS, you can find the same settings under "Energy Saver." It’s like making sure your car is running at full throttle.
15. The Future of Flight: Exploring the Latest Wi-Fi Technologies
The world of Wi-Fi is constantly evolving. Stay up-to-date with the latest advancements, such as Wi-Fi 6E and Wi-Fi 7, which offer even faster speeds and improved performance. Keeping an eye on emerging technologies means you don’t get left behind.
Closing:
Unleashing the hidden power of your laptop's Wi-Fi is not a one-time fix. It’s an ongoing process of understanding, tweaking, and maintaining your network. By following these tips and experimenting with your settings, you can transform your frustrating connection into a lightning-fast, reliable lifeline. So, go forth, become the Wi-Fi whisperer, and enjoy the speed and reliability you deserve! Happy browsing, streaming, and connecting! Let's unlock the power of Wi-Fi together!
FAQs:
1. My Wi-Fi keeps dropping. What should I do?
- Restart your router and laptop.
- Check for driver updates for your Wi-Fi adapter.
- Move your router to a more central and open location.
- Minimize interference from other electronic devices.
- Consider upgrading your router or Wi-Fi adapter.
2. Why is my Wi-Fi slow, even though my internet plan is fast?
- The router may be outdated.
- There might be too many devices connected simultaneously.
- Your router's placement might be poor.
- There may be interference from other devices.
- You could be connected to the 2.4 GHz band, which can be congested.
- Run a speed test to check.
3. How can I improve the Wi-Fi signal strength in a specific room?
- Relocate the router if possible.
- Use a Wi-Fi extender or mesh network.
- Ensure there are no physical obstructions blocking the signal.
- Try changing the channel your router is using.
4. What is the difference between 2.4 GHz and 5 GHz?
- 2.4 GHz has a longer range but slower speeds and is prone to interference.
- 5 GHz has a shorter range but faster speeds and less interference.
**5. Is it safe
Unlock Your Laptop's Hidden Hotspot: Free WiFi Anywhere!Wireless Adapter Settings Missing in Advanced Power Settings under Power Options in Windows 10 & 11

By Iviewgle Wireless Adapter Settings Missing in Advanced Power Settings under Power Options in Windows 10 & 11 by Iviewgle
Make Your Laptop's Wifi Signal Faster On Windows 1087 Tutorial

By MDTechVideos Make Your Laptop's Wifi Signal Faster On Windows 1087 Tutorial by MDTechVideos
WiFi disconnects frequently Windows 11 Easy fix

By The Geek Page WiFi disconnects frequently Windows 11 Easy fix by The Geek Page
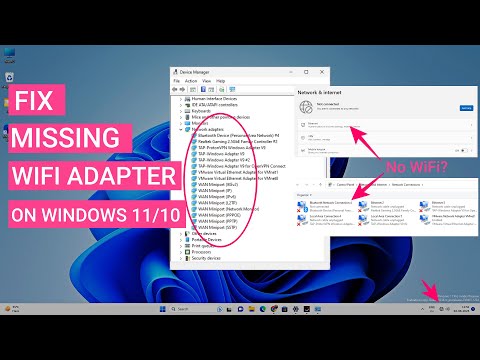
Title: Fix WiFi Adapter Missing In Windows 1110 Get Back Wireless Adapter
Channel: Sandeep Singh
Fix WiFi Adapter Missing In Windows 1110 Get Back Wireless Adapter by Sandeep Singh
Wifi On Laptop Phone
The Ultimate Guide to Mastering the Art of Sourdough: From Starter to Sublime Crust
For centuries, the allure of sourdough bread has captivated bakers and food enthusiasts alike. Its naturally leavened character, producing a delightfully tangy flavor and complex texture, sets it apart from its commercially produced counterparts. This guide provides a comprehensive exploration of sourdough baking, guiding you from the inception of your own starter to the perfect loaf, guaranteed to impress. We'll delve into the intricacies of the process, offering detailed instructions and invaluable tips to elevate your bread-making skills.
Cultivating Your Sourdough Starter: The Foundation of Flavor
The heart and soul of any exceptional sourdough loaf lie in its starter, a living culture of wild yeasts and beneficial bacteria. The process of creating a starter is a journey of patience and observation, yielding a unique blend of microorganisms that dictate the bread's character.
Week One: The Genesis of Life. Begin by combining equal parts, say 50 grams each, of whole wheat flour (the unrefined qualities will assist the starter's fermentation) and unchlorinated water in a clean jar. Stir thoroughly to ensure all flour is hydrated. Cover loosely with a lid or plastic wrap, allowing for the passage of air. Position the jar in a warm (around 70-75°F/21-24°C) and draft-free environment. Over the next few days, you'll observe the initial stages of activity. Bubbles may begin to appear, indicating the development of microbial life. Discard half of the mixture and feed it daily, adding a fresh 50 grams of flour and 50 grams of water. This consistent feeding provides nourishment for the growing culture and helps regulate its activity.
Week Two: Embracing Activity. You'll start witnessing a more pronounced transformation. The starter will likely double in size after feeding, and the aroma will shift, developing a subtle tang, a sign of fermentation. Continue discarding half and feeding daily. Note the activity, any patterns, and keep observing. A good starter will have a pleasant, slightly sour smell, and a bubbly, airy texture.
Week Three and Beyond: The Flourishing Culture. After two weeks, your starter should be nearing maturity. The rise and fall cycle will become more consistent. The aroma will evolve further, exhibiting even more pronounced tang. Observe whether the starter is doubling in size within 4-8 hours after feeding. At this stage, you can begin baking. Continue feeding regularly. The frequency of feedings will depend on the temperature and how often you bake.
- Troubleshooting: If the starter isn't rising, ensure you're using fresh flour and unchlorinated water. Adjust the feeding ratio if necessary. If mold appears, discard the starter and start anew.
Selecting Your Flour: The Key to Texture and Flavor
The choice of flour significantly impacts the final results, contributing to both the texture and the flavor profile of your sourdough bread. Consider these factors when selecting flour:
- Type of Flour: Whole wheat flour offers the most robust flavor and provides vital nutrients for the starter. All-purpose flour, though less flavorful, produces a lighter crumb. Bread flour, with its high protein content, creates a chewier, more structured loaf. Experiment with different varieties and blends to achieve your desired texture and flavor.
- Protein Content: Higher protein content means more gluten development, resulting in a chewier bread. Bread flour typically contains 12-14% protein, while all-purpose flour contains around 10-12%.
- Milling Process: Stone-ground flours retain more of the bran and germ, enhancing the flavor and nutritional value, albeit at the expense of a slightly coarser texture.
Crafting the Perfect Sourdough Dough: A Symphony of the Ingredients
Once your starter is active and ready, you can prepare your dough. The process involves combining the starter with flour, water, and salt.
- The Autolyse Stage: Unleashing the Potential. In a large bowl, combine the flour and water. Mix just until the flour is hydrated. Cover and let rest for 30 minutes to an hour. This process, called autolyse, allows the flour to fully hydrate, resulting in improved gluten development and a more extensible dough.
- Incorporating the Starter: Add the active starter to the autolysed dough. Mix thoroughly with your hands or a sturdy spatula to incorporate the starter evenly.
- The Role of Salt: Add the salt. Salt helps regulate the fermentation process, strengthens the gluten structure, and enhances the flavor.
- Bulk Fermentation: A Period of Transformation. After incorporating all the ingredients, begin the bulk fermentation. This is a critical stage. The dough will rise and build flavor. Cover the bowl and let the dough ferment at room temperature. During this time, the yeasts release carbon dioxide, causing the dough to rise, and the bacteria produce acids, imparting the characteristic tang.
- Folding: Developing Strength. During bulk fermentation, fold the dough every 30-60 minutes for the first few hours. This helps develop strength and redistribute the gases produced by the yeast. Wet your hands to prevent sticking, grip one section of the dough, stretch it upwards, and fold it over onto itself. Repeat this process a few times around the bowl.
- Monitoring the Rise: The duration of bulk fermentation depends on the temperature. The dough is ready when it has increased in volume by roughly 50% and has developed bubbles and a slightly jiggly texture.
- Shaping the Dough: Once the bulk fermentation is complete, gently turn the dough onto a lightly floured surface. Gently shape the dough into your desired form.
Baking Your Sourdough Masterpiece: Achieving the Crust and Crumb
The baking process is where all the components converge to create a superb loaf of sourdough bread.
- Preheating: Preheat your oven to 450-500°F (232-260°C) with your Dutch oven or baking stone inside. This ensures a hot oven and a well-developed crust.
- Transferring the Dough: Carefully remove the hot Dutch oven or baking stone from the oven (use oven mitts!). Gently place the shaped loaf into the Dutch oven or onto the hot baking stone. If using a baking stone, the dough must be carefully transferred.
- Scoring the Dough: Before baking, use a sharp knife or lame to score the top of the loaf. Scoring allows the bread to expand freely during baking and creates beautiful patterns.
- Baking with Steam (Dutch Oven Method): Cover the Dutch oven and bake for 20-25 minutes. The trapped steam creates a crisp, crackling crust. Remove the lid and continue baking for another 20-30 minutes, or until the crust is deeply golden brown and the internal temperature reaches 200-210°F (93-99°C).
- Baking with Steam (Baking Stone Method): If using a baking stone, generate steam by placing a pan of water on the bottom rack of your oven. Bake for 20-25 minutes, then remove the water pan. Bakes for an additional 20-30 minutes.
- Cooling: Once baked, transfer the loaf to a wire rack and let it cool completely. Resist the temptation to cut into it immediately! Cooling allows the internal structure to set and prevents a gummy texture.
Troubleshooting Common Issues: Mastering the Nuances
Even experienced bakers encounter challenges. Here are some common issues and their solutions:
- Flat Loaf: Under-proofed dough can result in a flat loaf. Ensure the dough has risen sufficiently during bulk fermentation and proofing. Over-fermentation can also cause the dough to collapse.
- Dense Crumb: Under-mixing, insufficient gluten development, or using too little starter can lead to a dense crumb. Make sure to autolyse the flour and water, thoroughly incorporate the starter, and allow for adequate bulk fermentation.
- Sour Flavor: The level of sourness depends on the starter's acidity and fermentation time. Experiment with different fermentation times and feeding schedules to achieve your desired acidity.
- Poor Crust: Insufficient oven temperature or lack of enough steam can produce a pale crust. Ensure your oven is preheated to the correct temperature, and bake with steam for the first part of the baking process.
Elevating Your Sourdough: Beyond the Basics
Once you feel comfortable with the fundamentals, there are many avenues to explore:
- Experiment with Different Flour Combinations: Blend various flours to fine-tune the flavor profile and texture of your bread. Try adding rye, spelt, or even ancient grains for unique characteristics.
- Incorporate Add-ins: Enhance the flavor and texture by adding ingredients like seeds, nuts, dried fruits, herbs, or cheeses.
- Master Shaping Techniques: Practice various shaping techniques to create different loaf styles and improve your bread's appearance.
- Bake Artisan Breads: Explore more advanced techniques, and experiment with more complex formulas.
Conclusion: A Lifelong Journey of Bread-Making
Baking sourdough bread is a rewarding endeavor that requires patience, practice, and a deep understanding of the ingredients and processes involved. This guide provides a foundation for your sourdough journey, offering detailed instructions and insightful tips to help you create exceptional loaves. Embrace the process, experiment with different techniques, and enjoy the satisfaction of crafting your own delicious, naturally leavened bread, a testament to your dedication and skill. Sourdough is
