how to tether wifi from laptop

Title: How To Share Internet From Laptop To Mobile Via WiFi in Windows 11
Channel: EasyTechGeek
How To Share Internet From Laptop To Mobile Via WiFi in Windows 11 by EasyTechGeek
how to tether wifi from laptop to phone, how to tether wifi from laptop, how to share wifi from laptop through ethernet, how to share wifi from laptop windows 11, how to tether internet from laptop, how to tether wifi from laptop to pc, how to share internet from laptop using lan cable, how to share internet from laptop via bluetooth, how to share internet from laptop windows 7, how to share internet from laptop via usb
Unlock Your Phone's WiFi Freedom: The Laptop Tethering Trick!
Unleash Seamless Connectivity: Master the Laptop Tethering Marvel!
Ever felt tethered by the limitations of spotty public WiFi? Indeed, we've all been there. Imagine a world where your laptop’s online access mirrors the unwavering reliability of your smartphone's data plan. This is where the magic of laptop tethering emerges.
The Secret Weapon: Your Smartphone as a WiFi Powerhouse
Forget those overpriced, slow hotel connections. Your smartphone, your constant companion, holds a secret. Interestingly, it’s a portable WiFi hotspot, ready to share its internet connection. Consequently, your laptop can tap into this readily available resource. The procedure is surprisingly straightforward, opening up a world of possibilities. So, you can stream movies, answer emails, or work on important projects.
Choosing Your Tethering Superpower: USB, WiFi, or Bluetooth
The path to tethering freedom branches in several directions. Primarily, you can pick from USB tethering, WiFi hotspot setup or Bluetooth tethering. Each offering unique advantages. Consider your situation closely. Ultimately, the best choice will depend on your needs.
USB Tethering: The Solid Connection
This method offers speed and stability. Connect your phone to your laptop with a USB cable. Subsequently, enable tethering in your phone's settings. This usually involves navigating to the "Network & internet" section. Then, it's just a matter of selecting "Tethering" or "Hotspot". Therefore, your laptop will recognize the phone as a network connection.
Pro Tip: USB tethering provides a wired connection. As a result, it's less susceptible to dropouts.
WiFi Hotspot: Wireless Liberation
This is the most flexible option. However, it might consume more battery. Activate your phone's WiFi hotspot feature. Then, on your laptop, find the network name. Enter the password, and connect. This option gives you wireless access. Therefore, you can work from anywhere in range.
Security Alert: Always protect your hotspot with a strong password.
Bluetooth Tethering: The Energy-Efficient Approach
Bluetooth is a decent option for basic tasks. It consumes minimal battery power. Pairing your phone and laptop via Bluetooth is essential. Next, find the tethering setting on your device, likely under your Bluetooth settings. Enable it.
Bear in Mind: Bluetooth's speed is slower than USB or WiFi.
Setting Up Your Personal WiFi Oasis: Step-by-Step Guide
Regardless of your chosen method, the initial setup is remarkably similar. First, find the relevant settings in your phone. Then follow the steps carefully. Let's break it down further.
- Access Your Phone's Settings: Locate your "Settings" app. Often, it's a gear icon.
- Navigate to Network & Internet: Search for a section labeled "Network & internet", "Connections", or similar.
- Find the Tethering Option: Select "Tethering", "Hotspot & tethering", or something similar.
- Choose Your Method: Select "USB tethering," "WiFi hotspot", or "Bluetooth tethering."
- Enable the Connection: Turn the feature on.
- Connect on Your Laptop: Your laptop will now connect to the tethered network.
Troubleshooting Common Hiccups
Every so often, snags appear. Do not be discouraged. Troubleshooting is easy, and solutions are available. Thus, you can swiftly resolve most connectivity troubles.
- Connection Issues: Verify your phone's internet connection. Ensure your phone has a data plan. Restart both devices.
- Password Problems: Double-check your WiFi hotspot password. Make sure you enter it correctly. Also, consider resetting it.
- Slow Speeds: Ensure sufficient cellular signal strength. Consider upgrading your data plan.
- Device Compatibility: Confirm that your phone and laptop support tethering. Update both devices.
Maximizing Your Tethering Experience
Tethering offers more than just basic internet access. You can enhance your experience with some clever tactics. Here's how to get the most out of your portable WiFi.
- Monitor Your Data Usage: Data can be exhausted rapidly. Keep track of your data consumption. Set data limits.
- Optimize Your Settings: Close unnecessary background applications. Additionally, consider lowering video streaming quality.
- Conserve Battery Life: Your phone’s battery will drain faster when acting as a hotspot. So, keep your phone plugged in when feasible.
The Verdict: Embracing Freedom and Flexibility
Laptop tethering is a game-changer. You regain control over your connectivity. Therefore, you're no longer reliant on unreliable public WiFi. Embrace the freedom to work, play, and connect. In conclusion, laptop tethering is a powerful tool!
WiFi Data Sharing: The Ultimate Laptop Trick You NEED to Know!Unlock Your Phone's WiFi Freedom: The Laptop Tethering Trick!
Hey there, fellow digital explorers! Ever been stuck in a Wi-Fi wasteland, desperate for an internet connection? We've all been there. That frustrating moment when your phone's data is dwindling, the signal's weak, and you just need to check that email, finish that work project, or stream your favorite show. Well, buckle up, because we're about to dive headfirst into the world of laptop tethering – a nifty trick that can liberate you from Wi-Fi woes and unlock the full potential of your phone's internet connection. Think of it as your trusty sidekick, turning your laptop into a Wi-Fi hotspot superhero!
1. The Great Wi-Fi Divide: Why Tethering Matters
Let's face it, we're addicted to the internet. It's woven into the fabric of our daily lives, like a comforting blanket on a chilly evening. From checking the news to connecting with loved ones, the internet is our portal to the world. But what happens when that portal suddenly slams shut? When Wi-Fi fails and data plans are on the brink of exhaustion? This is where tethering shines. It bridges the gap, providing a vital lifeline to the digital world. It's the difference between productivity and frustration, connection and isolation.
2. What Exactly is Laptop Tethering, Anyway?
Simply put, laptop tethering (or phone tethering to your laptop) is the process of using your phone's mobile data connection (4G, 5G, etc.) to provide internet access to your laptop. Imagine your phone as a tiny router, broadcasting its connection to your laptop. It’s like sharing a slice of your data pie. There are a few ways to do this, but we’ll break down the essentials to get you started. This means you can browse the web, send emails, and work on files even when you’re miles away from a Wi-Fi signal.
3. The Arsenal: What You'll Need for Tethering Success
Before we launch into the how-to, let's gather our supplies. Think of it as assembling your digital survival kit! You’ll need:
- Your Smartphone: (Android or iOS – both work perfectly!)
- Your Laptop: (Windows or macOS – again, this is a universal trick!)
- A USB cable: (The one that came with your phone, or any cable that fits!) OR
- Wi-Fi or Bluetooth: (For a wireless connection)
- An Active Data Plan: (Because, well, you're using your data!)
That’s it! No fancy equipment, no complicated software. Just a few everyday essentials, and you're on your way to Wi-Fi freedom.
4. USB Tethering: The Reliable Wired Connection
This is often the most stable and reliable method. Here's how it works:
- Connect: Plug your phone into your laptop using the USB cable.
- Settings: On your phone, go to your settings. This often involves searching for "Tethering" or "Mobile Hotspot."
- USB Tethering: Enable the "USB Tethering" option. The exact wording varies slightly depending on your phone's operating system, but it’s usually straightforward.
- Laptop Magic: Your laptop should automatically detect the connection. If not, a quick reboot might do the trick.
You'll now have internet access on your laptop via your phone’s data. Easy peasy, right?
5. Wi-Fi Hotspot Tethering: The Wireless Route
Want to go wireless? No problem! This turns your phone into a portable Wi-Fi hotspot.
- Settings: Again, dive into your phone's settings. Look for "Mobile Hotspot" or "Wi-Fi Hotspot."
- Activate: Enable the hotspot. You might need to create a password – make it secure!
- Connect: On your laptop, scan for available Wi-Fi networks and select your phone’s hotspot. Enter the password you created, and boom – connected!
This option is great for multiple devices, but be mindful that it can drain your phone’s battery faster.
6. Bluetooth Tethering: The Battery-Saving Option
Bluetooth tethering strikes a balance between stability and battery life. While it's often slower than USB or Wi-Fi, it's a great option if you’re trying to conserve power.
- Pair Up: Enable Bluetooth on both your phone and laptop and pair them.
- Settings: In your phone's Bluetooth settings, find the paired laptop and enable "Internet access" or a similar option.
- Laptop Ready: Your laptop should then connect to the internet via Bluetooth.
It's a tad slower, but it uses less energy than Wi-Fi tethering.
7. Android vs. iOS: The Tethering Showdown
The good news? Both Android and iOS phones support tethering using the methods we've discussed. The specific steps might look a little different based on your phone model and software version, but the core functionality remains the same. A quick search online for “[Your Phone Model] tethering” will help you find the exact instructions for your device.
8. Data Consumption: The Hungry Monster
Be aware of your data usage! Tethering can quickly consume your mobile data allowance. Streaming videos, downloading large files, and online gaming will eat up your data much faster than browsing. Always keep an eye on your data usage through your phone’s settings or your mobile carrier's app.
9. Speed and Performance: What to Expect
The speed of your tethered connection depends on several factors, including:
- Your phone's data speed: 4G, 5G, etc.
- Your mobile carrier’s signal strength: Weak signal = slow speeds.
- The number of devices connected: More devices = slower speeds.
- Distance between your devices: being in close proximity helps
Don't expect the same blazing-fast speeds as a fiber optic connection, but it should be perfectly adequate for browsing, email, and most work tasks.
10. Security First: Protecting Your Data
When using a Wi-Fi hotspot, security is crucial. Always:
- Use a strong password: Don't use something easily guessed.
- Keep your phone's software updated: Updates often include security patches.
- Be cautious of public Wi-Fi: Whenever is possible, tethering is safer than connecting directly to public Wi-Fi.
Think of your hotspot as a personal bubble, and always protect it!
11. Troubleshooting Troubles: When Things Go Wrong
Sometimes, things don't go according to plan. Here are a few common troubleshooting tips:
- Check your data plan: Make sure you haven't exceeded your data allowance.
- Restart your devices: A classic fix! Both your phone and laptop.
- Update drivers: For USB tethering, make sure your laptop's drivers are up to date.
- Contact your mobile carrier: If you're still having trouble, they can provide specific support.
Don’t get discouraged; a little troubleshooting usually gets the job done.
12. The Battery Factor: Managing Power Consumption
Tethering, especially using Wi-Fi, can drain your phone's battery. To conserve battery life:
- Plug in your phone: When possible, connect your phone to a charger.
- Disable background apps: Close apps you’re not using to prevent unnecessary data usage.
- Lower screen brightness: A brighter screen uses more power.
Think of it as a careful dance between connectivity and power!
13. Beyond Basic Tethering: Advanced Tips
- Use data-saving apps: Many apps can compress data to reduce usage.
- Monitor your data usage: Use your phone’s data usage settings to track your consumption.
- Consider a larger data plan: If you tether frequently, a larger data plan might be worth it.
Get creative and find what works best for your needs!
14. The Tethering Ethos: Responsible Connection
Tethering is a powerful tool, but it comes with responsibility. Be mindful of your data usage, respect your mobile carrier’s terms, and protect your privacy. It's all about using the internet responsibly.
15. The Future of Tethering: Where We're Headed
As technology evolves, so too will tethering. Expect even easier setup processes, faster speeds, and improved battery efficiency. The future is bright, and tethering will continue to evolve to meet our ever-growing need for internet access.
Wrapping Up: Your Personal Wi-Fi Fortress
And there you have it! A comprehensive guide to unlocking your phone's Wi-Fi freedom through laptop tethering. We've covered the basics, explored the different methods, and shared tips to get you started. Now go forth and conquer those Wi-Fi voids! Remember to use your new powers responsibly, and embrace the freedom of being connected, anytime, anywhere.
Frequently Asked Questions
1. Is tethering free?
Tethering itself is often "free" in the sense that you're not paying for a separate service. However, you are using your existing
WiFi Nightmare? Laptop Connection FIXED in 60 Seconds!How to set up network sharing in Windows 10 and share files, folders between computers.Easily
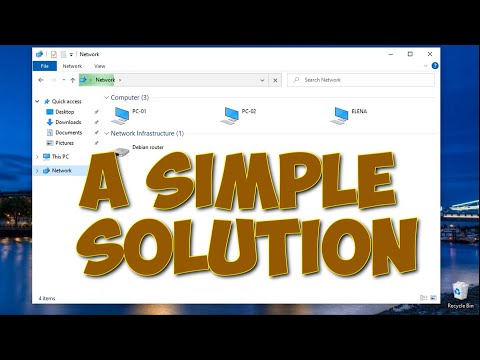
By ipMalik How to set up network sharing in Windows 10 and share files, folders between computers.Easily by ipMalik
How to Create Wifi Hotspot in Windows 10 Tutorial

By MDTechVideos How to Create Wifi Hotspot in Windows 10 Tutorial by MDTechVideos
Sharing Files Between Computers Wirelessly Solution for sharing folders on WIFI network

By FIXsage Sharing Files Between Computers Wirelessly Solution for sharing folders on WIFI network by FIXsage

Title: How to share a VPN Connection from Your Computer Make a VPN Hotspot
Channel: vpnMentor
How to share a VPN Connection from Your Computer Make a VPN Hotspot by vpnMentor
Working With Laptop
Here's your title: The Ultimate Guide to Brewing the Perfect Cup of Coffee at Home
The Ultimate Guide to Brewing the Perfect Cup of Coffee at Home
The aroma. The ritual. The taste. Coffee, for many, transcends mere beverage status; it's an experience, a daily communion, a fundamental element of the human experience. The pursuit of the perfect cup, a symphony of flavour and aroma, is a journey fraught with potential pitfalls – but ultimately, profoundly rewarding. We, as connoisseurs and dedicated home brewers, have dedicated ourselves to deciphering the secrets, honing the techniques, and ultimately, mastering the art of coffee brewing. This guide serves as your definitive companion, a detailed roadmap to unlocking the full potential of your beans and achieving coffee nirvana, right in your kitchen.
Understanding the Fundamentals: From Bean to Brew
The journey to exceptional coffee begins long before the first drop hits your cup. Let's start with the very foundation: the green bean. We'll navigate this vital journey of extracting coffee.
Selecting Your Beans: A World of Flavor
The origin story of your coffee is paramount. Consider this: a Brazilian Bourbon will offer a different flavour profile than an Ethiopian Yirgacheffe. The single best thing you can do to improve your coffee brewing is to start with great beans.
- Origin Matters: Explore beans from different regions, experimenting with African, South American, and Asian origins. Each terroir imparts unique flavour characteristics. Ethiopian beans often boast bright acidity and floral notes, while Sumatran coffees tend toward earthy, robust flavours.
- Roast Level: The roast profile significantly impacts the final taste. Light roasts retain more of the bean's original characteristics, offering brighter acidity and delicacy. Medium roasts strike a balance, while dark roasts develop bold, often bitter, flavours.
- Freshness is King: Always prioritize fresh-roasted coffee. Whole beans, ideally roasted within the past two weeks, are your best bet. Pre-ground coffee loses its aromatic compounds quickly. Date of roasting is crucial.
- Bean Storage: Store your beans in an airtight container, away from light, heat, and moisture. Avoid the refrigerator or freezer if possible, opening the container to add to the beans.
Grinding: The Gatekeeper of Flavor Extraction
Grinding is the indispensable process that unlocks the flavours locked within your beans. The grind size you choose is the most critical factor.
- The Burr Grinder Advantage: Invest in a burr grinder, which grinds beans evenly, a consistently sized particle is key. Blade grinders chop beans unevenly, leading to inconsistent extraction.
- Grind Size and Brew Method: The grind size must match your brewing method. French presses require a coarse grind, while espresso demands a fine, almost powdery, consistency.
- Experimentation is Key: Fine-tune your grind size to optimize flavour. Too coarse, and your coffee will be weak and under-extracted. Too fine, and it will be bitter and over-extracted.
Brewing Methods: A Coffee Lover's Arsenal
The brewing method is the next key step in creating the perfect coffee. Each allows you to unlock different aspects of the bean's potential.
The French Press: A Classic Choice
The classic immersion method, which delivers a full-bodied, rich cup.
- Preparation: Using a coarse grind, add coffee grounds to the French press.
- The Bloom: Pour a small amount of hot water (about twice the weight of your coffee) over the grounds. Allow it to bloom for 30 seconds. This releases trapped carbon dioxide.
- Immersion and Brewing: Pour the remaining water over the grounds, and gently stir. Allow the coffee to steep for 4 minutes.
- Plunge and Serve: Slowly plunge the filter to the bottom. Serve immediately.
Pour Over: Precision and Control
The pour-over method, such as a Hario V60, offers a meticulous and controlled brewing experience, resulting in a cleaner, brighter cup.
- The Setup: Place a paper filter in the pour-over device, and rinse it with hot water to eliminate paper taste and heat the device. Discard the rinse water.
- The Bloom: Add your ground coffee and pour a small amount of hot water to saturate the grounds. Allow it to bloom for 30-45 seconds.
- The Pour: Slowly pour the remaining water in a circular motion, ensuring all the grounds are saturated. Aim for a total brew time of 2.5-3 minutes.
- Enjoy the Brew: Remove the device, and enjoy the delicious and flavourful coffee.
The Aeropress: Versatile and Portable
The Aeropress, a remarkably versatile brewer, producing a concentrated coffee with significantly less bitterness than some methods.
- Preparation: Insert a filter into the cap of the Aeropress.
- The Grounds: Add your ground coffee, choosing a medium grind, and aim for the recommended coffee-to-water ratio.
- Immersion and Brewing: Place the Aeropress on a cup. Pour very hot water over the grounds until it has reached the desired level.
- Plunge and Serve: After 1-2 minutes, slowly press the plunger down. The total brew time, including bloom, should be around 90 seconds.
The Moka Pot: Italian Espresso at Home
The stovetop Moka pot, a device that delivers a concentrated, espresso-like coffee with a rich crema.
- Preparation: Fill the water chamber with water, and add coffee grounds to the filter basket.
- The Assembly: Screw the top chamber onto the base.
- Brewing on the Stove: Place the Moka pot on the stovetop over medium heat. Slowly, coffee will begin to fill the top chamber.
- Serve Immediately: Remove the Moka pot from the heat as soon as the bubbling stops or the coffee starts hissing.
Water Quality: The Unsung Hero
Water is the unsung hero of great coffee.
- Filtered Water: Always use filtered water. Tap water can contain chlorine and minerals that negatively impact the flavour.
- Temperature Control: Heat water to the recommended temperature for your brewing method. For most pour-over methods, 195-205°F (90-96°C) is ideal.
- Water-to-Coffee Ratio: Experiment with the water-to-coffee ratio. Begin with a ratio of 1:15 (1 gram of coffee to 15 grams of water) and adjust to your taste.
Troubleshooting Common Coffee Challenges
Here are some issues you may run into when brewing at home.
- Sour Coffee: Often caused by under-extraction. Try using a finer grind or increasing the brew time.
- Bitter Coffee: Usually the result of over-extraction. Use a coarser grind or reduce the brew time.
- Weak Coffee: The coffee is probably under-extracted. Use more coffee or a finer grind.
- Muddy Coffee: May be due to using a grind that is too fine, or a filter that is inadequate.
Beyond the Brew: Elevating Your Coffee Experience
The Perfect cup is more than the drink itself.
- Milk and Sugar: A Personal Touch: Experiment with different milk alternatives and sweeteners to customize your coffee.
- Coffee and Food: A Pairing Guide: Coffee pairs beautifully with many foods. Consider the nuances of various flavours.
- Cleaning and Maintenance: Keep Your Equipment Pristine: Regularly clean your brewing equipment to prevent buildup of stale coffee oils.
- Embrace the Experiment: Coffee brewing is a dynamic art. Try something new!
Conclusion: Your Coffee, Your Art
Brewing the perfect cup of coffee is a journey of discovery, a constant refinement of technique, and a celebration of the simple pleasures in life. With the knowledge we’ve shared, you are now equipped to elevate your home brewing experience. We encourage you to delve deeper, experiment fearlessly, and revel in the joy of crafting the perfect cup, one sip at a time. Your perfect cup awaits.
