how to mirror android phone to laptop via wifi
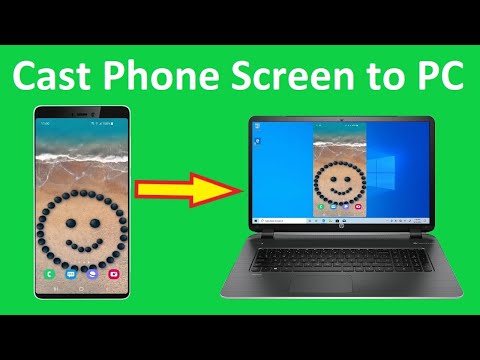
Title: How To CAST Android Mobile Phone Screen to PC Laptop for Free Connect Phone to PC Laptop
Channel: Howtosolveit
How To CAST Android Mobile Phone Screen to PC Laptop for Free Connect Phone to PC Laptop by Howtosolveit
Mirror Your Android to Laptop Wirelessly: The SHOCKINGLY Easy Method!
Unlock Your Android’s Potential: Effortless Wireless Laptop Mirroring
Have you ever wished you could see your Android phone's screen on a larger display? You are not alone. The desire for seamless integration between devices is common. The good news is, it's surprisingly easy to achieve. This article unveils a remarkably straightforward method to mirror your Android to your laptop wirelessly. Prepare to be amazed.
The Wireless Revolution: Saying Goodbye to Cables
Gone are the days of tangled wires and inconvenient setups. Today's technology allows for effortless wireless mirroring. This advancement provides a level of convenience previously unheard of. We are now entering an era of true device freedom. So, let’s jump right in.
Understanding the Magic: What Makes Wireless Mirroring Possible?
The core of wireless mirroring lies in advanced technologies. These technologies allow devices to communicate directly. The Android operating system offers several built-in capabilities. Also, there are third-party applications that facilitate mirroring. Your laptop, typically, leverages Wi-Fi. These components work synergistically. Together, they construct the wireless connection.
Essential Tools of the Trade: Getting Started
Before diving in, ensure you have the necessary tools. You'll need your Android phone, naturally. A laptop with Wi-Fi capabilities is also crucial. Beyond these, a compatible mirroring application is essential. Many readily available options are available. We will provide a few recommendations. These depend on your specific needs and preferences.
Method 1: Utilizing Built-In Android Features (If Applicable)
Some Android devices boast integrated mirroring features. These built-in tools often offer the simplest experience. Check your phone’s settings. Look for terms like "Screen Mirroring" or "Cast." The exact wording might vary. Check your laptop's settings as well. Your laptop has to support the mirroring function.
Method 2: Exploring Third-Party Applications: A World of Choices
If your device doesn’t support native mirroring, don’t worry. Several excellent third-party applications fill this gap. These apps make the process much easier. Some of the most popular applications are available at your fingertips.
Popular Application Options:
- ApowerMirror: This app is user-friendly. It offers a comprehensive set of features.
- LetsView: LetsView is another excellent choice. It provides a reliable and versatile mirroring experience.
- Vysor: Vysor allows for remote control. It’s a great option for advanced users.
Step-by-Step Guide: Making it Happen
Let’s get into the practical aspects. These steps are generally applicable. The exact steps can vary slightly. This is depending on the app you choose.
- Download and Install: Download and install your chosen mirroring application. Do this on both your Android device and your laptop.
- Connect to the Same Wi-Fi Network: Ensure both devices are on the same Wi-Fi network. This is crucial for the connection to work.
- Launch the Application: Open the mirroring application on both devices. The application will search for available devices.
- Select Your Laptop: On your Android device, select your laptop from the list.
- Grant Permissions: You might need to grant the application permission on your phone. This is to access your screen.
- Start Mirroring: Once the devices connect, tap the “Start Mirroring” button. Your Android screen should now appear on your laptop.
Troubleshooting Common Issues: Getting it Right
Encountering issues is sometimes inevitable. Here are some common problems and their solutions:
- Connectivity Problems: Double-check your Wi-Fi connection. Ensure both devices are connected to the same network.
- Application Crashes: Try restarting the mirroring application on both devices.
- Performance Lags: Close any unnecessary applications on your phone or laptop. This should improve performance.
- Compatibility Issues: Verify that your devices meet the application’s system requirements.
Maximizing Your Experience: Tips and Tricks
Elevate your mirroring experience with a few handy tips.
- Optimize Your Wi-Fi: A strong, stable Wi-Fi signal ensures smooth performance.
- Keep Your Software Updated: Update the application and device software. This helps to fix bugs.
- Experiment with Settings: Explore the application’s settings. There you might find options to customize the experience.
Beyond Mirroring: Diverse Applications
Wireless mirroring provides functionality beyond just viewing your screen. The concept opens up a world of possibilities.
- Presentations: Effortlessly display presentations. Show them from your phone.
- Gaming: Play mobile games on a larger screen. It's great for a more immersive experience.
- Content Creation: Review and edit your content. It’s a great way to optimize your content.
Conclusion: The Wireless Future is Now
Mirroring your Android to your laptop wirelessly is easier than ever. The benefits are numerous. The process is straightforward. By following these simple steps, you can unlock your device's full potential. Take control over your digital experience. Embrace the wireless future. Your Android and laptop are ready for greater collaboration.
Windows 7 WiFi Nightmare? FIX It NOW! (Easy Steps)Mirror Your Android to Laptop Wirelessly: The SHOCKINGLY Easy Method!
Hey tech enthusiasts! Remember the days when you were chained to your phone, squinting at that tiny screen while trying to show off vacation photos or binge-watch your favorite show? Well, those days are officially over! We’re diving headfirst into a world where your android screen becomes a magnificent extension of your laptop, all without the messy hassle of wires. We’re talking about mirroring your Android to your laptop wirelessly, and trust me, it's shockingly easy.
Unveiling the Magic: Why Mirroring Matters
Think of it like this: your phone is the lead guitarist, and your laptop is the amplifier. They both sound great on their own, but when hooked up, you get an epic, concert-level experience. Mirroring your Android to your laptop is like that, amplified. Forget the tiny screen; now, you can showcase photos, stream movies, play games, and even work on presentations with crystal-clear clarity and a much bigger viewing area. No more hunching over, no more eye strain – just pure, unadulterated enjoyment.
The Myth of Complexity: Busting the Wireless Mirroring Myth
You might be thinking, "This sounds complicated." And historically, it could be. But thankfully, technology has evolved. We're not talking about wading through tedious settings or downloading clunky software that hogs your computer’s resources. We're talking about streamlined, user-friendly methods that take just minutes to set up. Believe us, the ease of use is practically a superpower!
Method One: The Built-In Wonders
First up, let’s explore the simplest route. Many of us already have the tools we need, right at our fingertips.
The Windows Whisperer: Utilizing Microsoft's Miraculous App
If you're a Windows user, rejoice! Microsoft has made this process practically effortless. Here's the lowdown:
- Step 1: Check Your Compatibility: Make sure both your Android device and your laptop are connected to the same Wi-Fi network. This is crucial.
- Step 2: The Microsoft Connection: On your laptop, search for and open the "Connect" app. It's usually pre-installed. If not, download it from the Microsoft Store.
- Step 3: Android's Turn: On your Android device, pull down the notification shade and look for a "Smart View" or "Screen Mirroring" or "Cast" option. The name varies depending on your phone’s manufacturer, but the icon usually depicts a screen radiating outwards.
- Step 4: Select and Connect: Tap on the "Smart View" or equivalent. Your laptop should appear as an available device. Select it, and voila! Your Android screen now appears on your laptop.
It's that straightforward. Seriously.
The MacOS Mavericks: Alternatives for Apple Lovers
Okay, Apple users, we haven't forgotten about you! While the process isn't as natively integrated as with Windows, there are still excellent solutions.
- Step 1: Download the App: Android developers have tailored their applications to offer mirroring.
- Step 2: Establish the Connection: Connect your Android device and your laptop to the same Wi-Fi.
- Step 3: Execute the Mirror: Follow the app's onscreen instructions. Generally, it involves selecting your laptop from a list of available devices and granting necessary permissions.
Method Two: The Third-Party Powerhouse Apps
If the built-in methods aren’t quite hitting the mark for you, or if you need some extra bells and whistles, don't fret. The app store is brimming with powerful third-party options.
App Showdown: Choosing the Right App for You
This is where the fun begins. We’re talking about apps like Scrcpy, LetsView, Vysor, and many more. Each has its own strengths, features, and pricing models (some are free, others offer premium subscriptions).
- Scrcpy: This one's a powerhouse for tech-savvy users. It offers smooth performance and low latency, perfect for gaming or screen recording.
- LetsView: User-friendly and free to use, this is an excellent choice for beginners. It's great for presentations, screen sharing, and displaying photos.
- Vysor: Offers a balance of ease of use and features, including remote control of your Android device from your computer.
The best app depends on your individual needs. Consider what features are most important to you, such as:
- Ease of Use: Is it user-friendly, with a simple setup process?
- Latency: How quickly does the mirroring happen? Lower latency is essential for gaming and interactive activities.
- Features: Does it offer screen recording, remote control, or other features?
- Price: Is it free, subscription-based, or a one-time purchase?
Step-by-Step Installation & Setup Guide for Third-Party Apps
Installing and setting up these apps is generally quite simple:
- Download: Head to the app store (Google Play Store for Android; your respective app store for your laptop) and download your chosen app.
- Installation: Follow the on-screen instructions to install the app on both your phone and your laptop.
- Permissions: Grant the necessary permissions, such as access to your photos, microphone, and screen recording, depending on the app's features.
- Connection: Ensure both devices are on the same Wi-Fi network. Launch the app on both devices.
- Mirroring Initiation: Follow the app's prompts to connect your devices and start mirroring. This usually involves selecting your laptop from a list of available devices.
- Troubleshooting: If you run into any issues (e.g., connection problems, audio issues), consult the app's help section or online forums.
Elevating Your Experience: Tips and Tricks
Once you've got mirroring working, there are a few things you can do to optimize your experience.
Boosting Performance: Fine-Tuning Your Setup
To ensure smooth, lag-free mirroring, there are a few things you can do:
- Strong Wi-Fi: A stable and robust Wi-Fi connection is paramount. Make sure your laptop and Android device are close to your router.
- Close Unnecessary Apps: Close any unnecessary apps running on both your phone and your laptop to free up resources.
- Adjust Resolution and Frame Rate: Some apps allow you to adjust the video resolution and frame rate. Lowering these settings can improve performance if you're experiencing lag.
Beyond the Basics: Advanced Features to Explore
Once you've mastered the basics, you can explore advanced features like:
- Screen Recording: Capture videos of your phone screen, ideal for tutorials, gameplay recordings, or creating presentations.
- Remote Control: Control your Android device from your laptop using your mouse and keyboard.
- Screen Sharing: Share your Android screen with others during meetings or presentations.
Troubleshooting Common Problems
Let's face it, technology isn't always perfect. Here are some common issues and how to fix them:
Problem: Connection Issues – The Wi-Fi Woes
If you can’t connect, the cause is often simple.
- Double-Check Wi-Fi: Ensure both devices are on the same Wi-Fi network.
- Restart Devices: Restarting your phone and laptop can sometimes resolve connection glitches.
- Router Reboot: If all else fails, try restarting your router.
Problem: Lag and Poor Performance – The Slow Motion Syndrome
Lag is the enemy of a smooth mirroring experience.
- Optimize Wi-Fi: Ensure a strong Wi-Fi signal.
- Close Background Apps: Minimize background activity on both devices.
- Lower Resolution: Adjust the mirroring app's resolution settings if available.
Problem: Audio Not Working – The Silent Treatment
No sound? Let's fix it.
- Check Volume: Ensure both your phone and laptop volume levels are turned up.
- Check App Settings: Review the mirroring app's audio settings.
- Choose the Right Output: Make sure your laptop is set to use the correct audio output device (e.g., speakers).
Security First: Protecting Your Privacy
When mirroring your android device to your laptop wirelessly, safety is extremely important
Security Measures: Safeguarding Your Data
Mirroring, though beneficial, can open the door to some security issues.
- Use Trusted Networks: Only use mirroring on trusted networks, especially when connecting to public Wi-Fi.
- App Permissions: Be mindful of the permissions you grant to mirroring apps. Review these permissions regularly.
- Keep Software Updated: Ensure both your Android device and mirroring apps are up to date with the latest security patches.
Unlocking the Potential: Practical Applications of Wireless Mirroring
The applications are practically endless.
Productivity Powerhouse: Boosting Your Workflow
Mirroring can be a productivity game-changer:
- Presentations: Deliver presentations from your Android, showcasing photos, documents, or videos on the big screen.
- Multitasking: Display multiple windows on your laptop and phone side by side.
- Mobile Office: Access your files and apps on a larger screen for a more comfortable work experience.
Entertainment Extravaganza: Level Up Your Leisure Time
Unlock Your Laptop's WiFi Password: The Secret Method!Control & Mirroring Android to PC over WiFi SCRCPY Wireless Connection

By Techy Druid Control & Mirroring Android to PC over WiFi SCRCPY Wireless Connection by Techy Druid
How to Mirror Android to PCLaptop 100 Free using SCRCPY

By Cyber Droid How to Mirror Android to PCLaptop 100 Free using SCRCPY by Cyber Droid
How To Mirror Mobile Screen To Pc Sinhala With usb cable Wireless MirrorScreen sinhala

By THEJ How To Mirror Mobile Screen To Pc Sinhala With usb cable Wireless MirrorScreen sinhala by THEJ

Title: how to control Android phone from PCLaptop
Channel: NETVN82
how to control Android phone from PCLaptop by NETVN82
Laptop Working
Here's the title for your article: The Ultimate Guide to Mastering the Art of Sourdough Baking at Home
The Ultimate Guide to Mastering the Art of Sourdough Baking at Home
Welcome, fellow bread enthusiasts! Prepare yourself for a journey into the enchanting realm of sourdough, a baking process far more extraordinary than you might initially believe. This guide is designed to transform a neophyte home baker into a confident sourdough artisan, capable of crafting loaves that rival those found in the most esteemed bakeries. We will explore every facet of this captivating craft, from nurturing your starter to achieving the perfect crumb, ensuring you arrive at the pinnacle of sourdough mastery.
Understanding the Magic: What Makes Sourdough Unique?
Sourdough’s distinctive flavor profile and airy texture stem from a symbiotic relationship between wild yeasts and lactic acid bacteria, naturally present in flour. This intricate dance of life and fermentation distinguishes a sourdough loaf from its commercially-yeasted cousins. While the process requires patience and attention, the reward – a superior loaf brimming with complex flavors and textures – is well worth the endeavor. This fermentation process also offers considerable health advantages, aiding in digestion and offering enhanced nutritional value compared to many commercially produced breads.
Cultivating Your Own "Mother": The Genesis of a Starter
The heart and soul of sourdough is the starter, a living culture of wild yeasts and bacteria responsible for leavening and flavor creation. The initial weeks are crucial to building a thriving starter capable of producing consistently excellent bread. Begin by combining equal parts (approximately 50 grams each) of unbleached, all-purpose flour and filtered, non-chlorinated water in a clean glass jar. Mix thoroughly until a smooth paste forms. Cover the jar loosely with a lid or cloth, allowing for airflow, and keep it at room temperature (ideally between 70-75°F, 21-24°C).
Over the next 24 hours, or slightly longer, your starter should begin to show the first signs of activity. A slight rise in the mix indicates that the wild yeasts have started to ferment. Do not be alarmed if there is not much activity. Over the next few days, discard half of the starter and feed it with a fresh combination of equal parts flour and water. Repeat this process of discarding and feeding daily for the first week, observing the changes. The activity level, the aroma, and the color would change as the days went on. The smell may be slightly sour, and you may notice small bubbles forming. This is a positive sign.
Around day 7-10, the starter should begin to show significant activity, doubling or tripling in size within a few hours after feeding. The aroma should have become more pronounced, with a pleasant sourness. After about two weeks, the starter should begin to show consistency in rising and falling. You can then start baking and enjoying the fruits of your labor. A mature starter, also known as a “levain” or “mother,” is alive and well. Remember that a properly maintained starter is the cornerstone of successful sourdough baking. We recommend using a digital kitchen scale for accuracy in measuring your ingredients.
The Symphony of Feeding: Maintaining a Thriving Starter
Maintaining the vitality of your starter is a continuous process. The frequency of feeding depends on your baking schedule and the ambient temperature. If you bake regularly (1-2 times per week), keep your starter at room temperature and feed it daily with equal parts flour and water (e.g., 50 grams flour, 50 grams water, 50 grams starter). For less frequent bakers, store the starter in the refrigerator, feeding it once a week before using. When taking the starter from storage, allow it to come to room temperature, and feed it twice before using for baking. This will ensure sufficient leavening power.
Always use filtered or non-chlorinated water to avoid inhibiting yeast activity. Use good-quality flour; organic, unbleached all-purpose or bread flour works well; while whole wheat flour can contribute to the flavor and activity of your starter. A consistent flour type will help stabilize the starter. Observe your starter. When it's hungry, it will sink back down. This is the sign that it needs a fresh feeding.
Crafting the Perfect Dough: The Building Blocks of a Loaf
Once your starter is mature and active, you’re ready to begin creating your dough. The basic sourdough recipe involves the following key ingredients: active starter, flour, water, and salt. The ratio of these ingredients will vary depending on the specific recipe, but the principles remain constant.
Begin by mixing the starter with water, using your hand, a spatula, or the dough hook of your stand mixer. Add the flour, mixing until a shaggy dough forms. Let the dough rest for 30-60 minutes, a process called autolyse. This allows the flour to fully hydrate, which improves dough extensibility and ultimately the crumb structure. After the autolyse period, add the salt and knead the dough, by hand or in your stand mixer, until it becomes smooth and elastic.
The Art of Folding and Rising: Shaping the Flavor
Sourdough loaves benefit from gentle handling during proofing to develop the desired structure and flavor. Dough folding enhances the strength of certain gluten structures. This process involves gently stretching and folding the dough over itself, which develops gluten strength without overworking the dough.
Place the dough in a lightly oiled bowl and cover it. Perform four sets of folds, spaced approximately 30 minutes apart, during the initial rise. After the final fold, let the dough rise in a warm place for several hours, or until it has nearly doubled in size. The time to rise will depend on the strength of the starter and the ambient temperature.
Once the dough has risen, gently shape it into the desired loaf shape—a boule (round loaf) or bâtard (oval loaf) are common. Use plenty of flour on your work surface and on the dough to prevent sticking. Place the shaped loaf in a banneton basket (a proofing basket ideally lined with floured cloth) or a bowl lined with floured cloth. Cover the loaf and refrigerate it overnight or up to 24 hours for a cold proof. This slow fermentation further develops flavor and improves the crust.
Baking to Perfection: Achieving the Golden Crust and Airy Crumb
Baking sourdough involves a few key steps to achieve the perfect crust and crumb. Preheat your oven to 450-500°F (232-260°C) with a Dutch oven inside. The Dutch oven creates a steamy environment, which helps create a crispy crust and a good oven spring.
Carefully remove the hot Dutch oven from the oven. Gently place your pre-shaped loaf in the Dutch oven. Score the top of the loaf with a sharp knife or lame. This serves to control the expansion of the loaf during baking, creating a beautiful aesthetic. Cover the Dutch oven with its lid and bake for 20 minutes. Then, remove the lid and bake for an additional 25-30 minutes, or until the crust is golden brown and the internal temperature reaches 200-210°F (93-99°C).
Carefully remove the loaf from the Dutch oven and cool it completely on a wire rack before slicing. Resist the urge to cut into the loaf while still warm. This is critical--allowing the interior to cool down allows the structure to set, producing the perfect crumb.
Troubleshooting Common Sourdough Challenges
Even with the best techniques, you may encounter some challenges during your sourdough journey. Do not be discouraged! Here are some common issues and how to address them:
- Flat Loaves: This might indicate a weak starter, not enough proofing time, or over-proofing. Ensure your starter is active and doubled in size after feeding. Adjust the proofing time or try reducing the amount of starter in your recipe.
- Dense Crumb: This could result from under-proofing, not enough gluten development, or too much flour. Ensure the dough has risen sufficiently, follow the folding instructions, and use the precise amounts of flour and water.
- Sourness That is too much: This could be due to an over-fermented dough or a starter that has developed an excessive amount of lactic acid. Experiment with reducing the bulk fermentation time or the overnight cold proofing time.
Expanding Your Sourdough Horizons: Exploring Variations and Flavors
Once you’ve mastered the basic techniques, your creativity can truly flourish. Experiment with different flours, such as whole wheat, rye, or spelt, to alter the flavor and texture of your loaves. Add seeds, nuts, dried fruits, or herbs to the dough for added complexity. Consider adding some spices to your dough, such as cinnamon, or poppy seeds, or even garlic, in order to enjoy different flavors. Try different scoring patterns or experiment with different baking vessels. The possibilities are endless!
The Joy of Sharing: Concluding Thoughts on Sourdough
Sourdough baking is more than just a culinary pursuit; it is a connection to tradition, a testament to patience, and a celebration of nature's bounty. It’s about allowing time to transform simple ingredients into something extraordinary. The satisfaction of sharing a freshly baked, golden-crusted sourdough loaf with friends and family is unparalleled. Embrace the process, celebrate the imperfections, and savor every delicious bite. Happy baking!
