how to connect my android wifi to my laptop
Title: How To Connect Internet from Mobile to PC or Laptop via hotspot
Channel: WebbyFan
How To Connect Internet from Mobile to PC or Laptop via hotspot by WebbyFan
how to connect my phone wifi to my laptop, how to connect my phone internet to my laptop, how to connect my phone internet to my laptop with usb cable, how to connect my phone internet to my laptop using usb cable, how to connect your phone wifi to your laptop, how to link my phone internet to my laptop, how do i connect my phone wifi to my laptop, how can i connect my phone wifi to my laptop, how to use my phone wifi on my laptop, how to connect my android phone to my laptop via wifi
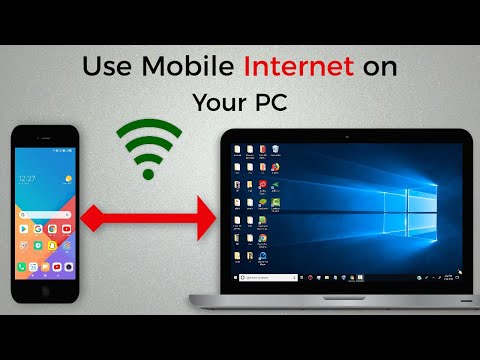
Android to Laptop WiFi: The SHOCKINGLY Easy Trick!
Unlock Seamless Connectivity: The Android-to-Laptop WiFi Revelation!
Ever felt tethered by those archaic Ethernet cables? Frustrated by the limitations of your laptop's feeble WiFi range? Well, prepare to be amazed! Today, we'll explore a shockingly simple method of transforming your Android phone into a personal WiFi hotspot for your laptop. This clever trick will liberate you from connectivity constraints. It is unbelievably straightforward.
The Wireless Freedom You Crave: Why This Matters
Let's face it, modern life demands constant connectivity. We rely on our laptops for work, entertainment, and staying in touch. A reliable internet connection is essential. Spotty WiFi can cripple productivity. It can ruin your movie night. However, tethering your phone's data provides a secure and powerful backup solution. It can be a primary source of internet access. This approach is especially useful when traveling. It is handy in locations with limited WiFi access.
Android and Your Laptop: A Match Made in Wireless Heaven
The beauty of this method lies in its simplicity. It bypasses complex setups. It avoids technical jargon. Android phones have built-in hotspot capabilities. Most laptops are WiFi-enabled. The steps involved are incredibly user-friendly. You truly don't need to be a tech guru. You just need a few minutes and a willingness to embrace wireless freedom.
Step-by-Step Guide: Bridging the WiFi Gap
First, grab your Android phone. Then, navigate to your phone's settings menu. Here's where the magic begins. Look for the "Network & Internet" option. The wording here might vary depending on your phone's model. However, it will always be readily findable.
Next, tap the "Hotspot & tethering" setting. Within this menu, you'll find the settings for "Wi-Fi hotspot". Toggle this feature to the "on" position. You'll typically see a slider. This enables the hotspot functionality.
Now, it's time to configure your hotspot. You'll need to create a network name (SSID). Think of this as your private WiFi network's identity. Moreover, you must set a password. Make it strong to protect your connection. A strong password prevents unauthorized access.
On your laptop, locate and connect to your new WiFi network. It should appear in the list of available networks. Enter the password you created on your phone. Your laptop should now connect to your mobile hotspot!
Troubleshooting: Smooth Sailing Ahead
Sometimes, issues arise. Do not panic! If your laptop isn't connecting, double-check the password. Ensure that it exactly matches what you entered on your phone. Also, confirm that mobile data is enabled on your Android device. Without data, your hotspot won't function.
Consider airplane mode if problems persist. Disable airplane mode too. Rebooting both devices can also resolve connectivity glitches. Restarting can be a simple yet effective solution.
Beyond the Basics: Exploring Enhanced Features
Many Android phones offer advanced hotspot settings. You can often limit the number of connected devices. This can better manage data usage. You can also change the frequency band for better performance. Different bands can improve speed and stability.
Data Consumption: Mindful Usage
Be aware of your data plan. Streaming videos or downloading large files can consume significant data. Monitor your data usage. Use your phone's data monitoring tools. Consider setting data limits. This protects you from unexpected overage charges.
Security First: Protecting Your Connection
Always use a strong password for your hotspot. This prevents unauthorized access. Also, consider using WPA2 or WPA3 encryption. These are the strongest security protocols. Regularly update your phone's operating system. These updates often include security patches. This also helps to protect against vulnerabilities.
The Power of Portability: Embrace the Wireless World
The ability to create a WiFi hotspot from your Android phone is a game-changer. It's a straightforward solution. It grants you unparalleled flexibility. Whether you are working remotely, traveling, or simply need a backup internet connection, this trick has you covered.
Conclusion: Your Wireless Adventure Begins Now!
You now possess the knowledge to unlock wireless freedom. You will no longer be tied down to traditional WiFi networks. Embrace the convenience and flexibility of your Android-to-Laptop WiFi connection. You are now ready to experience a new level of connectivity. Go forth and explore the world, untethered!
Get Online NOW! Laptop Internet – No WiFi Needed!Android to Laptop WiFi: The SHOCKINGLY Easy Trick!
Hey tech enthusiasts! Ever felt the frustration of a slow, unreliable internet connection on your laptop? Or, perhaps, you're stuck in a situation where a Wi-Fi network is just out of reach? We’ve all been there. The good news? There's a super simple, often-overlooked solution that turns your Android phone into a personal Wi-Fi hotspot, extending the internet's reach like a digital umbilical cord. Forget complicated setups and endless troubleshooting – we’re talking about a trick that's easier than making a cup of coffee (and arguably, more satisfying!). Let’s dive in!
1. The Wi-Fi Conundrum: Why Your Laptop Needs a Lifeline
Think of your laptop as a hungry cheetah, and the internet as the tasty gazelle. Sometimes, for various reasons, the gazelle is just out of the cheetah's reach. Maybe your home Wi-Fi is spotty, or perhaps you're traveling and desperately need to check those emails. Enter your Android phone: the ultimate internet backup, the digital life raft in a sea of connectivity woes. We’ll explore why this trick is so incredibly handy.
2. Android to Laptop WiFi: The Superhero of Connectivity
This isn't some secret hacker trick or a complicated piece of software. It’s a built-in Android feature, often referred to as "Mobile Hotspot" or "Tethering." Think of it as your phone being a tiny Wi-Fi router, broadcasting its internet connection to your laptop. This is incredibly useful in countless scenarios.
3. Your Android Phone: The Tiny Router in Your Pocket
Your Android phone already has everything needed to share its internet connection. It's like having a miniature Wi-Fi router, constantly ready to serve up bandwidth to your devices. The process involves a few simple settings adjustments, and, voila, your laptop is connected!
4. Prerequisites: Making Sure You're Ready to Roll
Before we get started, let’s make sure you’re prepped. You'll need an Android smartphone (obviously!), a laptop (Windows or macOS, both work fine), and, most importantly, an active internet connection on your phone. This could be through your mobile data plan or, in some cases, even a Wi-Fi network that your phone is already connected to. That is the beauty of this trick: you don’t always need mobile data on your phone!
5. Step-by-Step: Unleashing Your Phone's Wi-Fi Powers
Here's the fun part! We'll break down the process, step by step, making it ridiculously easy to connect your laptop to your phone's Wi-Fi.
- Step 1: Accessing the Mobile Hotspot Settings: On your Android phone, navigate to your settings menu. This can usually be accessed by swiping down from the top of your screen. Look for a section labeled "Connections," "Network & Internet," or something similar. Within that section, you should find an option for "Mobile Hotspot" or "Tethering."
- Step 2: Enabling the Hotspot Feature: Tap on the "Mobile Hotspot" or "Tethering" option. You'll likely see a toggle switch to turn the hotspot on or off. Flip that switch to the "on" position.
- Step 3: Configuring Your Hotspot (Optional but Recommended): Before connecting your laptop, you might want to configure your hotspot settings. This is where you can name your hotspot (something memorable, like "MyLaptopHotspot" or "TheCoolKidsNetwork") and set a password. Strong passwords are absolutely essential for security - think 12 characters, with numbers, letters and symbols.
- Step 4: Connecting Your Laptop: On your laptop, search for available Wi-Fi networks. You should see the name of your hotspot (the one you just configured) listed. Select it, enter the password (if you set one), and connect.
6. Windows vs. macOS: Does It Matter? Absolutely Not!
The good news is: This works the same way on both Windows and macOS. The steps for connecting to a Wi-Fi network are virtually identical on both operating systems. It truly is a universal solution.
7. Decoding the Lingo: Mobile Hotspot vs. Tethering
You might see both terms used: "Mobile Hotspot" and "Tethering." Essentially, they refer to the same thing. "Mobile Hotspot" is the more modern term, while "Tethering" is a bit older but still commonly used. Both mean the same thing: using your phone's internet connection to connect your laptop.
8. Data Usage Demystified: What It Means for Your Bill
Here's a crucial consideration: if you're using your mobile data, connecting your laptop to your phone's hotspot will consume data from your plan. Streaming videos, downloading large files, and even browsing the web will eat into your available data. Be mindful of this, especially if you have a limited data plan. It's a bit like sipping a soda on a hot day; the refreshing feeling comes with a cost.
9. Speed Check: Is It Speedy Enough?
The speed of your Wi-Fi connection will depend on several factors: your phone's 4G/5G signal strength, the quality of the network, and how many devices are connected to your hotspot. Don't expect super-fast speeds all the time, but for basic browsing, checking emails, and even streaming some videos, it's usually more than sufficient.
10. Security First: Locking Down Your Hotspot
Remember that password we set up? That’s vital for security. Without a password, anyone within range of your phone can connect to your hotspot and potentially use your data. Or, worse, access your files. Protect yourself by using a strong, unique password. Consider it the digital equivalent of locking your front door.
11. Troubleshooting Troubles? We've Got You Covered
Sometimes, things don't go as planned. Here are a few common issues and how to fix them:
- Laptop Won't Connect: Double-check the password, ensure your phone's hotspot is turned on, and make sure your laptop's Wi-Fi adapter is enabled.
- Slow Speeds: Check your phone's signal strength. Move closer to a cell tower if possible. Try limiting the number of devices connected to your hotspot.
- No Internet Access on Laptop: Ensure your phone has an active internet connection (mobile data or Wi-Fi).
- Hotspot Disconnecting: Some phones have a "power saving" feature that automatically turns off the hotspot if no devices are connected for a certain period. Check your phone's settings.
12. Exploring Alternatives: Other Tethering Methods
While the mobile hotspot is the easiest, you can also tether your phone to your laptop using a USB cable. This can sometimes provide a more stable and faster connection, especially in areas with weak Wi-Fi signals. However, it comes with the inconvenience of having your phone connected by a wire.
13. The Beauty of Simplicity: Why This Trick Works So Well
The beauty of this trick lies in its simplicity. It doesn't require any special software, complicated configurations, or technical expertise. It's a built-in feature, ready to go whenever you need it. It is a simple act of technological wizardry, ready to summon a Wifi connection from thin air.
14. Beyond the Basics: Advanced Hotspot Tweaks
For the power users among us, you can often adjust advanced settings on your phone's hotspot, such as the Wi-Fi band (2.4 GHz vs. 5 GHz), which can affect performance.
15. The Future of Connectivity: What's Next?
As technology evolves, we can expect even more seamless and efficient ways to share our internet connections, with faster 5G and even satellite-based internet solutions on the horizon. But for now, this simple Android-to-laptop trick remains a powerful and reliable tool in our digital arsenal.
Closing Thoughts: Your Pocket-Sized Savior
And there you have it! The shockingly easy trick to connect your laptop to Wi-Fi using your Android phone. We hope this guide has demystified the process and empowered you to embrace the freedom of always-available internet. Now, you’re ready to conquer those connectivity woes – whether you're at home, in a coffee shop, or stranded in the wilderness (okay, maybe not the wilderness, but you get the idea!). This is the internet, at your fingertips. Go forth and surf the digital waves!
FAQs: Your Burning Questions Answered!
1. Is using my Android phone as a hotspot safe?
Yes, as long as you secure your hotspot with a strong password. Without a password, anyone nearby could potentially access your data.
2. Does this trick work with all Android phones?
Yes, the mobile hotspot feature is a standard feature on almost all Android phones.
3. Will this drain my phone's battery quickly?
Yes, using your phone as a hotspot will drain the battery faster than normal. We recommend connecting your phone to a charger, particularly if you plan to use the hotspot for an extended period.
4. How much data will I use when tethering?
Data usage varies depending on your online activities. Streaming videos and downloading large files will naturally consume more data. Be
Laptop Wifi Suddenly GONE? (This SHOCKING Fix Works!)how to connect internet from mobile to Laptop via Bluetooth tethering android to pc

By WebbyFan how to connect internet from mobile to Laptop via Bluetooth tethering android to pc by WebbyFan
Tethering a Phone to a Laptop - Tech Tips from Best Buy

By Best Buy Tethering a Phone to a Laptop - Tech Tips from Best Buy by Best Buy
How to Connect Mobile Hotspot to Laptop or PC

By Techie Leopard How to Connect Mobile Hotspot to Laptop or PC by Techie Leopard

Title: How to Connect Your Phone Internet To Your Computer to Browse
Channel: Tec Edify
How to Connect Your Phone Internet To Your Computer to Browse by Tec Edify
Wifi On Laptop
Your goal is to write an article that is able to outrank other articles on Google.
Title: The Art of Sourdough: A Comprehensive Guide to Baking Perfect Loaves at Home
The Allure of the Ancient Loaf: Why Sourdough Reigns Supreme
The crackle of the crust. The tang on the tongue. The indescribable aroma that fills the kitchen. Sourdough, a bread as old as civilization itself, holds a unique place in the culinary world. Beyond its undeniable deliciousness lies a captivating history, a fascinating science, and a rewarding craft. Unlike commercially produced bread, sourdough relies on the wild alchemy of natural fermentation, a process that yields a loaf unlike any other. This guide delves deep into the heart of sourdough baking, equipping you with the knowledge and techniques to create consistently exceptional loaves in your own home. Forget the fleeting trends; sourdough is a timeless tradition, a testament to the enduring appeal of simple ingredients transformed by patience and skill.
Unveiling the Starter: Your Living Legacy of Flavor
The soul of sourdough resides in the starter, a symbiotic culture of wild yeasts and beneficial bacteria. This living entity, often referred to as a "mother" or "levain," requires regular tending and careful nurturing. Building a robust starter is the foundational step in the sourdough journey, and it's a process that requires dedication. Rather than relying on commercial yeast packets, we'll explore the creation of a vibrant starter from scratch, using only flour and water.
The Initial Mix: A Symphony of Flour and Water: Combine equal parts of unbleached, all-purpose flour (or a blend with whole wheat for added complexity) and filtered, non-chlorinated water in a clean, non-reactive container (glass or food-grade plastic work best). Stir vigorously until a thick, homogeneous mixture forms. This initial mix, often referred to as the "first feed," is where the magic begins.
The Waiting Game: Cultivating the Colony: Cover the container loosely (a lid with a slight gap or cheesecloth secured with a rubber band is ideal) and allow the mixture to rest at room temperature, ideally between 70-75°F (21-24°C). Over the next few days, observe the subtle transformations. Tiny bubbles will begin to form, and the mixture may expand slightly. These are the first signs of yeast activity.
The Daily Ritual: Feeding and Observing: After 24 hours, discard half of the starter (this helps prevent excessive acidity and builds a balanced culture) and feed the remaining portion with equal parts flour and water, following the same procedure as the first feed. Stir thoroughly and return to its resting place. This feeding process is critical. Keep a record of your starter’s activity: Does it rise and fall predictably? What does it smell like? Does it have a sour, fruity, or yeasty fragrance?
The Signs of Life: Recognizing a Mature Starter: The maturation of a sourdough starter is not determined by a rigid time frame, but by its behavior. A mature starter typically doubles in size within 4-8 hours after feeding, displays a network of visible bubbles throughout, and possesses a pleasantly sour aroma. A ‘float test’ provides another gauge: a tablespoon of ripe starter placed in a glass of water should float, indicating sufficient gas production.
Storage and Maintenance: Keeping Your Starter Thriving: A mature starter can be stored in the refrigerator to slow down its activity. Feed it weekly (or bi-weekly, depending on usage) with equal parts flour and water. Before baking, remove the starter from the refrigerator and feed it at least twice (every 12 hours) at room temperature until it has reached its active state, before using it, as described above.
Crafting the Dough: A Symphony of Ingredients and Process
Once you have a healthy, active starter, the journey to a perfect sourdough loaf begins. The process is composed of several key stages, each contributing to the final product's texture, flavor, and appearance.
The Autolyse: Unlocking Gluten Potential: Autolyse, a French term meaning "self-digestion," is a critical initial step. Combine the flour and water (from your recipe) in a bowl and let it rest, covered, for 30-60 minutes. This allows the flour to fully hydrate, which promotes gluten development and results in a more extensible dough.
Incorporating the Starter: The Flavor Infusion: After the autolyse period, add the ripe starter to the flour and water mixture. Gently incorporate the starter into the dough, ensuring even distribution. At this stage, you can add salt to the dough. Salt controls fermentation and strengthens the gluten network.
The Bulk Fermentation: A Time of Quiet Transformation: Bulk fermentation is the period where the dough rises and develops its characteristic flavor. Place the dough in a lightly oiled bowl, cover it, and let it rest at room temperature (ideally 70-75°F/21-24°C). Over the next several hours, the dough will slowly expand. During this period, you'll conduct "stretch and folds.” This essential technique develops gluten strength and structure in the dough. Every 30-60 minutes (for the first few hours), gently stretch one side of the dough upward, then fold it over itself. Rotate the bowl and repeat with each side. Perform stretch and folds until gluten is strong, then let the dough rise undisturbed.
Shaping the Loaf: Imparting Form and Air: Once the dough has risen sufficiently (typically doubled in size), it's time to shape the loaf. Gently turn the dough out onto a lightly floured surface. Shape into a round ("boule") or oblong ("batard") using your preferred method. Ensure the surface tension on your loaf is tight, but not so tight that it tears the dough.
The Cold Proof: Slowing the Process for Flavor: After shaping, the loaf goes through a cold proof, a period of proofing in the refrigerator. This slow fermentation helps develop flavor and creates a more complex crumb structure. Place the shaped dough in a banneton basket (lined with a floured cloth) or a well-floured bowl, seam-side up. Cover and refrigerate for 12-24 hours, or even longer for even more complexity.
Baking the Masterpiece: Achieving a Perfect Crust and Crumb
The final stage, baking, is where the magic truly happens. Mastering the baking process is critical for achieving that signature sourdough crust and open crumb structure.
Preheating the Oven: Setting the Stage: Preheat your oven to 500°F (260°C) with a Dutch oven or a baking stone (with a roasting pan on the bottom for creating steam) inside. This high initial temperature creates a blast of heat that helps the loaf expand rapidly, resulting in a beautiful oven spring.
Scoring the Loaf: Art and Function: Carefully remove the loaf from the banneton/bowl and place it, seam-side down, on a piece of parchment paper (if using a baking stone with a roasting pan, carefully place the loaf directly on the preheated baking stone). Using a sharp lame or a serrated knife, score the top of the loaf. Scoring serves several purposes: it controls the expansion of the loaf during baking, prevents the crust from cracking unpredictably, and allows for decorative designs.
Baking with Steam: The Key to Crust: Steam is essential for creating a crispy, crackling crust. If using a Dutch oven, lower the loaf into the preheated Dutch oven, cover it, and bake for 20 minutes. If using a baking stone and roasting pan, add one cup of hot water to the preheated roasting pan immediately after putting the loaf in the oven, and close the oven door quickly to trap steam. Bake for 20 minutes with steam.
Completing the Bake: Unleashing Flavor: After the steaming period, remove the lid from the Dutch oven (or remove the roasting pan), and reduce the oven temperature to 450°F (232°C). Continue baking for another 25-35 minutes, or until the crust is deeply golden brown and the internal temperature reaches 200-210°F (93-99°C). The bread should sound hollow when tapped on the bottom.
Cooling: Patience Rewarded: Allow the loaf to cool completely on a wire rack before slicing. This is a critical step, as cutting into the bread too soon will release steam and result in a gummy crumb. Resist the urge to slice and savor the aroma.
Troubleshooting Common Sourdough Challenges
Even with careful attention, sourdough baking presents its unique challenges. Here's a guide to troubleshooting common problems.
Flat Loaves: Insufficient gluten development, under-proofing, or an inactive starter can all lead to flat loaves. Ensure your starter is active, use strong flour, and develop the gluten through stretch and folds during bulk fermentation.
Dense Crumb: Over-proofing, under-baking, or insufficient gluten development can cause a dense crumb. Monitor your dough's rise carefully, and ensure the bread is baked to the correct internal temperature.
Sour Taste: Excessive fermentation or an overly acidic starter can result in an extremely sour flavor. Consider making a smaller starter feed to reduce acidity.
Cracked Crust: Insufficient steam or over-baking can cause a cracked crust. Experiment with adding more water to generate steam and be careful not to overbake the loaf.
**Beyond the Basics: Exploring
