how to view cobra dvr on laptop via wifi

Title: UPDATE Hik Connect for PC Hikvision CCTV Camera Connect to PC
Channel: Hik-Connect Hikvision
UPDATE Hik Connect for PC Hikvision CCTV Camera Connect to PC by Hik-Connect Hikvision
Unlock Cobra DVR on Your Laptop: Wireless Viewing Made Easy!
Effortlessly Stream Your Cobra DVR Footage on Your Laptop: A Seamless Guide
Let’s face it; security matters greatly. Your Cobra DVR holds crucial footage. You naturally want easy access, especially on your laptop. This guide unveils a straightforward method. It allows you to view your recordings wirelessly.
Gearing Up: Essential Preparations Before You Begin
First, ensure your Cobra DVR is functioning correctly. Double-check the power connection and recording status. Next, you will need your laptop and a stable Wi-Fi connection. This is the backbone of your wireless viewing experience. Make sure your laptop's Wi-Fi is enabled. Furthermore, you will need to know your DVR's IP address. You can find this in the DVR's menu settings. If you are unsure, consult the DVR's manual for specific instructions. In addition, you may need your DVR's username and password. This ensures secure access to your recordings. Therefore, make sure you keep these credentials handy.
Connecting to Your Cobra DVR: Navigating the Network
Now, let's connect your laptop. Open your web browser. Enter the IP address of your DVR in the address bar. Hit “Enter.” This should load your DVR’s login page. Enter your username and password. This then provides access to your system. Afterward, you will likely find a live view or playback option. Locate the playback or recording section. Consequently, you can browse through your recorded footage.
Understanding the User Interface: Locating Your Footage
The DVR's user interface varies. However, the basics stay the same. Explore the different menus. You should identify where the recordings are stored. Look for options like “Playback”, “Recordings”, or “Video Files.” Next, select the date and time range. This refines your search for specific events. Afterward, choose the relevant camera channels. This isolates the footage you need.
Wireless Viewing: Initiating the Playback Process
Once you've selected your footage, initiate playback. Click the "Play" button. Your video should now begin streaming. Ensure your Wi-Fi signal is strong. Weak signals cause interruptions. If you face buffering issues, try moving closer to your router. Also, you can minimize activities using the same Wi-Fi network. In addition, you can also adjust the video quality settings. Sometimes, lowering the resolution helps with playback.
Troubleshooting Common Issues: Addressing Potential Roadblocks
Sometimes, things can go awry. You may encounter problems accessing your DVR. If you can’t connect, verify your IP address. Make sure it's correctly inputted. Check the Wi-Fi connection on your laptop. Ensure it's actively connected to your network. If you are still unable to connect, check the DVR's network settings. Confirm they are configured correctly. Also, check your firewall settings. They could be blocking access. Additionally, remember your DVR’s username and password. Incorrect credentials prohibit access.
Enhancing Your Viewing Experience: Maximizing Functionality
Once connected, explore additional features. Many DVRs offer remote viewing capabilities. This lets you access your footage from anywhere. Consider downloading the DVR's mobile app. This provides even greater convenience. Further, some systems allow for remote control of camera features. These consist of pan, tilt, and zoom functions. Also, you can download recordings directly to your laptop. This makes them available offline. Now, consider regularly backing up your important recordings. Data loss could be a possibility.
Securing Your DVR: Protecting Your Data
Security is paramount. Therefore, change the default login credentials. This prevents unauthorized access. Moreover, keep your DVR's firmware updated. This protects against security vulnerabilities. Also, regularly back up your DVR's data. This acts as a safeguard against data loss. Consider using a robust password for your Wi-Fi network. Furthermore, use a strong password.
Final Thoughts: Enjoying Effortless Wireless Access
You can now view your Cobra DVR footage wirelessly. You have successfully unlocked wireless access. Enjoy the convenience of easy access to your recordings. This guide offers a simple, yet efficient process. Embrace the freedom of wireless viewing.
Unlock Your Laptop's Wi-Fi Freedom: Mobile Hotspot Hack!Let's dive into the world of our Cobra DVRs and get you watching your recordings wirelessly on your laptop!
Unlock Cobra DVR on Your Laptop: Wireless Viewing Made Easy!
Hey everyone! Ever felt like you’re missing out on the action captured by your Cobra DVR because you're stuck at your desk while the good stuff is on the big screen? We've all been there, right? I, personally, remember being itching to see who ding-dong ditched my house last week (it was the neighbor's kids, by the way!). Today, we're going to unravel the mystery of how to access your Cobra DVR recordings wirelessly on your laptop. Think of it as granting yourself a superpower – the ability to be everywhere at once when it comes to your security footage!
1. The Intrigue: Why Wirelessly Access Your Cobra DVR?
Before we dive into the nuts and bolts, let's address the elephant in the room: Why do this? Well, the benefits are plentiful, like stars in the night sky. We're talking convenience, flexibility, and a whole lot of peace of mind. Imagine being able to check on your property from the comfort of your bed, or reviewing footage while you're away on vacation. It’s the difference between being tethered to your DVR and being completely in control, like a digital explorer navigating the ocean of recorded data.
2. Decoding Cobra DVR: Understanding the Beast
Firstly, let’s understand what we are dealing with. A Cobra DVR (Digital Video Recorder) is essentially the brain of your security system. It's like the archive of your memories, but in moving pictures! It stores the footage captured by your cameras. To get it onto your laptop wirelessly, we'll need to understand how it operates and what features it offers. Check your Cobra DVR's manual for specific model information – it is your roadmap.
3. The Wireless Warriors: Required Equipment
You'll need a few essentials to begin this wireless quest. Think of them as your knightly armor and sword:
- Your Cobra DVR: Obviously!
- Your Laptop: A trusty steed.
- A Stable Wi-Fi Network: The invisible bridge connecting everything.
- Your DVR's Software (or a Web Browser): The enchanted scroll that unlocks the DVR's secrets.
- A Router: The gatekeeper of your home network.
Don't worry, the complexity ends there. We're not building a spaceship.
4. The Software Shuffle: Finding the Right App or Browser Access
This is the key, the secret handshake! Cobra DVRs often come with their own software, sometimes available for download from the manufacturer's website. Think of it as your personalized viewing portal. Other times, you can access your DVR's recordings directly through a web browser, by typing in its IP address (we'll get to that!), like you're visiting a webpage.
5. IP Address Unveiled: Locating Your DVR on the Network
Each device on your network has a unique IP address, like a secret code that whispers: "I'm here." You can usually find your DVR's IP address in your router's settings. It will be listed among connected devices. Alternatively, consult your DVR's manual; it usually has instructions on how to find this important piece of data.
6. Port Forwarding: Creating a Digital Tunnel
This is where things get slightly technical, but don't fret! Port forwarding allows external devices (like your laptop, when you aren't at home) to securely communicate with your DVR. This is usually done through your router's settings. You’ll need to access your router's configuration page (usually through a web browser) and look for the "Port Forwarding" or similar setting. In this section, you'll specify the DVR's IP address and the port numbers your DVR uses (check the manual!).
7. Setting up Your Digital Fortress: Security First!
Security is paramount, especially when it comes to video surveillance. Change the default login credentials on your DVR to something strong and unique. Think of it like changing the locks on your house. Use a strong password! Consider enabling two-factor authentication if it's available.
8. Connecting Wirelessly: The First Glimpse!
Once you have the software installed (or the web browser ready), and you know your DVR's IP address, you can finally connect wirelessly! Open your app, or type the address into your browser, and enter your login credentials. Voila! You should be able to see your DVR's live feed, or browse through your recordings.
9. Troubleshooting Troubles: Common Issues and Fixes
Sometimes, things don't go as planned. If you're experiencing connection problems, here are a few common culprits:
- Incorrect IP Address: Double-check the IP address!
- Firewall Issues: Make sure your firewall (on your laptop or router) isn't blocking the connection.
- Incorrect Port Forwarding: Review your router settings.
- Network Connectivity: Ensure that both your DVR and laptop are connected to the same Wi-Fi network.
10. The Mobile Advantage: Accessing Your DVR on Your Phone
Many Cobra DVRs have companion mobile apps, taking convenience to another level! Imagine checking your recordings while waiting in line at the grocery store. These apps typically offer similar functionalities as the desktop software, but in a pocket-sized package. Search the app store for "Cobra DVR" or look for the specific model's app.
11. Recording and Playback: Navigating Your Archive
Once you're connected, you'll want to know how to navigate your recordings. Most DVR systems have a user-friendly interface for searching by date, time, and camera. Experiment with the playback controls. Download and save important footage.
12. Remote Access: The Freedom to Watch From Anywhere!
Once you've set up port forwarding (as mentioned above), you can access your DVR remotely, even when you're away from home. Just use your DVR's public IP address (findable with a quick Google search) or a dynamic DNS service to connect via the software or app on your laptop or mobile device. This will be like having your own personal surveillance portal to the Universe of your videos!
13. Enhancing the Experience: Tips and Tricks
- Optimize Video Quality: Adjust the recording quality to balance image clarity with file size.
- Scheduled Recording: Set up scheduled recordings to capture specific events.
- Motion Detection: Use motion detection to trigger recordings. This saves space and ensures you don't miss a thing.
14. The Future of Surveillance: Advancements in Cobra DVRs
The Cobra DVR world is constantly evolving, just like everything else. Expect more user-friendly interfaces, cloud storage options, and integration with smart home systems.
15. The Grand Finale: Embracing Wireless Viewing
And there you have it! You’ve conquered the basics of accessing your Cobra DVR wirelessly. Get ready to enjoy the freedom and convenience of being able to monitor your property from anywhere, at any time. You're now a wireless viewing superhero!
Closing Thoughts:
Unlocking your Cobra DVR on your laptop is like opening a portal to your own personal archive – a digital window into your security footage. By following these steps, you've equipped yourself with the knowledge to access your recordings wirelessly, offering you unparalleled convenience and peace of mind. Remember to stay secure and explore all the features your DVR has to offer. Now go forth and enjoy the benefits of your newly acquired superpower!
Frequently Asked Questions (FAQs)
1. Can I connect to my Cobra DVR from anywhere in the world?
Yes, with proper setup, including port forwarding, you can access your DVR remotely.
2. Is it difficult to set up port forwarding?
It can seem daunting at first, but with the instructions in your router's manual and the steps we provided, it's manageable.
3. What if I forget my DVR's login credentials?
Consult your DVR's manual for instructions on how to reset your password.
4. Is my video footage secure?
Employ strong passwords, practice safe login habits, and use security protocols provided by your DVR.
5. Why can't I see the video feed on my laptop?
Double-check your network connection, the IP address, and port forwarding settings. Ensure the software is running properly and that the login credentials are correct.
1) Principal Keywords: Cobra DVR Laptop Wireless Viewing 2) SEO Headline: Unlock Cobra DVR: Wireless Viewing on Your Laptop Made Easy! 3) Pathway: Cobra DVR Setup 4) Meta Summary: Learn how to easily unlock and view your Cobra DVR recordings wirelessly on your laptop. Simple steps & tips included! 5) Image Alt Text: A laptop displaying a live feed from a Cobra DVR security camera, highlighting the ease of wireless viewing.
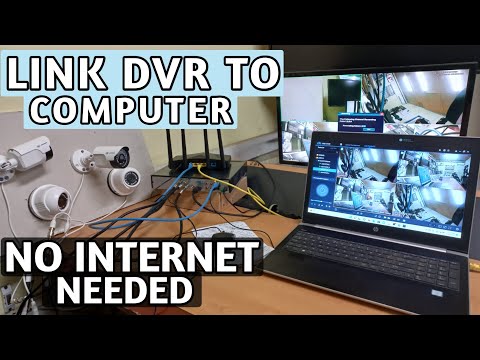
Laptop WiFi & LAN Connection: The Ultimate Guide (Solved!)HOW TO CONNECT DVR DIRECTLY TO LAPTOP

By Contentsio HD HOW TO CONNECT DVR DIRECTLY TO LAPTOP by Contentsio HD
How to link AHD CCTV Cameras to Computers without using internet.
By Tech Inside Out How to link AHD CCTV Cameras to Computers without using internet. by Tech Inside Out
HOW TO CONNECT DVRNVR TO LAPTOP OR PC 2024
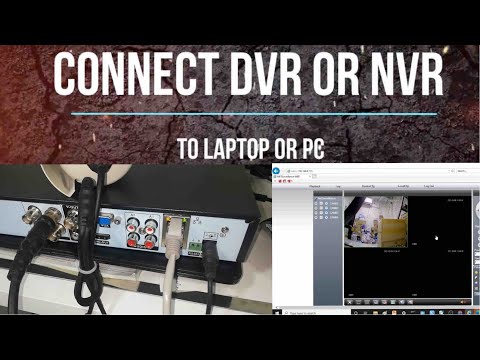
By FIXtastic Contents HOW TO CONNECT DVRNVR TO LAPTOP OR PC 2024 by FIXtastic Contents

Title: How to set up Dahua NVRXVRDVR & IP cameras Laptop & Pc How To Watch Dahua CCTV Live On Computer
Channel: IT Tips & Tricks
How to set up Dahua NVRXVRDVR & IP cameras Laptop & Pc How To Watch Dahua CCTV Live On Computer by IT Tips & Tricks
Laptop Wifi Connect
Unlock Cobra DVR on Your Laptop: Wireless Viewing Made Easy!
We understand the frustration of trying to access your valuable Cobra DVR footage. You've captured important moments, security details, or perhaps scenic drives, and the desire to view them seamlessly on your laptop is completely understandable. We're here to guide you through the process, ensuring a smooth and rewarding experience. Forget clunky connections and complicated setups. We'll break down the steps, making wireless viewing not just possible, but truly easy. Let’s get started!
Understanding Your Cobra DVR's Capabilities
Before diving into the setup, let's clarify what your specific Cobra DVR model is capable of. Not all models support wireless viewing in the same way. The process hinges on your DVR's built-in features.
- Wi-Fi Connectivity: Does your Cobra DVR boast built-in Wi-Fi capabilities? This is a crucial factor. Check your user manual or the device specifications. A Wi-Fi-enabled Cobra DVR is designed for wireless video transfer.
- Mobile App Support: Many contemporary Cobra DVRs communicate through mobile apps. These apps, available for both iOS and Android, often provide direct access to recordings and live feeds. They may also offer wireless viewing capabilities on a larger screen, like your laptop, through screen mirroring or app-based access.
- Network Capabilities: Some advanced models can connect to your home network via Ethernet cable. This provides a more stable connection and facilitates accessing recordings from multiple devices, including your laptop, without needing Wi-Fi direct.
- User Manual Review: The user manual is your ultimate resource. It contains specific instructions regarding wireless viewing, network settings, and any required software or drivers specific to your model. Consult it carefully. Look for keywords like "wireless," "Wi-Fi," "network," and "remote access."
By understanding your specific Cobra DVR's features, the setup process will become significantly clearer. This preliminary assessment is vital for a streamlined experience.
Preparing Your Laptop for Wireless Viewing
With your Cobra DVR's capabilities assessed, prepare your laptop for the wireless connection. This involves several essential steps:
- Network Connection: Ensure your laptop and your Cobra DVR are on the same Wi-Fi network. If your DVR uses an Ethernet cable, make sure your laptop is connected to the same local network to ensure proper communication.
- Wireless Adapters and Drivers: Verify that your laptop's Wi-Fi adapter and any necessary drivers are correctly installed and updated. Outdated or faulty drivers can cause connection issues. Check your laptop manufacturer's website for the latest driver updates.
- Firewall Settings: Your laptop's firewall might be blocking network connections from your Cobra DVR. Temporarily disable your firewall or, preferably, configure it to allow access from your DVR’s IP address. Consult your firewall’s documentation for precise instructions.
- Software Installation: Determine if your Cobra DVR requires specific software on your laptop. Some models use dedicated viewer applications or web interfaces. Download and install the required software from the Cobra website or the provided installation disc.
- Operating System Compatibility: Confirm that your laptop's operating system (Windows, macOS, etc.) is compatible with the Cobra DVR's software. Older operating systems may not be supported.
Completing these preparatory actions guarantees that your laptop is ready to communicate effectively with your Cobra DVR.
Setting Up the Wireless Connection to Your Cobra DVR
The actual setup process is dependent upon your Cobra DVR's specific features. However, here are common scenarios and their specific steps to guide you:
Using the Cobra DVR's Mobile App
- App Installation: Install the Cobra DVR's mobile app on your smartphone or tablet.
- DVR Connection: In the app, add your Cobra DVR. This will likely involve entering the DVR's serial number, cloud ID, or scanning a QR code.
- Laptop Mirroring: After linking the app to the DVR, find the screen mirroring or casting feature on your smartphone or tablet. Most devices can cast the screen to a smart TV or compatible device.
- Mirror to Laptop: To mirror to your laptop, you may need an app. Use apps like "LetsView" or "ApowerMirror." These mirroring software tools allow your mobile apps to connect to your laptop wirelessly.
- Access Footage: Once mirrored, you will be able to view the DVR recordings.
Connecting Through a Web Browser
- IP Address Identification: Find your Cobra DVR's IP address. This information is usually available in the DVR's settings menu or on the Network information screen.
- Open a Web Browser: Launch your preferred web browser on your laptop (Chrome, Firefox, Safari, etc.).
- Enter the IP Address: Type the DVR's IP address into the browser's address bar and press Enter.
- Login: You may be prompted to enter a username and password. Use the credentials you set up for your Cobra DVR. Refer to your user manual if you have forgotten credentials.
- Navigate the Interface: Once logged in, you should see the DVR's web interface. Look for options related to "playback," "recordings," or "live view."
- Access your Recordings: Click through the interface to find and play the recordings stored on your Cobra DVR. You might be able to download the files directly or view them within the browser.
Using Dedicated Viewer Software
- Software Installation: If your Cobra DVR came with dedicated viewer software, ensure it’s installed on your laptop.
- Software Launch: Run the viewer software.
- DVR Connection: In the software, you'll likely need to add your Cobra DVR. You may be prompted to enter the DVR's IP address, serial number and/or cloud ID along with a username and password.
- Access Recordings: Once connected, navigate through the software's interface to access your recordings. Features to search within specific dates and times are commonly available.
Troubleshooting Common Connection Issues
- Incorrect IP Address: Double-check that you entered the correct IP address for your Cobra DVR.
- Network Connectivity: Ensure both your laptop and Cobra DVR are connected to the same network. Test your internet connection to rule out general network problems.
- Firewall Interference: Review your firewall settings to ensure they allow communication between your Cobra DVR and your laptop.
- Username and Password: Verify you are using the correct login credentials for your Cobra DVR. Forgotten passwords can be reset through the DVR's settings or with a factory reset.
- Outdated Firmware/Software: Update your Cobra DVR's firmware and any associated software on your laptop. Manufacturers often release updates that improve connectivity and performance.
- Limited Network Bandwidth: Excessive network traffic, or poor Wi-Fi signal strength, can affect the speed and quality of your wireless viewing. Move your laptop closer to the router or consider using an Ethernet cable to increase your network's stability.
Optimizing Your Playback Experience
Once you've successfully connected, take these measures to make the most of your viewing:
- Choose Appropriate Resolution: If your Cobra DVR allows resolution settings, adjust the video quality based on your internet speed and the size of your laptop's screen. Lower resolutions can help to increase playback smoothness, especially on slower networks.
- Ensure Sufficient Storage: Verify that your laptop has enough storage space for any downloaded recordings.
- Use Headphones: For detailed audio review, use headphones.
- Organize Your Files: As you view recordings, consider establishing a system for organizing your video files. File naming conventions based on date, time, and relevant events will make it easier to find what you need later.
Maintaining Your Wireless Connection
- Regular Software Updates: Keep your Cobra DVR's firmware and any supporting software on your laptop current. Updating is a vital step to include security patches and improve performance.
- Network Security: Safeguard your network by setting a strong password for your Wi-Fi.
- Regular Network Checks: Occasionally, verify that your network is functioning optimally. Check your router's settings, and refresh your Wi-Fi signals, especially if your viewing experience degrades.
- Device Reboots: If you encounter connection problems, attempt restarting your Cobra DVR and your laptop. This can often resolve temporary glitches.
By pursuing these practices, you ensure that your ability to enjoy wireless viewing will be prolonged and effective.
Conclusion
Accessing your Cobra DVR recordings wirelessly on your laptop is entirely achievable with the appropriate setup. By understanding your DVR's capabilities, preparing your laptop correctly, and following the setup steps, you can quickly access your footage. With careful troubleshooting and maintenance, your wireless viewing experience will be seamless and enjoyable. Enjoy!
